Do you want to put images side by side in your WordPress content?
Often beginners struggle to find how to put two pictures next to each other in their WordPress posts and pages.
In this step by step guide, we will show how to easily put images side by side in WordPress (without writing any code).

Using the Block Editor to Put Images Side by Side
The easiest way to get your images side by side is to use the WordPress block editor.
The block editor has a special ‘Gallery’ block that lets you display images in rows and columns.
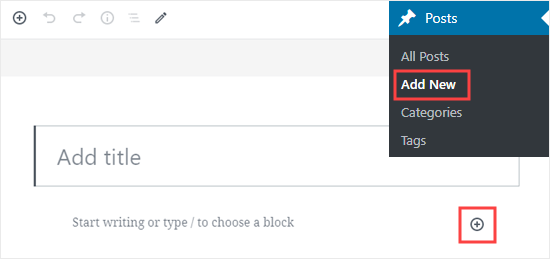
First, you’ll need to create a new post / page or edit an existing one to open the content editor. Once inside, click the (+) symbol to add a new block.
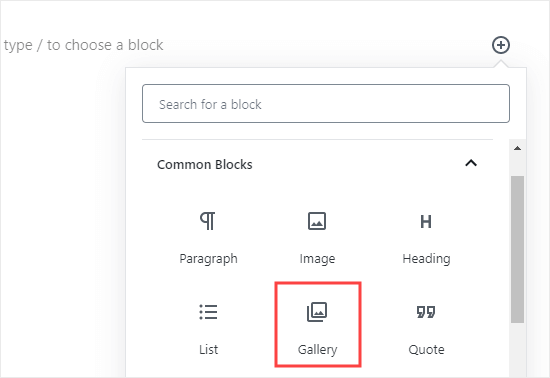
Next, you need to select the Gallery block and add it to your page. You can find the Gallery block in the Common Blocks section, or you can use the search bar to quickly locate it.
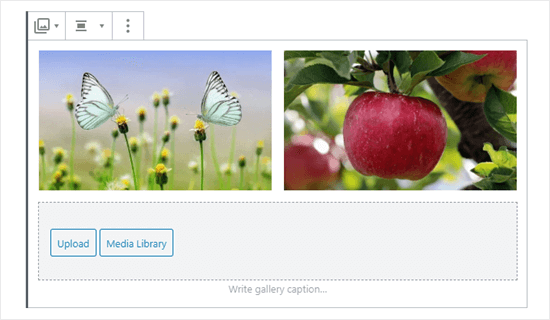
Now, you can easily add images to your gallery block, by dragging them into it or by using the Upload button. You can also select images from your WordPress media library.
As you can see, we’ve added 2 images to our Gallery block. WordPress has automatically positioned them side by side.
What if you want 3 images side by side? Here’s what happens if we add a third image. WordPress simply resizes the others to fit all 3 side by side:
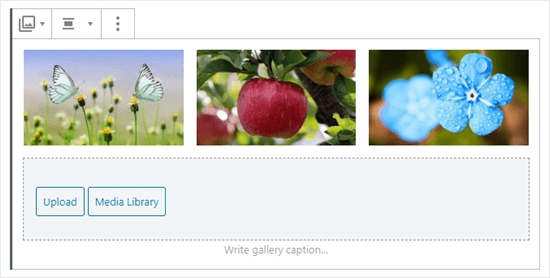
If you upload a fourth image, then WordPress will place it beneath the others.
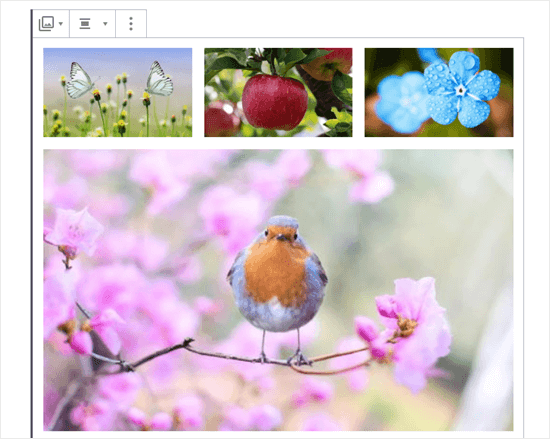
You can change the number of images WordPress should include side by side in a single column.
First, click on the Gallery block, if it’s not already selected. On the right hand side of the screen, you’ll see the Gallery’s block settings.
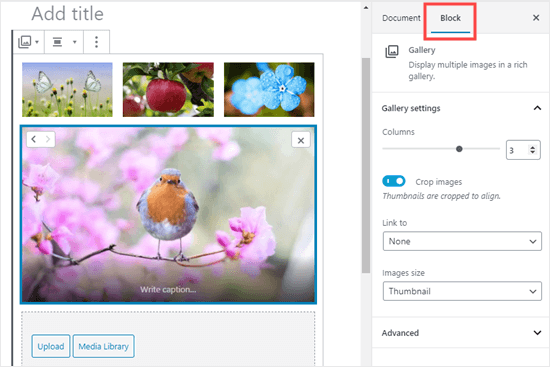
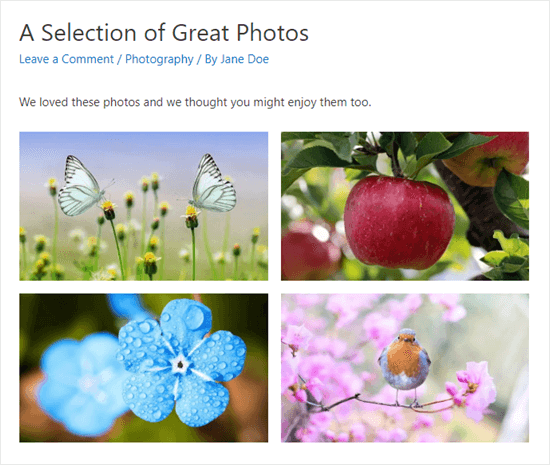
You can adjust the number of columns here to any number between 1 and 4. For instance, if you want two images side by side, and two more beneath them, you can set the Columns to 2.
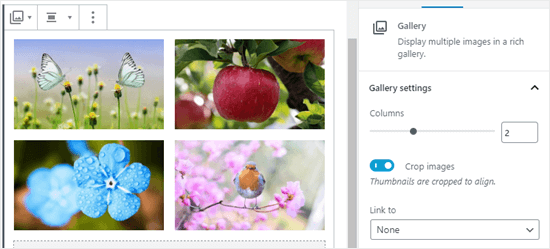
It’s as simple as that!
If you want to change where an image is positioned in your gallery, just click on it. You’ll then see arrows that you can use to move it forward or backward in the gallery.
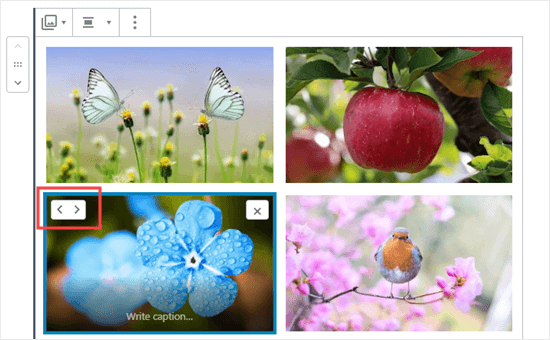
Here’s a finished gallery demo from our sample post:
Using a Plugin to Put Images Side by Side in WordPress
If you’re using the old classic WordPress editor, or if you want to create more complex galleries than the default Gallery block, then you will need a WordPress gallery plugin.
We recommend using Envira Gallery because it is the best WordPress gallery plugin
For the sake of this tutorial, we will be using the free version of Envira, but you may want to get the Pro version to get powerful features like albums, image slideshows, etc.
First, you’ll need to install and activate the Envira Gallery plugin. If you’re not sure how, just check out our step by step guide on how to install a WordPress plugin.
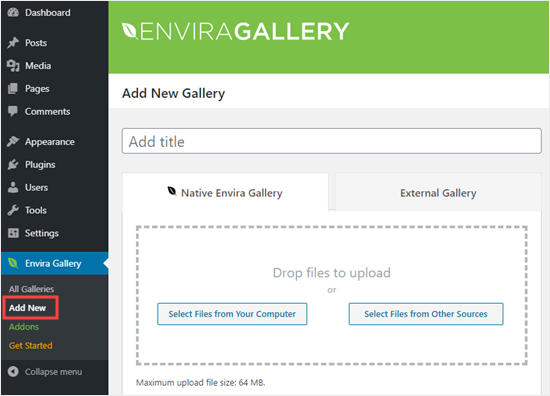
Next, you can go to Envira Gallery » Add New in your WordPress dashboard.
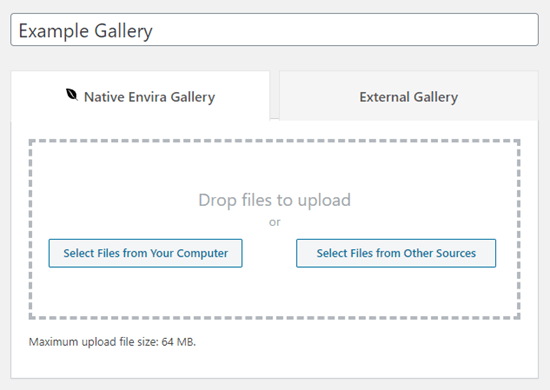
You’ll need to give your gallery a title. We’ve called ours ‘Example Gallery’. Next, upload the images you want to use.
You can either drag and drop them into the upload box, or you can use one of the ‘Select Files’ buttons.
Here’s how the images look once they’ve been uploaded:
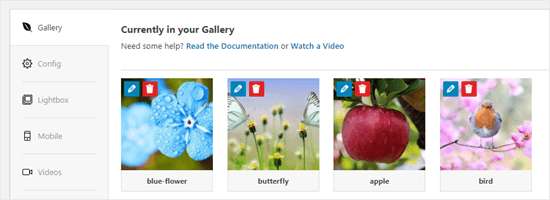
You may want to give your images a title and alt text here. The title appears below your image when the user brings their mouse cursor over it.
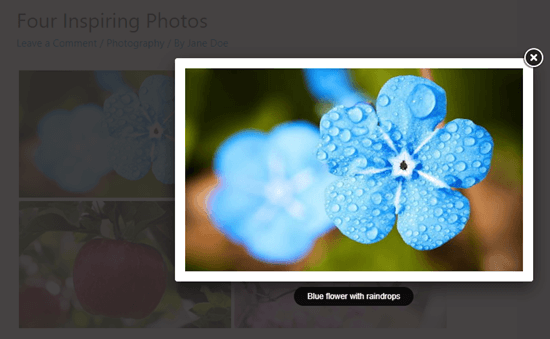
The title also appears below the image in the lightbox popup mode, which we’ll take a look at in a moment.
To edit the title and alt text, click the Edit button on an image in the gallery.
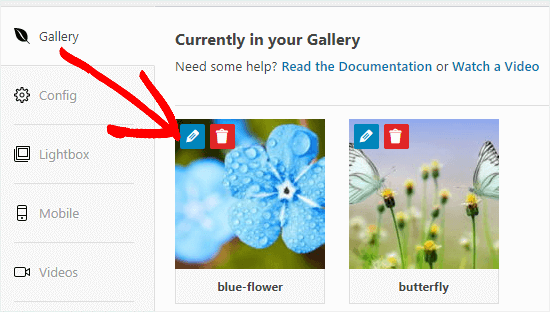
You can then change the title for your image. It defaults to the image’s filename.
You should also enter alt text, as this is helpful for your WordPress site’s SEO. If your title describes the image, then you can simply repeat it for the alt text.
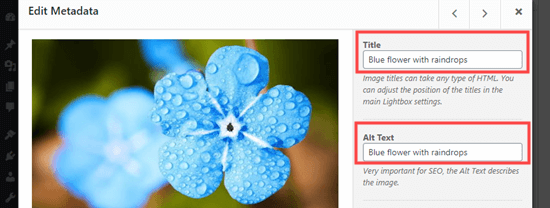
Once you’re done, please make sure you click the ‘Save Metadata’ button before clicking the X to close the window.

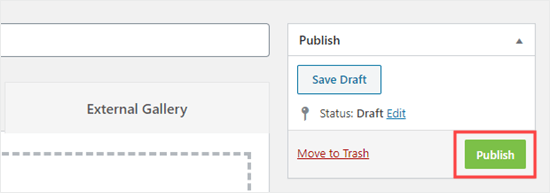
To add your gallery on the site, you’ll first need to publish it. Go ahead and click the Publish button on the right hand side of the screen.
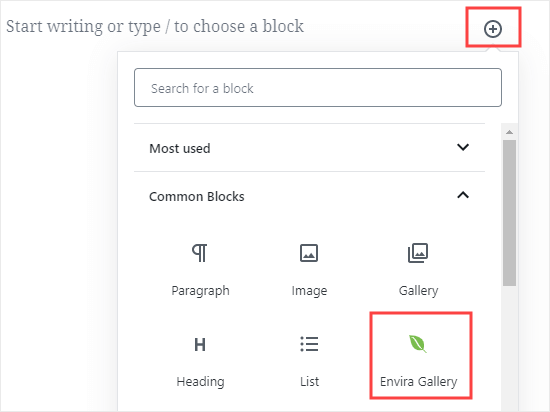
Now, edit a post or page, or create a new one. Inside the content editor, click (+) to add a block to your post, and select the Envira Gallery block. You can find it in the Common Blocks section, or you can use the search bar.
You’ll then need to click on the dropdown to select your gallery.
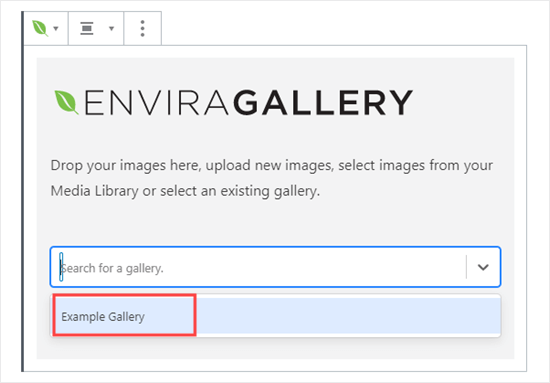
You should see your gallery in place in your post.
You can adjust the settings on the right-hand side of the screen. For instance, you might want to change the column layout, or the size of the margin between images.
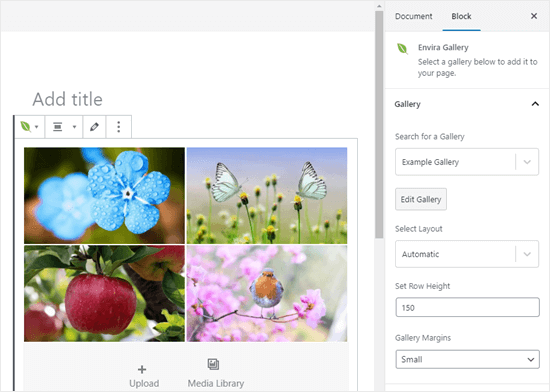
We decided to set our gallery to always display in two columns. We also added a wider margin between the images.
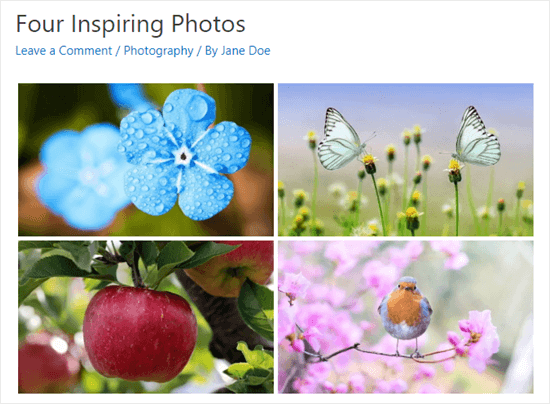
The user can click on an image to see the full-sized version in a lightbox. They can scroll through the images using the lightbox, too.
If you want to add more images to your gallery, then you can go back to it by visiting Envira Gallery » All Galleries in your WordPress dashboard. Simply click on the name of your gallery to edit it.
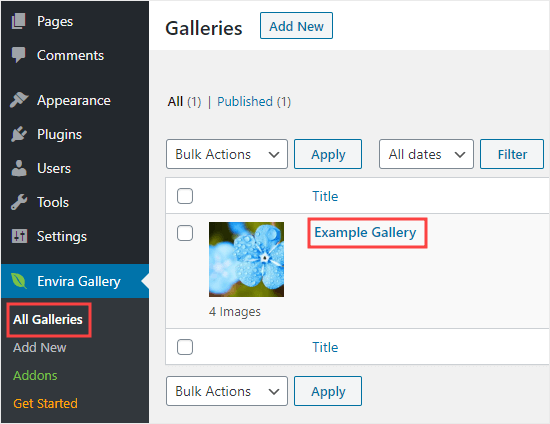
Any changes you make to your gallery will appear wherever you’ve placed it in your posts, pages, or sidebars. You don’t need to add it to these again.
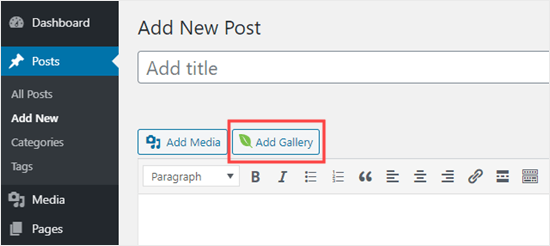
Tip: If you’re using the classic editor instead of the block editor, you can still use Envira Gallery.
You’ll see an ‘Add Gallery’ button above the classic editor that you can use to add an existing gallery to your post.
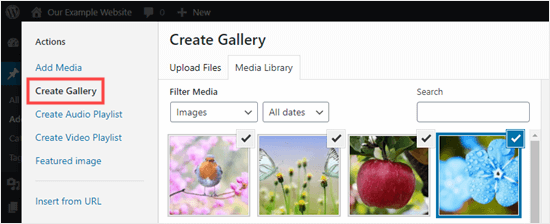
You can also create a new gallery by clicking the ‘Add Media’ button then ‘Create Gallery’.
We hope this tutorial helped you learn how to put images side by side in WordPress. You might also want to go through our guide on how to align images in the WordPress block editor, and our comprehensive list of the must have WordPress plugins (expert pick).
If you liked this article, then please subscribe to our YouTube Channel for WordPress video tutorials. You can also find us on Twitter and Facebook.
The post How to Put Images Side by Side in WordPress (Easily) appeared first on WPBeginner.
from WPBeginner https://ift.tt/3e3BVmP
More links is https://mwktutor.com
No comments:
Post a Comment