Do you need people to pick a date when they fill in a form on your website?
Perhaps you want to know a good time to call them, or maybe you want to gather information such as date of birth, etc. That’s where a date picker field can help.
In this article, we’ll show you how to create a WordPress form with a date picker.

Creating a WordPress Form With a Date Picker
For this tutorial, we’ll be using the WPForms. It’s one of the best contact form plugins out there, and you can use it for all sorts of different forms.
You’ll need to install and active the WPForms plugin on your site. If you’re not sure how to do that, take a look at our step by step guide on how to install a WordPress plugin.
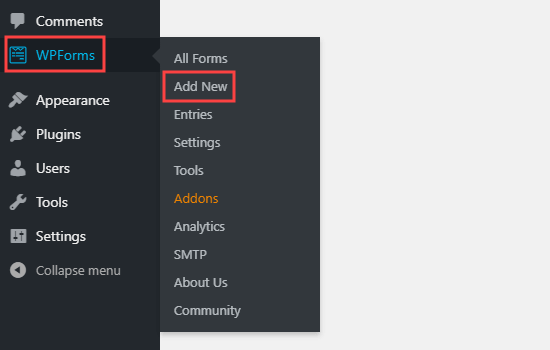
Once you’ve activated the plugin, go to WPForms » Add New in your WordPress dashboard.
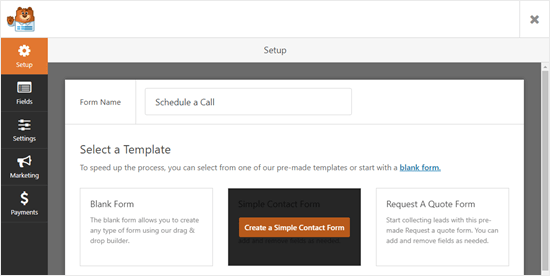
The WPForms builder will appear. First, type in a name for your form. Then, hover your mouse cursor over a template and click the button to select it. We’re going to use the Simple Contact Form template.
WPForms will automatically create a form for you using that template. Here’s the default simple contact form.
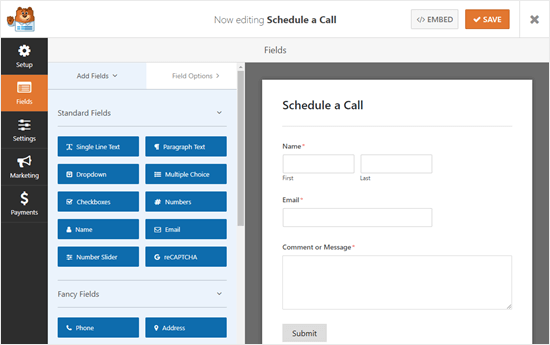
You can now edit the form in any way you like.
Let’s add the date picker field.
In the form builder, you’ll see all the fields that you can add to your form in the right column. Scroll down to the Fancy Fields section, and you will see the Date / Time field.
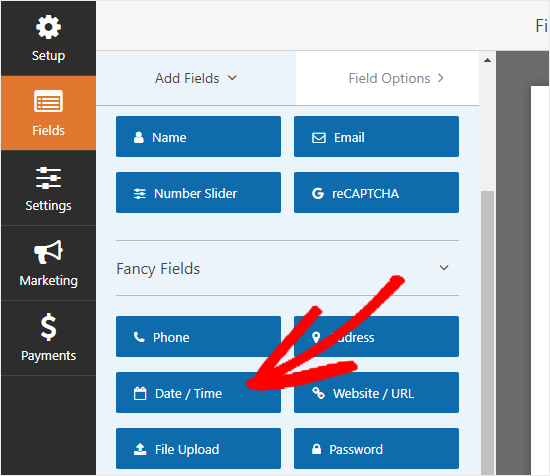
Drag and drop the field to where you want it on your form. We’ve placed it just below the Email field on our form.
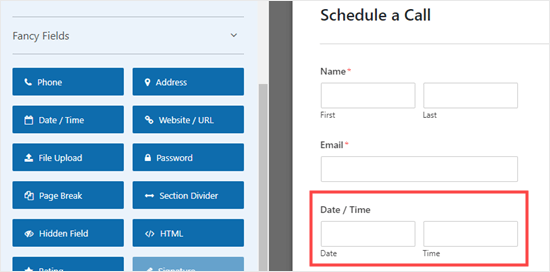
Next, click on the field to edit it. This will bring up the ‘Field Options’ tab on the left hand side of your screen.
You can change the label of the field, which defaults to ‘Date / Time’. We’re going to use ‘Preferred Time for Phone Call’ for our field.
You can also change the format of the field using the Format dropdown. For instance, you might want to use just a date and no time, such as for a date of birth field.
You can also check the Required box if you want to make this a mandatory field. This means the user will have to select a date and time before they can submit the form.
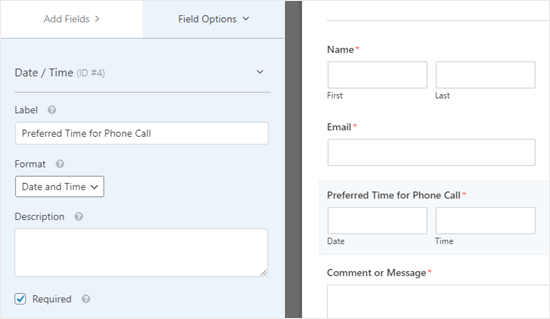
You can add any other new fields that you want to use, too. Just click the ‘Add Fields’ tab then drag and drop the field onto your field. To edit a field, simply click on it.
Setting Advanced Options for your Date Picker
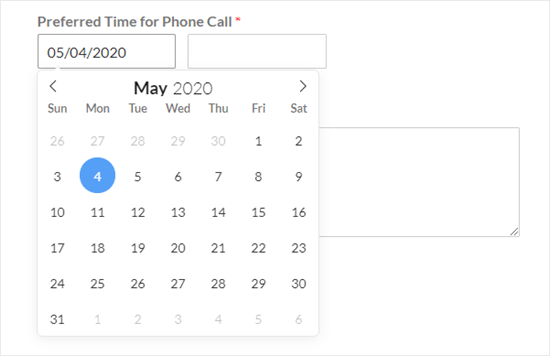
By default, the date picker on your form will be a calendar with a time dropdown next to it. The user simply clicks on a day to select that date.
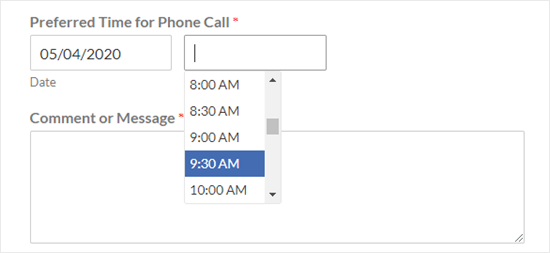
The time dropdown defaults to a 12 hour clock with 30 minute intervals, like this:
You might want to change how the date picker works. That’s easy to do in WPForms. In the Field Options tab, scroll down to Advanced Options.
Next, click the arrow to open up that section.
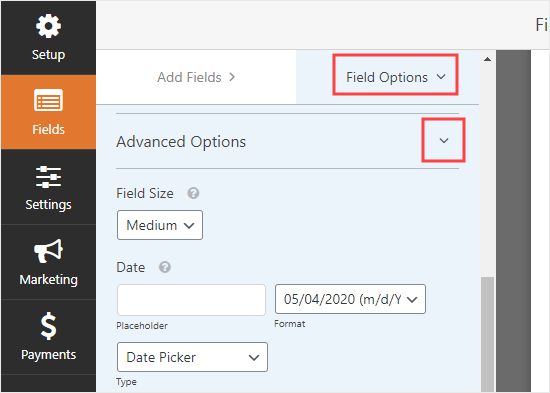
Here, you can make lots of changes. For instance, you might want to change the date format. The default is mm/dd/yyyy.

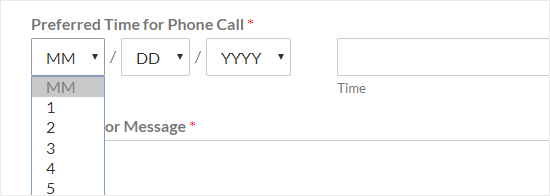
You can also switch from the date picker to a date dropdown, if you prefer. In this case, the user selects the month, day, and year from dropdown boxes, like this:
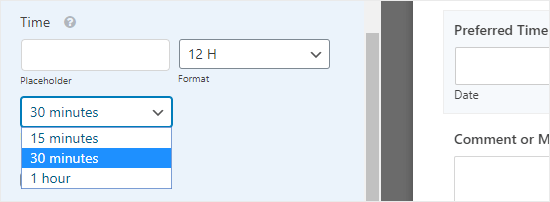
You can also change the time picker. It defaults to a 12 hour clock, but you can switch this to a 24 hour clock if you prefer. You can also change the intervals to 15 minutes or 1 hour instead of 30 minutes.
Once you’re happy with your form, you can save it by clicking the Save button on the top right.
You may also want to set up your form so that the person completing the form gets a copy of the details they submitted.
This could be helpful, for example, if they’re scheduling a call with you. They’ll have an email record of the call time they booked.
You can do that by following the instructions in our tutorial on creating a contact form with multiple recipients.
Adding Your Form to Your Website
You can either add your form to an existing page (or post) on your site, or you can create a new one. To create a new page, go to Pages » Add New in your WordPress dashboard.
You’ll then need to add a new block to your page. Click on the (+) to add the block then select the WPForms block. You can find it in the Widgets section or you can search for it using the search bar.
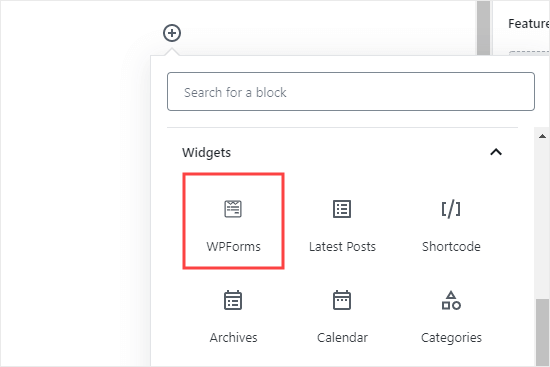
Next, you’ll need to select your form from the WPForms dropdown, like this:
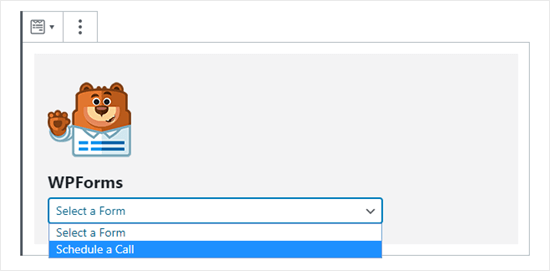
That’s all you need to do. You can now publish your page and your form will be live on your website. It should look something like this:
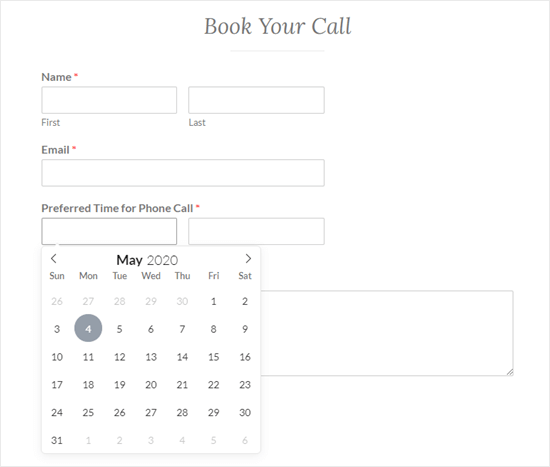
Note: The styling of the form will depend on the WordPress theme you’re using.
All forms created with WPForms are mobile-friendly out of the box and will work on any mobile devices. WPForms date-picker tool is also mobile-friendly and works on all screen sizes.
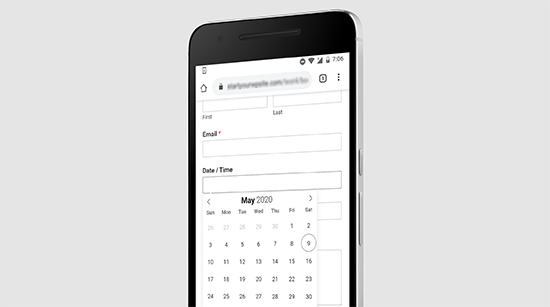
It’s always a good idea to test out your form to make sure it’s working as you expected. If you aren’t getting emails but you’re sure your notification settings are correct, our article on how to fix the WordPress not sending email issue should help.
You can make changes to your form by going to WPForms » All Forms. Then, just click on the title of your form or the Edit link beneath the title to edit it.
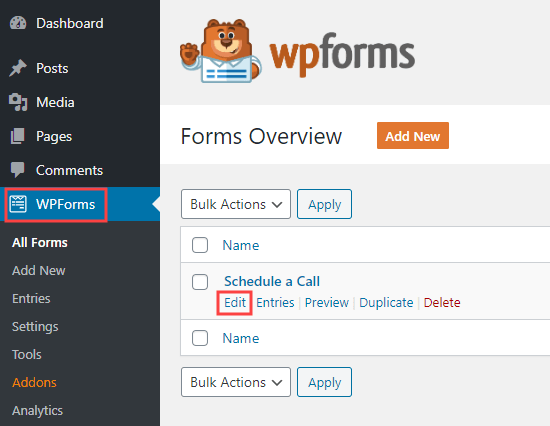
Once you save your form, it’ll be updated on your website automatically.
We hope this article helped you learn how to create a WordPress form with a datepicker. You might also want to take a look at our articles on how to block contact form spam in WordPress and how to track and reduce form abandonment in WordPress.
If you liked this article, then please subscribe to our YouTube Channel for WordPress video tutorials. You can also find us on Twitter and Facebook.
The post How to Create a WordPress Form With a Date Picker appeared first on WPBeginner.
from WPBeginner https://ift.tt/2yGn822
More links is https://mwktutor.com
No comments:
Post a Comment