Are you looking to add a text to speech feature in WordPress?
Text to speech feature allows you to add an audio version of your articles using artificial intelligence. This is particularly useful for long reads and helps users who prefer audio content while exercising or traveling.
In this article, we’ll show you how to easily add text to speech in WordPress.
What is Text to Speech in WordPress?
Text to speech is a technology that uses artificial intelligence to convert any text into natural-sounding speech. It is provided as a cloud-based service by several companies including Google Cloud and Amazon AWS.
Adding text to speech to your WordPress website allows users to listen to your articles while going through their daily activities like exercising, cooking, and traveling.
Text to speech can also help grow your audience by making content more accessible for the visually impaired and for people with reading difficulties.
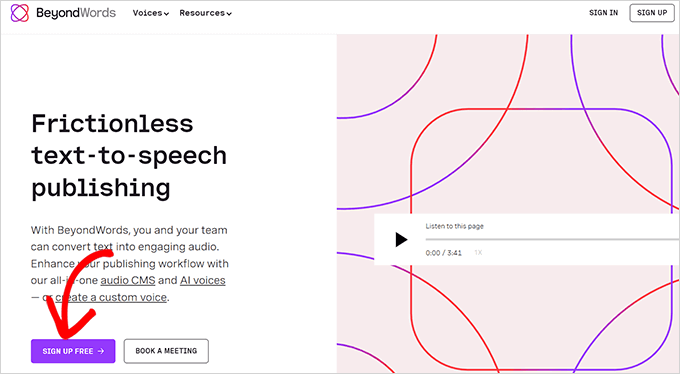
This is where BeyondWords comes in. It is a popular AI-based audio publishing platform that allows you to easily add a text to speech feature to your website using a WordPress plugin.
It is a freemium service that comes with different pricing plans. There is also a free plan, which allows you to convert up to 30,000 characters into audio every month.
That being said, let’s see how you can add text to speech in WordPress using BeyondWords.
Step 1. Creating a BeyondWords Account
First, you need to visit the BeyondWords website and click on the ‘Sign Up Free’ button.
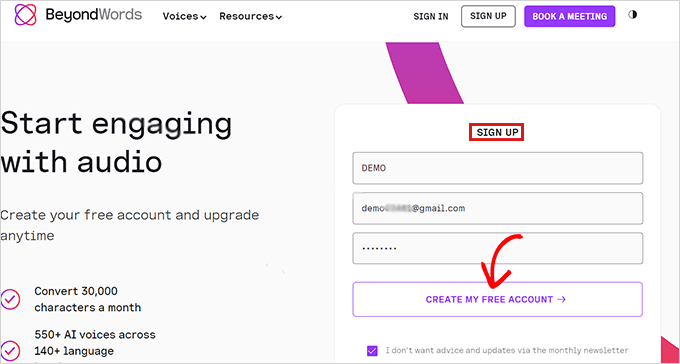
This will open up a ‘Sign Up’ page.
Now, you need to type your email address and password and then click the ‘Create My Free Account’ Button.
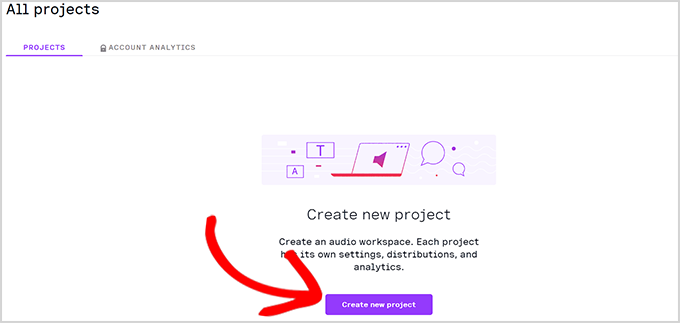
After you have created an account, you will be taken to your BeyondWords dashboard.
Here, simply click the ‘Create New Project’ button to create an audio workspace for your WordPress blog.
After that, a prompt will open up asking you to choose a title for your project.
Below that, you’ll have to select a language from the dropdown menu. Your articles will be narrated in the language that you choose here.
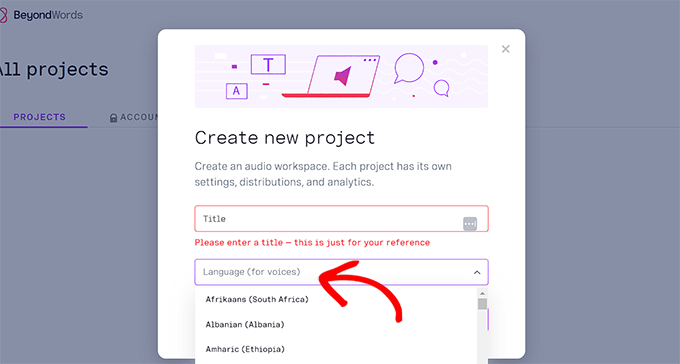
You can choose from about 143 languages that BeyondWords offers.
Once you’re satisfied with your choice, simply click the ‘Create’ button to save your project.

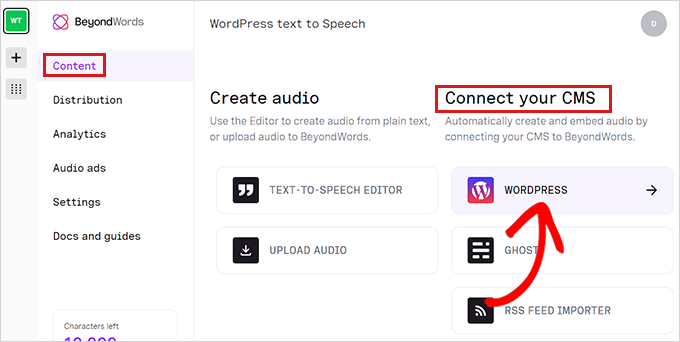
Next, you will be directed to the ‘Content’ page of your project dashboard.
Here, simply click the ‘WordPress’ tab under the ‘Connect your CMS’ column.
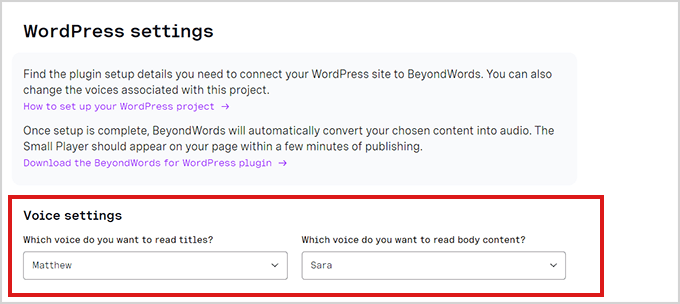
You will now be directed to the ‘WordPress Settings’ page. Here, you need to configure the voice settings.
Simply go to the ‘Voice Settings’ section and select voices for reading the title and the content body of your article from the dropdown menus.
After that, don’t forget to click the ‘Save Changes’ button to store your settings.
Your BeyondWords account has now been set up. Now it’s time to connect your WordPress website with BeyondWords.
Step 2. Integrating BeyondWords With WordPress Plugin
The first thing you need to do is install and activate the BeyondWords plugin. For more instructions, please see our guide on how to install a WordPress plugin.
Upon activation, go to the Settings » BeyondWords page from the admin dashboard.
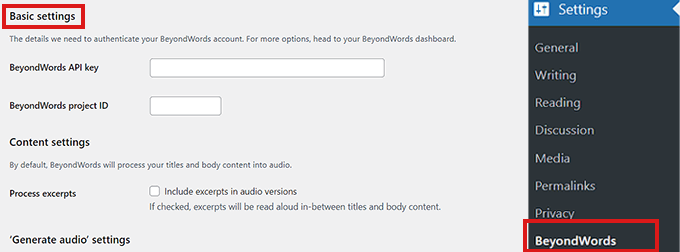
To fully integrate your account with WordPress, you’d need to give your BeyondWords API key and project ID.
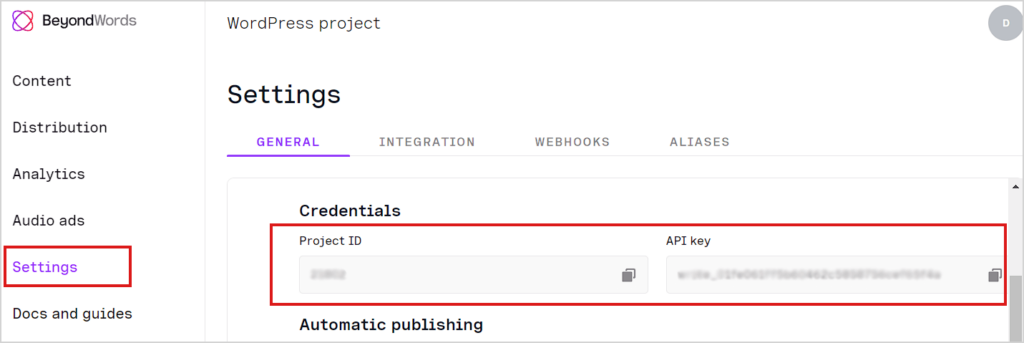
For that, head over to your BeyondWords project dashboard and go to Settings » General from the sidebar.
Now, scroll down to the ‘Credentials’ section and simply copy the API key and project ID.
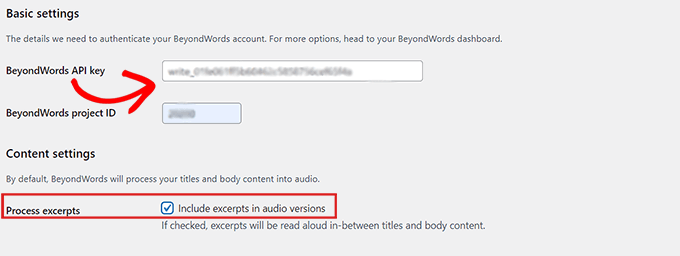
After that, you need to head over to the WordPress dashboard and then paste your credential details.
Now, scroll down to the ‘Content Settings’ section.
If you want to include excerpts in the audio version of your content, simply check the ‘Process excerpts’ option.
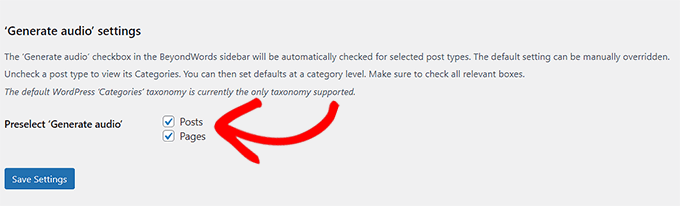
After that, scroll down to the ‘Generate Audio Settings’ section and check the boxes for ‘Posts’ and ‘Pages’ if you want to generate audio for both of them.
You can also uncheck either of the boxes if you don’t want to generate audio for posts or pages.
Don’t forget to click the ‘Save Changes’ button to store your settings.
Step 3. Adding Text to Speech in a Post
First, you need to edit the post or page where you want to display the text to speech audio player.
In the block editor, simply click the BeyondWords tab under the Post Settings panel.
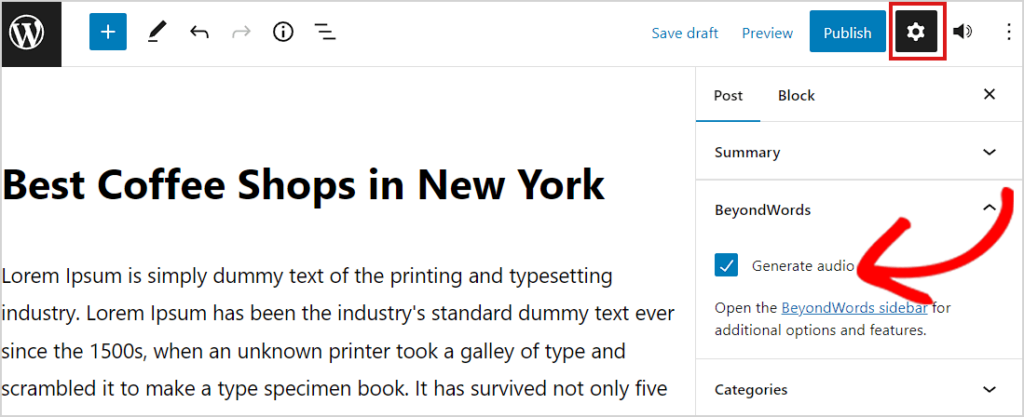
Now, you need to check the ‘Generate Audio’ box and then click the ‘Update’ or ‘Publish’ button to save your changes.
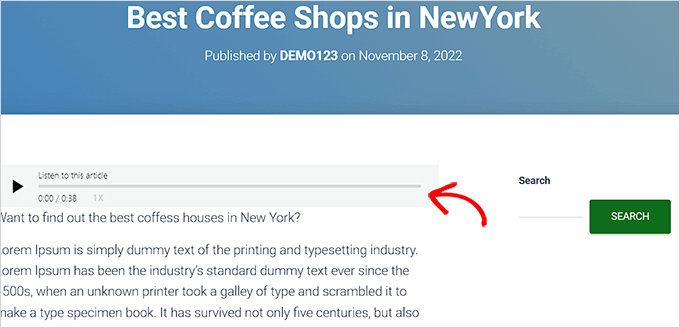
You can now visit that post or page to view the text to speech audio player in action.
We hope this article helped you learn how to easily add text to speech to your WordPress site. You may also want to see our guide how to create an email newsletter to grow your traffic, and our expert pick of the best WordPress plugins.
If you liked this article, then please subscribe to our YouTube Channel for WordPress video tutorials. You can also find us on Twitter and Facebook.
The post How to Add Text to Speech in WordPress (Step by Step) first appeared on WPBeginner.
from WPBeginner https://ift.tt/87DqKbh
More links is https://mwktutor.com
No comments:
Post a Comment