Do you want to stop users from stealing images on your WordPress site?
While there is no complete solution to prevent image theft on your website, there are some measures that you can take to make it a bit harder for users to save images from your website.
One such solution is to add no right-click popup to your images. You can do that in WordPress by using plugins that disable right click and make it difficult to download images from your website.
In this article, we’ll show you how to add no right-click on WordPress images and galleries. We’ll also talk about alternative approaches to discourage users from stealing images off your website.
Adding No Right Click on WordPress Images
First, you need to install and activate the No Right Click Images Plugin. For more details, see our step by step guide on how to install a WordPress plugin.
Upon activation, go to Settings » No Right Click Images page to configure plugin settings.
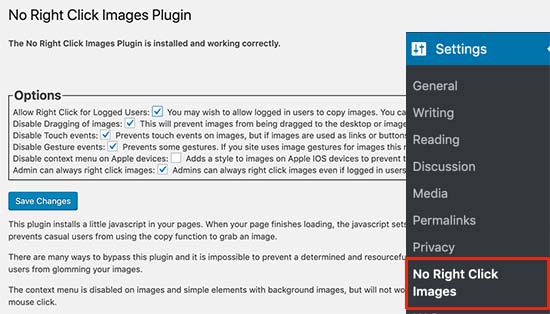
The default options would work for most users, but you can still review and change them as needed.
The first option allows logged in WordPress users to right-click on images. ‘Disable Dragging of images’ option prevents users from dragging an image from their browser to their computer.
‘Disable Touch events’ options prevents users from using touch devices like mobile phones to download images. It is the no right-click solution for smart phones and tablets.
You can also disable gestures and context menu on Apple devices.
After reviewing the settings, don’t forget to click on the ‘Save changes’ button to store your changes.
You can now log out of WordPress and then visit your website to see the plugin in action.
Adding No Right Click on Image Galleries
The above solution works for all images on your website. However, a lot of users who want to protect their images are photographers and people sharing their work through galleries.
This is where Envira Gallery comes in. It is one of the best WordPress gallery plugin on the market and comes with a protection addon that disables right-click for your image galleries.
First thing you need to do is install and activate the Envira Gallery plugin. For more details, see our step by step guide on how to install a WordPress plugin.
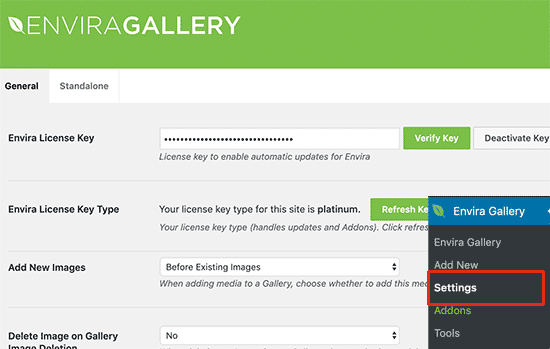
Upon activation, you need to visit Envira Gallery » Settings page to enter your license key. You can find this information under your account on the Envira Gallery website.
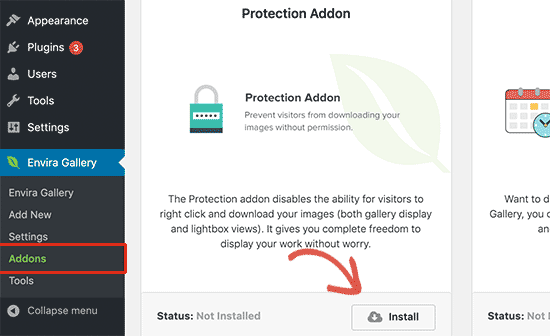
Next, you need to visit Envira Gallery » Addons page. Scroll down to the Protection addon and then click on the Install and Activate button.
Now you can start creating image galleries using the Envira Gallery plugin.
Let’s create your first image gallery and enable no-right-click protection for images in that photo gallery.
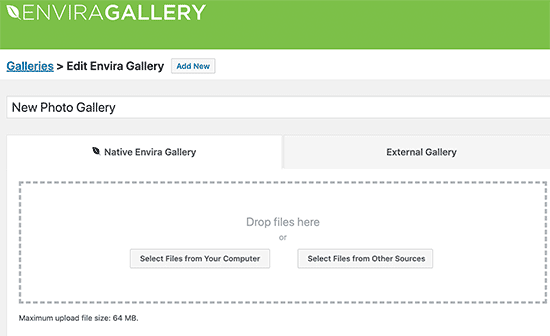
First, you need to visit Envira Gallery » Add New page to create a new gallery. Provide a title for your image gallery and then upload the files you want to add to the gallery.
After that, you need to scroll down to the gallery setting section below and click on the Misc tab. From here, go to the image protection settings section.
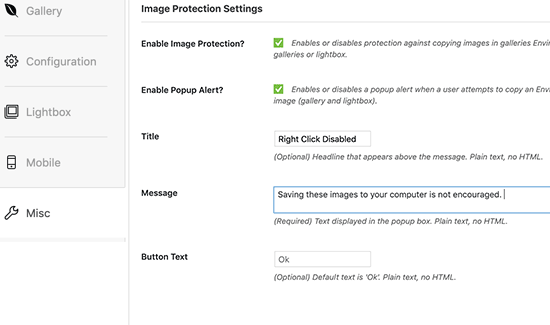
You need to check the ‘Enable Image Protection’ checkbox to disable right-click for this particular image gallery. Optionally, you can also show a popup notification when users try to use right-click.
You can now click on the publish button to save your image gallery.
Adding Your Gallery to a WordPress Post or Page
Your image gallery is ready, and you can now add it to any WordPress post or page. Simply edit the post or page where you want to add the gallery and add the Envira Gallery block to the editor.

After that, you need to select the image gallery you created earlier from the dropdown menu. Envira Gallery will load your image gallery with a live preview.
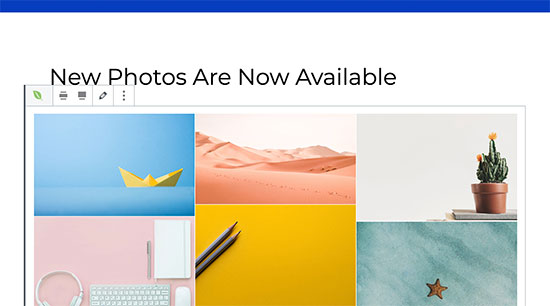
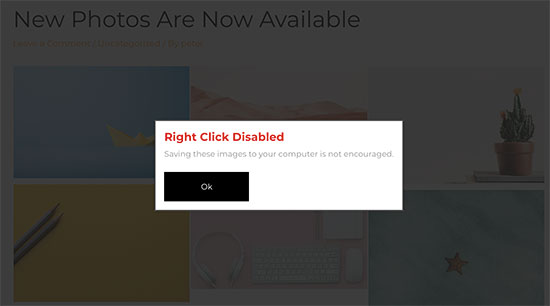
You can now save your post and visit your website to see the no right-click feature in action. If you have enabled the popup feature then this is how it would look when a user tries to right-click on an image in the gallery.
Pros and Cons of Disabling Right Click on WordPress Images
The number one reason users want to add no right-click on WordPress images is to prevent website visitors from illegally using those images elsewhere.
Adding no right-click to your images makes it harder for users to download images. It also serves as a reminder to users that the website owner does not want them to download images or reuse them without permission.
However, it does not completely stop users from stealing images from your website.
A user can still download an entire web page which will also include all images on that page.
They can also use the browser’s view source or inspect tool without right-clicking. This will give access to the direct image file which they can download and save on their computer.
On the other hand, adding no right-click on images may also stop several users who may have some genuine reason to save images from your website. Some users may find it annoying and this would affect their user experience on your website.
Alternative Approaches to Discourage Image Theft on Your Website
If you don’t want to affect user experience by adding no-right-click to your WordPress images, then there are a few things you can do to discourage improper use of your work.
1. Add a Copyright Notice Below Your Images
You can add a copyright notice below your images in plain text. This serves as a deterrent without affecting user experience.
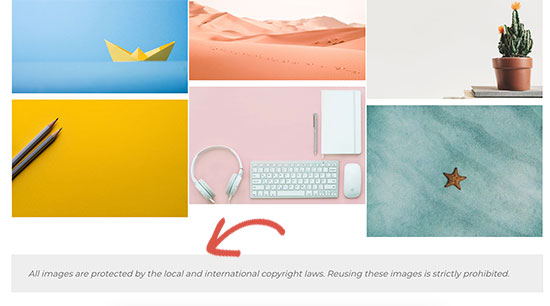
You can do this by using Gutenberg blocks. See more details in our Gutenberg tutorial.
2. Give Users a Chance to Ask for Permission
If you want users to be able to reuse your images with your permission and conditions, then you can simply let them know. We recommend using WPForms to create a simple contact form for users to send requests.
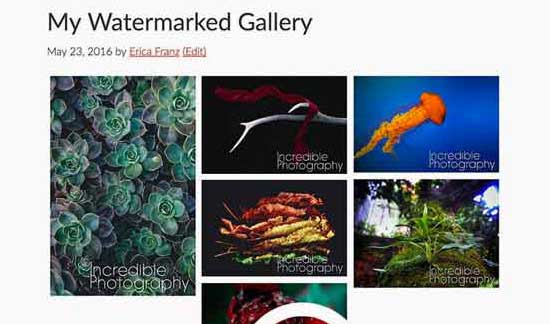
3. Add Watermark to Your Images
You can also add watermark to your images. This will affect the quality and aesthetics of your images, but it will definitely discourage users from stealing and reusing those images.
We hope this article helped you add no right-click on WordPress images. You may also want to see our guide on how to optimize your image SEO, and how to optimize images for web performance (without losing quality).
If you liked this article, then please subscribe to our YouTube Channel for WordPress video tutorials. You can also find us on Twitter and Facebook.
The post How to Add No Right Click on WordPress Images appeared first on WPBeginner.
from WPBeginner https://ift.tt/2JPnLZy
More links is https://mwktutor.com
No comments:
Post a Comment