Do you want to add icon fonts on your WordPress site? Recently one of our readers asked what’s the easiest way to add icon fonts in their WordPress theme?
Icon fonts allow you to add vector (resizable) icons without slowing down your website. They are loaded like web fonts and can be styled using CSS.
In this article, we will show you how to easily add icon fonts in your WordPress theme, step by step.
![]()
What are Icon Fonts and Why You Should Use Them?
Icon fonts contain symbols or pictograms instead of letters and numbers. These pictograms can be easily added to website content and resized using CSS. Compared to image based icons, font icons are much faster which helps with your overall WordPress website speed.
![]()
Icon fonts can be used to display commonly used icons. For example, you can use them with your shopping cart, download buttons, feature boxes, giveaway contest, and even in WordPress navigation menus.
There are several free and open-source icon fonts available that has hundreds of beautiful icons.
In fact, each WordPress install comes with the free dashicons icon font set. These icons are used in the WordPress admin menu and other areas inside WordPress admin area.
Some other popular icon fonts are:
For the sake of this tutorial, we will be using Font Awesome. It is the most popular free and open-source icon font available. We use FontAwesome on WPBeginner website as well as our WordPress plugins like OptinMonster, WPForms, RafflePress, etc.
In this guide, we’re going to cover three ways of adding icon fonts in WordPress. You can choose the solution that works best for you.
Adding Icon Fonts in WordPress Using Plugins
If you are a beginner level user just trying to add some icons to your posts or pages, then this method is suitable for you. You wouldn’t have to modify theme files, and you would be able to use icon fonts everywhere on your website.
First thing you need to do is install and activate the Font Awesome plugin for WordPress. For more details, see our step by step guide on how to install a WordPress plugin.
Upon activation, the plugin enables Font Awesome support for your theme. You can now edit any WordPress post or page and use icon shortcode like this:
[icon name=”rocket”]
You can use this shortcode along with other text or by itself in a dedicated shortcode block.
![]()
Once added, you can preview your post or page to see how the icon will look on a live site. Here is how it looked on our test site.
![]()
You can also add the font icon shortcode inside a paragraph block by itself where you can use the block settings to increase icon size.
![]()
As you increase the text size, this may look odd inside the text editor. That’s because the shortcode does not automatically change into an icon font inside the block editor.
You will need to click the preview button on your post or page to see how the actual icon size would look.
![]()
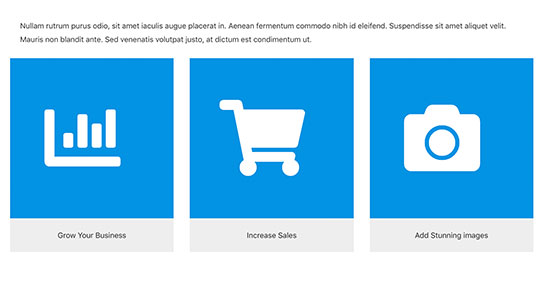
You can also use the icon shortcode inside columns and create feature boxes like this:

2. Using Icon Fonts with a WordPress Page Builder
Most popular WordPress page builder plugins come with built-in support for icon fonts. This allows you to easily use icon fonts in your landing pages as well as other areas on your website.
Beaver Builder is the best WordPress page builder plugin on the market. It allows you to easily create custom page layouts in WordPress without writing any code.
Beaver Builder comes with beautiful icons and ready to use modules that you can just drag and drop into your post and pages.
![]()
You can create icon groups, add a single icon, and move them into well-positioned rows and columns. You can also select your own colors, background, spacing, and margin without writing CSS.
![]()
You can even create completely custom WordPress themes without writing any code using Beaver Builder’s Themer product.
Elementor is another popular WordPress page builder plugin. It also comes with several elements that allow you to use icon fonts, including an Icon element.
![]()
You can just drag and drop an icon anywhere and use it with rows, columns, and tables to create beautiful pages.
Other popular page builders like Divi and Visual Composer also have full support for icon fonts.
3. Adding Icon Fonts in WordPress Manually with Code
As we mentioned earlier that icon fonts are just fonts and can be added to your site like you would add any custom fonts.
Some icon fonts like Font Awesome, are available from CDN servers across the web and can be linked from your WordPress theme directly.
You can also upload the entire font directory to a folder in your WordPress theme and then use those fonts in your stylesheet.
Since we are using Font Awesome for this tutorial, we will show you how you can add it using both methods.
Method 1:
This manual method is quite easy.
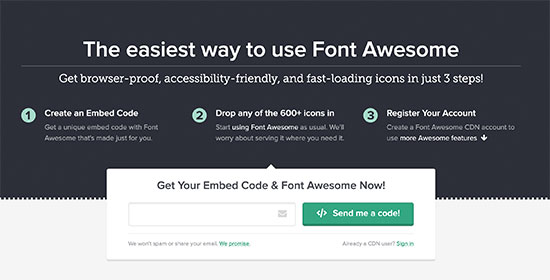
First, you need to visit the Font Awesome website and enter your email address to get the embed code.

Now check your inbox for an email from Font Awesome with your embed code. Copy and paste this embed code in your WordPress theme’s header.php file just before the </head> tag.
Your embed code will be a single line that will fetch the Font Awesome library directly from their CDN servers. It will look something like this:
<script src="https://use.fontawesome.com/123456abc.js"></script>
This method is simplest, but it can cause conflicts with other plugins.
A better approach would be to properly load JavaScript in WordPress using the built-in enqueueing mechanism.
Instead of linking to the stylesheet from your theme’s header template, you can add the following code in your theme’s functions.php file or in a site-specific plugin.
function wpb_load_fa() {

wp_enqueue_script( 'wpb-fa', 'https://use.fontawesome.com/123456abc.js', array(), '1.0.0', true );

}

add_action( 'wp_enqueue_scripts', 'wpb_load_fa' );
Method 2:
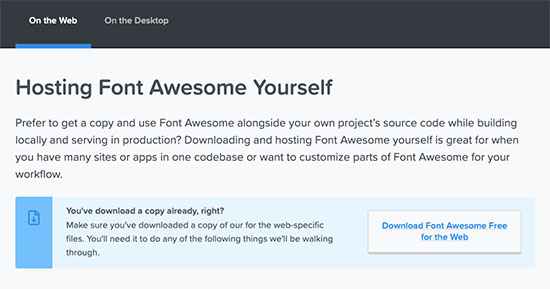
The second method is not the easiest, but it would allow you to host the Font Awesome icon fonts on your own website.
First, you need to visit the Font Awesome website to download the font package to your computer.

Simply download the icon fonts and unzip the package.
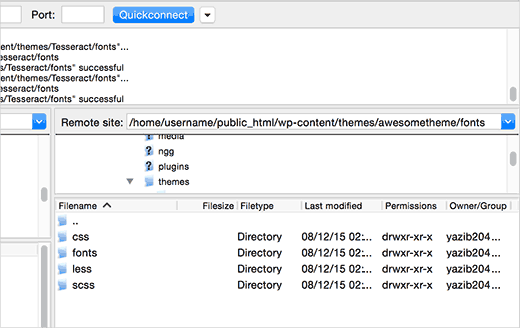
Now, you will need to connect to your WordPress hosting using a FTP client and go to your WordPress theme’s directory.
You need to create a new folder there and name it fonts. Next, you need to upload the contents of the icon fonts folder to the fonts directory on your web hosting server.

Now you are ready to load icon fonts into your WordPress theme. Simply add this code to your theme’s functions.php file or in a site-specific plugin.
function wpb_load_fa() {

wp_enqueue_style( 'wpb-fa', get_stylesheet_directory_uri() . '/fonts/css/font-awesome.min.css' );

}

add_action( 'wp_enqueue_scripts', 'wpb_load_fa' );
You have successfully loaded Font Awesome into your WordPress theme.
Now comes the part where you will be adding actual icons into your WordPress theme, posts, or pages.
Manually Displaying Icon Fonts in WordPress
Go to the Font Awesome’s website to see the full list of icons available. Click on any icon you want to use, and you will be able to see the icon name.
![]()
Copy the icon name and use it like this in WordPress.
<i class="fa-arrow-alt-circle-up"></i>
You can style this icon in your theme’s stylesheet like this:
.fa-arrow-alt-circle-up {
font-size:50px;
color:#FF6600;
}
You can also combine different icons together and style them at once. For example, lets say you want to display a list of links with icons next to them. You can wrap them under a <div> element with a specific class.
<div class="icons-group">
  <a class="icons-group-item" href="#"><i class="fa fa-home fa-fw"></i>Home</a>
  <a class="icons-group-item" href="#"><i class="fa fa-book fa-fw"></i>Library</a>
  <a class="icons-group-item" href="#"><i class="fa fa-pencil fa-fw"></i>Applications</a>
  <a class="icons-group-item" href="#"><i class="fa fa-cog fa-fw"></i>Settings</a>
</div>
Now you can style them in your theme’s stylesheet like this:
.icons-group-item i {
color: #333;
font-size: 50px;
}
.icons-group-item i:hover {
color: #FF6600
}
We hope this article helped you learn how to easily add icon fonts in your WordPress theme. You may also want to take a look at our tutorial on how to add image icons with navigation menus in WordPress.
If you liked this article, then please subscribe to our YouTube Channel for WordPress video tutorials. You can also find us on Twitter and Facebook.
The post How to Easily Add Icon Fonts in Your WordPress Theme appeared first on WPBeginner.
from WPBeginner https://ift.tt/2nfvpnk
More links is https://mwktutor.com
No comments:
Post a Comment