Do you want to add a login form to your WordPress sidebar?
A login form in the WordPress sidebar allows users to quickly log in from anywhere on your website. Having easy access to a login form can increase sales for ecommerce sites, boost retention for online courses, and more.
In this article, we will show you how to easily add a custom login form to your WordPress sidebar.

When and Why Do You Need a Custom Login Form in WordPress?
If you run membership websites, online stores, or sell online courses, then you likely need your users to login to perform certain actions.
Since the sidebar appears throughout a website, it makes the login form more noticeable and easily accessible from every page on the site.
Adding a login form to your WordPress sidebar makes it easy for users to sign in to their accounts quickly. This boosts engagement, provides a better user experience, and increases form conversions.
That said, let’s look at how to add a login form to your WordPress sidebar easily. We’ll show you how to add the default login form in the sidebar and create a custom login form.
You can click the links below to jump ahead to your preferred section.
Method 1: Adding Default WordPress Login Form in Sidebar
You can show the default WordPress login form in the sidebar of your website. This makes it super easy for users to enter their username and password to access the WordPress admin area.
For this tutorial, we’ll use the Astra theme. Do note that the options may vary depending on the WordPress theme you’re using.
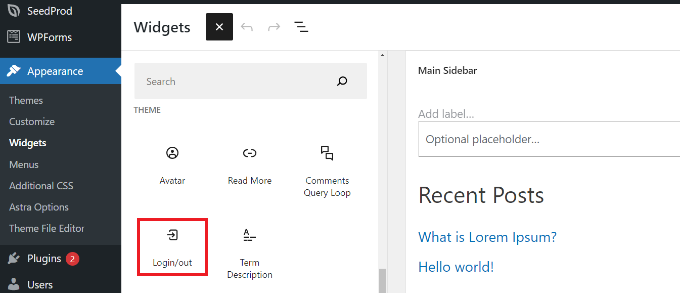
To start, you need to go to Appearance » Widgets from your WordPress dashboard.
From here, you can click the ‘+’ button and scroll under the ‘Theme’ heading and click on the ‘Login/out’ widget block to add it to your sidebar.
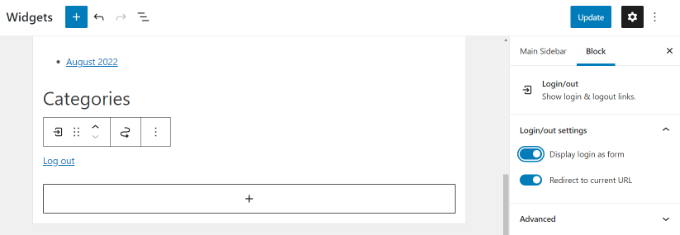
Next, you’ll see the ‘Login/out’ block in your widgets area. You can then enable the options to display login as a form.
When you’ve made the changes, click the ‘Update’ button at the top.
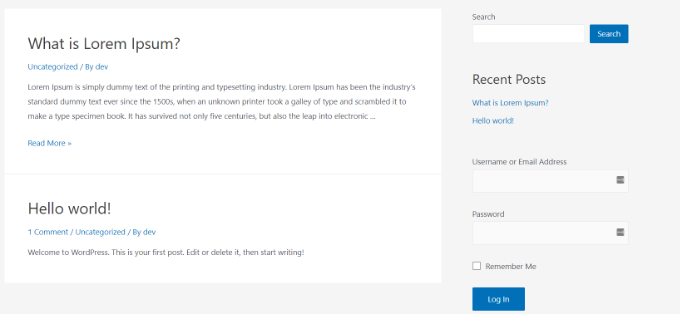
After that, you can visit your website to see the default WordPress login form in action.
Do note that you’ll be logged in if you immediately go check the form. Simply log out of your site to see how the form will appear to your members.
Method 2: Adding a Custom Login Form Using WPForms Plugin
The default WordPress login form only offers a username and password field. However, you can create a custom user registration form with more fields and customization options.
The best way to do that is by using WPForms. It is the most popular WordPress form plugin, and the premium version of WPForms allows you to easily create WordPress login and registration forms with custom fields.
WPBeginner users can use the WPForms Coupon: SAVE50 to get 50% off on their purchases.
The first thing you need to do is install and activate the WPForms plugin. For more details, see our step-by-step guide on how to install a WordPress plugin.
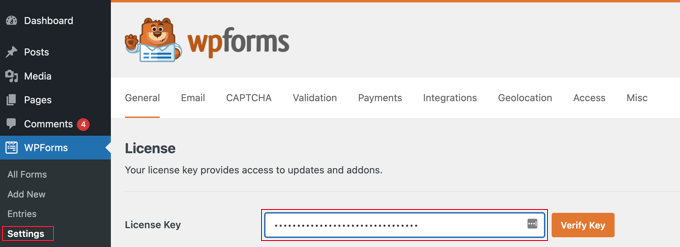
Upon activation, you need to visit WPForms » Settings page to enter your license key. You can get your license key from your WPForms account on their website.
After verification, you need to go to WPForms » Addons page.
From here, you need to scroll down to the ‘User Registration Addon’ and click on the ‘Install Addon’ button.
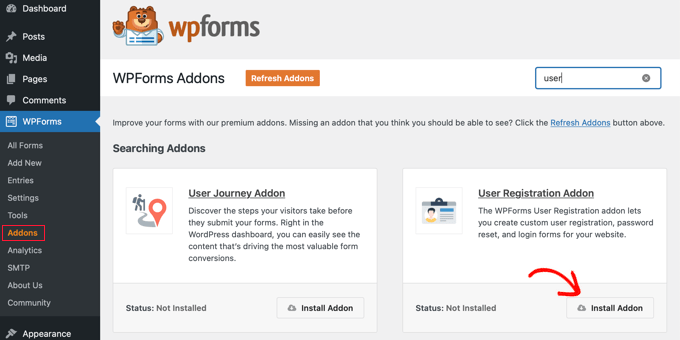
The addon will now automatically install and activate on your website.
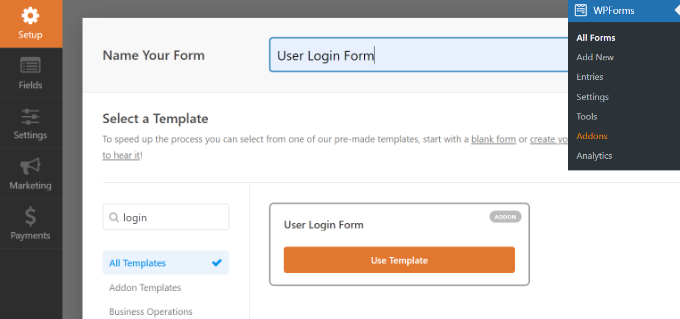
You are now ready to create a custom WordPress login form. Simply visit WPForms » Add New page to launch the WPForms builder.
First, you need to enter a form name at the top and then select the built-in ‘User Login Form’ template. Simply hover over it and click the ‘Use Template’ button.
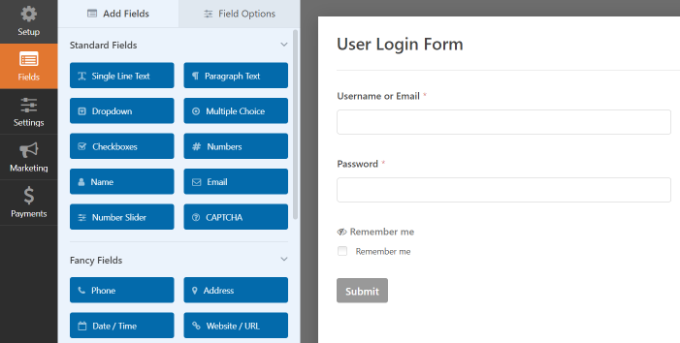
It will display the login fields pre-loaded in your form. You can click on a field to edit it or add new fields from the left column.
WPForms offers multiple form fields you can add using the drag-and-drop builder. For example, you can add a name or CAPTCHA form fields to the login form.
Afterward, head to the ‘Settings’ tab and click on the Confirmation section.
This is where you need to define what to do once a user successfully logs in to your site.
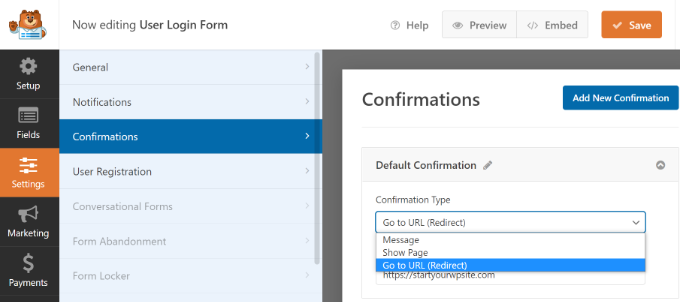
The options include a message, a custom page, or a redirect URL to any page on your site.
Ideally, you would want to redirect users to a page once they are logged in. This could be your homepage, WordPress admin panel, or any other page on your website such as their membership dashboard or client portal.
Next, you can click the ‘Save’ button at the top and exit the form builder.
Your login form is now ready. From here, you can add it to your WordPress sidebar.
Simply visit the Appearance » Widgets page in your WordPress admin area. On this page, add the ‘WPForms’ widget block in the sidebar widget area of your site.
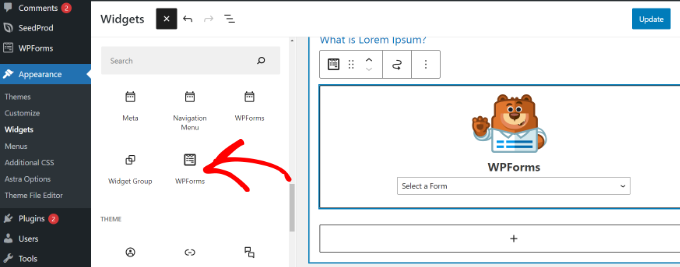
Next, you can select your user login form from the dropdown menu.
You can view more options in the settings panel on your right. For instance, there are options to show the form title and description.
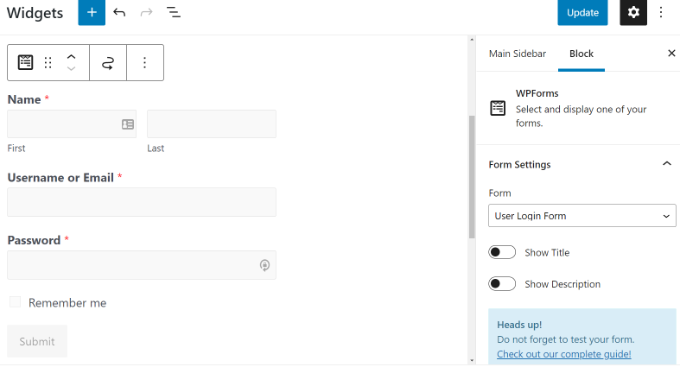
Don’t forget to click the ‘Update’ button when you’re done.
You can now visit your website to see the custom login form.
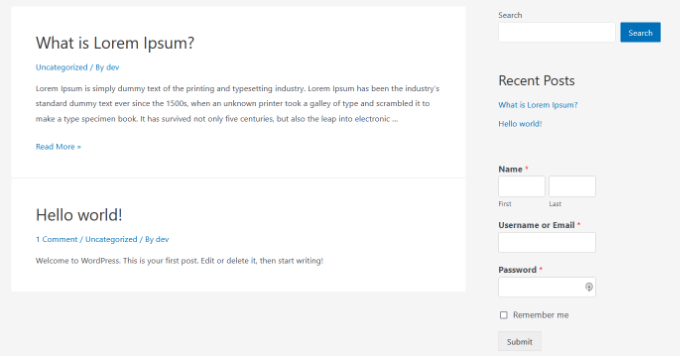
You can also use WPForms to create a custom user registration form with anti-spam features.
We hope this article helped you learn how to add a login form in your WordPress sidebar. You may also want to see our step-by-step guide on how to start a WordPress blog and the best email marketing services for small businesses.
If you liked this article, then please subscribe to our YouTube Channel for WordPress video tutorials. You can also find us on Twitter and Facebook.
The post How to Add a Login Form in Your WordPress Sidebar first appeared on WPBeginner.
from WPBeginner https://ift.tt/ymZHWxv
More links is https://mwktutor.com
No comments:
Post a Comment