Do you want to add an HTML sitemap page in WordPress?
Unlike XML sitemaps that are submitted to the search engines for better crawling, HTML sitemaps present an organized list of your pages and posts for your website visitors.
In this article, we’ll show you how to add an HTML sitemap page in WordPress.
What’s the Difference Between XML and HTML Sitemaps?
An XML sitemap is a file that lists your website content in an XML format for search engines like Google and others.
You can submit your XML sitemap in webmaster tools to improve and control how the search engines crawl your website.
On the other hand, an HTML sitemap is for your actual website visitors. It is a simple page that lists all your posts and pages in an organized way.
Now that you know the difference, let’s take a look at how to add an HTML sitemap page to WordPress using two different WordPress plugins. You can use the quick links below to jump straight to the method you want to use.
- Add an HTML Sitemap Page in WordPress with All in One SEO
- Add an HTML Sitemap Page in WordPress with Simple Sitemap
Method 1. Add an HTML Sitemap Page in WordPress with All in One SEO
We recommend using the All in One SEO plugin to add an HTML sitemap page in WordPress. It’s the best WordPress SEO plugin in the market used by over 2 million websites and lets you create an HTML sitemap with a couple of clicks.
Note: There is a free version of All in One SEO Lite available, but we will be using the premium version in our example because it includes all the powerful features like smart sitemaps, redirection manager, SEO schema, and more.
First thing you need to do is install the All in One SEO plugin. For more details, see our step by step guide on how to install a WordPress plugin.
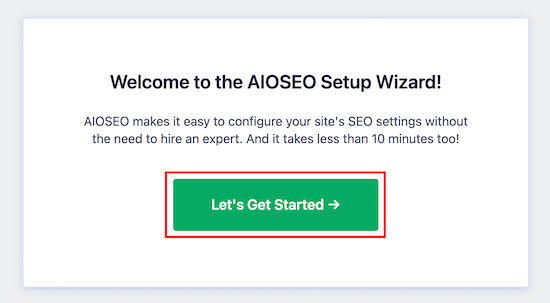
Upon activation, the AIOSEO setup wizard will open, which will guide you through setting up the plugin and getting your SEO settings right.
Simply click the ‘Let’s Get Started’ button and follow the steps.
After that, you’ll be taken to the WordPress admin dashboard, where you’ll have a new menu option called ‘All in One SEO’.
Then, you need to go to All in One SEO » Sitemaps, click on the ‘HTML Sitemap’ menu option, and make sure the ‘Enable Sitemap’ toggle is turned on.
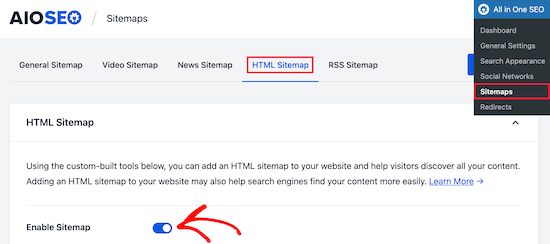
Next, you can choose how you want to display your HTML sitemap.
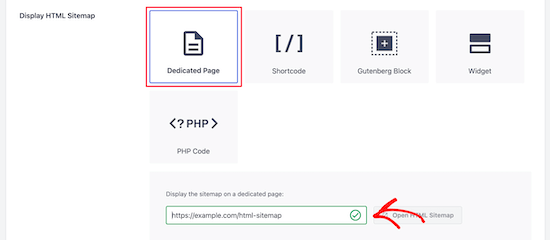
For this tutorial, we’ll select the ‘Dedicated Page’ option, but you can also add it as a shortcode, block, widget, and more.
Then, enter the page URL where you want the HTML sitemap to display. The plugin will automatically create a new page for you.
Once you’ve done that, scroll down to the ‘HTML Sitemap Settings’ section.
Here you can customize how your HTML sitemap will display. You have control over what posts and pages will display, taxonomies such as categories and tags, sort order, and more.
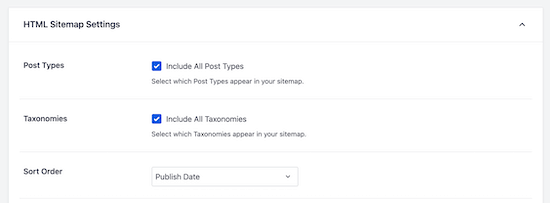
You can also turn on ‘Compact Archives’ to display your HTML sitemap in a compact date archive format.
This is similar to how we display our compact archives on our 404 pages here at WPBeginner.
After you’re done customizing your HTML sitemap settings, make sure to click the ‘Save Changes’ button.

Now your visitors can view your HTML sitemap and more easily navigate around your website.
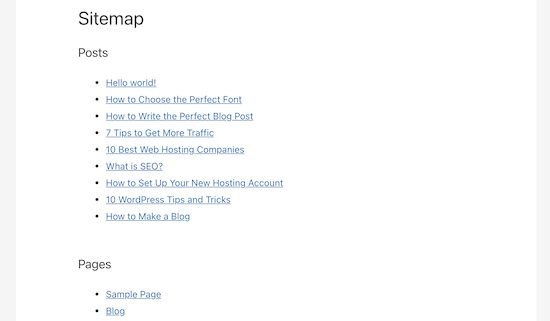
If you chose the ‘Dedicated Page’ option above, then you can visit the page by clicking the ‘Open HTML Sitemap’ button.
Method 2. Add an HTML Sitemap Page in WordPress with Simple Sitemap
Simple Sitemap is a free plugin that lets you easily add an HTML sitemap to your WordPress website.
First thing you need to do is install and activate the Simple Sitemap plugin. For more details, see our beginner’s guide on how to install a WordPress plugin.
Once the plugin is activated, you can open an existing page, or create a new HTML sitemap page by navigating to Pages » Add New.
This plugin has newly added Gutenberg blocks that you can use to simply add an HTML sitemap page.
All you need to do is click the ‘Plus’ icon, then select the ‘Simple Sitemap’ option.
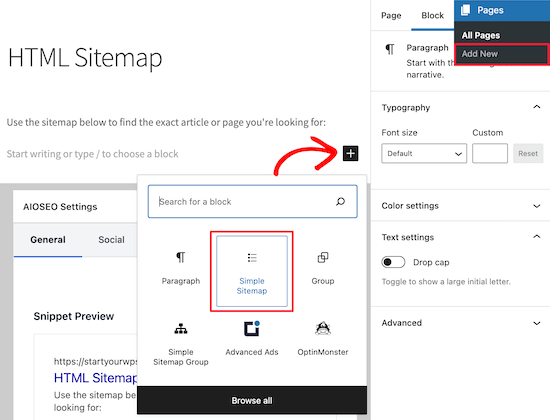
Another block included with this plugin is the ‘Simple Sitemap Group’ that creates a branching visual sitemap. But, we’re going to use the ‘Simple Sitemap’ block for this tutorial.
Once you add the block, it will automatically create your HTML sitemap.
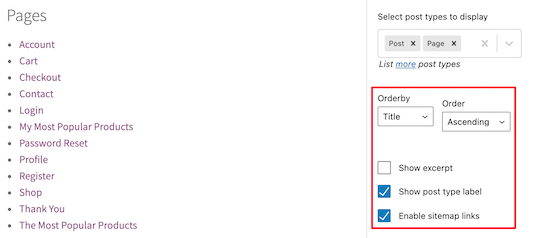
On the right-hand menu, you have customization options where you can choose to display ‘Posts’ or ‘Pages’, or both together.
In the box under ‘Select post types to display’, simply enter ‘Post’ or ‘Page’ to choose what you want to display.
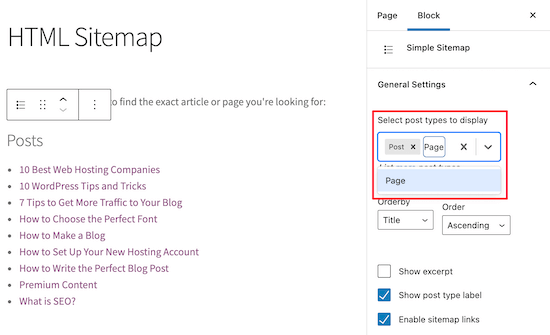
After that, you can change how the list displays by changing the ‘Orderby’ or ‘Order’ drop-downs.
You can also display the excerpt for the pages or posts listed, and enable or disable links. However, we’re going to keep the default plugin settings to keep our HTML sitemap simple and easy to browse.
Once you’ve finished customizing your HTML sitemap page, click ‘Publish’ or ‘Save’ if you’re updating an older page.
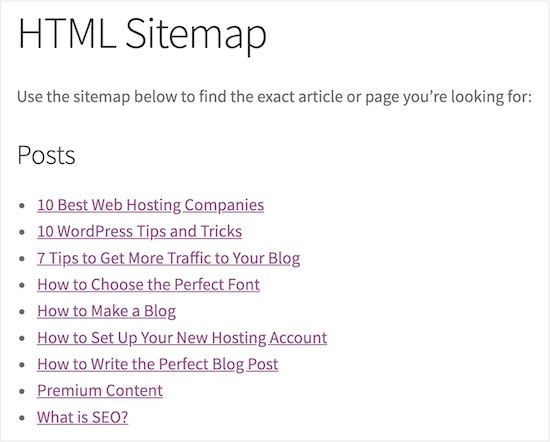
When your visitors go to your HTML sitemap, they’ll see a navigation page that looks similar to the one below.
Adding an HTML Sitemap in WordPress using Shortcodes
Another way to add an an HTML sitemap to WordPress is by using a shortcode. This gives you more control over the placement of your HTML sitemap and works for those who are using the classic editor.
Simply create a new page by navigating to Pages » Add New, then give your new page a name.
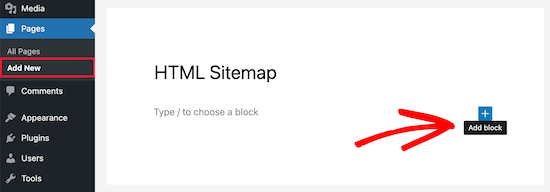
After that, click the ‘Plus’ icon to add a new block to your page.
Then, type ‘shortcode’ into the search box and select the ‘Shortcode’ block.

After that, simply copy and paste one of the following shortcodes in the text editor.
[simple-sitemap-group]
[simple-sitemap]
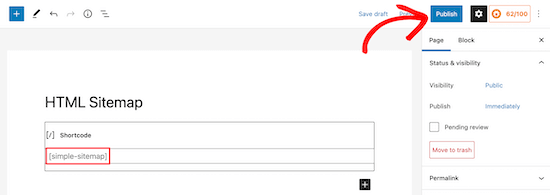
Once you’ve done that, click ‘Publish’ or ‘Update’ to save your changes.
If you need more help, then see our guide on how to add a shortcode to WordPress.
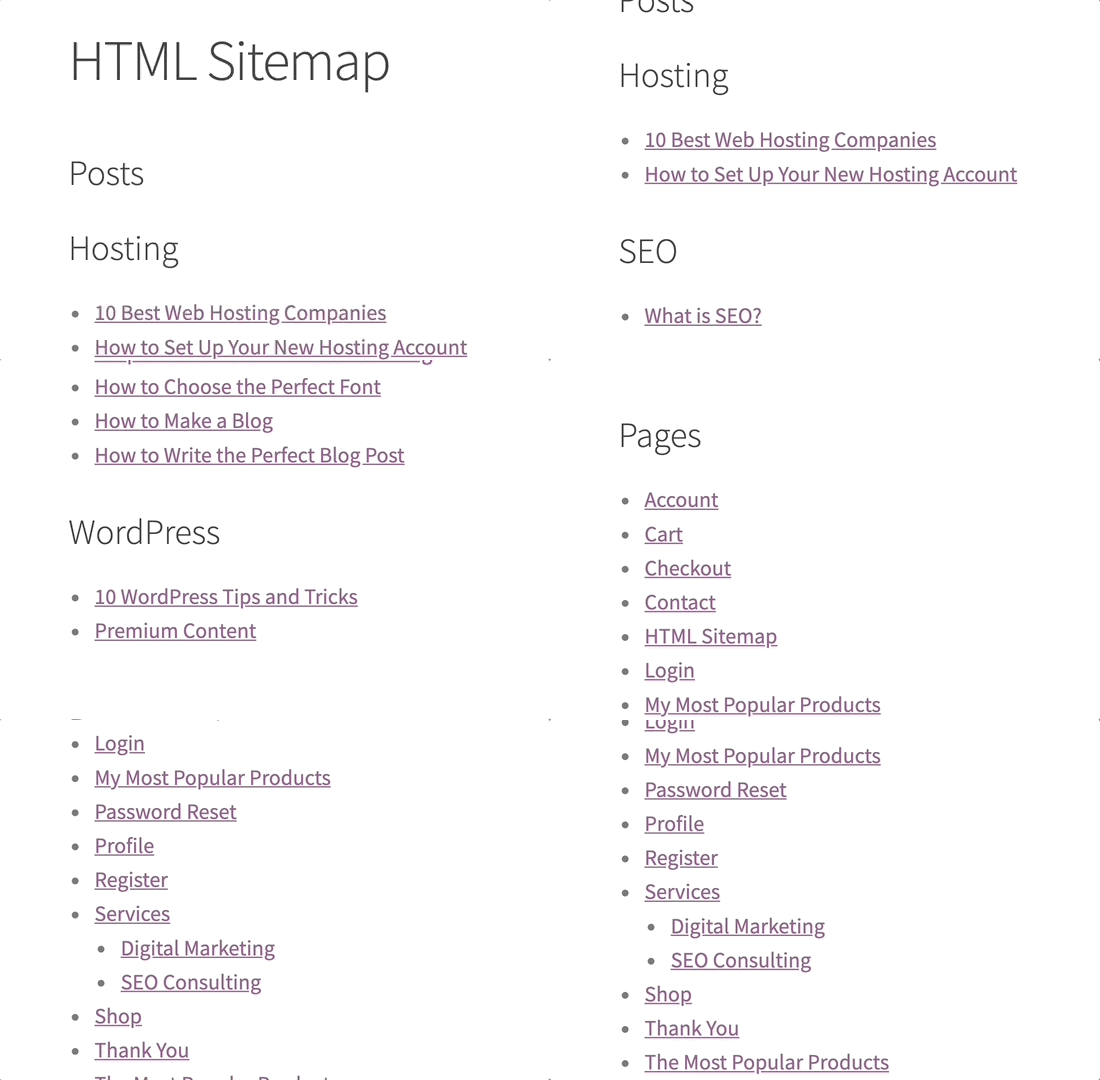
The first shortcode will list your posts by category, and the second shortcode will list your pages.
This is how the plugin will display your sitemap to your website visitors.
Creating an HTML Sitemap in WordPress For Top Pages Only
Many site owners use WordPress as a CMS with their main content published as pages instead of posts. For more details, see the difference between posts and pages in WordPress.
In this case, you would want to your HTML sitemap to show pages in the proper hierarchical order.
Here is how you can add HTML Sitemap with only pages.
Simply add this shortcode to the page where you want to display your HTML sitemap. Follow the same steps above to add the shortcode to a new WordPress page.
[simple-sitemap]
This is how it will display your HTML sitemap with all your WordPress pages listed in a hierarchical list.
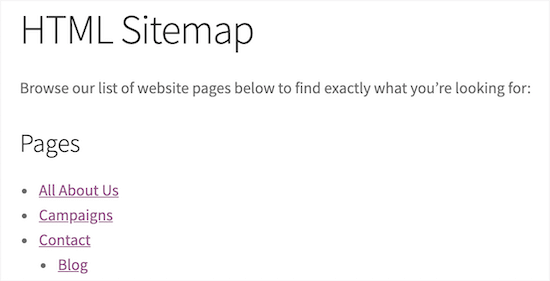
It also includes your parent and child pages listed in a nested fashion. For more details, see our guide on how to create a child page in WordPress.
We hope this article helped you learn how to add an HTML sitemap page in WordPress. You may also want to see our expert picks of the best virtual business phone number apps and our guide on how to choose the best blogging platform.
If you liked this article, then please subscribe to our YouTube Channel for WordPress video tutorials. You can also find us on Twitter and Facebook.
The post How to Add an HTML Sitemap Page in WordPress (2 Ways) appeared first on WPBeginner.
from WPBeginner https://ift.tt/3AOXbaO
More links is https://mwktutor.com
No comments:
Post a Comment