Do you want to create a WooCommerce contest to boost customer engagement and increase sales?
Contests are an easy way to get new visitors to your WooCommerce store, increase brand awareness, and keep customers engaged.
They can also help you boost customer loyalty, improve conversions, and increase sales in the long run.
In this article, we’ll show you how to easily create a WooCommerce contest to boost loyalty and engagement.
Why Run a WooCommerce Contest?
As an online store, you need to bring new customers to your website. The challenge is that most of these users leave without making a purchase.
Only 30% of customers who add products to their cart actually finish the checkout. This is why we have a comprehensive guide on how to recover abandoned cart sales in WooCommerce.
Once a user leaves your website, it is hard to bring them back unless you find ways to stay in touch.
Adding contests and giveaways allows you to provide users a fun reason to stay a little longer. They also help you collect email addresses, user responses, and grow your social media following.
All of this ultimately leads to more sales and increased customer loyalty.
That being said, let’s take a look at how to easily create a WooCommerce contest to grow your business.
Creating a WooCommerce Contest Giveaway
For this tutorial, we’ll be using a plugin called RafflePress. It is the best WooCommerce contest / giveaway plugin that allows you to easily run viral contests and giveaway campaigns on your website.
It comes with social actions that help you amplify your reach and find new customers. It also helps you grow your email list, increase social media followers, and boost customer loyalty.
Note: our team built RafflePress to help us grow our online presence. Based on user request, we released it as a plugin for anyone to use.
First, you need to install and activate the RafflePress plugin. For more details, see our step by step guide on how to install a WordPress plugin.
Upon activation, the plugin will add a new menu item labeled ‘RafflePress’ in your WordPress admin sidebar. Clicking on it will take you to the plugin’s settings page.
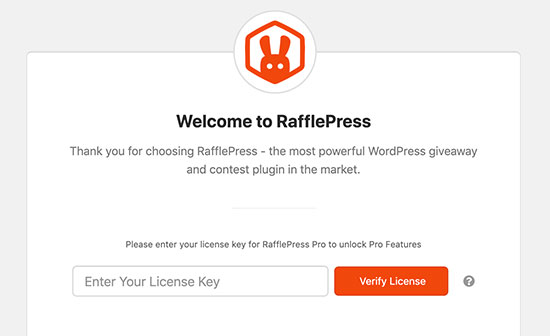
First, you will need to enter your license key. You can find this information under your account on the RafflePress website.
After entering your license key, you are now ready to create your first WooCommerce contest.
Simply visit RafflePress » Add New page to get started.
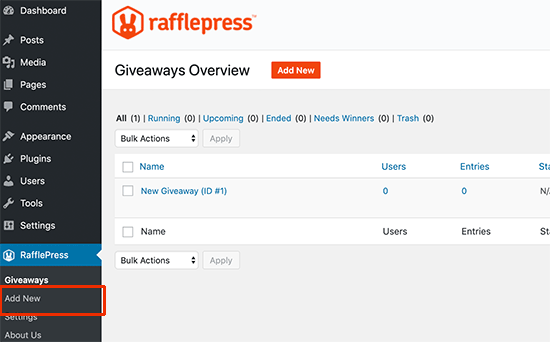
This will launch the RafflePress contest builder.
First, you need to provide a name for your new contest campaign. After that, you need to select a template to use as a starting point.
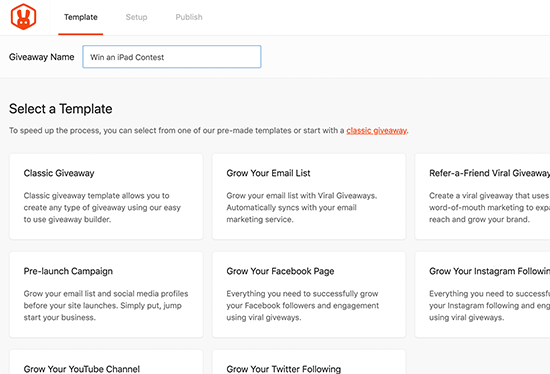
RafflePress comes with several goal-based contest templates to choose from. These templates are designed to help you get the best results for specific goals like growing your email list or social media following.
You can select one that best suits your goals. If you are unsure, then start with the classic template.
RafflePress will now load the template in the builder.
Add a Prize to Your WooCommerce Contest
Let’s set a prize or incentive for your WooCommerce contest. You need to click on the pencil icon under the Giveaway Prize Details section to enter the prize title and description.
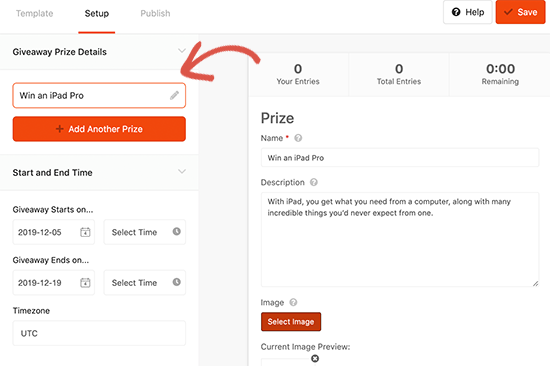
After that, don’t forget to upload prize image which will be prominently displayed with your contest.
Next, you need to choose the start and end date for your contest. We recommend leaving enough time before the start / end date to ensure that you can promote it properly.
Add Actions Users Need to Perform to Join The Contest
Actions are the tasks you want website visitors to perform in order to join the contest. RafflePress comes with a number of actions designed to help you reach your intended goals.
You need to select actions that help you maximize your reach to new audiences as well as existing customers.
For example, if you run a fast fashion eCommerce store, then you would want to increase your Instagram following.
Let’s start adding actions to the contest.
Simply switch to the ‘Actions’ tab from the left menu, and you’ll see a list of actions.
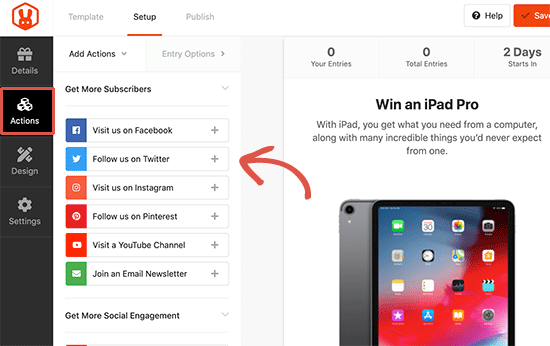
You can click on an action to add it to your contest. It will appear below the prize description section.
You can then click on the individual action to see action settings in the left column.
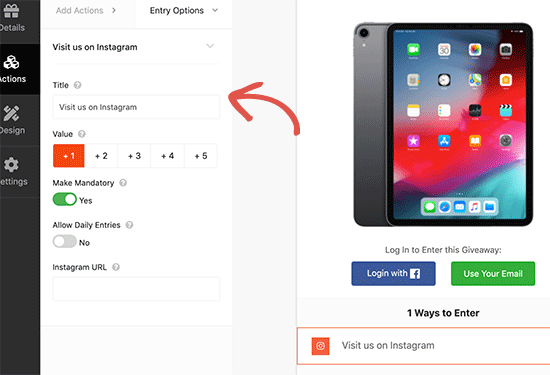
Each action comes with some basic settings. You can set a title, the number of entries users will earn for completing it, allow daily entries, or make an action mandatory.
Apart from these settings, you will also see settings related to specific actions.
For instance, if you want users to visit your Instagram profile, then you will need to enter your Instagram profile URL.
You can add as many actions as you like. Adding more options gives your users more ways to participate, and helps you reach more marketing channels.
RafflePress seamlessly integrates with all the best email marketing services, so you can use it to grow your email list.
Bonus Tip: Prioritize channels based on your campaign goals. For instance, if you wanted to grow your email list, then you need to move it up and make it mandatory.
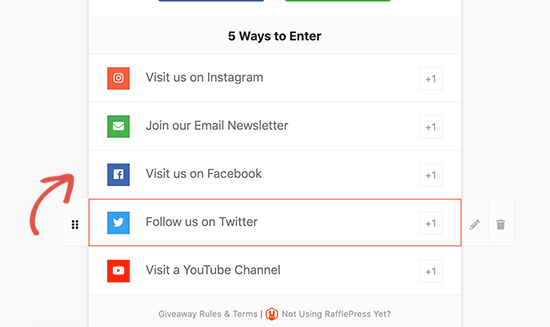
You can simply drag and drop actions to arrange them in the order you want customers to join in.
Once you are done, don’t forget to click on the ‘Save’ button to store your settings.
Customize WooCommerce Contest Design
Next, you would want to change the appearance of your contest widget so that it stands out.
Simply, click on the ‘Design’ section from the left column and then select a layout, font, and button color for your contest widget.
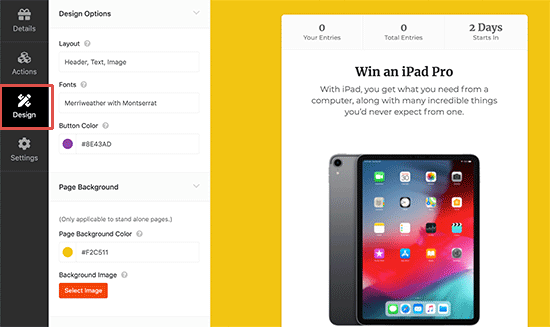
You can also set a background color or image if you want to create landing page for your contest (more on this later in this article).
Once you are satisfied with the design click on the ‘Save’ button to save your progress.
Configure Contest Settings
RafflePress comes with a number of options that give you full control of your contest campaign.
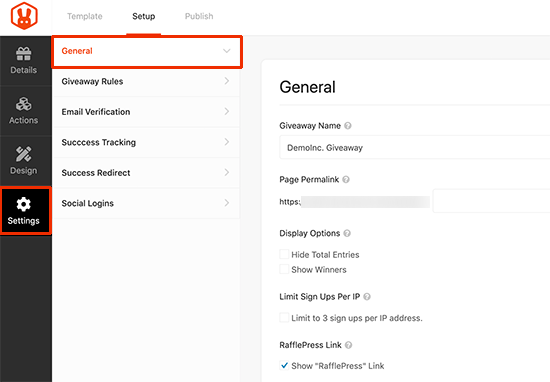
Switch to the ‘Settings’ tab from the left menu and click on the ‘General’ tab. From here you can set basic options for your giveaway including the option to show winners, number of entries, limit signups per IP, and more.
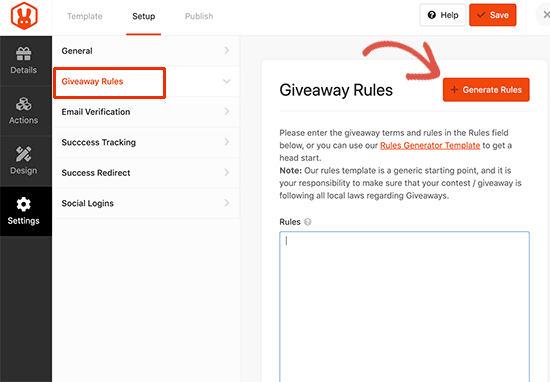
After that, switch to the ‘Giveaway rules’ tab. RafflePress includes a Rules Generator which allows you to easily generate contest rules for your campaign.
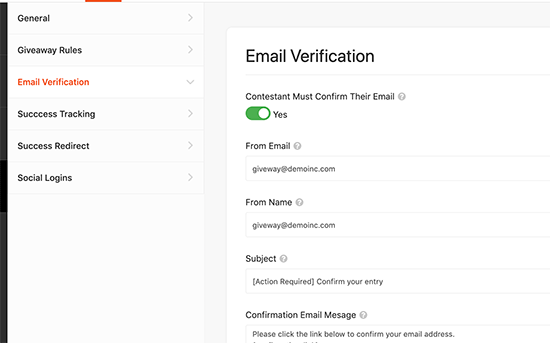
After that, switch to the ‘Email Verification’ settings. From here you can turn on email verification, which will only accept entries from users who verify their email address.
Next, click on the ‘Success tracking’ option. If you want to add Google Analytics or other tracking code like Facebook pixel, then this option allows you to add those scripts.
![]()
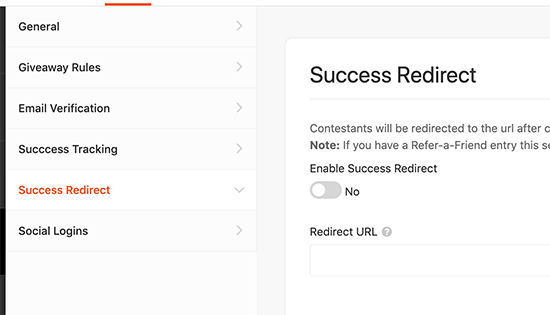
Next, click on the ‘Success Redirect’ tab. From here you can redirect users to any page after they successfully complete all actions. This could be a WooCommerce product page, a landing page, or simply a thank you page.
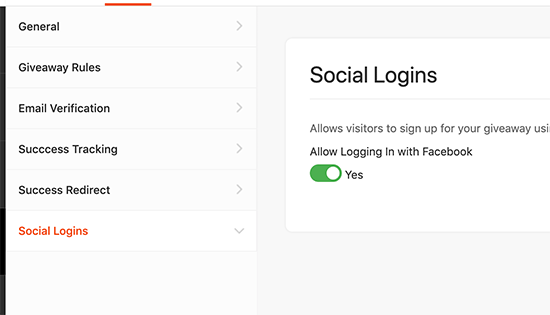
Finally, you’ll reach the social logins section. From here you can turn on social logins and allow users to join the contest by signing in with their Facebook account.
Once you are done reviewing settings, don’t forget to click on the Save button to store your changes.
Publish and Add Contest to Your WooCommerce Store
Now that your contest is ready, it is time to add it to your WooCommerce store.
RafflePress makes it super easy to add your giveaway anywhere. There are three ways you can do so.
- You use the RafflePress block to add giveaway in a blog post or a page
- You can use shortcode to add it anywhere posts, pages, product pages, sidebar widgets
- You can also create Giveaway landing page
Let’s check out each of these items.
1. Adding Contest Block to Blog Posts / Pages
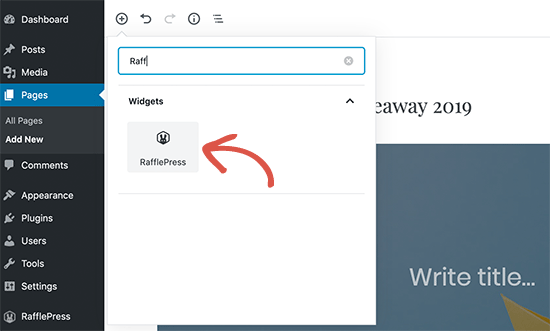
Simply create a new post or page in WordPress or edit an existing one. On the edit screen, click on the add new block button and then select RafflePress.
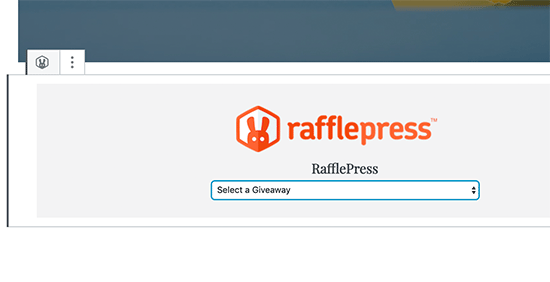
You’ll see RafflePress block appear in the editor. From here, you need to click on the drop down menu in the block settings and select the contest giveaway you created earlier.
2. Add Contest Using Shortcode
Shortcodes come in handy when you want to add the contest to a product page, sidebar widget, or with a page builder plugin.
First, you need to edit the contest giveaway and then switch to the ‘Publish’ tab. From here, click on the shortcode option and copy the shortcode you see on the screen.

3. Create a Contest Page in WooCommerce
RafflePress also allows you to give your contest widget its own landing page. You can find the option under the Publish tab while editing your Contest giveaway.
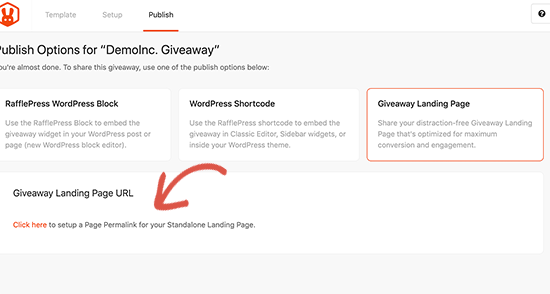
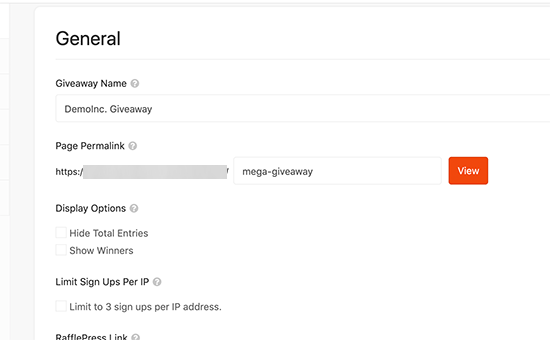
You can launch the landing page settings by clicking on the link. From there you need to create a URL for your landing page. Once done, you can click on the view button to see your landing page in action.
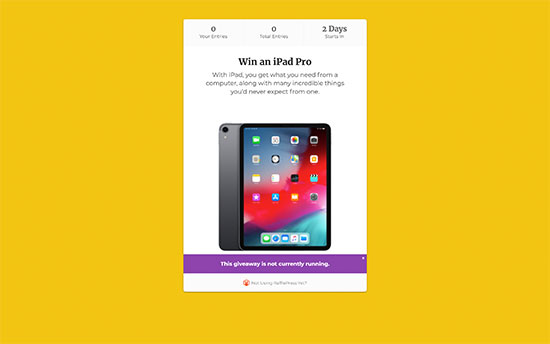
RafflePress will take you to your contest landing page. You can now copy the URL and start promoting it across your marketing channels.
Promoting Your WooCommerce Contest
Now that you have created and added your WooCommerce contest, it is time to start promoting it.
We recommend adding your contest before it begins and give yourself plenty of time to build anticipation and excitement for the contest.
You can give a shout out to your email newsletter subscribers and spread the word around on your social media profiles. Reach out to influencers in your industry, friends, and family members to help you get the ball rolling.
You can also promote it on relevant online communities and forums. And don’t forget to promote it across your website using a platform like OptinMonster, so that your visitors are aware of it.
Choosing Contest Winners
RafflePress will automatically start your contest on the time you selected in settings and will end it on your selected time as well.
Once the contest has ended, RafflePress can also help you pick a random winner.
Go to RafflePress » Giveaways page and click on the ‘Need Winners’ link next to your contest.
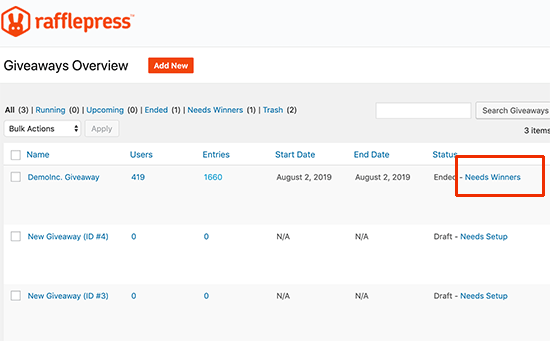
The plugin will now ask you how many winners you want to choose. After that, it will randomly pick the winners.
You can then email those users to let them know and provide the necessary information to get their prize.
We hope this article helped you learn how to easily create a WooCommerce contest and build customer loyalty. You may also want to see our expert pick of the best WooCommerce plugins for your online store.
If you liked this article, then please subscribe to our YouTube Channel for WordPress video tutorials. You can also find us on Twitter and Facebook.
The post How to Create a WooCommerce Contest to Boost Loyalty and Engagement appeared first on WPBeginner.
from WPBeginner https://ift.tt/365ph2b
More links is https://mwktutor.com
No comments:
Post a Comment