Have you ever wanted to redirect users to a specific page after they login to your WordPress site?
Depending on the user’s role, WordPress would either take them to the dashboard or their profile section in the WordPress admin area.
In this guide, we’ll show you how to easily redirect users after a successful login in WordPress. We’ll also show you how to redirect after login based on user roles and permissions.
Why Redirect Users After Login in WordPress?
A lot of website owners run multi-user WordPress websites. For example, a multi-author blog, a membership community, or an online store.
All these websites require users to login to perform certain actions and access their account details.
Many WordPress membership plugins and eCommerce software automatically handle redirects by showing user custom login pages and redirect them to a custom account management page.
However, some websites may not be using such a plugin. In that case, users will be redirected to the default WordPress admin area.
The default WordPress method doesn’t offer users clear guidance on what to do next. While this may work for bloggers and writers, this is not an ideal user experience for your users and customers.
That being said, let’s take a look at how to easily redirect users after successful login in WordPress. We’ll show you two methods, and you can pick the one that best meets your requirements.
Method 1. Setting up Login Redirects in WordPress using Peter’s Login Redirect
This method is easier and allows you to set up login redirects based on user roles and permissions.
The first thing you need to do is install and activate the Peter’s Login Redirect plugin. For more details, see our step by step guide on how to install a WordPress plugin.
Upon activation, you need to visit Settings » Login/logout Redirects to setup the plugin.
It allows you to set up post login redirects for various situations. Let’s take a look at each one of them.
Setup Login Redirect for Specific Users
The first option on the settings page allows you to redirect only specific users. You can select a username from the drop-down menu. After that, you can enter the URLs to redirect a user on login and logout.
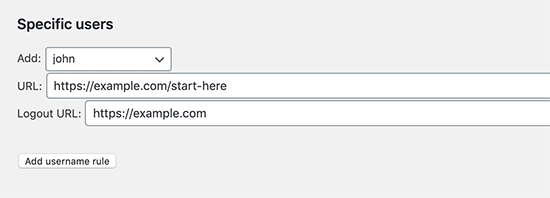
Once done, click on the Add username rule button to store this setting. Repeat the process if you need to set up redirects for more individual users.
Setting up Login Redirect by User Role in WordPress
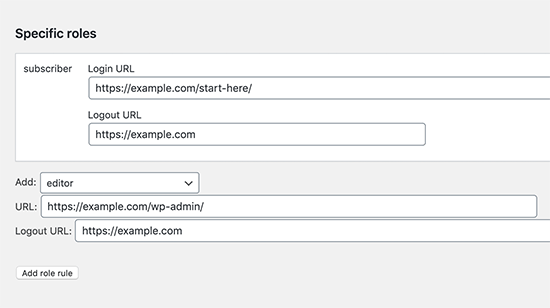
You can also set up a login redirect based on user role in WordPress. You simply need to select a user role from the drop down list and then enter the redirect URL. For example, you can redirect editors to the admin-area and subscribers to a custom page.
Setting up Login Redirect by Capabilities in WordPress
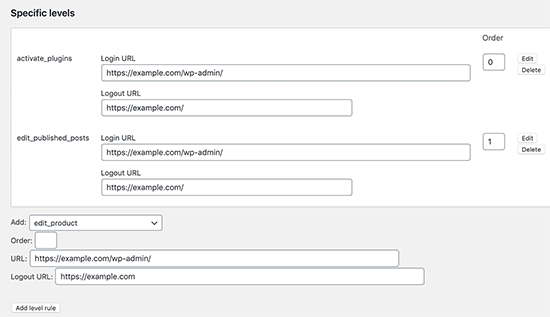
The plugin also allows you to set up login redirects based on user levels and capabilities. This option is particularly useful if you are using user roles with custom capabilities in WordPress.
Simply select a user level from the drop-down menu and enter login and logout URLs. You can set order to any number, and this will determine how this rule is stored and displayed in plugin settings.
Setting up Login Redirect for All Users in WordPress
On the plugin’s settings page, there is an option to set a redirect for all other users. If a user does not match any rules you set above, then you can redirect them by entering a URL here.
You can also use this setting to create a site-wide redirect for all users.

Setting up a User Registration Redirect in WordPress
When a new user signs up on your site, WordPress redirects them to the login page. You can set up a redirect URL to send them to any other page on your site under the Post Registration section.

For example, you can redirect them to a welcome page with links to different things they can do on your website.
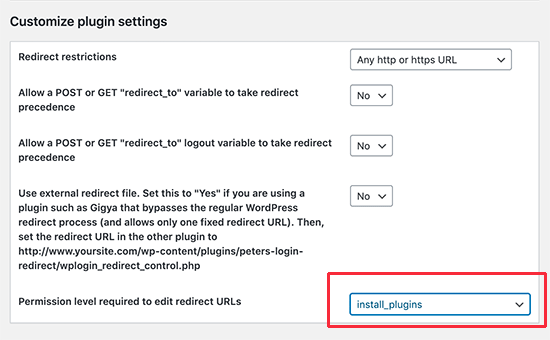
Important: Do not forget to change permission level under ‘Customize plugin settings’ section. The plugin allows anyone who can edit categories to edit redirect URLs. This means a user with the Editor user role can set up redirects. We recommend changing this to install_plugins, so only users with administrator role can setup redirects.
Method 2. Set up Login Redirects in WordPress Using WPForms
If you want to create a custom login form in WordPress, then you can use WPForms to set it up with a post-login redirect.
WPForms is the best WordPress contact form plugin on the market. It allows you to easily create beautiful forms and add them to your WordPress site.
It is a premium plugin, and you’ll need at least their “Pro” plan to access login form feature.
First, you need to do is install and activate the WPForms plugin. For more details, see our step by step guide on how to install a WordPress plugin.
Upon activation, you need to visit WPForms » Settings page to enter your license key. You can find this information under your account on WPForms website.
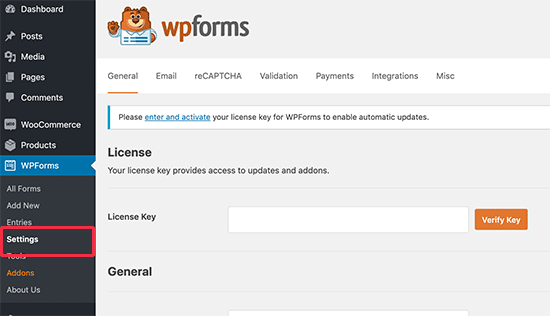
After entering the license key, you would be able to install add-ons. Go ahead and visit WPForms » Addons page and locate the User Registration Addon.
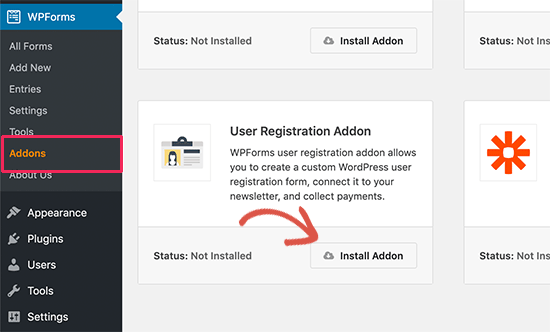
Next, click on the Install Addon button to download and activate the addon. You are now ready to create your own custom login forms.
Next, you need to visit WPForms » Add New page and scroll down to the ‘User Login Form’ template. You need to click on the ‘Create a User Login Form’ button to continue.
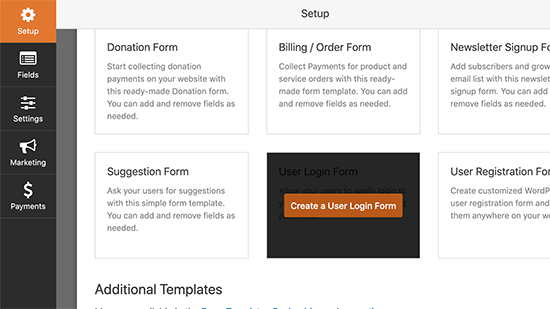
WPForms will load the User Login Form with required fields. You can click on the fields to add your own description or text around them. You can also click on the Submit button and change its label to ‘Login’.
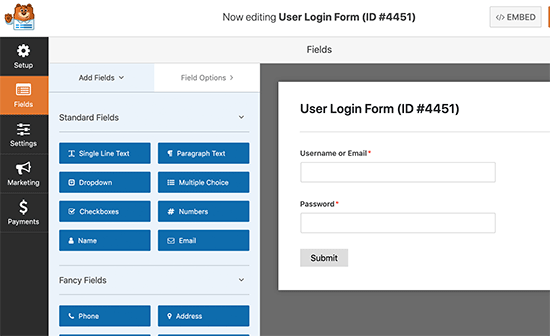
Finally, you can set up login redirect for this login form.
Go to Settings » Confirmation tab from left columnns and select ‘Go to URL’ redirect as your confirmation type.
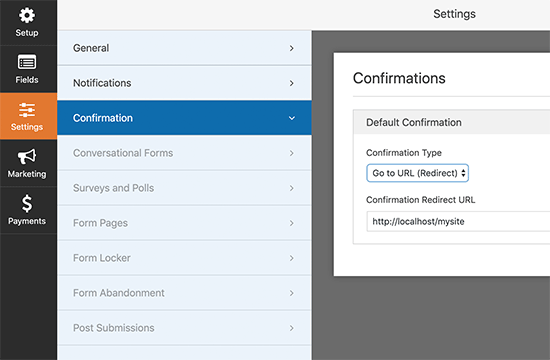
Below that you can enter the URL where you want users to be redirected.
Your login form is now ready. You can save your settings and exit the WPForm builder interface.
Now let’s add your login form to your website.
Simply edit the page where you want to display the login form or create a new one. On the page edit screen, add the WPForms block to your content area.

Next, select the login form you created earlier, and WPForms block will automatically load it inside the content area.
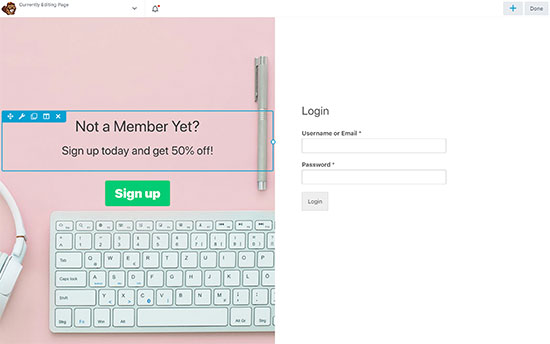
The advantage of this method is that you can set up a redirect for your custom login form, and you can also use page builders like Beaver Builder or Divi to create stunningly beautiful login pages.
Troubleshooting Login Issues in WordPress
Setting up redirects using the methods described above works like a charm. On rare occasions, you may see issues, depending on how your WordPress website is set up, and the plugins you are using.
Here are some tips to help you resolve you resolve those issues.
1. Update Your Permalink Structure
Simply go to Settings » Permalinks page and click on the ‘Save settings’ button without making any changes.
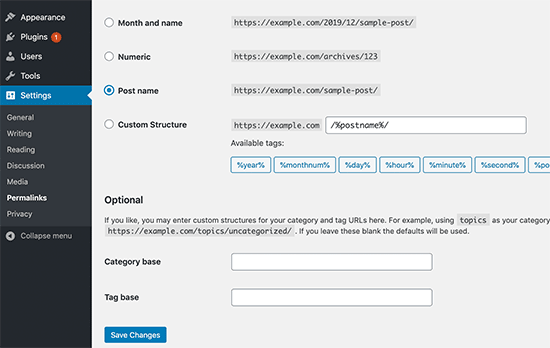
This refreshes the WordPress permalink settings. Keep this tip handy as it can also help fix other redirect issues in WordPress.
2. Fix Login Page Redirect Issue
If you the WordPress login page keeps refreshing and redirecting you back to the login form, then this is a sign of a conflicting setting.
For troubleshooting this problem, see our guide on how to fix WordPress login page refreshing and redirecting issue.
3. Follow General Troubleshooting Tips
The most likely problem behind login issues is a plugin or theme conflict. To figure out which one is causing the problem, follow the step in our ultimate WordPress troubleshooting guide.
We hope this article helped you learn how to easily redirect users after successful login in WordPress. You may also want to see our complete WordPress security guide to keep your user data safe and secure.
If you liked this article, then please subscribe to our YouTube Channel for WordPress video tutorials. You can also find us on Twitter and Facebook.
The post How to Redirect Users after Successful Login in WordPress appeared first on WPBeginner.
from WPBeginner https://ift.tt/2Z340nm
More links is https://mwktutor.com
No comments:
Post a Comment