Do you want to create a custom WordPress theme from scratch?
In the past, you had to follow the WordPress codex and have a decent coding knowledge to build a custom WordPress theme. But thanks to new WordPress theme generators, now anyone can create a completely custom WordPress theme within an hour (no coding knowledge needed).
In this article, we will show you how to easily create a custom WordPress theme without writing any code.

Creating a Custom WordPress Theme for Beginners
Unlike static HTML sites, WordPress themes are a set of template files written in PHP, HTML, CSS, and JavaScript. Typically, you would need to have a decent understanding of all these web design languages or hire a web developer to create a custom WordPress theme.
If you hired a developer or agency, then the cost of a custom WordPress theme can reach thousands of dollars.
Since many small business owners couldn’t afford the high costs of a custom WordPress theme, a lot of them just settled for the default themes that came with WordPress.
Those who didn’t want to settle and wanted customizations either used a drag & drop WordPress page builder, or they used a theme framework to build a custom theme.
While WordPress theme frameworks made building a WordPress theme easier, they are a solution for developers, not an average website owner.
On the other hand, WordPress page builder plugins made it super easy to create custom page layouts using a drag & drop interface, but they were limited to layouts only. You couldn’t build custom themes with it.
Until Beaver Builder, one of the best WordPress page builder plugins decided to solve this problem with their add-on called Beaver Themer.
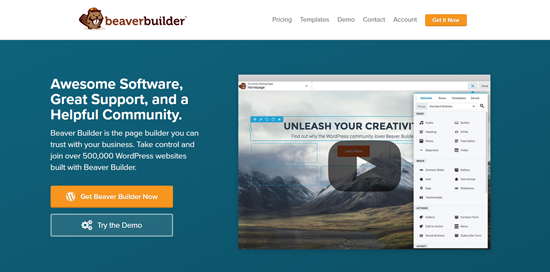
Beaver Themer is a site builder add-on that allows you to create custom theme layouts using a drag and drop interface and without learning to code.
Let’s take a look at how to use Beaver Themer for easily creating a WordPress theme.
Setting up Beaver Themer to Build a Custom Theme
Beaver Themer is an add-on plugin for Beaver Builder, so you will need both plugins for this article.
First, you need to install and activate the Beaver Builder and Beaver Themer plugins. For more details, see our step by step guide on how to install a WordPress plugin.
Beaver Themer allows you to create a custom theme, but you will still need a theme to start with. We recommend using a light-weight theme that includes a full-width page template to act as your starter theme.
You can find many such themes in WordPress.org theme directory. Most modern WordPress themes include a full-width template. Our top picks are:
- Astra – A free light-weight all-purpose WordPress theme that comes with built-in support for Beaver Builder.
- OeanWP – Another popular free multi-purpose WordPress theme that comes with full page builder support.
- StudioPress themes – All of their themes are compatible with Beaver Builder and would work great with Beaver Themer.
For the sake of this tutorial, we will be using Astra, which is light-weight and easy to customize WordPress theme.
Setting up Your Theme for Beaver Themer
When building a custom WordPress theme with Beaver Themer, it’s important to make sure that Beaver Themer has access to the full body of the page (from edge to edge).
This is the default Astra layout. As you can see that this layout includes a sidebar which can be difficult to work with when using Beaver Themer.
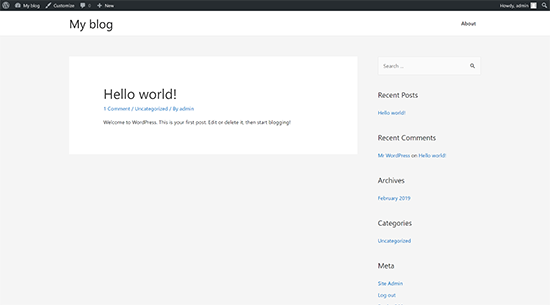
You can change that by visiting the admin panel of your website and then navigate to Appearance » Customize page. From here, you need to switch to the Layout » Sidebars tab.
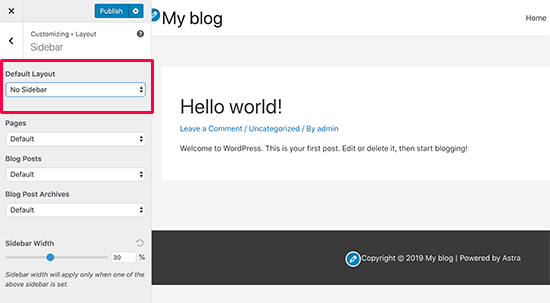
Once there, simply select ‘No Sidebar’ under the default layout option and click on the Publish button to save your changes.
Your theme will now start using a layout with no sidebars. This is the best layout to use with Beaver Themer.
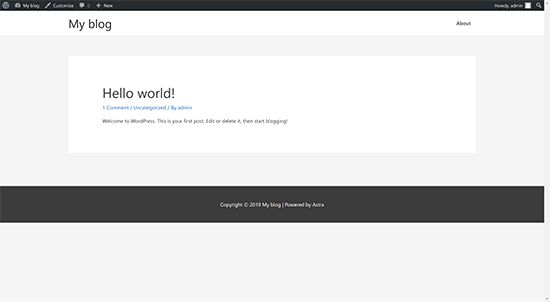
This full-page layout allows Beaver Themer to use every inch of the screen, so you can create a beautiful end-to-end visual experience.
Most WordPress themes include a template file for full-width pages. If you are using some other theme, then you may find an option to remove sidebars in your theme settings.
If you cannot find it, then contact your theme developer and they may be able to help you with that.
Once you have set up your theme to a full-width layout, you are ready to create your custom WordPress theme using Beaver Themer.
Quick Beaver Themer Fundamentals
Beaver Themer works on top of Beaver Builder. As a page builder plugin, Beaver Builder allows you to drag and drop items to a page to create custom layouts.
It has the following items that you can use in your layouts:
- Template: A collection of columns rows, and modules that make up an entire page layout.
- Columns: Vertical layout modules that help align content horizontally.
- Rows: Horizontal collection of multiple modules
- Module: An item that outputs specific information such as title, text block, table, gallery, etc.
Simply edit a page in Beaver Builder and then click on the add button at the top right corner. You can then drag and drop columns, rows, modules, to your page and start editing them right away.
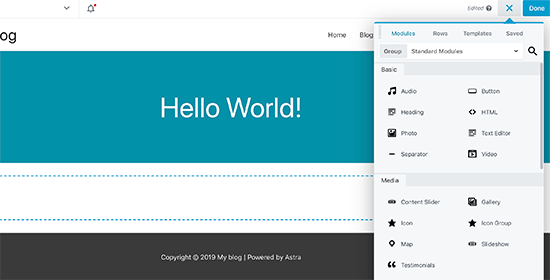
If you don’t want to start from scratch, then select from a list of pre-made templates to begin with.

Beaver Builder also allows you to save your layouts and then use them later as templates.
To learn more see our article on how to create a custom page layout using Beaver Builder.
However, we don’t just want to create page layouts. We want to create a complete custom theme.
This is when Beaver Themer comes in.
It adds another item to Beaver Builder called ‘Themer Layout’.
Themer layouts allow you to create custom layouts for the header, footer, content areas, 404 page, and other template parts.
These are the building blocks of all WordPress themes and by using them you’ll be able to create a custom theme that fits your needs.
Using Beaver Themer Templates to Create a Custom WordPress Theme
In the following instructions, we’ll walk you through the steps it takes to build the most popular custom theme elements. By the time you’re done, you’ll have completely transformed your base theme into a fully custom WordPress child theme.
Building a Custom Header for Your Theme
Let’s start with your website’s header area. A custom header is an essential component of a theme and building one can be tricky using traditional methods.
Luckily, Beaver Themer has header features built in. You can either use the pre-created template or use the menu and image modules with a two-column layout.
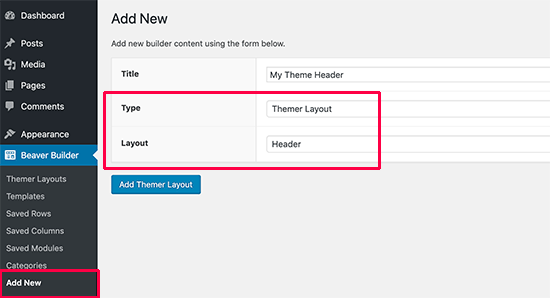
In order to get to this header area, first, we’ll need to set up a header layout in Beaver Themer. Visit Beaver Builder » Add New page and provide a title for your header.
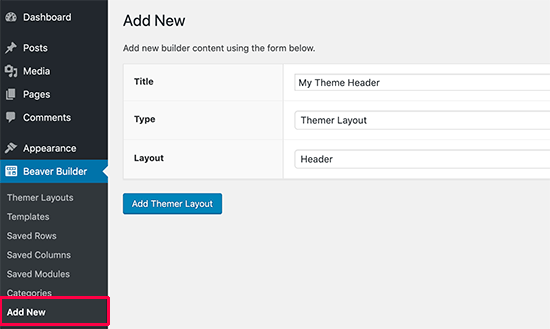
After that, select ‘Themer Layout’ as the type and ‘Header’ as the layout option. Once you’re done click on the ‘Add Themer Layout’ button to continue.
This will bring you to the layout settings page. From here you need to select ‘Entire Site’ as the location where the header template will be displayed on.
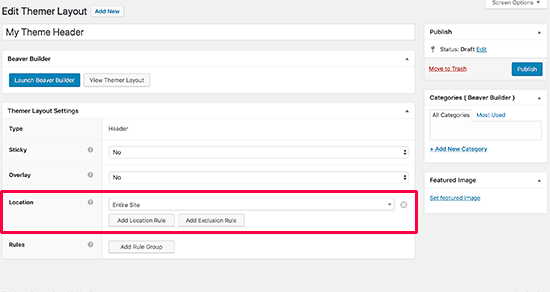
Next, click on the ‘Launch Beaver Builder’ button to open the builder interface.
Beaver Builder will launch with a basic single column and two-row header layout as a starting point.

You can use the same Beaver Builder drag and drop tools to change the background, colors, text, etc. You can also add other modules, load pre-made templates, and add rows / columns by clicking on the add button at the top right corner.
Once you are satisfied with the design, click on the Done button to save or publish your layout.
You can now visit your website to see your custom theme header in action. As you can see, we have applied the header layout to our custom theme.

Aside from the header, it will not you show any content yet, and you will likely see your base theme’s footer area.
Let’s change this.
Building a Custom Footer for Your Theme
You can create a custom footer for your theme using the Beaver Themer just like you created a custom header.
Head over to Beaver Builder » Add New page and provide a title for your footer layout. Next, select ‘Themer Layout’ as the type and ‘Footer’ as the layout option.
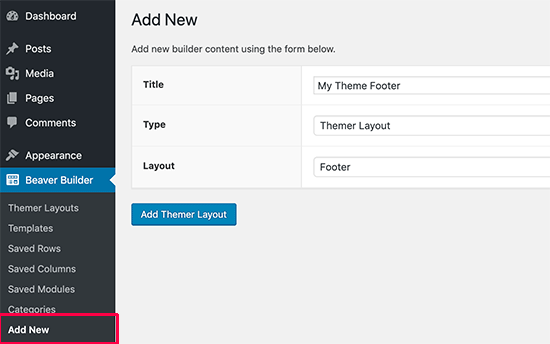
Click on the ‘Add Themer Layout’ button to continue.
This will bring you to the layout settings page. From here you need to select ‘Entire Site’ as the location that the template will be displayed on.
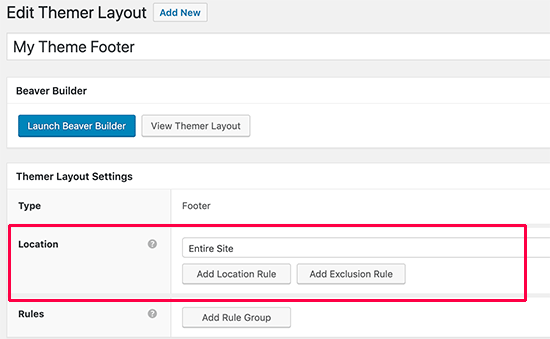
After that click on the ‘Launch Beaver Builder’ button to open the builder interface.
Beaver Builder will launch with a footer layout using three columns. You can use this layout as a starting point and start editing.
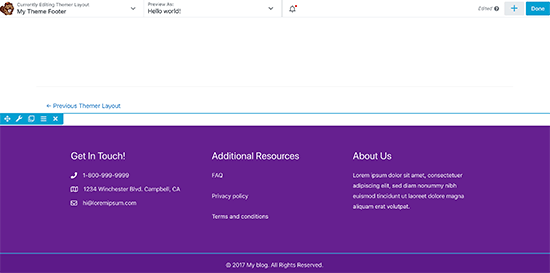
You can add modules, text blocks, or anything else you want. You can always change colors, fonts, add a background image, and more.
Once you are satisfied with the design, click on the Done button to save or publish your layout.
Building Content Area for Post and Pages
Now that we’ve created headers and footers for every page and post on the website, it’s time to build the post or page body (the content area).
We’ll start off in much the same way that we built the header and footer by adding the ‘Singular’ layout in the Add New page.
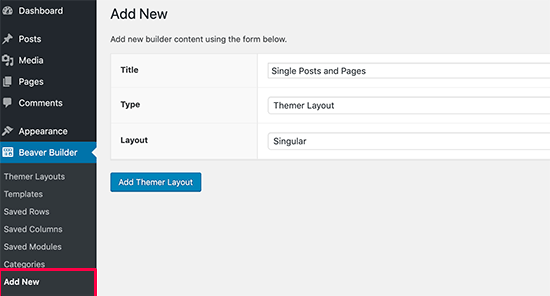
Next, you will choose where to display this layout. You can choose singular to use it for all single posts and pages, or you can choose posts or just the pages.
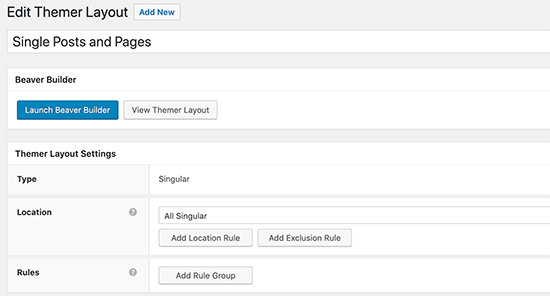
After that click on the ‘Launch Beaver Builder’ button to open the builder interface.
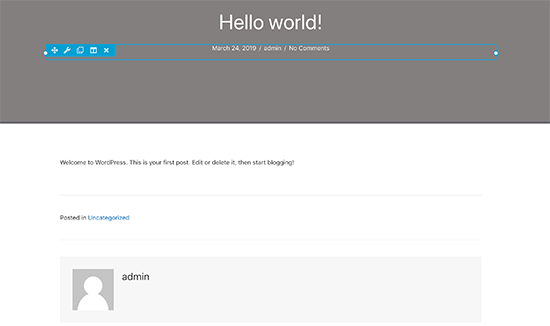
Beaver Builder will load a sample singular layout with post/page title at the top, followed by content, author bio box, and comments area.
You can point and click to edit any of these items or add new modules, columns, and rows as needed.
Once you are satisfied with the layout, click on the Done button to save and publish your changes.
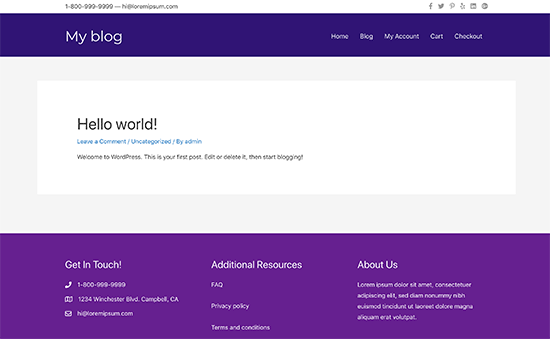
You can now visit your website to see it in action.
Creating Archive Layouts for Your Custom Theme
Now that your custom theme has started to shape up, you can move on to creating layouts for other parts of your website. Archive pages are where WordPress displays your categories, tags, author, and monthly archives.
Let’s create a layout for archive pages in your custom theme.
You’ll start by visiting Beaver Builder » Add New page and providing a title for your archive layout.
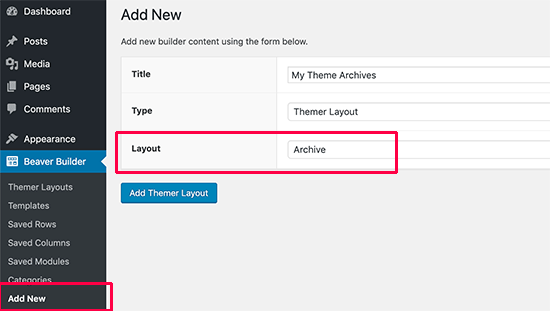
After that, select ‘Themer Layout’ as type, and ‘Archive’ as the layout option. Click on the ‘Add Themer Layout’ button to continue.
This will bring you to the layout settings page. From here you need to select ‘All Archive’ as the location that the template will be displayed on. You can also create separate layouts for each individual archive type like date, search results, category, tags, etc.
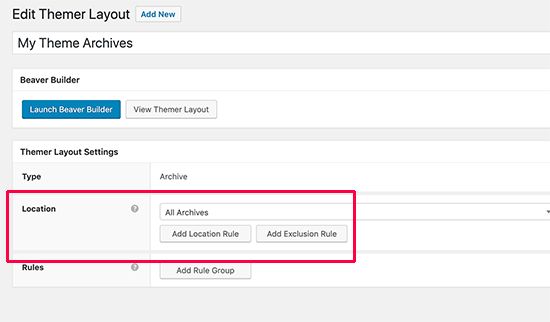
After that click on the ‘Launch Beaver Builder’ button to open the builder interface.
Beaver Builder will launch with a basic single column archive layout. It will display archive title at the top, which is followed by posts.
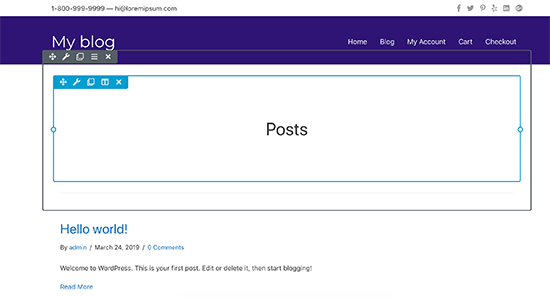
You can point and click on any item to edit its properties. You can also add new modules, rows, and columns as needed.
After that, click on the ‘Done’ button to save and publish your changes.
Creating Other Layouts for Your Custom WordPress Theme
Beaver Themer also allows you to create layouts for other pages in template hierarchy, for example, 404 page, template parts, search results page, and more.
Using the built-in drag and drop functionality of Beaver Builder, you can easily create your own custom WordPress theme from scratch without ever writing code. This is truly the most beginner friendly WordPress theme development method in existence.
We hope this article helped you learn how to create a custom WordPress theme without learning to code. You may also want to see our guide on how to speed up your WordPress website for better SEO and user experience.
If you liked this article, then please subscribe to our YouTube Channel for WordPress video tutorials. You can also find us on Twitter and Facebook.
The post How to Easily Create a Custom WordPress Theme (without Any Code) appeared first on WPBeginner.
from WPBeginner https://ift.tt/2Oq7smN
More links is https://mwktutor.com
No comments:
Post a Comment