Often while reading WordPress tutorials, you may be asked to add custom code snippets in your theme’s functions.php file or in a site-specific plugin.
The problem is that even the slightest mistake can break your website.
In this article, we will show you an easy way to add custom code in WordPress without breaking your site.
The Problem with Custom Code Snippets (And How to Fix It)
Often you’ll find code snippets in WordPress tutorials with instructions to add them into your theme’s functions.php file or a site-specific plugin.
The biggest problem is that even a tiny mistake in the custom code snippet can break your WordPress site and make it inaccessible.
Not to mention, if you update your WordPress theme, then all your customizations get removed.
The other problem is that if you add multiple code snippets in a site-specific plugin, it can become hard to manage the file.
Luckily, there is an easier way for users to add and manage custom code snippets in WordPress.
WPCode is the most popular code snippets plugin used by over 1 million WordPress websites. It makes it easy to add code snippets in WordPress without having to edit your theme’s functions.php file.
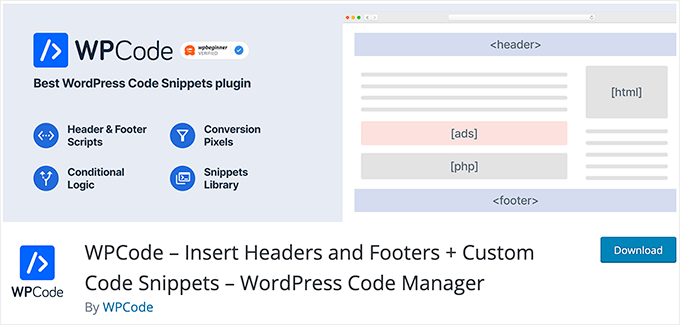
WPCode also makes it simple to add tracking codes for Google Analytics, Facebook Pixel, Google AdSense, and more to your site’s header and footer areas.
You’ll never have to worry about breaking your site because the smart code snippet validation helps you prevent common code errors.
In addition, WPCode comes with a built-in snippets library where you can find all of the most popular WordPress code snippets like disable REST API, disable comments, disable Gutenberg, allow SVG file uploads, and much more. This eliminates the need to install separate plugins for each feature request.
The best part is that you can manage all your code snippets from one central screen and add tags to organize them.
With that said, let’s take a look at how to easily add custom code snippets in WordPress with WPCode.
Adding Custom Code Snippets in WordPress
The first thing you need to do is install and activate the WPCode plugin on your website.
For more details, see our step by step guide on how to install a WordPress plugin.
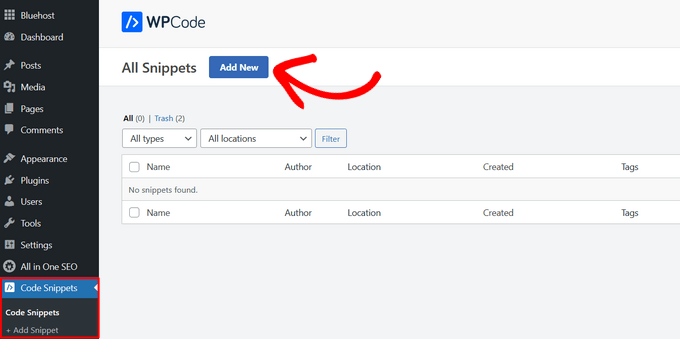
Upon activation, the plugin will add a new menu item labeled ‘Code Snippets’ to your WordPress admin bar. Clicking on it will show you a list of all the custom code snippets you have saved on your site.
Since you just installed the plugin, your list will be empty.
Go ahead and click on the ‘Add New’ button to add your first custom code snippet in WordPress.
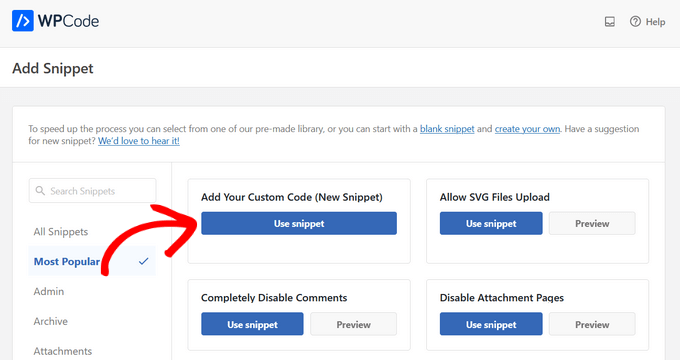
This will bring you to the ‘Add Snippet’ page. Here you can choose a code snippet from the pre-made library or add your custom code.
To add custom code, click on the ‘Use snippet’ button underneath the ‘Add Your Custom Code (New Snippet)’ option.
You need to start by entering a title for your custom code snippet. This could be anything that helps you identify the code.
After that, you can copy and paste your code snippet into the code box. Be sure to also select the correct code type from the drop-down menu on the right.
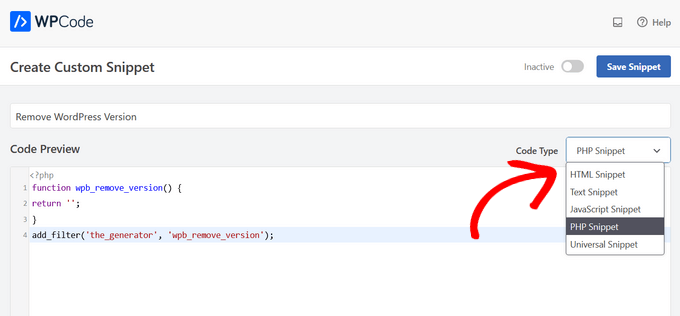
In the screenshot above, we have added a custom code snippet to remove the WordPress version number from our test site.
function wpb_remove_version() {
return '';
}
add_filter('the_generator', 'wpb_remove_version');
Below the code box, you will see insertion options. There are two main insertion options: Auto Insert and Shortcode (Default).
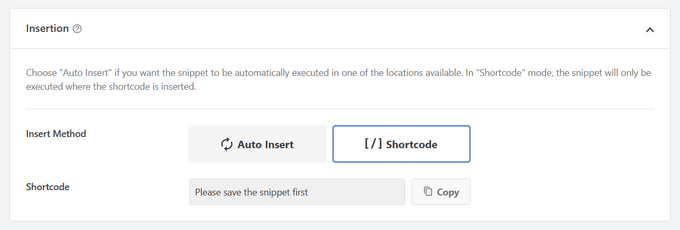
If you chose the ‘Auto Insert’ method, the snippet will be automatically inserted and executed on your site.
You can automatically run the snippet only in the WordPress admin area, on the front-end of your site, or everywhere. If you are unsure, then select the default ‘Run snippet everywhere’ option.
With the ‘Shortcode’ method, the snippet is not automatically inserted. Once you save the snippet, you’ll get a shortcode specific to the snippet that you can use anywhere on your site.
When you scroll further down, you will see a ‘Basic info’ area. You can add anything here that helps you understand what this code does, where you found it, and why you are adding it to your website.
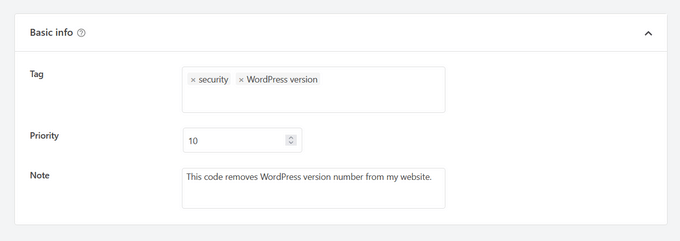
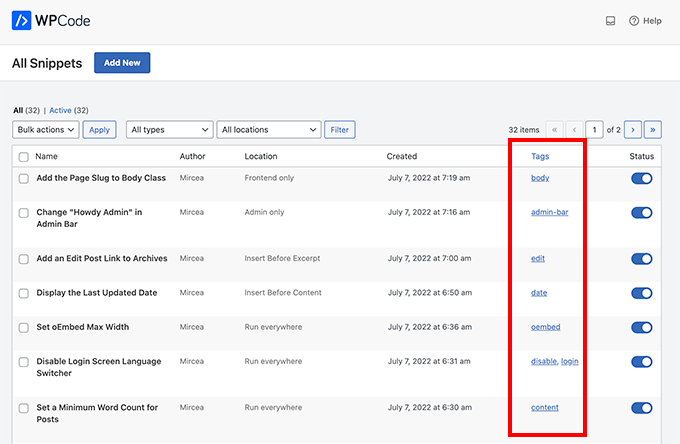
You can also assign tags to your code snippet. This will help you sort your code snippets by topic and functionality.
The priority field allows you to control the order in which the snippets are executed when you want to display multiple snippets in the same location. By default, all snippets get a priority of 10. If you want a snippet to display earlier than others, simply set the snippet priority to a lower number, like 5.
Lastly, you can use the powerful ‘Smart Conditional Logic’ section to either show or hide auto-inserted snippets based on a set of rules.
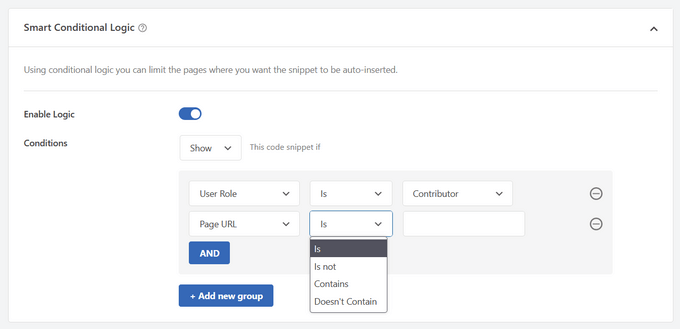
For example, you can show code snippets to logged-in users only, load code snippets only on specific page URLs, and more.
When you’re finished choosing options, you can click the ‘Save Snippet’ button in the top-right corner of the screen and toggle the switch from ‘Inactive’ to ‘Active.’
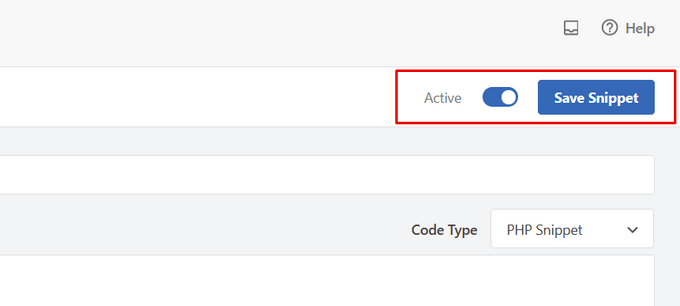
If you want to save the code snippet and not activate it, then simply click on the ‘Save Snippet’ button.
Once you have saved and activated the code snippet, it will be added to your site automatically, if that’s the insertion method you chose, or displayed as a shortcode.
Handling Errors in Custom Code
Often, if you make a mistake in adding the custom code in your site-specific plugin or theme file, then it would immediately make your site inaccessible.
You would start seeing a syntax error or a 500 internal server error on your site. To fix this you’ll need to manually undo your code using an FTP client.
The neat part about the WPCode plugin is that it will automatically detect a syntax error in the code and immediately deactivate it.
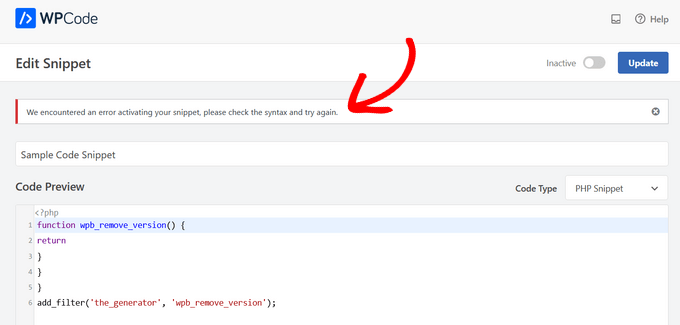
It will also show you a helpful error message, so you can debug the error.
WPCode’s smart code snippet validation will also detect any errors as you’re adding your custom code.
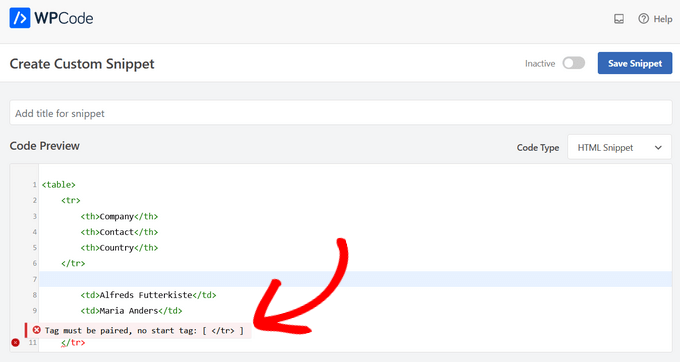
Hovering over the error will bring up instructions to help you fix it.
Managing Your Custom Code Snippets
WPCode plugin provides an easy user interface to manage your custom code snippets in WordPress.
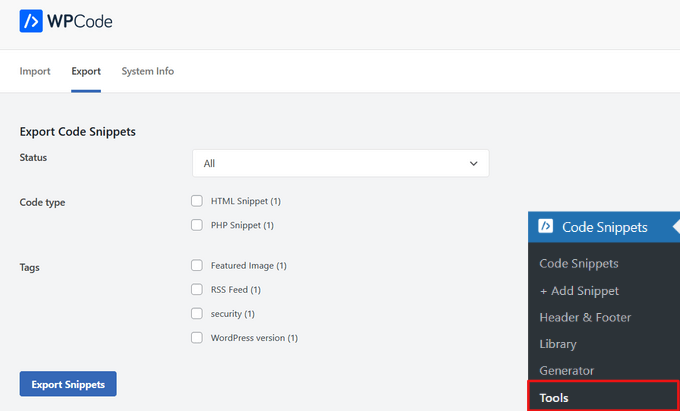
You can save code snippets without activating them on your site, and then activate or deactivate the snippet at any time you want. It’s also possible to filter code snippets by type and location, and use tags to organize your code snippets easily.
You can also export specific code snippets or bulk export all of them.
Simply go to Code Snippets » Tools and click on the ‘Export’ tab.
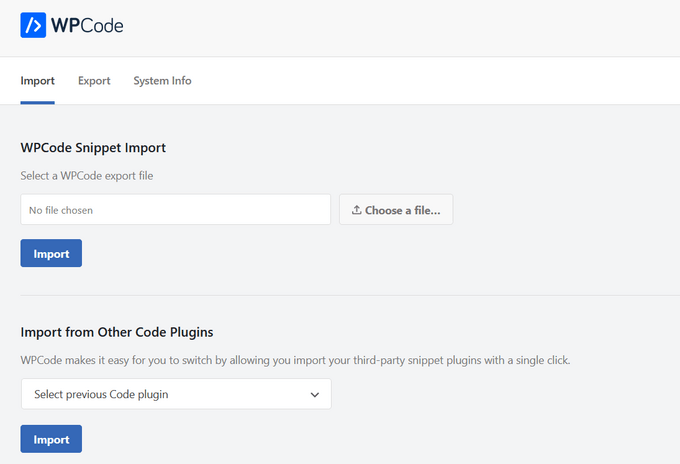
If you’re moving websites to a different server, you can easily import your code snippets to the new site.
Just visit the Code Snippets » Tools » Import page and upload the export file.
We hope this article helped you learn how to easily add custom code in WordPress. Want to experiment with some code snippets on your website? Check out our list of extremely useful tricks for the WordPress functions file, and don’t forget to see our ultimate guide to speeding up your WordPress site.
If you liked this article, then please subscribe to our YouTube Channel for WordPress video tutorials. You can also find us on Twitter and Facebook.
The post How to Easily Add Custom Code in WordPress (Without Breaking Your Site) first appeared on WPBeginner.
from WPBeginner https://ift.tt/EUT82Jr
More links is https://mwktutor.com
No comments:
Post a Comment