Friday 31 December 2021

Best of Best WordPress Tutorials of 2021 on WPBeginner

2021 is about to come to an end, and it has been an unprecedented year.

Many people started new businesses to tackle the challenges caused by the previous year’s circumtances. A record number of users took advantage of WPBeginner’s free resources to launch their businesses online.

We are ever more grateful for your continued support, which provides us inspiration and energy to move forward.

To keep up with our tradition, in this article we’ll share our staff-pick of the best of best WordPress tutorials on WPBeginner.

We’ll also share an overview of 2021 from our CEO to gain some perspective and reflect upon the progress.

Best WordPress tutorials on WPBeginner - 2021

WPBeginner Recap 2021 by Syed Balkhi

If I had one word to describe 2021, it would be perseverance.

It was an incredibly hard year for many people, including me, but as the year comes to an end, I am proud of all that we achieved.

The most important personal lesson for me this year is that Family is the best gift of life. None of my success would be possible without the support of my beautiful wife, Amanda, and my family.

Balkhi Family 2021

2021 has been a very productive year for our businesses. We accomplished a lot, and I learned a ton.

WPBeginner turned 12 years old, and after five years we now have a brand new website design that’s focused on content discoverability.

WPBeginner New Theme (v6)

As part of the site design, we switched our WordPress SEO plugin from Yoast to AIOSEO, we added a brand new mega menu, improved our site search, saw massive site speed improvements, and more.

See the full case study of our website redesign process.

Our WPBeginner Engage community on Facebook passed 81,000 members, and it’s now the largest WordPress facebook group (it’s free to join).

WPBeginner YouTube Channel passed 262,000 subscribers, and we passed 27 million video views.

WPBeginner – Fun Fact:

Our team has now grown to over 200+ people across 39 different countries. We’re hiring for full-time remote positions. If you’re interested, check out our Careers page.

Our growth is a direct result of the incredible growth WordPress has seen. It is the world’s most popular website builder and is now powering over 43.2% of all websites on the internet.

Overall, our plugins are now being used by more than 19 million websites (compared to 15 million from last year). That’s a growth of over 333,000 new websites every month.

Since we have over two dozen premium WordPress plugins, I will only share notable highlights from a select few.
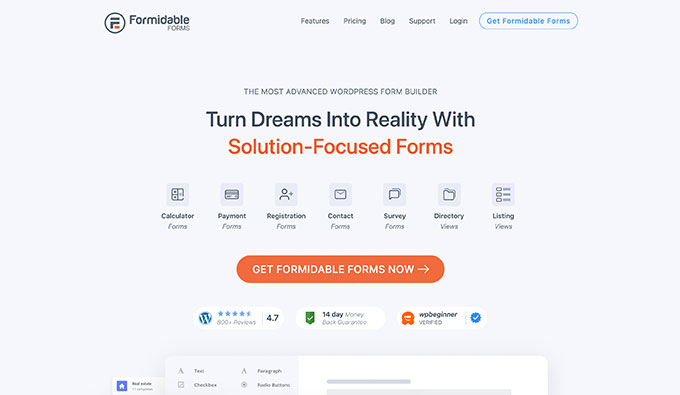
WPForms

WPForms is the most beginner-friendly WordPress form builder in the market.

This year, we became only the 9th plugin in the history of WordPress to pass the 5 million active installs milestone, and only the second plugin to reach 10,000+ five-star ratings!

Our growth is proof that WPForms is hands down the best online form builder in the market (both WordPress and SaaS).

This year we added over 300+ form templates, a new Square payments integration, Save & Resume addon for secure multi-page forms, dozens of workflow improvements including keyboard shortcuts, automation tools for process automation, and more.

SeedProd

SeedProd is our drag & drop website builder for WordPress used by over 1 million websites.

It started out as a simple coming soon page plugin, but last year we completely revamped it to add a powerful landing page builder that was not just easy … but also FAST.

This year we took another major leap forward, and SeedProd has become a full no-code website builder for WordPress.

Now you can use it to create completely custom WordPress themes using our easy drag & drop interface (no coding needed).

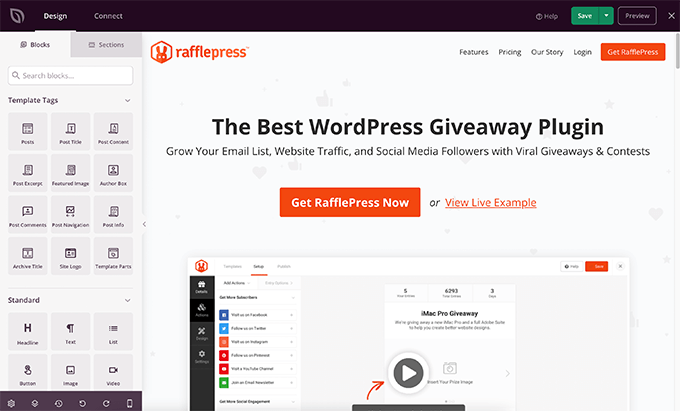
We re-built our custom RafflePress website theme using SeedProd website builder.

SeedProd Custom Theme Builder

Our team also added content personalization features that allows you to dynamically replace any text on page to offer a more personalized user experience.

SeedProd already comes with over 150+ Pro templates, 2 million stock photos, and every feature you need to quickly build a custom website using WordPress.

2022 is going to be a HUGE year for SeedProd. If you haven’t tried it yet, then you probably should take a look.
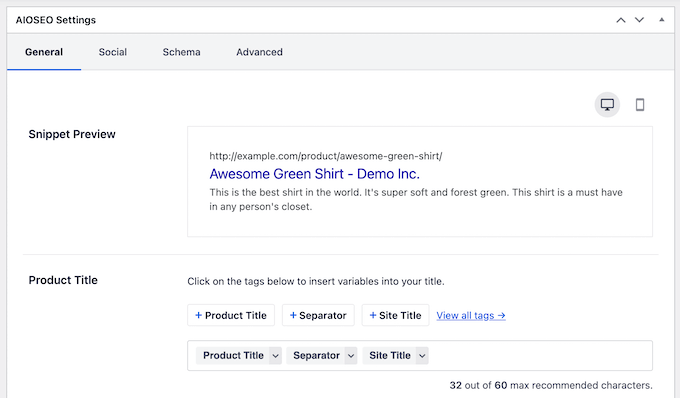
AIOSEO

AIOSEO is the original all-in-one WordPress SEO plugin that we acquired last year.

Our team completely revamped the plugin, and this year we passed the 3 million active installs milestone.

We added several really powerful features that no other WordPress SEO plugin has including the most powerful Redirection manager (including full site redirects for easy site migration), an easy headline analyzer to help you boost CTR / improve rankings, a robust WordPress breadcrumbs solution for both SEO & themes, advanced local SEO for WordPress module, HTML + RSS sitemaps, granular schema / priority settings control for SEO professionals, and dozens of other powerful features.

AIOSEO

With all the changes we have made, I truly believe that using AIOSEO will give you a competitive advantage and help you get higher SEO rankings in 2022.

This is why all of our businesses have started switching away from Yoast to AIOSEO, including most recently WPBeginner.

I believe our biggest advantage over competitor SEO plugins is that we’re actually practitioners. Our content sites get over 100 million pageviews per year, so we are prioritizing items that actually get results!

Not to mention our prices are fair for small businesses, agencies and web pros.

Sometimes it’s easy to get complacent with the legacy tools we use in our businesses, but as you go into 2022, I highly recommend giving AIOSEO a try if your goal is to improve your SEO rankings (here’s a link to the free version).
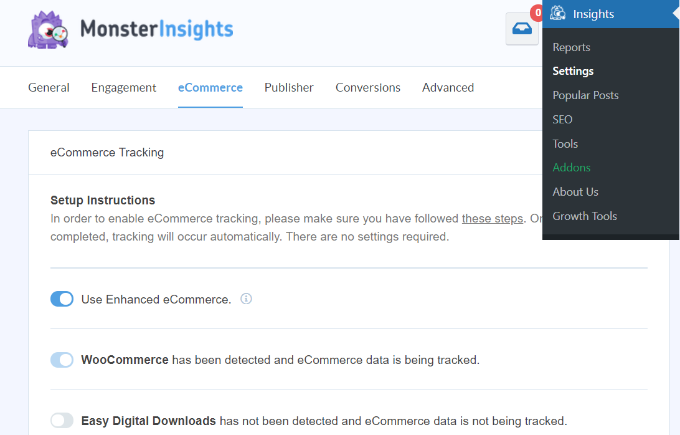
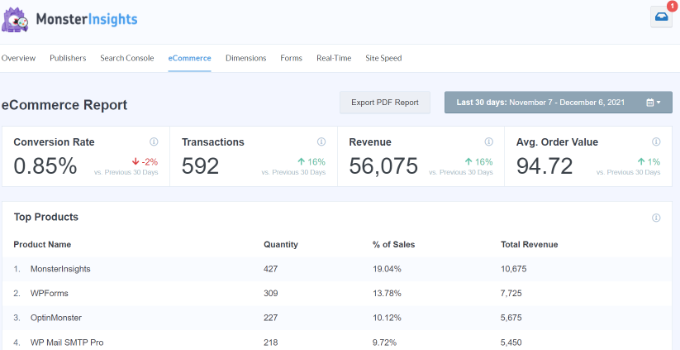
MonsterInsights

MonsterInsights is the most popular Google Analytics plugin for WordPress. This year we passed the 3 million active websites milestone.

The biggest news in the Google Analytics world this year was GA v4, and it received mix reactions from marketers. That’s because Google removed several important features in the new version that existed in the classic version.

As the largest Google analytics integration plugin in the world, this made it tricky for us to navigate our product updates.

We worked closely with the team at Google to launch our GA4 integration with improved onboarding while also allowing the Dual Tracking mode for our users, so you can take advantage of new GA4 features while also keeping the data points from Universal Analytics that GA4 doesn’t yet support.

MonsterInsights Dual Tracking GA v4

As far as I know, we’re the ONLY solution in market that lets you do dual tracking.

We also launched our brand new Media tracking addon that lets you track video engagement inside Google Analytics with just two clicks, a no-code Google Ad conversion tracking for tracking paid ad performance, and integrations with AIOSEO focus keyword tracking, AffiliateWP, EasyAffiliate, and more.

Other Notable Plugin Highlights

OptinMonster, our flagship lead generation & conversion optimization toolkit, launched a custom domains feature that helps you bypass ad-blockers and improve website speed. Also the new campaign builder improvements are really solid!

WP Mail SMTP, the most popular SMTP plugin for WordPress, now lets you track open and click data from default WordPress / website emails. Crazy to think something this critical was NOT possible until 2021!

Smash Balloon, the most popular social feeds plugin, launched a new feed customizer with built-in templates for Facebook feeds. Similar updates are coming for the popular Instagram plugin in 2022.

Acquisitions & Investments

This year, we added several premium WordPress plugins to our family of products.

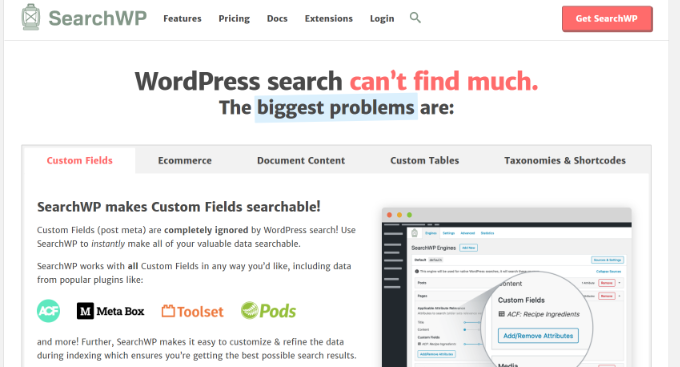
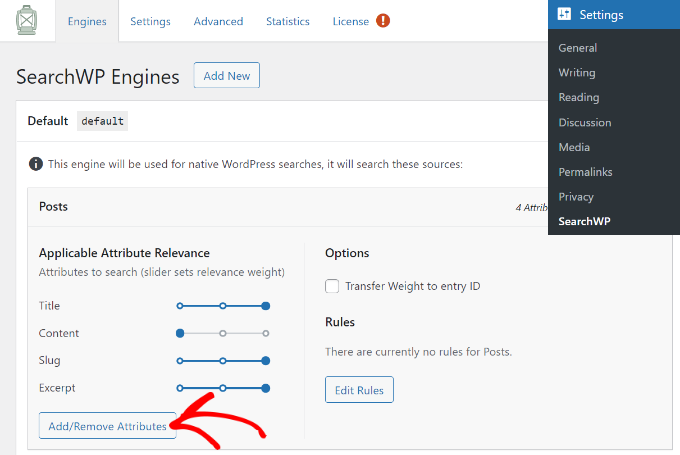
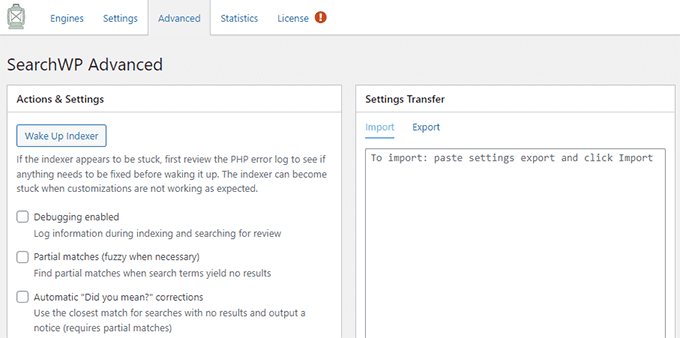
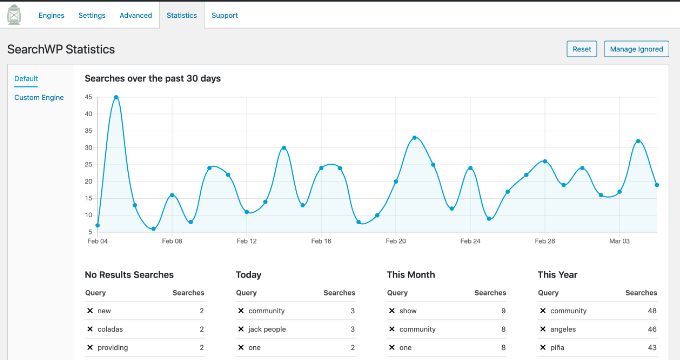
SearchWP is the most powerful WordPress search plugin that lets you fully customize the WordPress search algorithm without any code. We have exciting plans for it in 2022 (see the full story).

A portfolio of premium plugins from Pippin Williamson including Easy Digital Downloads (popular eCommerce plugin for selling digital products), WP Simple Pay (easy plugin for accepting credit card payments), Sugar Calendar (simple event calendar plugin for WordPress), and AffiliateWP (affiliate management plugin for WordPress).

This was very special for me personally because we use these plugins to power our business. I wrote a background story here.

In 2018, I created the WPBeginner Growth fund to invest and advise other WordPress focused companies.

All of our portfolio companies did really well this year.

MemberPress is the most popular membership and course platform for WordPress. We passed $1 billion in creator earnings of which $600 million was generated in 2021. It’s mind-blowing to see the impact we’re making.

Uncanny Automator is a no-code workflow automation plugin for WordPress. It’s basically Zapier for WordPress without the high costs. This year the team made major improvements and added integrations with Google sheets, Slack, Facebook, Instagram, and more.

Advanced Coupons team launched a loyalty program solution for WooCommerce. This plugin is a must have for all WooCommerce store owners because it lets you add features like Loyalty program, BOGO deals, Scheduled coupons, shipping coupons, and more.

We’re also in the process of wrapping up few more growth fund investments that will be announced in the new year.

Want us to acquire or invest in your business? Learn more about the WPBeginner Growth fund where I invest in WordPress companies.

With that said, let’s take a look at 2021’s best WordPress tutorials on WPBeginner.

January

How to fix cURL error 28: Connection timed out after X milliseconds – In this article, we showed how to troubleshoot and fix the cURL error 28 in WordPress.

How to Add Keywords and Meta Descriptions in WordPress – Meta description and keywords help you improve WordPress SEO. In this article, we showed you how to properly add meta keywords and description in WordPress.

How to Make a Smart WooCommerce Product Search – A faster search on an eCommerce store boosts sales and conversions. In this article, we showed you how to add a smart WooCommerce product search to your online store.

Best Google Forms Alternatives in 2021 (Better Features + Free) – Google Forms is an easier and free forms builder but it is not very flexible. In this article, we shared our pick of the best Google Forms alternatives with better features.

February

How to Add a Custom Domain Alias for Your WordPress Landing Page – In this tutorial we showed how to use a single WordPress install to create landing pages for multiple domain names.

How to Setup All in One SEO for WordPress Correctly (Ultimate Guide) – In this beginner’s guide, we walked users through complete setup of All in One SEO for WordPress plugin.

How to Require an Email Address to Download a File in WordPress – Want to capture more leads on your website? In this tutorial we showed how to require email address to download a file in WordPress. This file could be lead magnet like ebook, PDF reports, music, software, or more.

March

How to Prevent Invalid AdSense Clicks in WordPress (Step by Step) – In this guide, we showed how to detect and prevent invalid AdSense clicks and impressions generated by spam bots.

SiteGround vs Bluehost vs WP Engine (Honest Comparison) – Our users often asked us about which one of our top hosting recommendations is best? In this article, we compared SiteGround vs Bluehost vs WP Engine with pros and cons of each provider.

How to Optimize Your WordPress Robots.txt for SEO – Robots.txt file plays an important role in SEO. In this tutorial, we showed how to properly optimize your WordPress robots.txt file for better SEO.

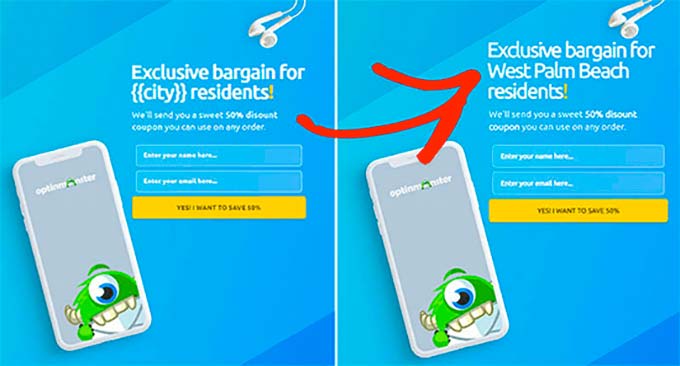
Ultimate Guide to Geolocation Targeting in WordPress – Geolocation targeting allows you to show personalized content to users. In this tutorial, we showed how to apply Geolocation targeting in WordPress for better user experience on your website.

April

How to Display Announcements in Your WordPress Blog – Want to promote a limited-time deal or a sale event on your site? In this article, we showed you how to easily display highly effective announcements on your WordPress website.

How to Add Business Hours in WordPress – With location search on the rise, adding business hours to your website helps more customers discover your business in search. In this article, we showed how to easily add business hours to your WordPress website.

How to Improve Organic Click Through Rate (CTR) in WordPress – Organic click-through rate is the average clicks a page gets when displayed in search results. In this article, we showed how to improve organic CTR for your WordPress website to get more free traffic from search engines.

How to Easily Embed Instagram in WordPress – Want to promote your Instagram account on your website? In this tutorial, we showed how to easily embed Instagram in WordPress and get more Instagram followers from your website.

May

How to Display Popular Products on WooCommerce Product Pages – In this article, we showed two methods to easily display your top products on individual WooCommerce product pages.

How to Add FAQ Schema in WordPress – FAQ schema allows your frequently asked questions to be more SEO friendly. In this tutorial we showed how to easily add FAQ schema in WordPress.

How to Create a Landing Page in WordPress – Landing pages are the perfect tool to boost conversions for your sales and marketing campaigns. In this beginner’s guide we showed how to easily create a landing page with WordPress.

How to Check if Your Website is SEO Optimized – Want to see if your website is properly optimized for SEO? In this guide, we showed how to easily check if your website is optimized for SEO.

June

How to Create a Referral Program in WordPress – Referral programs or affiliate programs are a great way to get more people to promote your products online. In this article, we showed how to easily create a referral program in WordPress.

How to Create a Custom WooCommerce Cart Page – The default WooCommerce cart page is not optimized for conversions. In this guide, we showed you how to create a custom cart page in WooCommerce without writing any code.

How to Add Schema Markup in WordPress and WooCommerce – Schema markup helps search engines display your listings more prominently. In this article, we showed how to easily add Schema markup to your WordPress site or WooCommerce store.

How to Easily Create a Coupon Site in WordPress – Coupon sites are a popular way to make money online. In this tutorial, we showed how to easily create a coupon website in WordPress.

July

How to Customize WooCommerce Checkout Page – The default WooCommerce checkout experience is quite limited. In this tutorial, we showed how to customize WooCommerce checkout page for more sales and conversions.

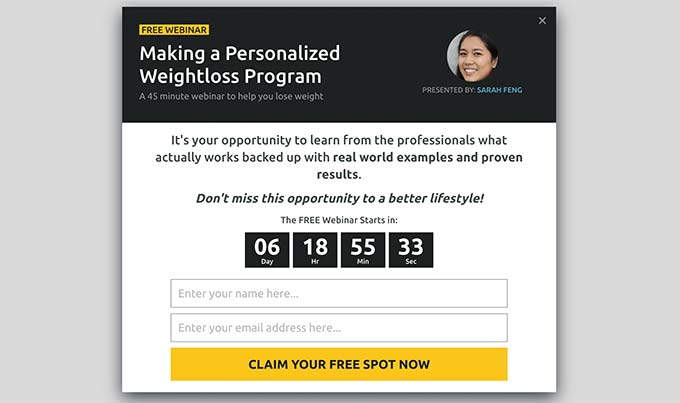
How to Easily Integrate Zoom Meetings & Webinars in WordPress – Do you want to embed a Zoom meeting or webninar in your WordPress site? Learn how to easily integrate Zoom mettings and webinars in WordPress.

How to Add Front-End Login Page and Widgets in WordPress – Want to create custom front-end login pages in WordPress? In this article, we showed three ways to add front-end login page or sidebar widgets in WordPress.

How to Display Breadcrumb Navigation Links in WordPress – Breadcrumb navigation tells users where they are on a website. They also appear in search results which make your listing more prominent. In this article, we showed how to display breadcrumbe navigation links in WordPress.

August

How to Update Your PHP Version in WordPress – Using latest version of PHP can significantly improve performance and security of your WordPress site. In this article, we showed how to easily update PHP version for your WordPress website.

Instapage vs Leadpages vs Unbounce vs SeedProd – In this guide, we compared the top landing page and lead generation tools on the market. See our detailed breakdown of Instapage vs Leadpages vs Unbounce vs SeedProd.

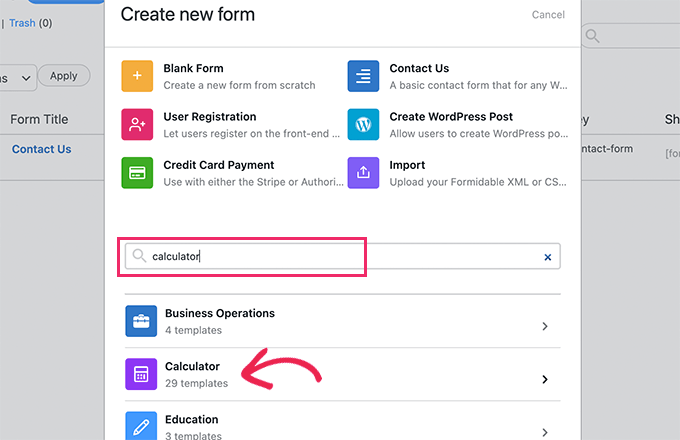
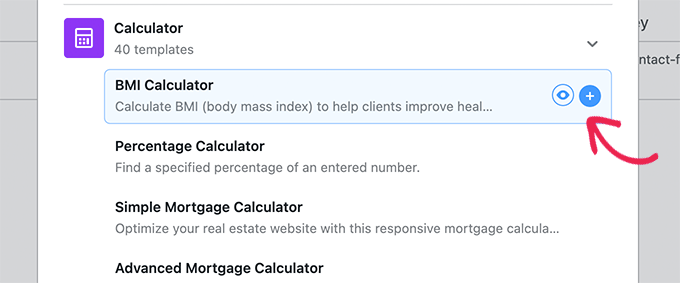
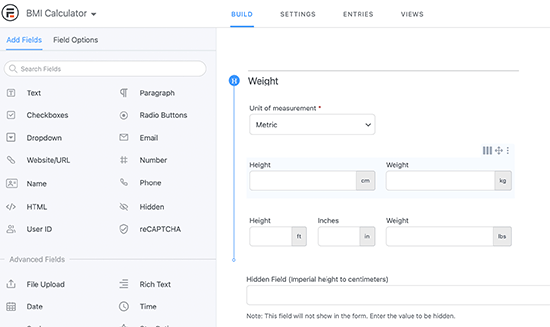
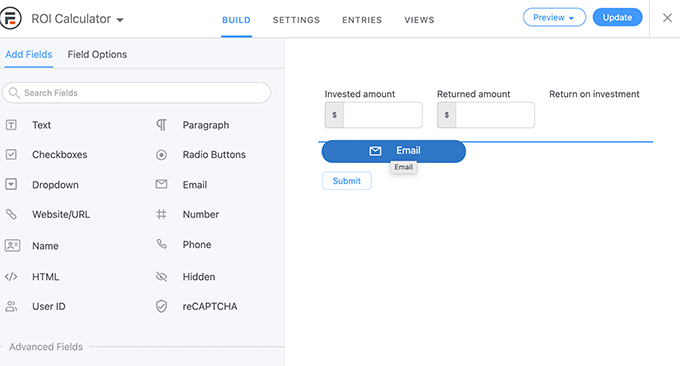
How to Generate More Leads with Free Online Calculators – Many famous bloggers now use free online calculators as a tool to capture more leads. In this guide, we showed how to easily generate more leads with free online calculators.

September

How to Make a High Converting Sales Funnel in WordPress – A sales funnel is the path a user takes on your website to become a customer. Optimizing this path can lead to higher conversions and more sales. In this tutorial, we walked you through creating a high converting sales funnel in WordPress.

How to Improve WordPress Search with SearchWP – The default WordPress search feature is not very effective. In this tutorial, we showed how to improve WordPress search with SearchWP.

How to Properly Move from Shopify to WooCommerce – We created a free Shopify to WooCommerce exporter to provide an easier way to migrate from Shopify. In this step-by-step guide, we showed how to easily move your online store from Shopify to WooCommerce.

How to Add a CRM on Your WordPress Site and Get More Leads – integrating WordPress with CRM software allows you to manage customer interactions on your website and follow up with leads. In this article, we showed how to add a CRM to WordPress site and get more leads.

October

How to Create a Paid Newsletter in WordPress – Paid newsletters are an incredibly popular way to make money online from your email subscribers, but using a platform like Substack can get expensive. In this guide, we walked through creating a paid newsletter in WordPress.

How to Properly Move from Ghost to WordPress (Free Tool) – Want to move your website from Ghost to WordPress? In this article, we showed how to easily move away from Ghost to WordPress using a free tool.

How to Find the Most Important Page of Your WordPress Site – Want to find out which page on your site is bringing you the most engagement, conversions, and sales? In this article, we showed how to easily find the most important page on your WordPress site.

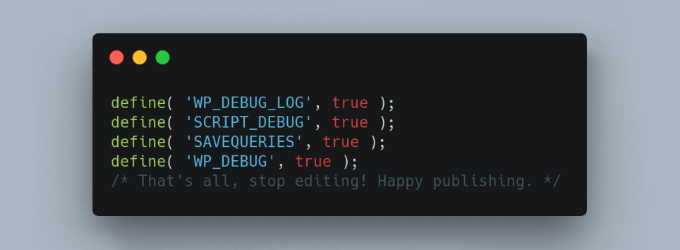
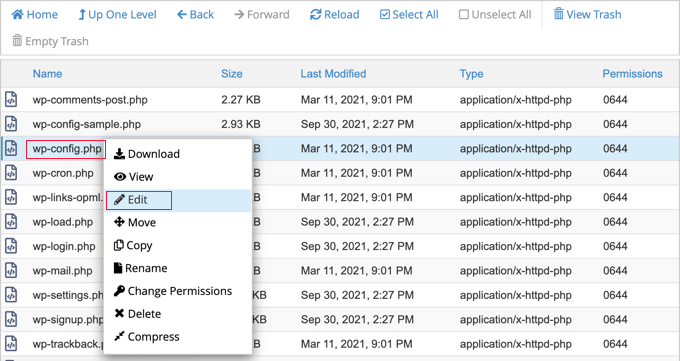
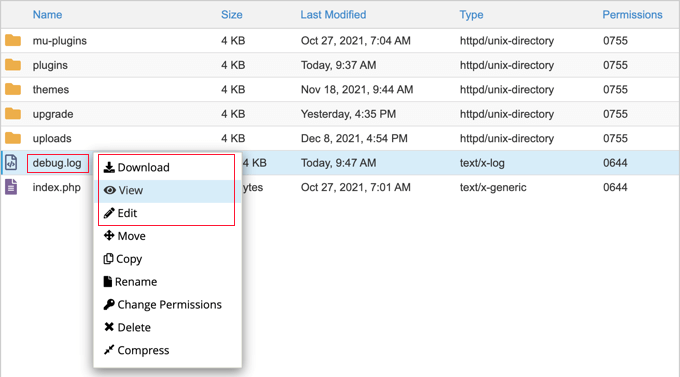
How to Fix The Critical Error in WordPress – WordPress may sometimes show you a message that ‘There has been a critical error on this website. In this article, we showed how to easily troubleshoot and fix the critical error in WordPress.

November

How to Use Headline Analyzer in WordPress to Improve SEO Titles – Headlines are the most effective way to get more people to click on your articles. In this tutorial, we showed how to use a headline analyzer in WordPress to improve SEO titles.

How to Offer a Shipping Discount in WooCommerce – Do you want to offer a shipping discount to your customers? In this guide, we showed how to easily add a shipping discount offer to your WooCommerce store.

How to Set Up Business Call Forwarding From Your Website – Properly setting up call forwarding for your business phone number helps you offer better customer satisfaction. In this tutorial, we showed how to easily setup business call forwarding from your WordPress website

Substack vs WordPress: Which One is Better? – Substack and WordPress both allow you to easily publish content online and sell membership subscriptions.

December

How to Add Product Tags, Attributes, and Categories to WooCommerce – Adding metadata to your WooCommerce products helps customers find what they’re looking for and improves SEO. In this guide, we explained how to add product tags, attributes, and categories in WooCommerce.

How to Submit your WordPress Site to Google News – If you run a news website, then adding your site to Google News can boost traffic. In this tutorial, we showed how to easily submit your WordPress site to Google News.

How to Do an SEO Competitor Analysis in WordPress – Want to see how your competitors are doing with their SEO? In this article, we showed how to easily do an SEO competitor analysis directly from your WordPress dashboard.

How to Properly Rename Categories in WordPress – As your site grows you may need to rename categories, merge them, or delete some categories. In this article, we showed you how to properly rename categories in WordPress.

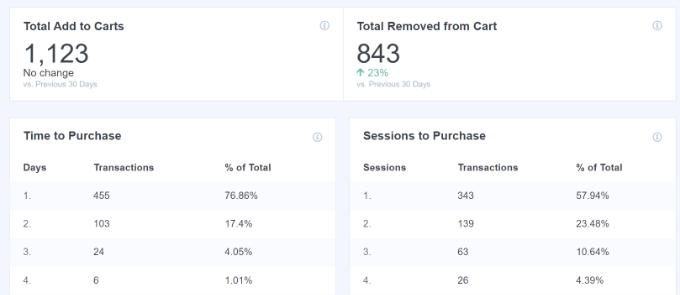
10 Important Metrics to Measure on your WordPress site – a beginner’s guide on the top 10 things you must track on your website to make data-drive ndecisions.

These were some of the best WordPress tutorials on WPBeginner in 2021. We hope that you found them helpful.

We want to thank all WPBeginner users, who visited our website, offered feedback, left comments, and shared it with others. We truly appreciate you.

We look forward to adding even more useful WordPress tutorials in 2022. Have a Happy New Year.

If you liked this article, then please subscribe to our YouTube Channel for WordPress video tutorials. You can also find us on Twitter and Facebook.

The post Best of Best WordPress Tutorials of 2021 on WPBeginner first appeared on WPBeginner.


from WPBeginner https://ift.tt/32MboJV
More links is https://mwktutor.com

Thursday 30 December 2021

How to Find and Access WordPress Error Logs (Step by Step)

Do you need to access the WordPress error logs to troubleshoot a problem on your site?

WordPress comes with a debugging system that can log any error messages displayed on your site. This can help you discover and fix problems on your website.

In this article, we’ll show you how to find and access your WordPress error logs.

How to Find and Access WordPress Error Logs

How and When Can WordPress Error Logs Help?

Are you having problems with your WordPress website? Checking your WordPress error logs can help you find the source of problems such as slow website performance, plugins that aren’t working properly, and website crashes.

What is an Error Log?

An error log is a list of error messages generated by your website and the dates and times they occurred. Once WordPress debug mode is turned on, these messages are collected in a file, so that you can review them later.

Your WordPress error log is a troubleshooting tool that can help you identify the plugins, themes, or code that are causing problems. You can then go ahead and find a fix for those WordPress errors.

For example, checking the error logs can help troubleshoot errors like the WordPress white screen of death, PHP errors, the invalid JSON error, and the “Sorry, you are not allowed to access this page” error.

That being said, let’s have a look at how to find and access your WordPress error logs. The first step is to enable WordPress debug mode, which you can do using either a plugin or code.

Enabling WordPress Debug Mode With a Plugin

WordPress debugging is turned off by default, so WordPress will not be logging any errors. If you can still log into your WordPress site, then you can enable debug mode using a plugin.

The first thing you need to do is install the WP Debugging plugin. For more details, see our step by step guide on how to install a WordPress plugin.

WP Debugging plugin

Upon activation, the plugin automatically activates WordPress debug mode, and error messages on your site will now be logged.

Enabling WordPress Debug Mode Using Code

You can also turn on WordPress debug mode using code. This is suitable for more advanced users, or if you can’t log in to your WordPress admin area.

You will need to edit your wp-config.php file using an FTP client or the file manager option in your WordPress hosting control panel.

Edit Your Website's wp-config.php File

Once you have the file open, you need to find the text where it says ‘That’s all, stop editing! Happy blogging.’

Just before this line, go ahead and add the following code:

define( 'WP_DEBUG', true );
define( 'WP_DEBUG_LOG', true );

For step by step instructions, see our guide on how to set up WordPress error logs in wp-config with code.

How to Find and Access WordPress Error Logs

Now that you have enabled WordPress debug mode, any future error messages on your website will be stored in the WordPress error logs.

That means that your logs will be empty at first. You will need to try to recreate the problem on your site, so the error messages can be saved to the log file. For example, you should revisit any posts or pages that are causing an error.

Next, you need to connect to your website using an FTP client or the file manager option in your WordPress hosting control panel. If you haven’t used FTP before, then you may want to see our guide on how to use FTP to upload files to WordPress.

Once connected, you should navigate to the /wp-content/ folder. Inside the folder, you will find a file called debug.log. This file contains every WordPress error message, warning, and notice that has been logged.

Download, View, or Edit the debug.log File

To see the contents of this file you will need to download, view, or edit it. You can then inspect the error messages along with the date and time they occurred. This information can help you find a solution to the problems you are encountering on your website.

Debug.log Contains Error Messages and Time Stamps

How to Fix Issues Found in WordPress Error Logs

Once you’ve accessed your WordPress error logs, you can find the error message that was logged at the time the problem on your website occurred. Keep in mind that the times displayed are UTC, not your own local time.

While most users won’t understand what the error messages mean, they’re a good place to start troubleshooting. Once you note the error message and code, you may find a solution to your problem in our guide on the 50 most common WordPress errors and how to fix them.

If you can’t find the solution on your own, then you can reach out for help on our free WPBeginner Engage Facebook Group where you can get help from our WordPress experts and over 80,000 users. Make sure you quote the error code or message you found in the WordPress error logs.

Other places you can turn for help are the official WordPress forums, your WordPress web hosting company’s support team, or the designated support area for the plugin or theme you are having trouble with.

When asking for support, check our guide on how to properly ask for WordPress support and get it to learn the right way to ask questions and the best places to find support.

Disabling WordPress Debug Mode

Once you have fixed the issue on your WordPress site, we recommend you disable debug mode.  Leaving it on may slow down your website and can potentially leak unwanted information which is a security risk.

If you enabled debug mode with a plugin, then simply navigate to Plugins » Installed Plugins and deactivate the WP Debugging plugin.

Deactivate the WP Debugging Plugin

If you enabled debug mode with code, then simply edit the wp-config file as you did before.

You need to change the WP_DEBUG and WP_DEBUG_LOG lines to ‘false’.

Deactivate WordPress Debug Mode

We hope this tutorial helped you learn how to find and access your WordPress error logs. You may also want to learn how to get a free SSL certificate for your website, or check out our tips on how to speed up WordPress performance.

If you liked this article, then please subscribe to our YouTube Channel for WordPress video tutorials. You can also find us on Twitter and Facebook.

The post How to Find and Access WordPress Error Logs (Step by Step) first appeared on WPBeginner.


from WPBeginner https://ift.tt/32GfTpn
More links is https://mwktutor.com

Wednesday 29 December 2021

How To Properly Set Up eCommerce Tracking In WordPress

Are you looking to set up eCommerce tracking in WordPress?

Setting up eCommerce tracking for your online store will help you find your top-selling products, see which campaigns perform the best, understand how people find and use your website, and more. Then you can use those insights to get more traffic and boost sales.

In this article, we’ll show you how to properly set up eCommerce tracking in WordPress so you can grow your business and make more money.

Set up eCommerce tracking in WordPress

Why Set Up WordPress eCommerce Tracking?

When starting a new online store, most store owners begin by making decisions based on gut feeling or best guesses.

That’s good for getting started, but to take your business to the next level of growth, you need to start making data-driven decisions.

But what data should you base your decisions on?

That’s where WordPress eCommerce tracking comes in. It helps you make

decisions based on data from your actual visitors and customers. You’ll get tailored insights to boost your sales so you can make more money.

For instance, you can find out which products your customers like to buy the most on your WooCommerce store. This way, you can offer similar products to get more sales.

Plus, eCommerce tracking in WordPress can help you better understand your audience, where they’re from, and how they use your website, so you can invest more in the channels and strategies that are proven to work.

For example, if you find out that 80% of course sales on your membership site comes from Facebook, then you may decide to invest in ads on Facebook and stop spending time on other social media platforms that aren’t converting.

With that said, let’s take a look at how to track your eCommerce store’s performance in WordPress.

Setting Up eCommerce Tracking in WordPress

The easiest way to track the performance of your online store is by using MonsterInsights. It’s the best Analytics WordPress plugin and is used by over 3 million professionals.

MonsterInsights helps you set up eCommerce tracking in Google Analytics without editing code. The plugin works with some of the most popular eCommerce plugins, including WooCommerce, Easy Digital Downloads, MemberPress, LifterLMS, GiveWP, and more.

It also shows important stats inside your WordPress admin area, so you can quickly view how your website is performing and get insights to grow your business.

MonsterInsights

Note: You’ll need the MonsterInsights Pro version because it includes the eCommerce addon, dashboard reports, and other advanced tracking features. There is also a MonsterInsights Lite version you can use to get started.

First, you can install and activate the MonsterInsights Pro plugin on your website. If you need help, then please refer to our guide on how to install a WordPress plugin.

Upon activation, you’ll be taken to the MonsterInsights welcome screen in your WordPress dashboard. Go ahead and click the ‘Launch the Wizard’ button.

Set up MonsterInsights

Next, follow the steps in the wizard to set up the plugin and connect your website with Google Analytics. For more details, you can go through our guide on how to install Google Analytics in WordPress.

After that, you’ll need to navigate to Insights » Addons from your WordPress dashboard. Then scroll down to the eCommerce addon and click the ‘Install’ button.

Install the eCommerce addon

The addon will automatically activate, and you’ll see the status change to Active.

Enabling Enhanced Ecommerce Reporting

In the next step, you’ll need to enable Enhanced Ecommerce in Google Analytics. Enhanced Ecommerce allows you to track your customer’s shopping behavior, checkout behavior, top products, and sales performance in Google Analytics.

To start, you can visit the Google Analytics website and login to your Google account. Next, you’ll have to choose the property on which you’d like to enable Enhanced Ecommerce.

Select your property in analytics

Now, go ahead and click the ‘Admin’ settings option from the menu on your left.

Click admin settings

After that, you’ll need to click on ‘Ecommerce Settings’ under the View column.

Ecommerce settings

On the next screen, you can click the toggles for ‘Enable Ecommerce’ and ‘Enable Enhanced Ecommerce Reporting’ to switch them to On.

There is also an option for creating ‘Checkout Labeling’ that you can use to label your checkout funnel steps. However, this is optional and you can simply go ahead and click the ‘Save’ button.

Enable ecommerce and enhanced ecommerce reporting

Once you’ve enabled Ecommerce settings in Google Analytics, you can head back to your WordPress website dashboard.

After that, simply navigate to Insights » Settings and then click the ‘eCommerce’ tab. Next, you’ll need to ensure that the ‘Use Enhanced eCommerce’ option is enabled under the eCommerce Tracking section.

Use enhanced ecommerce option

MonsterInsights will now automatically detect your WordPress eCommerce plugin and start recording analytics.

Next, let’s look at how you can use MonsterInsights’ reports to see your online store’s performance.

View eCommerce Reports in WordPress

When it comes to using Google Analytics and finding the data that you need, it can be overwhelming for beginners.

MonsterInsights makes it super easy to get the data that matters, as it brings all your important stats inside the WordPress dashboard. This way, you get to see how your eCommerce store is performing and then make decisions to grow your business.

To see eCommerce reports in WordPress, you can head over to Insights » Reports and then click the ‘eCommerce’ tab.

Ecommerce report

In the report, you can quickly glance at an overview of how your online store is doing by looking at the conversion rate, transactions, revenue, and average order value.

Besides that, MonsterInsights also shows your Top Products. It helps you spot your top selling items along with its quantity, percentage of sales, and total revenue. You can use this data to find out which products your customers like and then offer similar products to boost sales.

Next, you can scroll down and view the Top Conversion Sources.

Top conversion sources

These are the websites that are sending the most sales to your store. You could invest in ads on those sites, create special discount offers or free shipping offers for people that arrive from these sources, or reach out to them to work out a cross-promotion or other partnership.

Other reports you can view in the eCommerce section in MonsterInsights includes the Total Add to Carts, Total Removed from Cart, Time to Purchase, and Sessions to Purchase.

Add to carts and time to purchase

You can use these reports to better understand your customer’s behavior while shopping and during checkout.

For instance, MonsterInsights shows how long it takes for customers to purchase a product from their first visit. You can use the data to optimize your sales funnel and reduce shopping cart abandonment.

We hope this article helped you learn how to properly set up eCommerce tracking in WordPress. You may also want to see our expert pick of the best business phone services, and the best WordPress plugins for business sites.

If you liked this article, then please subscribe to our YouTube Channel for WordPress video tutorials. You can also find us on Twitter and Facebook.

The post How To Properly Set Up eCommerce Tracking In WordPress first appeared on WPBeginner.


from WPBeginner https://ift.tt/3FBpYmc
More links is https://mwktutor.com

Tuesday 28 December 2021

How To Create A Custom Calculator In WordPress

Do you want to create a custom calculator in WordPress?

Perhaps you want users to be able to calculate something on a landing page, or you’d like to use the calculator as a tool to generate more leads for your business.

In this article, we’ll show you how to easily create a custom calculator in WordPress.

Easily create a custom calculator in WordPress

Why Add a Custom Calculator in WordPress?

Adding a custom calculator to your WordPress website allows your users to quickly calculate things without leaving your website.

For instance, on a health and fitness WordPress blog, you can add a BMI calculator allowing users to quickly calculate BMI, so they know which subscription plan or a product to purchase.

Similarly, you can use custom calculators for calculating a mortgage, car payments, product configurations, loan interest, and more.

Custom calculators can also be a useful tool to generate leads on your website. For instance, you can ask users to provide their email addresses to get the personalized results of the calculator tool sent to their inbox.

That being said, let’s take a look at how to easily create a custom calculator in WordPress.

Creating a Custom Caclulator in WordPress

The best way to create a custom calculator for your website is by using Formidable Forms. It is the best WordPress calculator plugin on the market and the easiest way to build any kind of advanced form.

Formidable Forms

The first thing you need to do is install and activate the Formidable Forms plugin. For more details, see our step by step guide on how to install a WordPress plugin.

Upon activation, you’ll need to install the free version of the plugin called Formidable Forms Lite. This free version provides the core foundation for advanced features of the plugin.

Next, you need to visit the Formidable Forms » Global Settings page to enter your plugin license key. You can find this information under your account on the Formidable Forms website.

Enter Formidable Forms license key

Now, you are ready to create your first custom calculator for your website.

Simply head over to the Formidable » Forms page and click on the Add New button.

Adding a new calculator form

This will bring up a list of available form templates to choose from.

In the search box, type ‘Calculator’ and select the ‘Calculator’ category.

Choose calculator category

This will bring up a list of calculator templates to choose from. Formidable Forms comes with a bunch of commonly used custom calculators.

Simply click to select and and then click on the add button to use that form. For the sake of this tutorial, we’ll be creating an ROI Calculator (Return on Investment calculator).

Select your custom calculator template

The plugin will load the Formidable Forms’ form builder interface with the calculator template you selected.

From here, you can simply point and click to customize amy form field if needed. You can click on a field to change its label and properties.

Edit your calculator form

You can also add new fields from the left column by simply dragging and dropping the field.

Add new field

Once you are satisfied with the form fields, you can simply click on the ‘Update’ button at the top right corner of the screen.

Save calculator

Your custom calculator form is now ready, and you can add it to any WordPress post or page on your website.

Simply edit an existing post / page or create a blank page. On the content editor screen, you need to add the Formidable Forms block to your page.

Add Formidable Forms block

After adding the block, you can simply click on the drop-down menu in the block settings and select your ROI Calculator form.

Select ROI Calculator form

Formidable Forms block will now fetch and display the preview of your calculator form inside the WordPress block editor.

ROI calculator preview in the editor

You can now continue editing your page or save and publish it on your website.

Once done, you can visit the page in a new browser tab to see your calculator in action.

Customizing Your Calculator Form in WordPress

You can always customize any calculator you create with Formidable Forms. Simply, go to the Formidable » Forms page and click on the edit button to change your calculator form.

Edit your calculator form

Any changes you make to your form will automatically appear on any posts or page where you have added this form on your website.

Viewing Your Calculator Form Entries

Formidable Forms automatically saves calculator form entries into your WordPress database.

You can easily view all calculations performed by users by visiting Formidable » Entries page.

View calculator form entries

From here, you can click on individual entries to view the data entered by users.

Alternately, you can also filter entries by specific calculator form to view data from all entries in a table format.

Calculator data entries

From here, you can also download all calculator data in the CSV format and view it in spreadsheet software.

Need even more insights? Switch to the Reports tab for your form entries and you will be able to see detailed charts and graphs for your calculator.

Viewing calculator data reports

For instance, in our ROI calculator report, we can see the average ROI percentage as submitted by users.

Average values for your calculator form data

These charts give you quick insights into how users interact with calculators on your website and average responses. You can then use this information to tailor your content for your audience’s requirements.

Capturing Leads with Your Custom Calculator

Formidable Forms makes it super easy to add customer calculators in WordPress and connect it to your email marketing service.

However, you’ll still need to nudge users into using the calculator and capture leads, and increase sales.

This is where OptinMonster comes in. It is the best lead generation software on the market and allows you to easily convert website visitors into subscribers and customers.

Popup example

It comes with tools like lightbox popups, slide-in popups, countdown timers, header and footer banners, and more. All of them help you nudge users into using your custom calculators.

OptinMonster also comes with powerful targeting rules and personalization options to show users targetted messages at the right time.

Personalization example

We hope this article helped you add a custom calculator in WordPress. You may also want to see our guide on best business phone services, or see our tips on how to track conversions in WordPress.

If you liked this article, then please subscribe to our YouTube Channel for WordPress video tutorials. You can also find us on Twitter and Facebook.

The post How To Create A Custom Calculator In WordPress first appeared on WPBeginner.


from WPBeginner https://ift.tt/3Fzgibz
More links is https://mwktutor.com

Monday 27 December 2021

How to Make Custom Fields Searchable in WordPress

Do you want your visitors to easily search custom fields to find content on your website?

WordPress search doesn’t work with custom fields by default, which can make it harder for your visitors to find what they need. By making custom fields searchable, you can provide a better user experience for your visitors.

In this article, we’ll show you how to make custom fields searchable in WordPress.

How to make custom fields searchable in WordPress

What Are Custom Fields & Why Make Them Searchable?

WordPress custom fields allow you to store any kind of additional information (metadata) about a post or page.

WordPress adds metadata such as title, author, date, time, and more to your posts and pages. With custom fields, you can add more information about your content, and display them on your website if you wish. A lot of popular WordPress plugins and themes use custom fields to store important data.

For example, the content you enter in your WordPress SEO plugins such as All in One SEO is technically a custom field, or custom product attributes that you may add to your WooCommerce products sometimes are also custom fields.

AIOSEO Product Title Optimization

However, WordPress doesn’t search content on your website using custom fields. By default, when a visitor uses a search bar on your website, WordPress will only show them results where the title and content match their search terms.

Making your custom fields searchable improves the user experience on your WordPress website. It allows your visitors to search for any content with ease, keeping them on your website longer and reducing any frustration.

That said, let’s look at how you can make custom fields searchable.

Making Custom Field Searchable in WordPresss

The easiest way to make custom fields searchable is by using the SearchWP plugin. It’s the best WordPress search plugin and allows you to adjust the search algorithm without editing code.

The plugin indexes everything on your WordPress site. For instance, it uses custom fields, PDF documents, text, custom tables, files, categories, shortcodes, and more to improve WordPress search for your users.

Besides that, SearchWP works seamlessly with other popular plugins like Advanced Custom Fields, Meta Box, Toolset, Easy Digital Downloads, WooCommerce, and Pods.

SearchWP

To start indexing your custom fields, first you’ll need to install and activate the SearchWP plugin. If you need help, then please see our guide on how to install a WordPress plugin.

Upon activation, you can head over to Settings » SearchWP and then navigate to the ‘Engines’ tab from the WordPress admin panel.

After that, you’ll need to click the ‘Add/Remove Attributes’ button to add custom fields to the search algorithm for your posts, pages, and media.

Add and remove attributes

When you click the button, a popup window will now appear.

Go ahead and click the dropdown menu under Custom Fields and then select the ‘Any Meta Key’ option to make all your custom fields searchable. Or you can type the custom fields you want to include during the search process. if you don’t want to include them all.

Choose any meta key

Once you’ve chosen the custom fields, simply click the ‘Done’ button.

A custom fields option will now be added to the search algorithm for posts. You can see the ‘Custom Fields’ under the Applicable Attribute Relevance section.

Next, you can adjust the attribute slider to set the relevance weight given to each attribute during a search.

Adjust the search relevance

For example, if you move the slider to the right and set it to maximum, then SearchWP will give high preference to the data in the custom fields when searching content on your site.

You can now repeat the step for making custom fields searchable for pages and media files.

After making these changes, don’t forget to click the ‘Save Engines’ button.

Click the Save Engines button

SearchWP will now index your content, PDF metadata, custom fields metadata, images, files, and other types of metadata to include in WordPress search.

You’ll be able to see the ‘Index Status’ in the right corner and view how many items the plugin has indexed.

SearchWP index status

Besides that, SearchWP also offers other customization settings.

For instance, if you go to the ‘Settings’ tab, then you can add stopwords and synonyms to be ignored during the search process to improve relevancy and performance.

The plugin will already have a list by default, but you can add more stopwords if you want. Similarly, you can add synonyms for search terms that you want to ignore while searching.

Add stopwords in settings

Next, you can edit more settings by going to the ‘Advanced’ tab.

For example, the plugin lets you enable the option to show partial matches when search terms show no result, limit results to exact matches when double quotes are used, remove minimum word length, and more.

SearchWP Advanced Settings

Now, if you want to see the search history and see which queries your users search the most, then head over to the ‘Statistics’ tab.

The plugin will give all the stats about your WordPress search from the past 30 days or the last 1 year. You can use this data to see which queries your users search while on your site and come up with new content ideas.

View search stats

We hope this article helped you learn how to make custom fields searchable in WordPress. You may also want to look at our guide on how to register a domain name and the best WordPress plugins for business sites.

If you liked this article, then please subscribe to our YouTube Channel for WordPress video tutorials. You can also find us on Twitter and Facebook.

The post How to Make Custom Fields Searchable in WordPress first appeared on WPBeginner.


from WPBeginner https://ift.tt/3yYXLDj
More links is https://mwktutor.com