Tuesday 31 August 2021

How to Add Content Locking in WordPress (2 Methods)

Do you want to add content locking to your WordPress site?

Many websites use content locking to boost their lead generation, increase sales, or build their email list.

In this article, we will show you how to add content locking in WordPress without annoying users.

Adding content locking in WordPress

What is Content Locking & When Do You Need It?

Content locking is a technique used by site owners to encourage their users to take action. That action might be anything from signing up for an email newsletter to paying for premium content.

Content lock example

Content locking works similarly to content upgrades. When you offer valuable content on your WordPress website such as a course or ebook download, you give your visitors a reason to take initiative and sign up for a membership.

Doing this effectively can help you generate leads, build an email list, and grow your business. But if you don’t set up content locking in the best way, then visitors to your site may find it annoying.

That being said, let’s see how you can easily add content locking in WordPress the right way. Method 1 is best for exclusive free content, and Method 2 for premium paid content.

Method 1: Add Content Locking with OptinMonster

OptinMonster is the best email capture tool on the market. It’s the best choice when you want to use exclusive content to grow your email list.

You will need a Plus or higher plan for content locking. WPBeginner users can get a 10% discount by using this OptinMonster coupon.

The first thing you need to do is install and activate the OptinMonster plugin. For more details, see our guide on how to install a WordPress plugin.

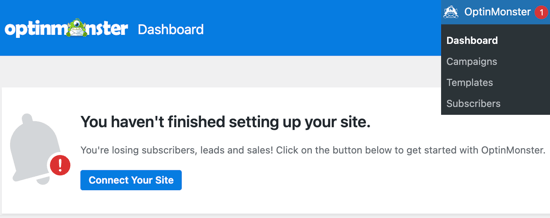
Upon activation, you’ll need to connect your site to your OptinMonster account. You can do that by clicking on the OptinMonster menu item in your WordPress admin bar and then clicking the Connect Your Site button.

Connect Your Site to OptinMonster

Once you’ve done that, you’ll then need to log into your OptinMonster account or create a new one.

After you are successfully connected, you should navigate to the OptinMonster » Campaigns page in your WordPress dashboard. Since you haven’t yet created a campaign, you’ll be asked to create a new one.

Navigate to the OptinMonster Campaigns Page

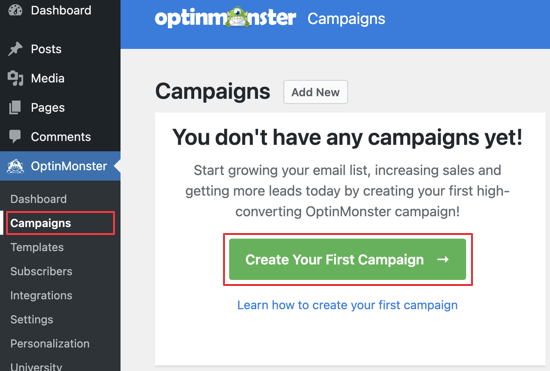
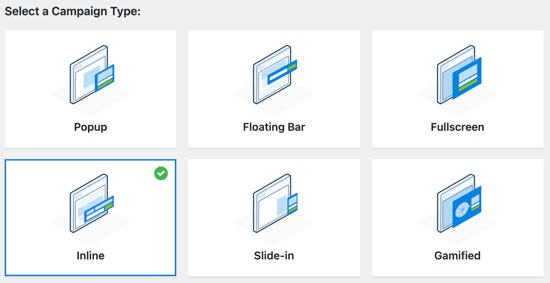
When you click the ‘Create Your First Campaign’ button, you’ll be taken to the OptinMonster website and asked to select a campaign type.

To add content locking, you’ll need to select the Inline option.

Select the Inline Option

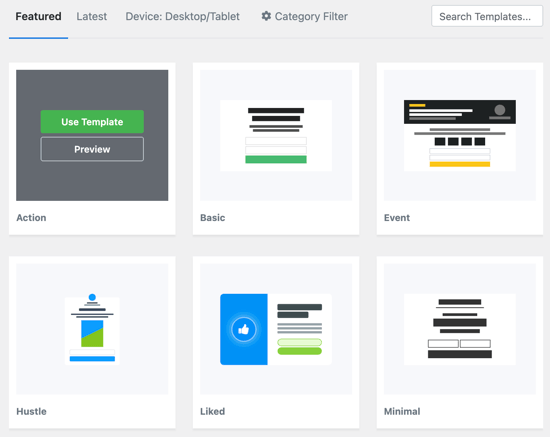
You’ll then need to scroll down and choose a template. OptinMonster offers 65+ templates, and they all work great across any device.

You can view each template by clicking on the Preview button. When you find one that matches your needs, you’ll need to click the Use Template button.

We’ll go with the Action template because it points our readers’ attention to a single call to action.

Choose a Template as a Starting Point

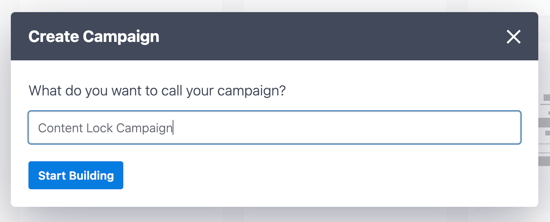
You’ll then be asked to provide a title for your campaign.

Once you’ve typed it in, simply click the Start Building button.

Add a Title for Your Campaign

This will open the OptinMonster editor. Here you can spend time perfecting the content and appearance of the popup.

You can click on any section to change the wording, edit fonts, add images, change colors, and more. You can also customize the Success message that’s displayed to your users after they sign up.

The OptinMonster Editor

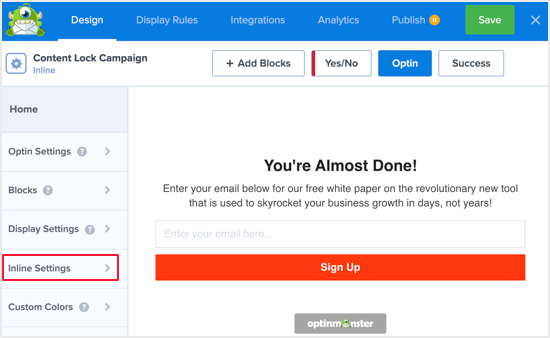
Once you’re happy with the way your popup looks, we need to activate content locking.

To do that, you need to click on the Inline Settings tab. You can then turn on content locking by clicking on the ‘Lock Content Below Campaign’ on/off switch.

OptinMonster Inline Settings

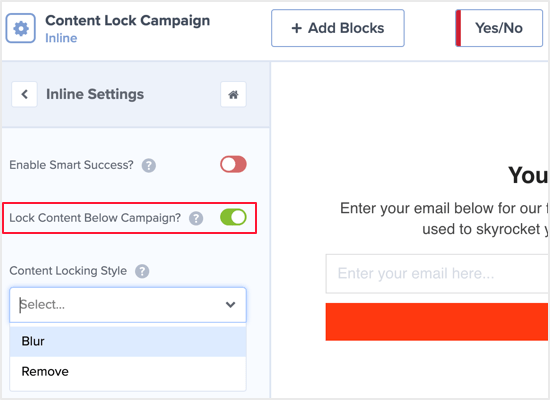
While you’re there, you should choose whether your locked content will be blurred or just not displayed. You can make your selection from the Content Locking Style dropdown menu.

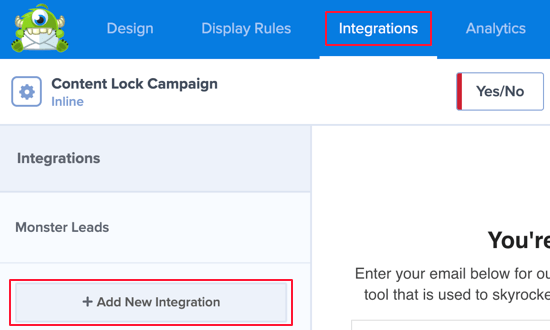
The next step is to connect your email marketing service. The good news is that OptinMonster supports many popular providers.

You’ll need to click on the ‘Add New Integration’ button. You should find your email service in the drop down menu.

Click Add New Integration

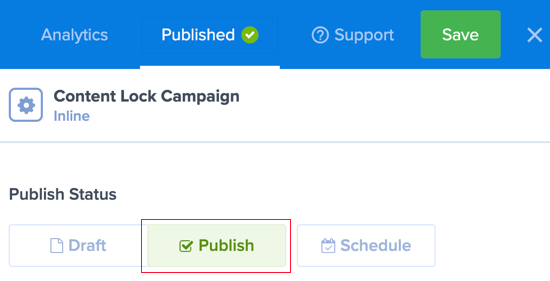
After that, you need to make the campaign active. Simply click on the Published tab at the top of the screen and then click on the Publish button.

Then you can save your campaign by clicking the Save button at the top right.

Toggle the Post Status to Publish

We’ll finish setting up OptinMonster back at your WordPress dashboard. Once there, you need to navigate to OptinMonster » Campaigns.

This will take you to your list of campaigns.

Navigate to the OptinMonster Campaigns Page

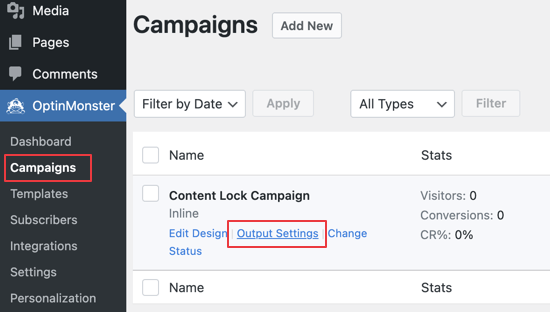
When you hover your mouse over the current campaign, some links will appear. To customize how your content locking will work, click on the Output Settings link.

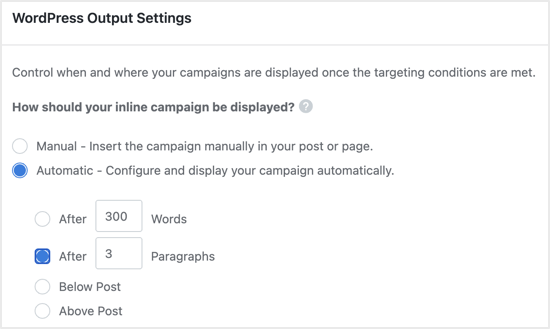
The Automatic option is the simplest to set up. It will lock content automatically after a specified number of words or paragraphs. For example, you could lock all content after the first three paragraphs in each post.

Lock Content Automatically

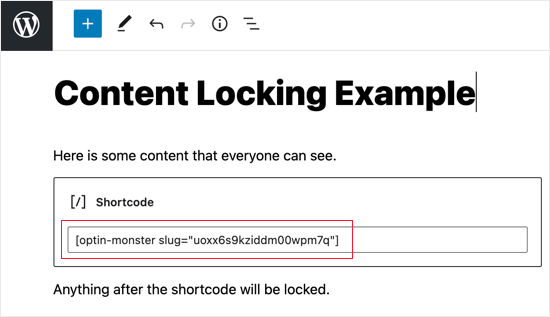
The Manual setting requires a little more work but lets you choose exactly which content will be locked. You do this by adding a shortcode to each post that you wish to lock.

You Need to Add Shortcode to Each Locked Post

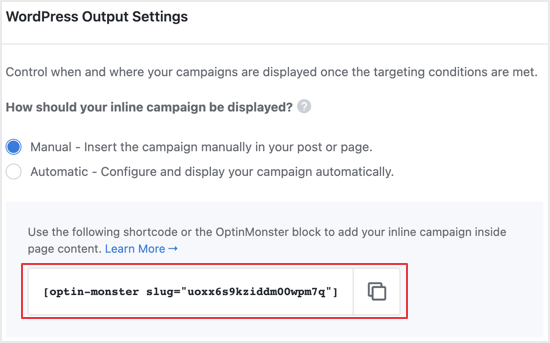
Start by copying the shortcode.

To add it to your content, you’ll need to edit the post or page where you want to enable content locking. Simply paste the shortcode just before the content you wish to lock.

Paste the Shortcode Before the Locked Content

Now you can save and publish your post or page.

If you’d like to see content locking in action, then simply visit the post or page in a new browser window.

Preview Content Locking in Action

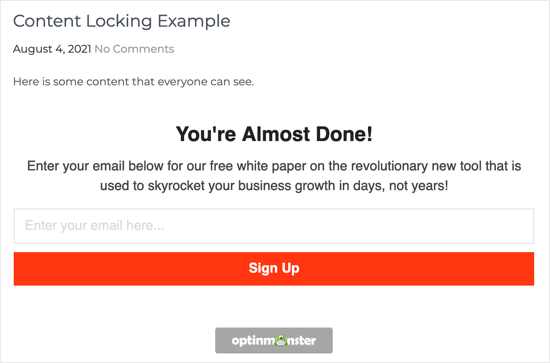
The locked content is blurred or hidden.

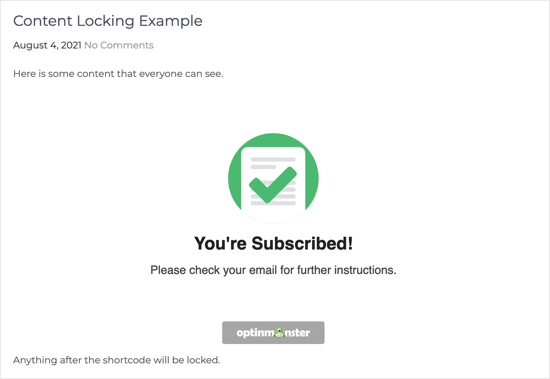
Once they enter an email address, the locked content will be displayed.

The Rest of the Content Will Be Displayed

Method 2: Add Content Locking with MemberPress

MemberPress is the best membership plugin for WordPress, and it can effectively lock your WordPress content. It’s the best choice when you want to make money by charging for premium content.

You will need at least a Basic plan for content locking. WPBeginner users can get up to 50% off by using this MemberPress coupon.

The first thing you need to do is install and activate the MemberPress plugin. For more details, see our guide on how to install a WordPress plugin.

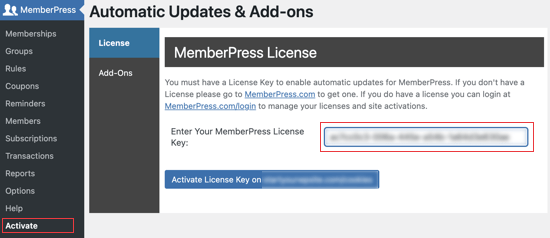
On activation, you’ll have to enter your MemberPress license key. To do that, navigate to MemberPress » Activate and paste your key into the text box. You then need to click the Activate License Key button.

Enter Your MemberPress License Key

When you first set up your membership site, you’ll have to select up a payment method, decide on pricing, create a signup page, and more.

Check out our ultimate guide on how to create a WordPress membership site for all the details.

In this tutorial, we’ll show you how to use MemberPress to create a premium subscription and then determine which content can only be accessed after paying for a membership.

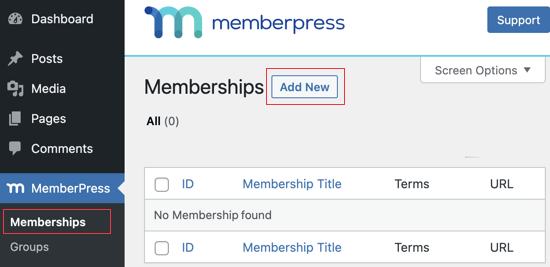
Let’s start by setting up a new membership plan for your subscribers. To create a membership level, you need to go to the MemberPress » Memberships page and click on the ‘Add New’ button at the top.

Go to the MemberPress Memberships Page

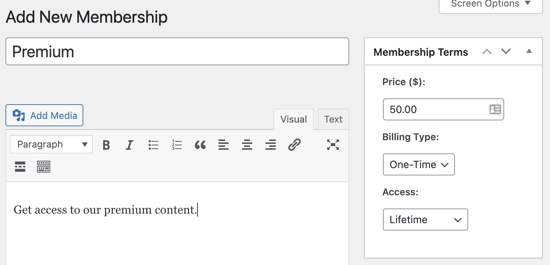
You’ll need to give the plan a name and decide on the cost of the content and the billing type.

We’ll create a one-time lifetime payment, but you could choose one of the regular subscription options.

Give the Plan a Name

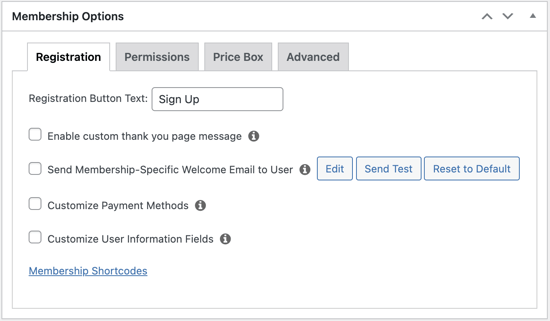
After that, you need to scroll down to the membership options meta box below the post editor.

This is where you can customize permissions and membership options for this particular plan.

Scroll Down to Membership Options

If you need more than one membership plan, then go ahead and repeat this process. When you’re finished, you can click on the Publish button on the left of the screen to make it available.

The next step is to select which content is available to each membership plan on your website. MemberPress makes it easy to control access using ‘Rules’.

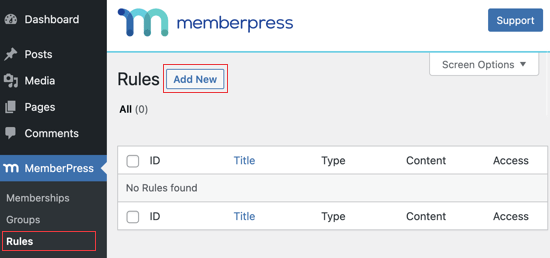
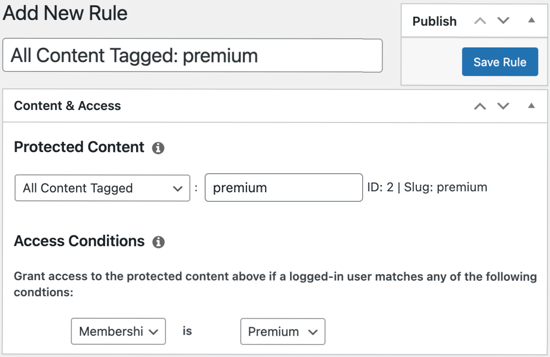
You can set up your rules by visiting the MemberPress » Rules page and clicking on the Add New button at the top.

Visit the MemberPress Rules Page

The rule edit page allows you to select different conditions and associate them to a membership plan.

For example, we’ll protect all content with the ‘premium’ tag so that it’s available only to members of the Premium plan.

Add a New Rule

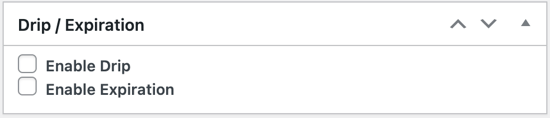
Below the rules editor, you’ll see the content drip and expiration options. These let you release content gradually and make it unavailable after a period of time.

If you’d like all the content to be available as soon as they sign up, and remain available without expiring, then you should leave them unchecked.

See the Content Drip and Expiration Options

Repeat the process to create more rules as needed for your membership site.

Once you are satisfied, go ahead and click on the ‘Save Rule’ button on the left to save your rule settings.

Click the Save Rule Button

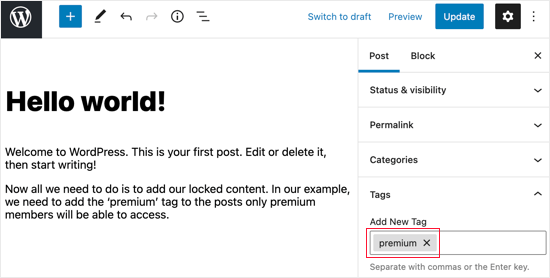
Now all we need to do is to add our locked content.

In our example, we’ll need to add the ‘premium’ tag to the posts we want only Premium members to be able to access.

Add the Premium Tag to Locked Posts

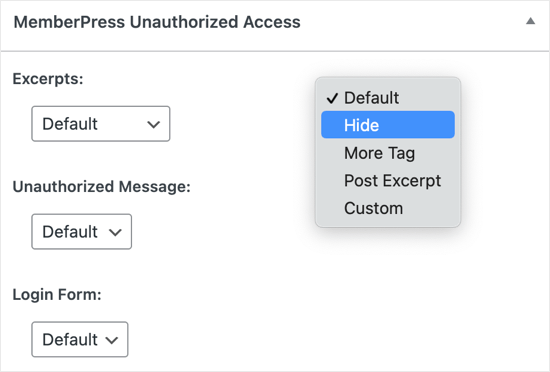
Next, scroll down to the ‘MemberPress Unauthorized Access’ metabox below the post editor.

Here you can select what logged out users (non-members) will see when they reach this content.

MemberPress Unauthorized Access

You can see the content lock in action by visiting your WordPress site.

This is what someone who is not a premium member will see when navigating to a locked page on our demo site.

Preview the Locked Page

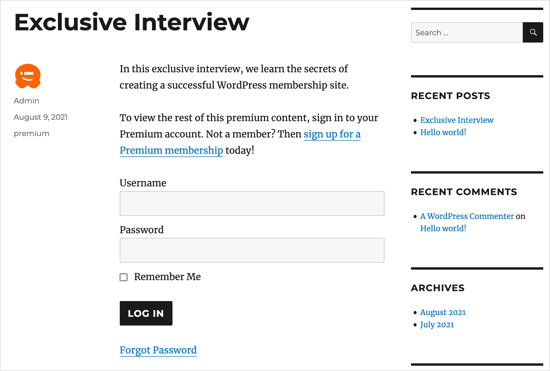
Premium members will be able to see the content when they log in to your WordPress site.

We hope this article helped you add content locking in WordPress. You may also want to learn the right way to create an email newsletter or check out our list of must have WordPress plugins to grow your site.

If you liked this article, then please subscribe to our YouTube Channel for WordPress video tutorials. You can also find us on Twitter and Facebook.

The post How to Add Content Locking in WordPress (2 Methods) appeared first on WPBeginner.


from WPBeginner https://ift.tt/2MyE27k
More links is https://mwktutor.com

Monday 30 August 2021

How to Fix WooCommerce Not Sending Order Emails (The Easy Way)

Are you frustrated by your WooCommerce store not sending order emails?

When running an eCommerce store, you need to know that your customers will receive their receipts and any order update emails quickly and reliably.

In this article, we’ll show you the easy way to fix WooCommerce not sending order emails.

How to fix WooCommerce not sending order emails

What Causes WooCommerce Emails to Not Send?

If you are running an online store, then you rely on email to keep your business running smoothly.

You use email to welcome new customers and build your relationship with them. Emails are sent to confirm orders and follow up on abandoned shopping carts. And email is needed to let customers reset their passwords.

But all too often, we hear that eCommerce sellers have trouble with WooCommerce not sending emails.

Sometimes this happens because of issues in your WooCommerce settings. We’ll show you how to check those settings first.

Other times it’s a deeper issue with the way WordPress sends email. By default, WordPress sends emails through PHP mail. Unfortunately, not all WordPress hosting servers are correctly configured to use PHP mail.

Even when your emails are sent successfully, they may be incorrectly identified as spam. This means they could be automatically deleted without ever being seen.

The best way to make sure your emails are reliably delivered is to send them through an SMTP service.

We’ll show you how to set up an SMTP server later in this guide, but first, let’s make sure there isn’t a problem with your WooCommerce settings.

Check WooCommerce Email and Order Settings

The first thing to check is your WooCommerce settings for emails and orders. If one of your settings is wrong, then your order emails won’t be sent.

Check WooCommerce Email Settings

We’ll start by checking that your emails haven’t been accidentally deactivated. To do that, navigate to WooCommerce » Settings on the WordPress dashboard and then click on the Emails tab.

List of WooCommerce Emails

Here you’ll see a list of all the notification emails that WooCommerce will send. Some are sent to you and some to your customers. You’ll need to check the settings for each email.

Let’s start at the top and check the ‘New order’ email by clicking on the ‘Manage’ button on the right.

You’ll need to check two settings. First, make sure the email is enabled. Sometimes it is disabled accidentally, and the email won’t be sent if the box isn’t checked.

Make Sure the Email is Enabled

Second, you need to make sure that the recipient’s email address is correct. You’ll only find this setting for emails that will be sent to you. When an email is sent to the customer, the correct email address will be used automatically.

You can do the same for each type of email in the list. If everything looks good, then we need to check the status of each order where WooCommerce did not send an order email.

Check WooCommerce Payment Status

You’ll need to navigate to WooCommerce » Orders to check the status of recent orders. If you don’t yet have any orders, then you’ll want to create a test order and then come back.

Navigate to WooCommerce » Orders

If the order status is ‘Pending payment’ as in this example, then that explains why an email was not sent. By default, WooCommerce doesn’t send an order email for pending sales.

Pending orders are waiting for further action. Maybe the customer added something to their cart and then abandoned it. Or maybe the customer needs to complete a manual payment, such as a bank transfer.

But if the status is ‘Processing’, then there’s a problem. An email should have been sent to both you and the customer. If it didn’t arrive in the inbox, then most likely it was treated as spam.

That’s a common problem with WooCommerce and WordPress emails. The best way to solve that problem is to send your email using an SMTP server.

Fix WordPress Email Reliability with an SMTP Server Plugin

SMTP is the standard protocol for sending emails over the internet, but it isn’t what WordPress uses by default. Unfortunately, that often results in emails from WordPress being treated as spam.

Sending email through an SMTP server is more reliable because it uses proper authentication. Your customer’s email software will be confident that your emails are genuine, and they’re less likely to be moved to the junk folder.

WP Mail SMTP is the best SMTP plugin for WordPress and WooCommerce. It’s the easiest way to make sure your order emails are actually delivered to your customer’s inbox.

To fix WooCommerce not sending order emails, you’ll need to install and activate the WP Mail SMTP plugin. You can check out our guide on how to install a WordPress plugin for more details.

Note: The free version of WP Mail SMTP is all that’s required for this tutorial. But the Elite plan includes White Glove Setup where an expert will set up the plugin for you.

On activation, the WP Mail SMTP setup wizard will start automatically. You’ll need to click on the Let’s Get Started button.

The WP Mail SMTP Setup Wizard Will Start Automatically

Next, you need to choose the SMTP service you wish to use. We recommend SMTP.com and Sendinblue because they are able to securely send large numbers of emails and without triggering spam filters.

Plus, Sendinblue lets you send up to 300 emails each day for free.

Choose Your SMTP Mailer Service

Once you’ve selected a service, you need to click on the ‘Save and Continue’ button. After that, you’ll be asked to configure your mailer settings.

Here you’ll be asked to copy some information from the mailer service you selected, and then paste it into the form. The exact steps you need to take will depend on the mailer service you have chosen.

Configure Your Mailer Settings

Note: If you’d prefer to bypass the wizard and set up WP Mail SMTP manually, then you’ll find manual step by step instructions in our ultimate guide on how to set up WP Mail SMTP with any SMTP service.

The setup wizard will also ask you to set up a From Email. Make sure you use the same business email address here as you entered when setting up your SMTP mailing service.

We Recommend You Force the Same Email Address

We also recommend that you check the ‘Force From Email’ box. This will make sure you use the same email address across your website. This can also help to make sure your WooCommerce emails don’t go to spam.

You’ll then be asked which email features you wish to enable. You need ‘Improved Email Deliverability’ and ‘Email Error Tracking’ to fix WooCommerce not sending email. They will be selected by default.

Enable WP Mail SMTP Email Features

If you’ve purchase WP Mail SMTP Pro, then you’ll have access to a few additional features. For example, the ‘Detailed Email Logs’ feature will let you check individual emails to make sure they being are sent.

WP Mail SMTP Pro Offers Additional Features

The Pro version will also let you resend a failed email. That can be really helpful when the customer typed in the wrong email address.

Send a Test Email

Congratulations, you’ve now set everything up! Let’s make sure it works by sending a test email.

You’ll need to navigate to WP Mail SMTP » Tools and then click on the ‘Email Test’ tab. The site’s admin email will be entered by default, but you can send the test email to a different address if you like. Next, click ‘Send Email’.

Make Sure Everything Works by Sending a Test Email

If everything has been set up correctly, then you should see a ‘Success!’ message. Make sure you also visit your email inbox to make sure the email actually arrived.

You Should See a Success! Message

We hope this tutorial helped you learn how to fix WooCommerce not sending order emails.

You may also want to learn the right way to create an email newsletter or check out list of must have WooCommerce plugins to grow your store.

If you liked this guide, then please consider subscribing to our YouTube Channel for WordPress video tutorials. You can also find us on Twitter and Facebook.

The post How to Fix WooCommerce Not Sending Order Emails (The Easy Way) appeared first on WPBeginner.


from WPBeginner https://ift.tt/3juwPoW
More links is https://mwktutor.com

Saturday 28 August 2021

How to Create Advanced Search Form in WordPress for Custom Post Types

Do you want to create an advanced search form in WordPress for custom posts types?

You can offer your visitors a better website experience by adding a search form that includes your custom post types in the results.

In this article, we’ll show you how to create an advanced search form for custom post types in WordPress, step by step.

How to create advanced search form in WordPress for custom post types

Why Create an Advanced Search Form for Custom Post Types in WordPress?

If you have many different content types, then a custom post type search form lets you help your visitors more easily find the most relevant content.

For example, we use custom post types here at WPBeginner to organize our deals and glossary sections. This keeps them separate from the rest of the content on our site.

If we were to add a custom post types search form to each of these pages, then the search results would only show posts from that category.

This kind of custom search helps your visitors view more pages and stay on your site longer, which gives off positive WordPress SEO signals like lower bounce rate and increased dwell time.

With that said, let’s show you how to create an advanced search form for custom post types in WordPress.

Create a New WordPress Search Algorithm with a WordPress Plugin

The easiest way to create an advanced search form for custom posts types is by using the SearchWP plugin. It’s the best search plugin for WordPress used by over 30,000 sites.

It’s easy to use and and gives you complete control over your WordPress search results.

First thing you need to do is install and activate the plugin. For more details, see our step by step guide on how to install a WordPress plugin.

Upon activation, you need to go to Settings » SearchWP and then click on the ‘License’ menu option.

Add SearchWP license key

Then, enter your license key in the ‘License’ box and click the ‘Activate’ button.

You can find this information in your account on the SearchWP website.

Once you’ve done that, you need to click on the ‘Engines’ menu option.

SearchWP engines settings

This brings you to a screen where you can set your search engine settings. Think of it like creating your own Google search algorithm for your website.

With SearchWP, you need to create a site-wide search engine before you can create a custom post types search engine, so we’ll do that first.

You can adjust the search engine settings by clicking on the ‘Posts’, ‘Pages’, ‘Library’, or other custom post type drop downs.

Each section has a ‘Weight Multiplier’ that will change how the search engines rank content.

If you want the search engine to value page titles higher than the content, then adjust the slider accordingly.

Adjust search engine attributes

Once you’re finished customizing your default search engine settings, make sure to click the ‘Save Engines’ button to create your first search engine.

Now that your initial search engine is set up, it’s time to create an advanced search form for your custom post types.

Add an Advanced Search Form Limited to a Single Custom Post Type

To create a custom search box, we’ll start by adding a separate search engine that only targets the custom post types you want.

First, navigate to Settings » SearchWP and then click the ‘Add New’ button.

Add new SearchWP search engine

This will automatically create a new separate search engine.

Next, click the ‘Sources & Settings’ button.

Click sources and settings

This will bring up a popup where you can select the sources for your custom search engine.

Simply uncheck the boxes of the sources you don’t want to include.

In this example, we’ll only leave the ‘Coupons’ box checked, since we want to create a search form that only lets users search through our coupon pages.

You also need to give your search engine a name. Take note of the name in the ‘Engine Name’ box, because you’ll need it at a later step.

Supplemental search engine settings

Then, click the ‘Done’ button.

Once you’ve done that, click the ‘Save Engines’ button to save your new custom post type search engine.

Now, you need to download the SearchWP shortcodes extension to easily add your new custom post search form to WordPress.

First, head over to the SearchWP Shortcodes Extension website and then click the ‘Download available with active license’ button.

Download SearchWP shortcodes extension

After that, you need to install and activate the extension the same way you installed the plugin above.

Now, you can create a new custom post search form page using shortcodes.

Simply navigate to Pages » Add New and then give your page a name.

After that, click the plus ‘Add Block’ icon to bring up the blocks menu.

Add block for shortcodes

Next, type ‘HTML’ into the search box.

Then, select the ‘Custom HTML’ block.

Select custom HTML shortcodes block

Once you’ve done that, you can add the following shortcodes and HTML to your page. If you need more help, then see our guide on how to add a shortcode in WordPress.

[searchwp_search_form engine="coupon" var="searchvar" button_text="Find Results"]
 
<div class="search-results-wrapper">
 [searchwp_search_results engine="coupon" var="searchvar" posts_per_page=4]
  <h2>[searchwp_search_result_link direct="true"]</h2>
  [searchwp_search_result_excerpt]
 [/searchwp_search_results]
</div>
 
<div class="no-search-results-found">
 [searchwp_search_results_none]
 No results found, please search again.
 [/searchwp_search_results_none]
</div>
 
<div class="search-results-pagination">
 [searchwp_search_results_pagination direction="prev" link_text="Previous" var="searchvar" engine="my_test_engine"]
 [searchwp_search_results_pagination direction="next" link_text="Next" var="searchvar" engine="my_test_engine"]
</div>

The code above will add your search engine, create a section to display the search results, show a no results message if necessary, and add pagination if the results go into multiple pages.

You need to change the engine name engine="coupon" to your own engine name. The rest of the code can stay the same.

Publish SearchWP shortcodes page

Make sure you click ‘Publish’ or ‘Update’ to save your page and make it live.

Your custom post type search engine is now live on your website.

Custom post types search form example

SearchWP is a very flexible and customizable search plugin. You can also use this plugin to add live Ajax search, create a search by category feature, and more.

We hope this article helped you learn how to create advanced search form in WordPress for custom post types. You may also want to see our guide on how to choose the best website builder and our picks of the best live chat software for small businesses.

If you liked this article, then please subscribe to our YouTube Channel for WordPress video tutorials. You can also find us on Twitter and Facebook.

The post How to Create Advanced Search Form in WordPress for Custom Post Types appeared first on WPBeginner.


from WPBeginner https://ift.tt/3yoIlpS
More links is https://mwktutor.com