Do you want to add a services section to your WordPress website?
Many professionals, small companies, and agencies need a way to showcase their services across their website.
In this article, we’ll show you how to easily create a services section in WordPress. We’ll also share how to collect leads from your services section with a contact form.

Why Create a Services Section in WordPress?
Normally, you can create custom pages in WordPress for each service you offer.
After that, you can add links to those pages in your navigation menu at the top or in the page content.
A services section on your homepage lets you quickly highlight the services to potential customers and clients. It is usually a compact area in the layout of your homepage or landing pages.
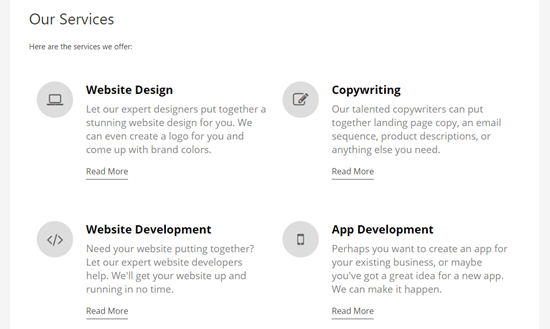
Here’s an example of how a typical services section could look:
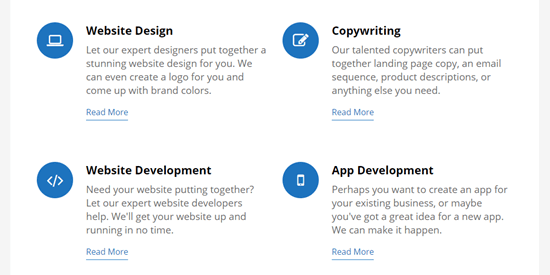
This helps you provide a quick overview of different services with a call to action where users can get more details or fill out a form.
That being said, let’s take a look at how to easily make a services section in WordPress and then add it to any page on your website.
Create Custom Homepage with Page Builders
If you’re looking for the most customizable way to add a services section to your homepage, then you may want to consider using a custom landing page.
You can use one of the many drag & drop WordPress page builders to create a custom page with services section without writing any code.
For custom landing pages, we recommend SeedProd. It’s used by over 1 million websites and comes with tons of pre-made section templates and landing page templates.
If you’re looking for a SeedProd alternative, then you can take a look at Beaver Builder, Divi, or Elementor because they all will let you customize your homepage to add a completely custom services section to your homepage.
If you don’t want to use a page builder, then don’t worry. There are other WordPress plugins that can let you add a services section using Gutenberg.
Creating a Services Section in WordPress using Block Editor
First you need to install and activate the free Service Box Showcase plugin. For more details, see our step by step guide on how to install a WordPress plugin.
Upon activation, go to the Service Box » Add New Service Box page in your WordPress admin to create a services box.
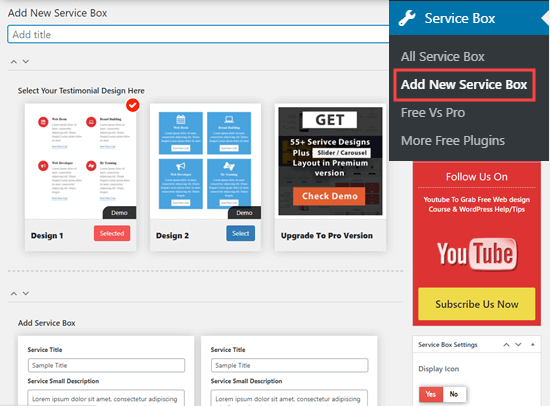
Here, you need to enter a title for your services area and choose a design option. There are 2 different designs to choose from in the free version.
Once you’ve done this, simply scroll down the page a little. Here, you will see two sample services, with a title, description, and icon.
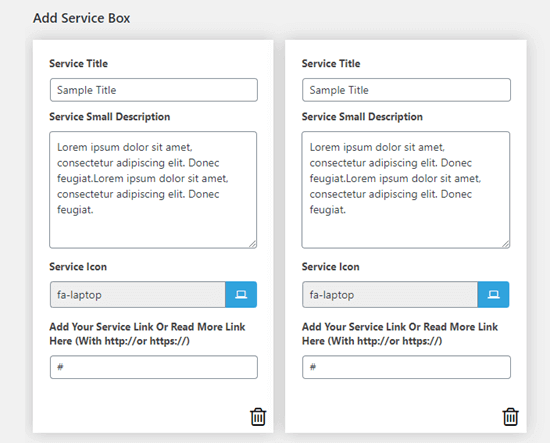
Go ahead and type in a title and description for your services. After that click on the current icon, and then select the one you want to use.
![]()
It’s also best practice to add a link to a page for further information about the service. This gives you the space to let people know how to book and pay for your service.
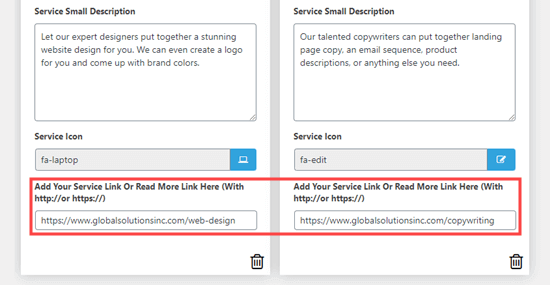
You can also add more service boxes using the ‘Add New Service Box’ button. Simply click on this to create as many boxes as you need.

Once you’ve created your service boxes, click on the Publish button at the top of the page to save your changes. Don’t worry, this won’t add the service section to your site straight away.
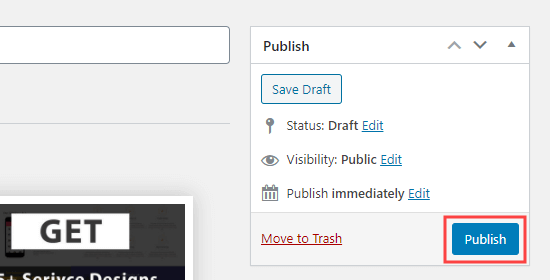
You are now ready to add this services section to your home page or any post or page. You can even add it sidebar or footer widget-area.
Adding Your Service Section to a WordPress Page
To add the services section into a page, you’ll need to copy the shortcode generated by the plugin. You can find under the service boxes.
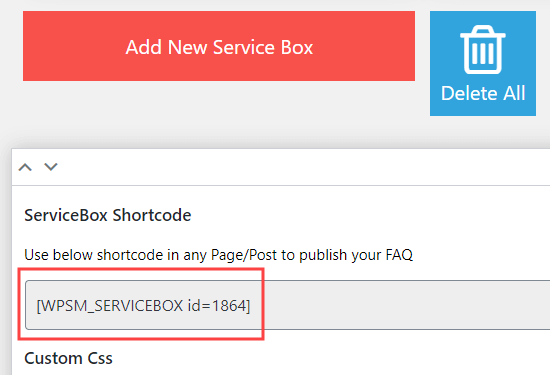
After copying the shortcode, you can add it to any WordPress post or page. Simply edit the page where you want to display the services section or create a new one.
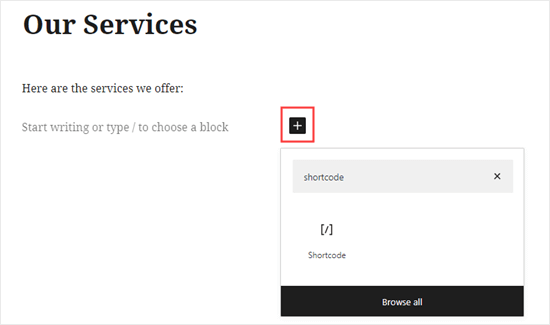
On the post edit screen, click on the (+) button to add a new block. You need to look for the shortcode block and then click on it to insert it into the content area.
Next, you just need to paste your shortcode into the block settings.
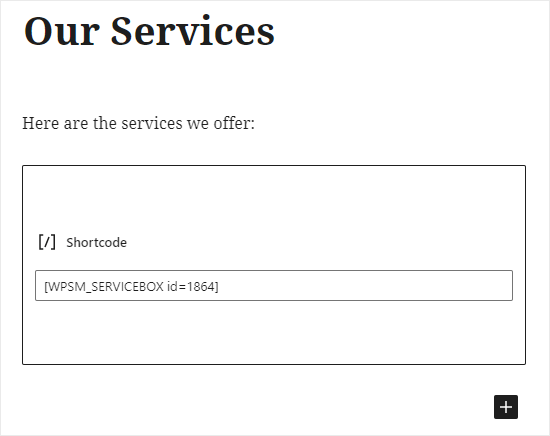
After that you can save or publish your page and preview it. Here’s how the services section looks live on our demo website:
Styling Your Services Section
The plugin gives you some basic options to easily change the appearance of your services section.
Simply go to Service Box » All Service Box page in your WordPress admin area and then click on the services section you created earlier.
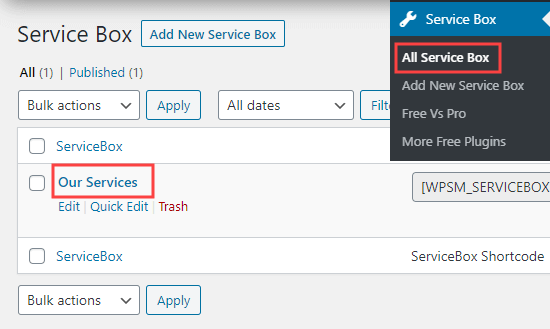
This will open the services edit screen where you’ll find the styling options in the right column. From here, you can change fonts, colors, show or hide icons, ‘Read more’ link, and more.
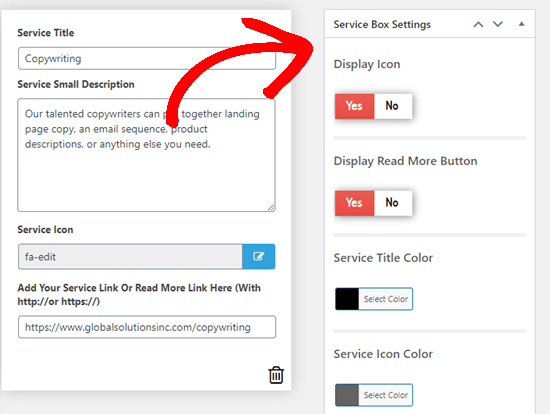
Don’t forget to click the ‘Update’ button at the top of the page to save your changes.
Creating Request a Quote Form For your Services
Now that you have added a services section, the next step is to convert those users. Many businesses do this by adding a request for a quote form.
It is basically like any contact form but with a few differences to match your business needs. This allows customers to send you a message, and you can then sell them your service.
The easiest way to do this is by using WPForms, which is the best WordPress forms plugin. It allows you to easily add any type of forms to your website using a simple drag and drop tool.
First, you need to install and activate the WPForms plugin. For more details, see our step by step guide on how to install a WordPress plugin.
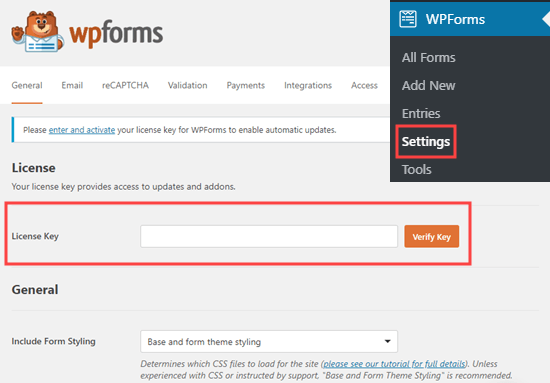
Upon activation, you need to visit the WPForms » Settings page to enter your license key. You can find this information under your account on WPForms website.
Next, you need to visit the WPForms » Addons page and click on the Install button next to the ‘Form Template Pack Addon’.
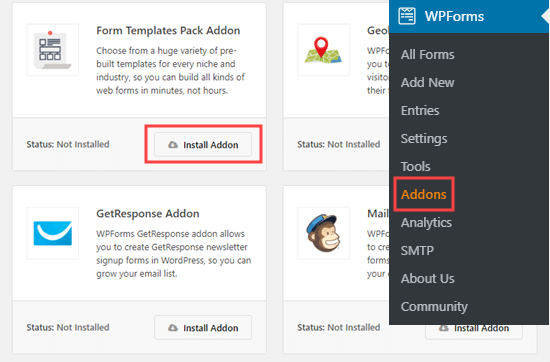
This addon contains several additional templates including one to create a request a quote form.
Now you are ready to create your form.
Simply go to the WPForms » Add New to launch the WPForms form builder. First, you need to type in a name for your form, then select the Request a Quote template.
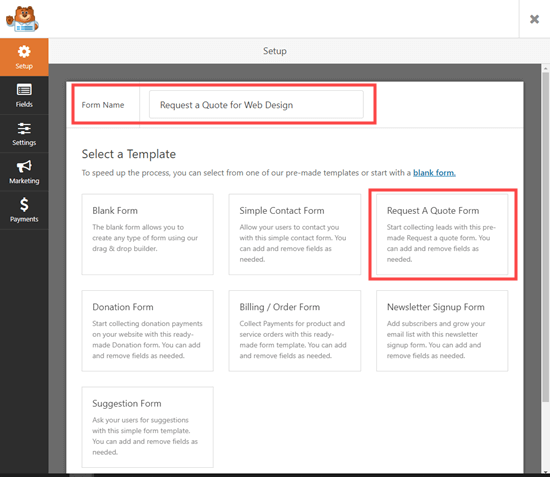
WPForms will now load the form editor with all the entries you usually need in a ‘Request for Quote’ form. These include Name, Business/Organization, Email, Phone, and a box where the customer can type their request:
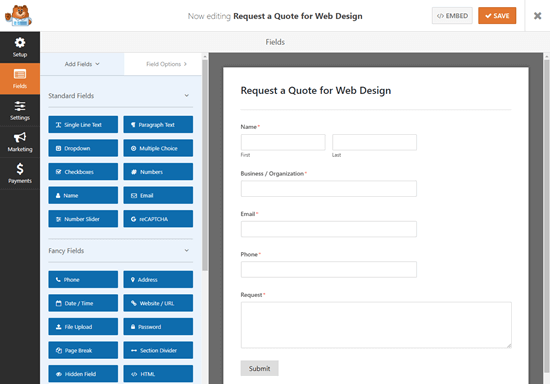
You can easily add new fields from the left column or edit existing fields by simply clicking on them. You can also move the fields up and down to rearrange them.
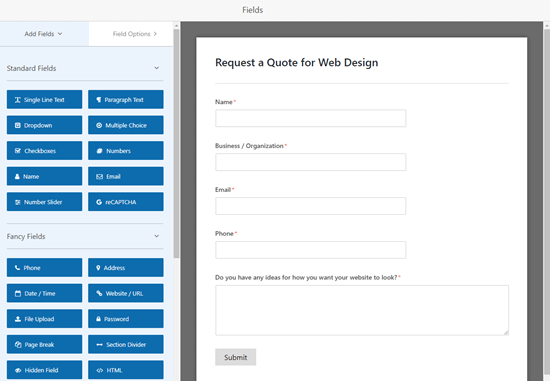
Once you are satisfied with the form simply click on the Save button at the top to save your changes.
You can now add this form to any WordPress post or page. Simply edit the page where you want to add the form and the WPForms block to the content area.
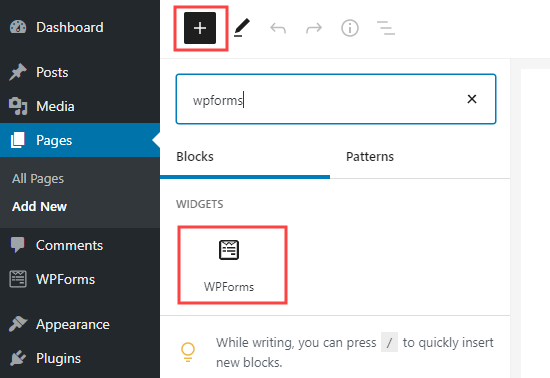
From the block settings, you need to select the form you created earlier from the drop-down menu. WPForms will load a preview of the form on screen.
You can now go ahead and save or publish your page to see your form live on your WordPress site.
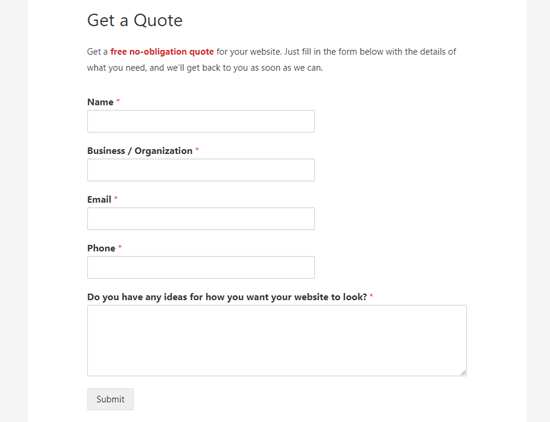
Want more help creating your form, setting up notifications, and putting your form on your website? Just check out our step by step tutorial on creating a contact form.
Tip: You can also use WPForms to take bookings and even to accept credit card payments.
We hope this article helped you learn how to create a services section in WordPress. You might also like to check out our article on the best live chat software and best business phone services for small businesses.
If you liked this article, then please subscribe to our YouTube Channel for WordPress video tutorials. You can also find us on Twitter and Facebook.
The post How to Create a Services Section in WordPress appeared first on WPBeginner.
from WPBeginner https://ift.tt/36hzVWb
More links is https://mwktutor.com

No comments:
Post a Comment