Do you want to organize or reorder WordPress pages with drag and drop?
By default, WordPress lists your pages in alphabetical order, both in the back-end admin and on the front-end of your website. But if you want them in a different order, then you’ll need to change it yourself.
In this article, we will show you how to organize or reorder your WordPress pages with a drag-and-drop functionality.

When You May Need to Reorder WordPress Pages
You might need to reorder your WordPress pages if you have a specific way of arranging your menu items. For example, if your blog has a ‘Start Here‘ page, then you’d probably want it as one of your first menu items and not the last ones.
This way, new visitors can easily find it, learn more about your WordPress website, and navigate it more efficiently.

When you create a new page in WordPress, it will be automatically placed in alphabetical order. This is different from blog posts, which are listed based on their published date.
So, if you already have pages like About Us, Blog, and Contact Us, and you decide to add a Start Here page, then it will appear at the end of the menu.
Another reason to organize your WordPress pages is when you want to group them based on how important they are or how often you edit them. This makes it easier to find and update important pages quickly in the admin area.
If you want to change the order of pages in your WordPress site, then continue reading. We will guide you through 4 easy methods for you to try, most of which use a drag-and-drop feature.
You can use the quick links below to jump to the section you want to read:
- Method 1: Organize WordPress Pages With Simple Page Ordering (Plugin Method)
- Method 2: Reorder WordPress Pages by Changing the Order Page Attribute (No Plugin)
- Method 3: Organize WordPress Menu Items With the Full Site Editor (Block Themes)
- Method 4: Reorder WordPress Menu Items Using the Menu Editor (Classic Themes)
- Bonus: How to Reorder Posts on Your WordPress Blog Homepage
Note: We are using WordPress.org for this tutorial, not WordPress.com. Some methods here may work with WordPress.com, but if you use the free version, then you won’t be able to use the plugin in the first method.
You can learn more about the differences between WordPress.org and WordPress.com in our comparison chart.
Method 1: Organize WordPress Pages With Simple Page Ordering (Plugin Method)
The first method is to use Simple Page Ordering. This free plugin can activate a drag-and-drop feature that lets you rearrange your WordPress pages, and it also works with custom post types with page attributes.
We recommend this method if you are a beginner who has a lot of pages to organize.
First, you need to install and activate the WordPress plugin in the admin area. Once done, just go to Pages » All Pages. When you hover over your list of pages, your cursor should now use a 4-arrow icon, and you can reorder your WordPress pages, like so:
Method 2: Reorder WordPress Pages by Changing the Order Page Attribute (No Plugin)
Another way to rearrange WordPress pages is by adjusting each page’s order number in the Page Attribute settings. However, we only recommend this method if you have just a few pages, as you will need to edit each page individually.
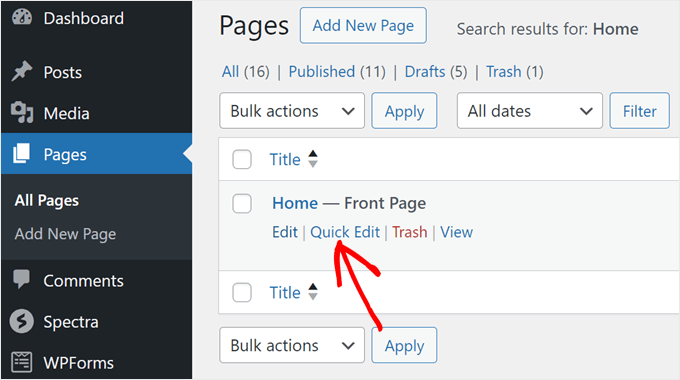
In the WordPress dashboard, go to Pages » All Pages. Then, click ‘Quick Edit.’
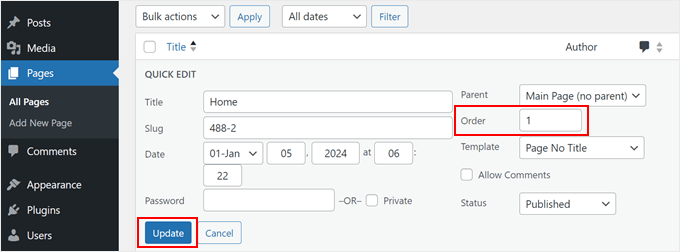
After that, you will see ‘Order’ (above the ‘Template’ dropdown menu). By default, all pages will have ‘0’ as their order.
To prioritize the pages correctly, make sure to assign each one a unique number. For example, if you have 7 pages and want your ‘Home’ page to be first, then set its order to ‘1’. If the next priority is your ‘Start Here’ page, then give it an order of ‘2,’ and so on.
Lower numbers mean higher priority. No page should be using ‘0’ because it will make WordPress place that page first in the admin area and in your navigation menu.
Once done, just click the ‘Update’ button.
This is what the Simple Page Ordering plugin from the first method actually does. When you rearrange your pages, the plugin automatically changes their order numbers, too.
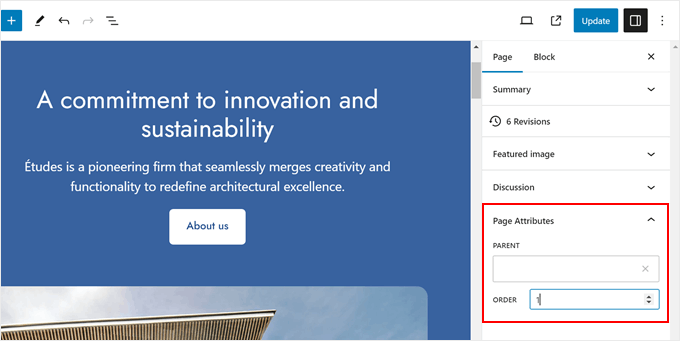
You can also change a page’s order inside the Gutenberg block editor. In the ‘Page’ sidebar, scroll down to the ‘Page Attributes’ section.
Here, you can modify the order number and if needed, assign the page as a sub-page to a parent page. Once you have inserted a number, just click the ‘Update’ or ‘Publish’ button.
When you follow methods 1 and 2, the order of your pages should also be reflected in your navigation menu. But if that doesn’t happen, then you can try methods 3 or 4.
Method 3: Organize WordPress Menu Items With the Full Site Editor (Block Themes)
If you use a WordPress block theme, then you can also organize your WordPress pages in the menu with the Full Site Editor.
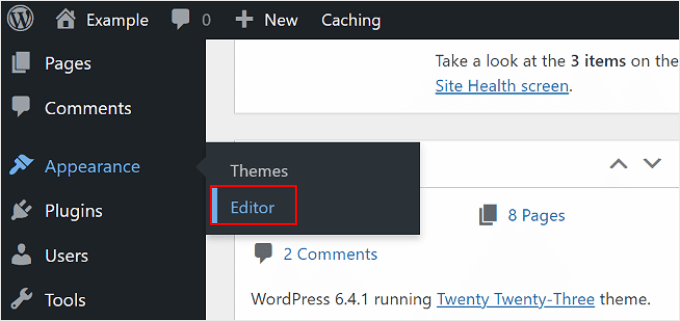
First, go to Appearance » Editor from the WordPress dashboard.
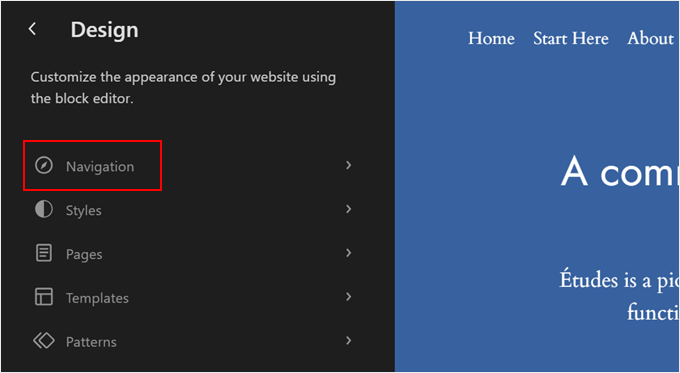
You will now see a list of menu options to choose from in the Full Site Editing sidebar.
Simply click ‘Navigation’ to organize your WordPress pages in the navigation menu.
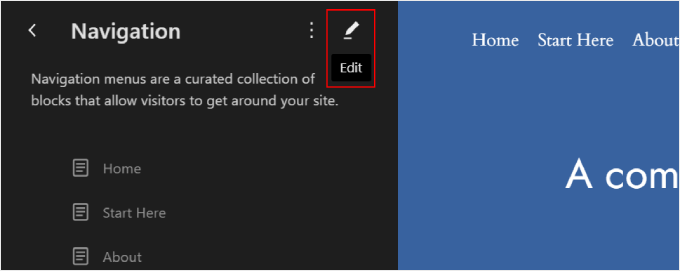
On the next page, you will see a list of all your pages.
There, just click the pencil ‘Edit’ button next to Navigation.
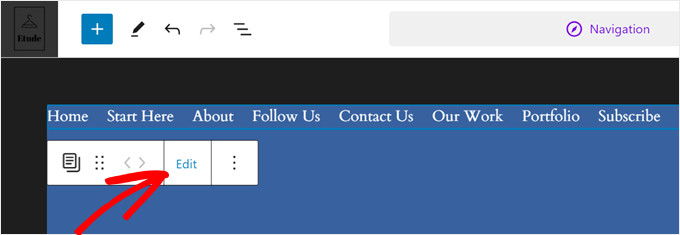
Go ahead and click the Menu block so that the block toolbar shows up.
After that, click the ‘Edit’ button.
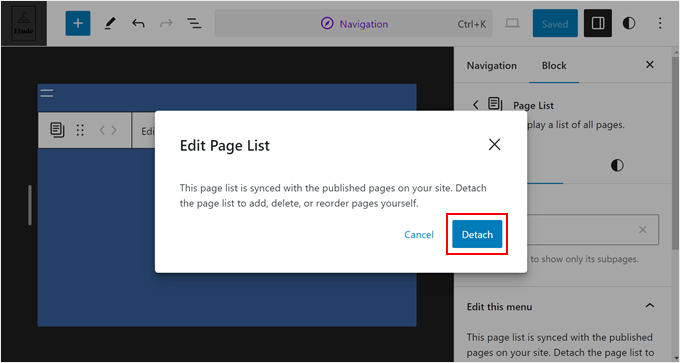
A popup will appear asking if you want to detach your ‘Page List’ block from the version that automatically displays all of your published pages. Doing this will let you add, delete, or reorder the pages in that list.
Go ahead and click ‘Detach’ to continue.
Now, simply click on a menu item inside the block.
Then, use the right and left arrows in the toolbar to rearrange the order of pages.

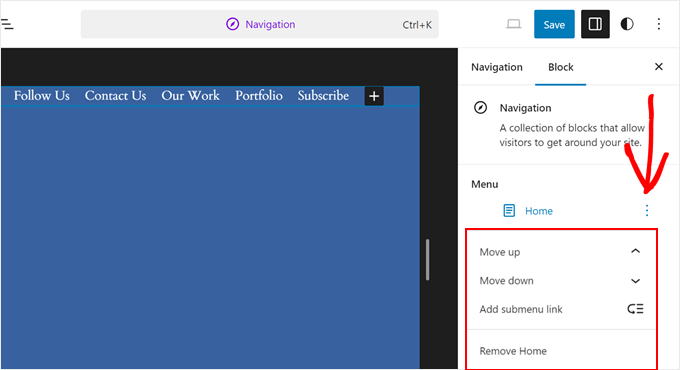
You can also do the same thing in the Block settings sidebar by clicking the three-dot button next to a menu item.
You will then see options to move the item up or down, add a sub-menu, or remove the page from the menu.
Once you are happy with how the menu looks, just click the ‘Save’ button.
Method 4: Reorder WordPress Menu Items Using the Menu Editor (Classic Themes)
If you use a classic WordPress theme, then you can reorganize the WordPress pages in your menu using the menu editor.
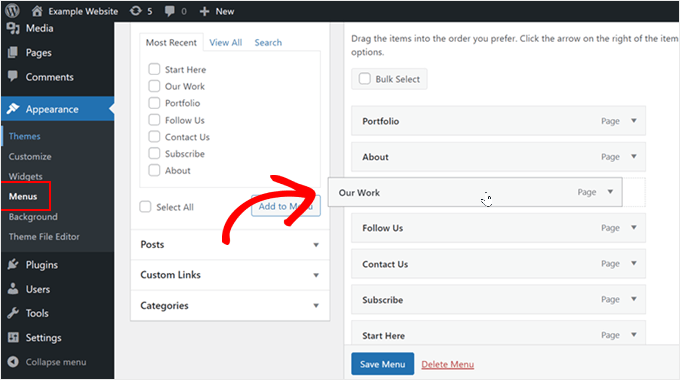
Simply go to Appearance » Menus to get started. If you haven’t created a menu yet, then you can read our guide on how to add a navigation menu in WordPress.
To reorder the menu items, you can just drag and drop the pages, like so:
Alternatively, you can click on the arrow sign in the menu item.
Then, you will see some options to move the page up, down, to the top, or under a parent page.
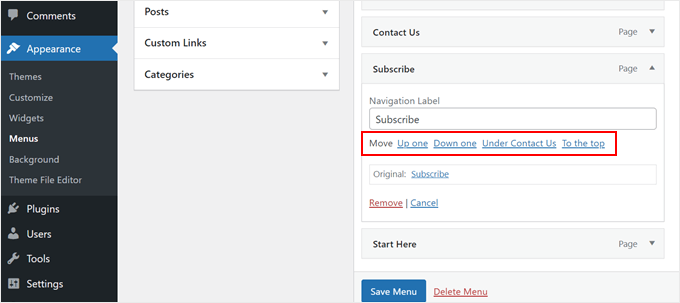
When you are satisfied with the menu structure, just click ‘Save Menu.’
Bonus: How to Reorder Posts on Your WordPress Blog Homepage
We have already talked about how to reorder WordPress pages, but how about reorganizing your blog posts?
If you have a blog page on your WordPress website, then you may notice that its posts get automatically arranged in reverse chronological order (from the most recent posts to the least recent).
This is already a good option by default, as users will be able to see your latest content piece. However, there might be instances where you want a particular post to always be highlighted, such as when you are promoting a special event.
In this case, then you may want to check out our step-by-step guide on how to easily reorder blog posts in WordPress.
This tutorial goes through several methods to reorganize your WordPress posts, from using the Post Types Order plugin and adding code to your functions.php file to reorganizing your product pages with WooCommerce.
We hope this article helped you learn how to organize or reorder WordPress pages with drag and drop. You may also want to check out our list of the most wanted WordPress tips, tricks, and hacks and our expert pick of must-have WordPress plugins to grow your website.
If you liked this article, then please subscribe to our YouTube Channel for WordPress video tutorials. You can also find us on Twitter and Facebook.
The post How to Organize or Reorder WordPress Pages with Drag & Drop first appeared on WPBeginner.
from WPBeginner https://ift.tt/53osFXc
More links is https://mwktutor.com
No comments:
Post a Comment