Do you want to accept Bitcoin payments in WordPress?
Bitcoin makes it super easy to accept online payments from anywhere in the world. Plus, it helps your customers to protect their privacy and pay anonymously.
In this article, we will show you how to easily accept Bitcoin payments in WordPress.

Why Accept Bitcoin Payments in WordPress?
WordPress allows you to build an eCommerce store in minutes using WooCommerce or other WordPress eCommerce plugins.
These platforms let you accept payments online using PayPal, Stripe, 2Checkout, and many other popular payment gateways. In fact, you can accept payments with Stripe or PayPal without even using a shopping cart plugin.
However, not all payment gateways are available everywhere. Some of your clients may not have PayPal available in their region, and others may not want to use their credit cards.
Bitcoin offers an alternate payment method that anyone worldwide can use.
It is one of the most popular cryptocurrencies that’s used as a form of payment. Bitcoin is different from conventional currencies because it’s free from any central control or oversight from governments and banks.
Once you accept payments in Bitcoin, you can transfer them to your bank account or keep them in your wallet. The value of Bitcoin is increasing over time, and it is likely to continue as more people start using the Bitcoin cryptocurrency. Plus, you don’t have to worry about chargebacks or disputes with Bitcoin payments.
Another advantage of offering Bitcoin payments is that they protect customer privacy. Users can pay anonymously using the cryptocurrency.
That said, let’s take a look at how to get started with Bitcoin and integrate it into your WordPress website.
Setting Up a Bitcoin Wallet
First, you will need a Bitcoin wallet. This is a piece of software that you will use to send or receive Bitcoins and store them safely. It’s just like a traditional bank account but for cryptocurrencies.
There are many different types of wallets available. You can install a wallet on your computer or even on your phone. To learn more about wallets and choose the right wallet for your needs, please visit the Bitcoin Wallets page.
For the sake of this tutorial, we will be using Coinbase. It offers a free Google Chrome extension and easily integrates with different WordPress plugins to let you accept Bitcoin in WordPress.
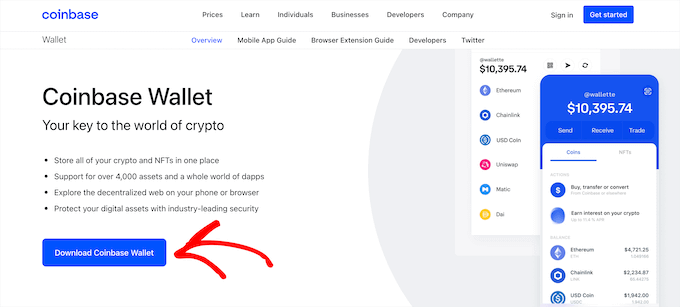
You will need to visit the Coinbase Wallet website and click the ‘Download Coinbase Wallet’ button.
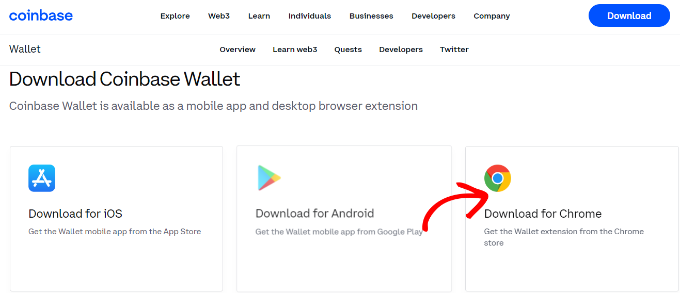
Next, you will see different ways to download the Coinbase wallet. It offers mobile apps for iOS and Android and Chrome extension.
Go ahead and select the ‘Download for Chrome’ option.
After that, you will see the Google Chrome web store and be able to install the Coinbase extension.
Simply click the ‘Add to Chrome’ button to start the installation.

Next, you should see the Coinbase extension in your browser.
When you click it, you will see an option to set up a wallet. Go ahead and click the ‘Create new wallet’ button.
After that, Coinbase will show you a recovery phrase to keep your wallet safe. You can copy the phrase and keep it safe in a password manager or anywhere else.
Go ahead and click the checkbox and then click the ‘Continue’ button.
Next, you will need to verify that you have copied the recovery phrase. Coinbase will ask you to select the first and last words in the phrase.
You can click the ‘Submit’ button when you are done.
On the next screen, Coinbase will ask you to set a password.
Once you have done that, simply check the terms and privacy policy checkbox and click the ‘Submit’ button.
You have successfully created a Coinbase wallet.
Next, you can click the Coinbase Chrome extension icon in your browser.

After that, you will need an address to receive your Bitcoin payments in the Coinbase wallet.
For that, simply click the ‘Receive’ option in the Coinbase browser extension.
Next, you will see different addresses for various cryptocurrencies.
You can navigate to Bitcoin and click the copy to clipboard option to copy the wallet address. As an alternative, there is also an option to generate a QR code.
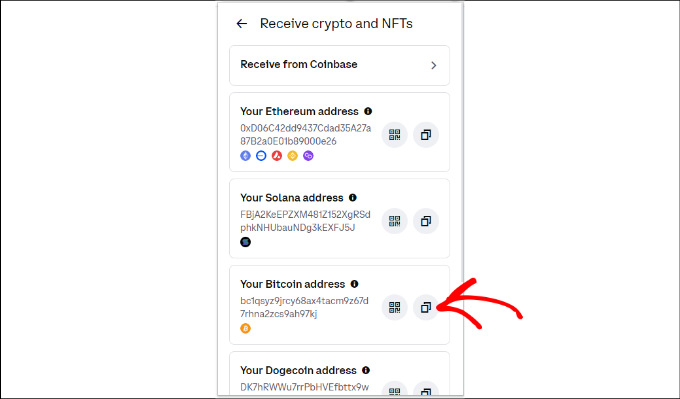
You can now save the Bitcoin wallet address from Coinbase in a Notepad file, as you will need it in the next step.
Setting Up a Digital Payment Processing Provider
Next, you will need to sign up for a NOWPayments account.
It is an online payment processing service that lets you accept Bitcoin, Ethereum, and over 200 different cryptocurrencies worldwide.
To start, just visit the NOWPayments website and click the ‘Accept Crypto’ button.
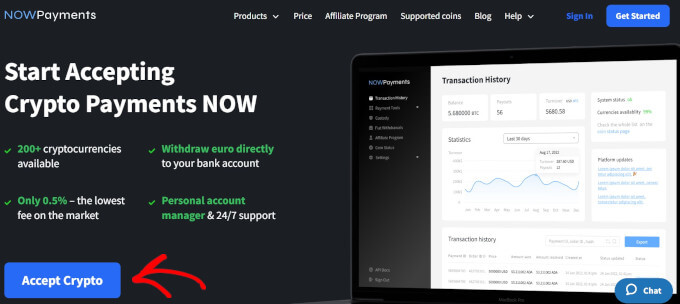
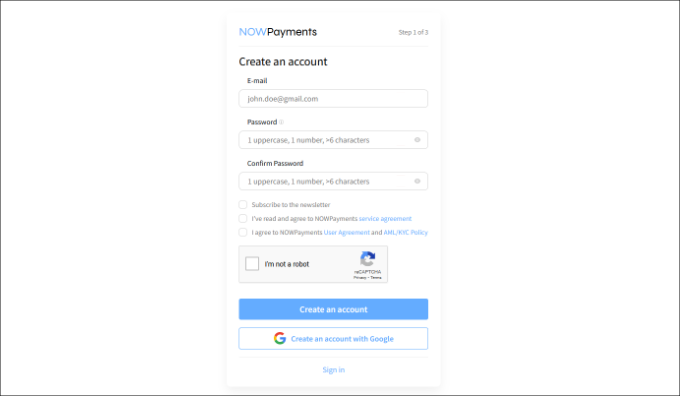
Next, you will need to create an account. Go ahead and enter your email address and password.
Once you’ve entered these details, you need to click the user agreement checkbox, reCAPTCHA, and the ‘Create an account’ button.
After that, you will receive a confirmation email.
Simply click the link in the email to verify your account, and then log in to NOWPayments to view the dashboard.
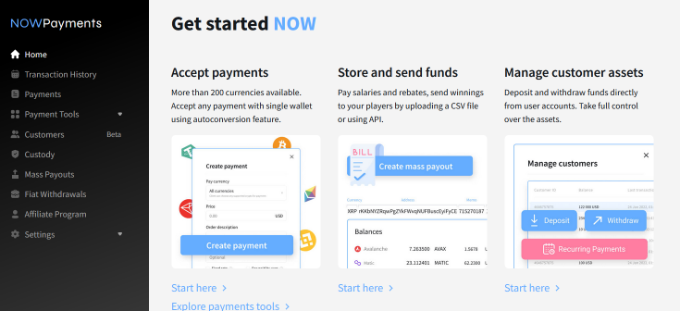
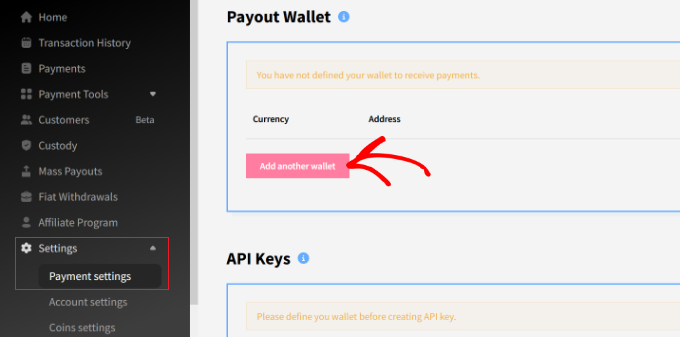
Next, head over to the Settings » Payment settings from the menu on your left.
Here, you can click on the ‘Add another wallet’ button.
After that, you can choose ‘BTC’ from the dropdown menu and add Bitcoin as the currency.
From here, simply enter the Coinbase wallet address you copied earlier.
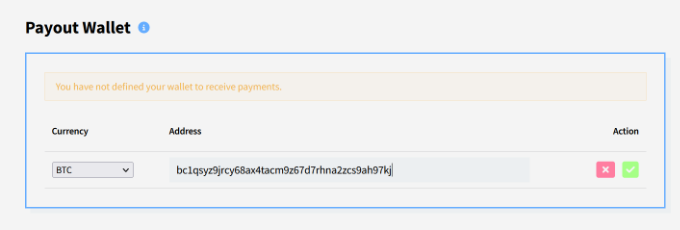
Once you are done, simply click the green tick button to add the wallet.
As soon as you add the wallet, NOWPayments will create an API key. You will need this key when adding a payment option to your WooCommerce store or WordPress site.
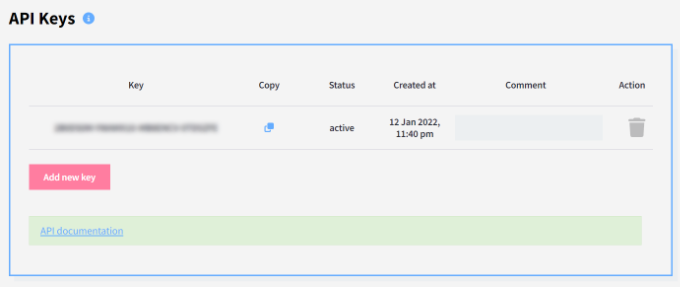
Next, you can scroll down to the Instant Payment Notifications section.
Under the ‘IPN secret key’ field, go ahead and click the ‘Generate’ button.

Once the secret key is generated, you should copy and save it, as you will need it in the next step.
After completing these steps, you are ready to accept payments on your website.
Accepting Bitcoin Payments in WooCommerce With NOWPayments
If you are already using WooCommerce, then this method is recommended for you.
The first thing you need to do is install and activate the NOWPayments For WooCommerce plugin. For more details, see our step-by-step guide on how to install a WordPress plugin.
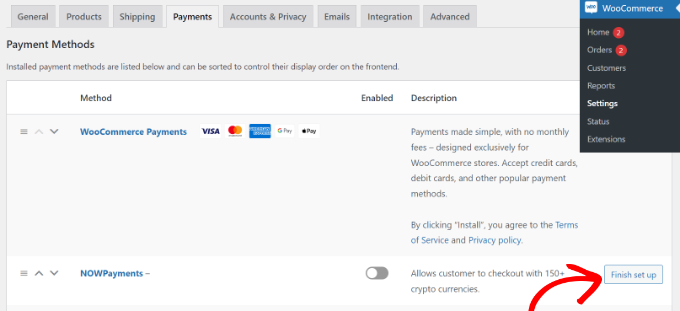
Upon activation, you need to visit the WooCommerce » Settings page from your WordPress dashboard and click on the ‘Payments’ tab.
Next, make sure that the NOWPayments method is enabled, and then click on the ‘Finish set up’ button to configure its settings.
Next, you will need to enter the IPN Secret and API Key in the respective fields that we created earlier.
You can find both keys in your NOWPayments Payment settings tab.
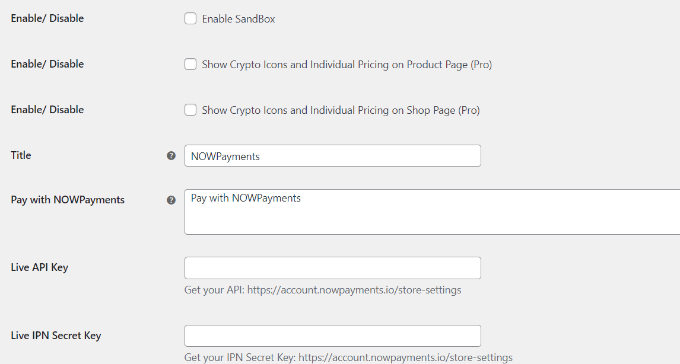
After entering these details, don’t forget to save your changes to activate the payment gateway.
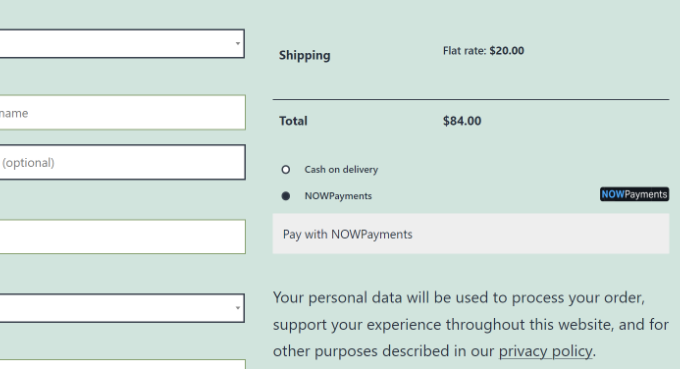
Your customers will now see an option to pay using NOWPayments on your store’s checkout page.
Accepting Bitcoin Donations in WordPress With NOWPayments
This method is recommended for users who want to accept donations but are not using a shopping cart or eCommerce plugin on their WordPress website.
NOWPayments allows you to create a Bitcoin donation button and donation widget for your website.
First, you will need to log in to your NOWPayments account and head over to Payment Tools » Donations from the menu on the left.
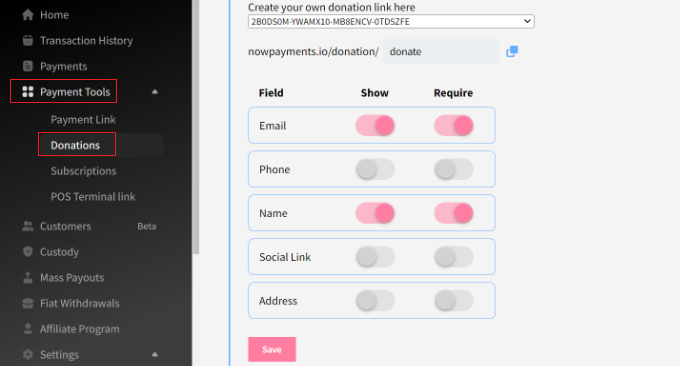
Here, you can create a link for your donation widget and choose which fields to show and make required in the widget.
Don’t forget to click the ‘Save’ button when you are done.
You can also choose a donation button style and select your API key.
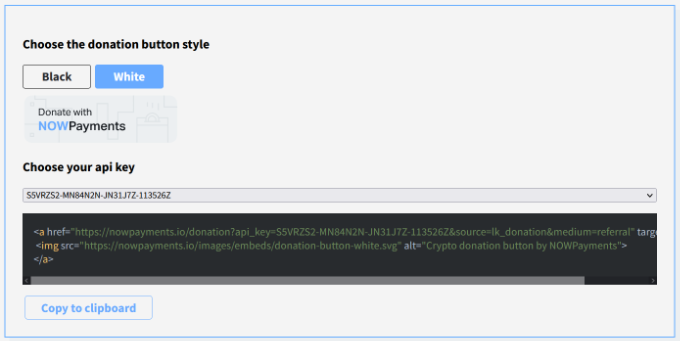
After that, you need to go back to WordPress and edit or create a new page or post where you’d like to display your Bitcoin donation widget and button.
Once you are in the WordPress editor, go ahead and click the ‘+’ button to add a Custom HTML block.
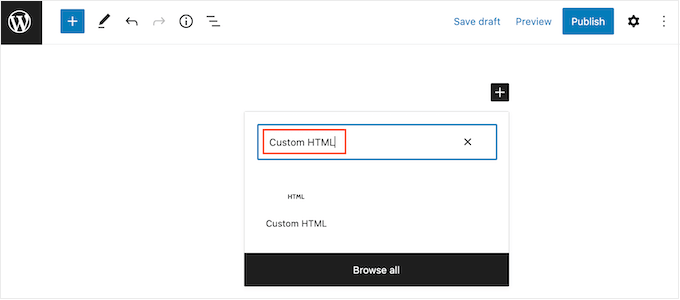
Next, you will need to enter the following code to show a donation widget:
<iframe src="https://nowpayments.io/embeds/donation-widget?api_key=XXXXXXX-XXXXXXX-XXXXXXX-XXXXXXX&source=lk_donation&medium=referral" frameborder="0" scrolling="no" style="overflow-y: hidden;" width="354" height="680"></iframe>
Note: You will need to replace the API key placeholder with the key you generated in the NOWPayments Store Settings.
Now, just publish your blog post or page to see the donation widget in action. Your visitors can now choose Bitcoin and other cryptocurrencies for donation.
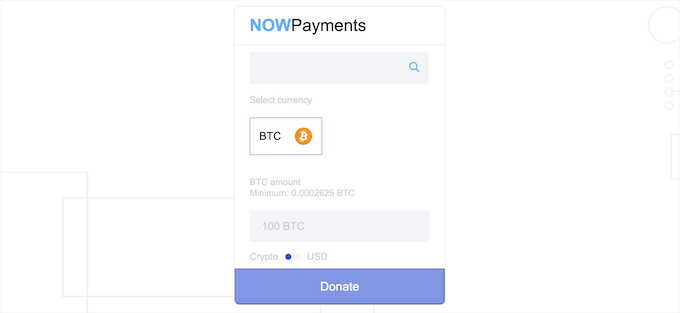
To learn more, please follow our guide on how to add a Bitcoin donate button in WordPress.
We hope this article helped you learn how to accept Bitcoin payments in WordPress. You may also want to see our ultimate step-by-step WordPress security guide for beginners and our expert picks of the best WordPress eCommerce plugins.
If you liked this article, then please subscribe to our YouTube Channel for WordPress video tutorials. You can also find us on Twitter and Facebook.
The post How to Easily Accept Bitcoin Payments in WordPress (Step by Step) first appeared on WPBeginner.
from WPBeginner https://ift.tt/bwysPWN
More links is https://mwktutor.com
No comments:
Post a Comment