Thursday 30 September 2021

How to Add a CRM on Your WordPress Site and Get More Leads

Do you want to add a CRM to your WordPress site?

Integrating WordPress with a CRM allows you to easily manage customer interactions on your website and follow up with leads.

In this article, we’ll show you how to add a CRM on your WordPress website to boost conversions and sales.

How to easily add a CRM software to your WordPress website

What Is a CRM?

CRM or Customer Relationship Management software allows you to easily manage a customer’s interactions with your business. A CRM helps you track the user journey of each website visitor, keep a record of previous interactions, and successfully convert leads into customers.

There are many CRM solutions available on the market. Most of them allow you to store customer information in the cloud so you can track and manage customer relationships with an easy to use dashboard.

We recommend using HubSpot. It is the best CRM software on the market and can be easily integrated into your WordPress website.

It allows you to capture customer information with forms, chat bots, email service providers, and more. It also integrates with all popular third-party tools that you may already be using to grow your business online.

More importantly, it is extremely easy to use even for beginners who have never used a CRM before.

That being said, let’s take a look at how to easily add a CRM to your WordPress site.

Adding a CRM on Your WordPress Site

First thing you need to do is sign up for a HubSpot CRM account. They have a limited free CRM software plan which allows you to get started and try out the software without a big upfront investment.

HubSpot CRM

Once you have signed up, you need to connect your HubSpot CRM account to your WordPress website.

Simply install and activate the HubSpot plugin. For more details, see our step by step guide on how to install a WordPress plugin.

Upon activation, the plugin will add a new HubSpot menu to your WordPress admin sidebar. Clicking it will take you to the setup wizard where you need to click on the ‘Sign in here’ link at the top.

Sign in to your HubSpot account

This will bring up a popup where you need to enter your HubSpot login details. After that, you can select your website and then click on the ‘Continue with this account’ button.

Select your website

The plugin will now connect your WordPress site to your HubSpot CRM account.

Collecting Data in Your CRM on WordPress

HubSpot CRM comes with built-in tools to collect customer data on your WordPress website and add it to your contacts list. This includes forms, live chat, and email.

You can easily create forms by visiting HubSpot » Forms page and clicking on the Create Form button.

HubSpot forms

If you’re already using a form plugin on your website such as WPForms, then HubSpot will automatically detect those form submissions and adds them to your contacts.

WPForms captured lead

Similarly, you can also create a live chat widget by visiting HubSpot » Live Chat page and clicking the ‘Create a chatflow’ button.

HubSpot chat flow

HubSpot also integrates with other top live chat software on the market if you prefer to use a different provider. HubSpot will automatically start populating your contacts list from your live chat conversations.

You can also import your contacts from your existing email marketing service provider. Simply go to HubSpot » Email page and choose your email service provider for detailed instructions.

Send marketing emails

You can also manually add contacts by visiting HubSpot » Contacts page and clicking on the Create Contact button.

Contacts

Using HubSpot CRM to Manage and Nurture Leads

After you start adding leads from your WordPress site to your CRM software, the next step is to manage your business’s interactions with them.

From the Hubspot menu in your WordPress dashboard, you can simply click on a contact name to edit it and see a detailed view of all interactions. You can view the user journey that led them to the form submission.

Contact view

From here, you can assign the contact to a team member, send and track emails, create tasks, schedule meetings and calls, and more.

All these interactions will be automatically tracked and recorded into your CRM software.

You can also set a status for a contact based on how far along they are in your sales funnel. For instance, you can mark the status as lead, potential lead, customer, opportunity, and more.

Contact status

Using Third Party Tools with Your CRM

HubSpot offers a good set of tools to capture leads, track contacts, and manage customer relationships. However, you may want to use other third-party tools for conversion optimization and lead capturing.

The good news is that HubSpot works automatically with many of the popular marketing tools. Following are a few the most popular marketing tools you can use with your HubSpot CRM.

1. WPForms

WPForms

WPForms is the best WordPress form builder plugin that is perfect for creating lead capturing forms for your website.

It has payment addons, user journey tracking, and many advanced features that are missing in the default HubSpot forms. For example, the form abandonment feature allows you to capture leads even with the user doesn’t finish filling out the form.

You can also use WPForms to create surveys and polls, forms with digital signatures, multi-page forms, and most any other type of form you need for your business.

2. OptinMonster

OptinMonster

OptinMonster is the best tool for conversion optimization. It allows you to capture more leads and quickly grow your email list.

With OptinMonster’s drag and drop builder, you can create lightbox popups, spin-a-wheel popups, slide in boxes, header and footer banners, countdown timers, and much more.

3. LiveChat

LiveChat

LiveChat is the best live chat and marketing automation platform on the market. Whether you use it for support or sales, it integrates with your HubSpot CRM and allows you to easily follow up with potential leads.

Unlike Hubspot’s built-in chat feature, it comes with incredibly powerful targeting rules that let you show personalized campaigns at right time to maximize your conversions.

4. SeedProd

SeedProd is the best WordPress page builder tool on the market. It allows you to quickly create professional grade marketing pages, landing pages, sales pages, and other campaigns. This helps you get even more leads without any coding skills.

Apart from these tools, you can also connect your HubSpot CRM to thousands of other apps via Zapier.

We hope this article helped you add a CRM on your WordPress site. You may also want to see our guide on why building an email list is important, or our comparison of the best HR payroll software for small business.

If you liked this article, then please subscribe to our YouTube Channel for WordPress video tutorials. You can also find us on Twitter and Facebook.

The post How to Add a CRM on Your WordPress Site and Get More Leads appeared first on WPBeginner.


from WPBeginner https://ift.tt/3AZAnWy
More links is https://mwktutor.com

Wednesday 29 September 2021

How to Add or Remove Capabilities to User Roles in WordPress

Do you want to add or remove capabilities to user roles in WordPress?

WordPress comes with a simple but powerful user management system. Each user has capabilities based on the roles they are assigned.

In this article, we’ll show you how to modify user roles in WordPress by adding or removing capabilities from user roles.

Customing user role permissions in WordPress

Why Add or Remove User Role Capabilities in WordPress

WordPress comes with a built-in user management system and some predefined user roles and permissions.

As an Administrator, you have the ability to perform any action on your WordPress website. For instance, you can add or remove new users, install plugins and themes, delete content, and more.

If you run a multi-author WordPress blog, then you can add other users with Editor, Author, or Contributor user roles. This gives them user role permissions to add new content, but they cannot do administrative tasks.

WordPress also comes with a Subscriber role so users can log in to your site and manage their profiles.

Users with different roles on a WordPress website

Similarly, WordPress plugins can also create user roles with custom permissions. For example, eCommerce plugins can create a user role for customers with specific custom permissions, or a membership plugin can create its own custom user roles for members.

But what if you wanted to give a user role certain extra permissions or take away some existing permissions?

For instance, you may want to take away publishing permission from the Author user role, or allow Authors to edit other user’s blog posts.

What if you wanted to create a totally custom user role with limited capabilities?

That being said, let’s take a look at how to easily modify user role capabilities in WordPress and create custom user roles with specific permissions.

Add / Remove User Role Capabilities in WordPress

The first thing you need to do is install and activate the Members plugin. For more details, see our step by step guide on how to install a WordPress plugin.

Upon activation, you need to visit the Members » Roles page and click on the Edit link below the user role that you want to modify.

Edit user role

This will open the user role editor where you will see different sections in the left column and available capabilities to the right.

Edit capabilities

You’ll notice two checkboxes to Grant or Deny the permission next to each capability.

If a user role is granted permission that you want to take away, then you need to uncheck the Grant option and check the Deny box.

For instance, if you want to prevent the Author user role from publishing blog posts, then you need to switch to the Posts section and then check the Deny box next to the ‘Publish Post’ option.

Remove capability

Similarly, you can also give additional capabilities to a user role.

For instance, let’s suppose you want to allow users with the Author user role to be able to moderate comments as well. By default, the Author user role does not give users permission to moderate comments.

To do that, you need to switch to the ‘General’ section and check the Grant box next to the Moderate Comments option.

Add capability

Don’t forget to click on the ‘Update’ button to save your changes after you are done modifying a user role.

You can now create a new user account with that particular user role and log in to make sure that your customized permissions are working as you intended.

Adding A New User Role with Custom Permissions

The plugin also allows you to create custom user roles where you can select which permissions and capabilities the role would give to the users.

Let’s suppose you have a ‘Movies’ custom post type on your website and you want some users to be able to add movie reviews there. However, you don’t want them to edit any other section.

To do this you’ll need to create a custom user role.

Simply go to Members » Add New Role page. First, you need to provide a title for the custom user role.

New custom user role

After that, you can switch to the section where you want to grant the user the capabilities. For instance, we have a section called Movies for our custom post type on our test site.

There you can give users the permissions to edit and publish content for that post type.

After that, you can review other sections too and see if you want to give users capabilities to do anything else on your site.

Once you are finished, don’t forget to click on the Add Role button to save your changes.

You can now add a new user to your website and assign them the custom user role you just created.

User with custom role

After that, you can log in with that new user account to make sure that everything is working fine. Here is what our custom user role dashboard looked like:

Custom user role dashboard

Securely Managing User Accounts in WordPress

Customizing WordPress user roles and permissions allows you to control user access to the admin area of your WordPress website.

However, it also opens up your site to hacking attempts and vulnerabilities. Following are a few things that you can do to make sure that only users with access can securely log in to your WordPress website.

1. Enforce Strong Passwords

WordPress includes a strong password generator by default, but users can skip it. You can add a password policy manager to ensure all users are using a strong password.

2. Enforce Two-Step Authentication

Two-step authentication asks users to enter a one-time code to login to their account in addition to their password. Users can generate this code via an authenticator app on their computers or phone.

For more details, see our guide on how to add two-step authentication in WordPress.

3. Install a WordPress Security Plugin

WordPress security plugins help protect your website by monitoring it for suspicious activity and login attempts. We recommend using Sucuri, which is the best WordPress security plugin on the market.

We hope this article helped you learn how to add or remove capabilities to user roles in WordPress. You may also want to see our guide on how to get a free email domain, or our comparison of the best business phone services for small business.

If you liked this article, then please subscribe to our YouTube Channel for WordPress video tutorials. You can also find us on Twitter and Facebook.

The post How to Add or Remove Capabilities to User Roles in WordPress appeared first on WPBeginner.


from WPBeginner https://ift.tt/39KO6nR
More links is https://mwktutor.com

Tuesday 28 September 2021

How to Send WordPress Emails Using Amazon SES (Step by Step)

Are you having trouble sending emails from your WordPress site?

One easy way to improve WordPress email reliability is by using the Amazon Simple Email Service, or Amazon SES.

In this article, we will show you step by step how to send emails from your WordPress site using Amazon SES.

How to Send WordPress Emails Using Amazon SES (Step by Step)

Why and When You Need Amazon SES for WordPress Emails

All too often we hear that users have trouble sending emails from their WordPress website. That’s a problem because you rely on email to keep your website running smoothly.

For example, your site relies on email to reset lost passwords, or send notifications when new users register or someone fills in your contact form.

By default, WordPress uses the PHP mail function to send out emails. However, this function doesn’t always work as expected. That’s often because WordPress hosting companies block it to prevent abuse and spam.

Also, spam filters on popular email service providers check incoming emails to verify the sender. Default WordPress emails fail this check and sometimes may not even make it to the spam folder.

SMTP (Simple Mail Transfer Protocol) is the industry standard for sending email. Unlike the PHP mail function, SMTP uses proper authentication, which increases the chances your emails will be successfully delivered.

Amazon SES is an SMTP service designed for business email. It’s a good solution for sending WordPress notification emails to just you and your team, and also sending email newsletters to large mailing lists.

The service is free for the first year. After that, you may need to pay as you go, depending on the number of emails you send and other factors. You can get an idea of what it will cost you on the Amazon SES pricing page.

In this tutorial, we’ll show you how to send email to the Amazon SES service from your WordPress website using the WP Mail SMTP plugin.

Editor’s Note: we believe that Amazon SES is a bit complicated for beginners. This is why we generally recommend users to use SMTP.com or Sendinblue which both works with WP Mail SMTP plugin as well.

Configuring Your Amazon AWS Account

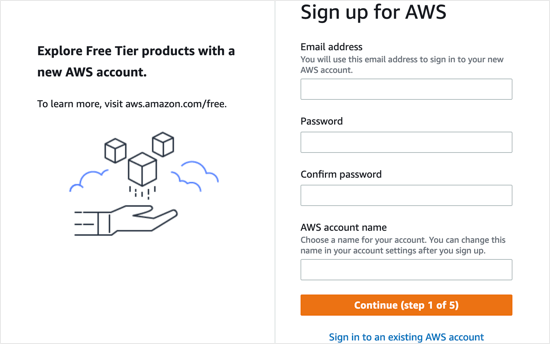
First, you’ll need to sign up for a free account by visiting the Amazon Web Services website. While the account is free, you will need to enter credit card details when setting up the account.

You’ll Need to Sign Up for a Free Account with Amazon Web Services

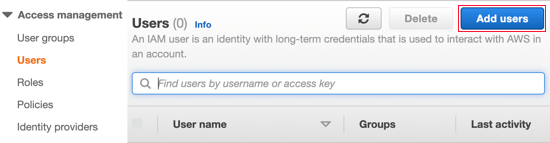
Once you’ve created an AWS account, you’ll need to set up a User. This will provide you with access keys needed later.

To do that, you need to open the Amazon Web Services Users page. Within this page, you need to click the ‘Add users’ button.

Click the Add Users Button

Next, you need to set up a new user. In the User name field, you can add any name you’d like, but we recommend you use the format yourdomain_wpmailsmtp.

This will be helpful in the future if you create additional users for other websites. You’ll know at a glance which website each user is for, and that it’s used by the WP Mail SMTP plugin.

You Need to Set Up a New User

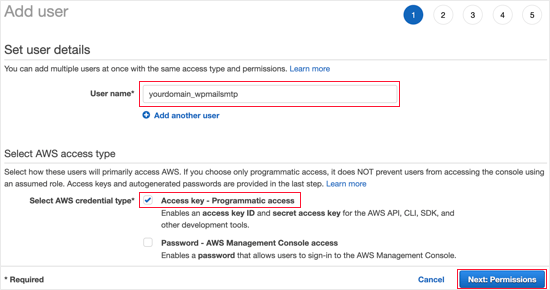
You will also need to select the AWS credential type. You should click the checkbox next to ‘Access key – Programmatic access’.

Once you’re finished, you can click the ‘Next: Permissions’ button at the bottom of the screen.

You’ll now see the ‘Set permissions’ screen. You need to click on the third option, ‘Attach existing policies directly’.

You’ll Now See the 'Set Permissions' Screen

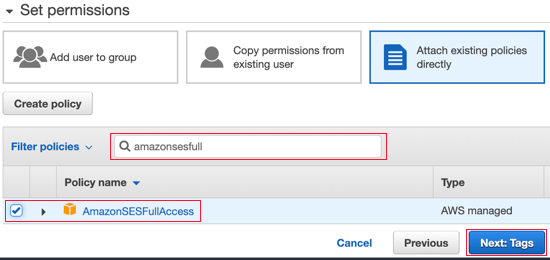
Then you should type ‘AmazonSESFullAccess’ into the search bar to filter the list. Now just one policy should be listed. Make sure you click the checkbox on the left of that policy.

After that, click on the ‘Next: Tags’ button at the bottom of the screen. We don’t need to change any settings on the ‘Add tags’ page, so just click the ‘Next: Review’ button and you’ll be taken to the Review page.

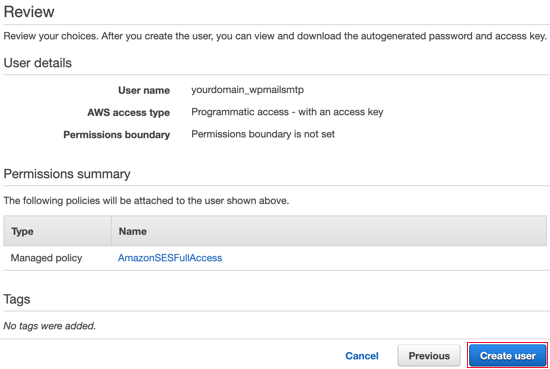
Once there, you can see all of the details you’ve chosen for this user. If everything looks correct, then simply click on the ‘Create user’ button.

You Can See All of the Details You’ve Chosen for this User

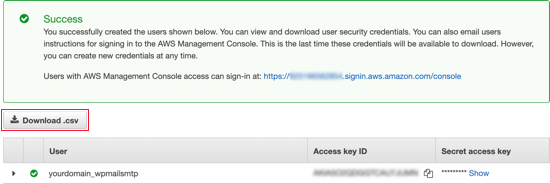
You will now see a message that you successfully created the user. You will also see an Access Key ID and Secret Access Key for your user.

You’ll need these later in the tutorial, so you should make a copy of them in a safe location or simply download the CSV file. Alternatively, just keep this browser window open so you can come back to it later.

You Will Now See a Message that You Successfully Created the User

Switching Amazon Web Services to Production Mode

By default, your Amazon SES account will be run in Sandbox Mode. This limited mode will only allow you to send emails to verified email addresses and is designed to stop spammers from abusing the system.

If you want to send emails to anyone, then you’ll have to make a request to move from Sandbox Mode to Production Mode. The first step is to visit the AWS Support page for creating a new case.

First you’ll need to log in as the user you just set up. Once you’re on the ‘Create case’ page, you’ll need to click on the second option, ‘Service limit increase’.

Click on the Second Option, ‘Service Limit Increase’

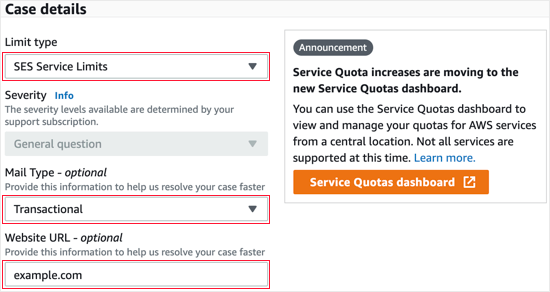
Next, you will need to fill in the case details. Amazon will use your answers to make sure that you won’t be sending spam emails.

You should leave the limit type as ‘SES Service Limits’ and select ‘Transactional’ as the mail type. In the Website URL field you should type in your site’s address.

Case Details

The next section is labeled ‘Describe, in detail, how you will only send to recipients who have specifically requested your mail’. Here you should share some details about your email sending process.

For example, you could say that you are only sending site notifications to the site administrator, or sending mail only to those who have filled out a form on your site.

Case Details

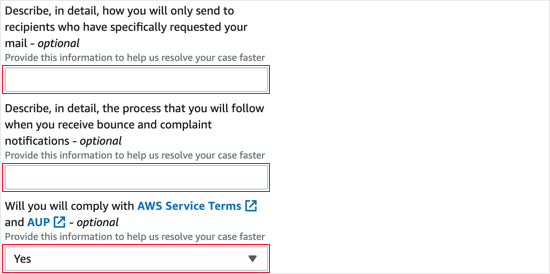
Then you are asked to ‘Describe, in detail, the process that you will follow when you receive bounce and complaint notifications’. For example, you can explain that the ‘Force From Email’ setting in WP Mail SMTP will send all bounce notifications to a specified email address.

When asked whether you will comply with the AWS terms of service, you should answer ‘Yes’.

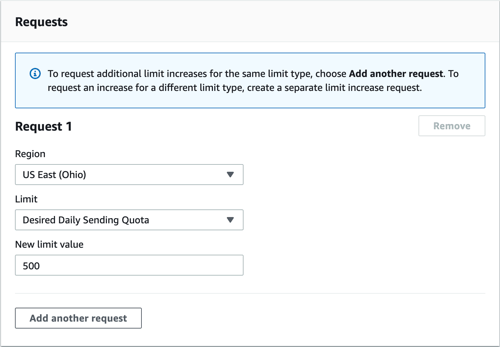
Next, you should scroll down to the Requests section. Start by selecting the same region as when you set up your AWS account. This will be the region closest to where your site’s server is located.

For the limit field, you should select ‘Desired Daily Sending Quota’ from the drop down menu. After that, under ‘New limit value’ you should type in your estimate of the maximum number of emails you expect to send in a day.

Select ‘Desired Daily Sending Quota’ From the Drop Down Menu

The last section on the page is ‘Use Case Description’. Here you should share details of the kind of website you have and why you will be sending emails.

Make sure you include the types of emails that will be sent, such as confirmations of form submissions, purchase receipts, or newsletters. A more detailed response here may give your application a greater chance of success.

Use Case Description

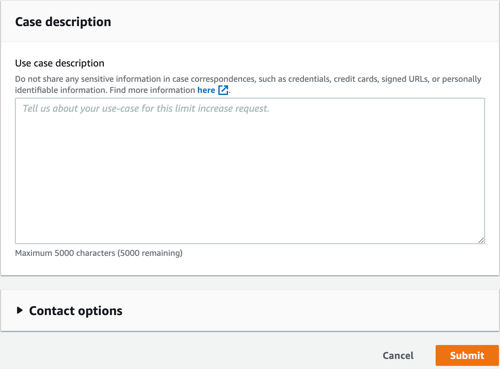
Once you have completed the application, go ahead and click the Submit button. You’ll get two emails from Amazon Web Services confirming that a new case has been created.

You should receive a decision from Amazon within one business day. But in the meantime, you can continue with this tutorial.

Installing WP Mail SMTP on Your WordPress Website

WP Mail SMTP is the best SMTP plugin for WordPress. You will need to buy a Pro plan or higher to use Amazon SMTP. This also gives you access to premium support and white glove set up by one of their experts.

If you’d like to have the WP Mail SMTP support team set this up for you, you can follow their guide on how to request white glove set up for SMTP instead of following the steps below.

First, you’ll need to install and activate WP Mail SMTP on your website. For more details, check out our guide on how to install a WordPress plugin.

Installing WP Mail SMTP

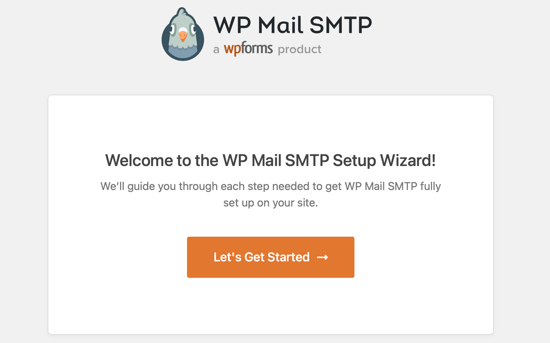
On activation, the WP Mail SMTP setup wizard will start automatically. You’ll need to click on the Let’s Get Started button.

WP Mail SMTP Setup Wizard

Next, you’ll be shown a list of email services that are supported. Here you need to select Amazon SES and then click on the ‘Save and Continue’ button.

Select Amazon SES

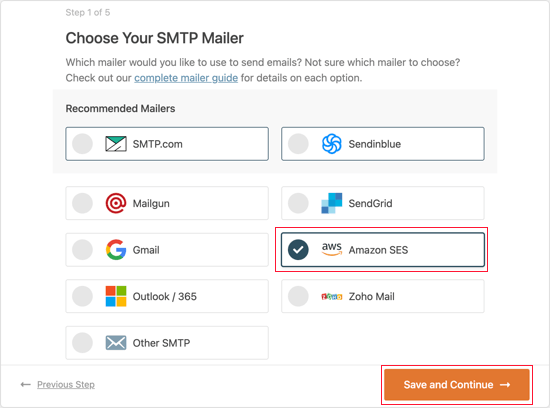
You will see a message explaining that Amazon SES is a good choice for technically advanced users. You should click the ‘I Understand, Continue’ button to dismiss the message.

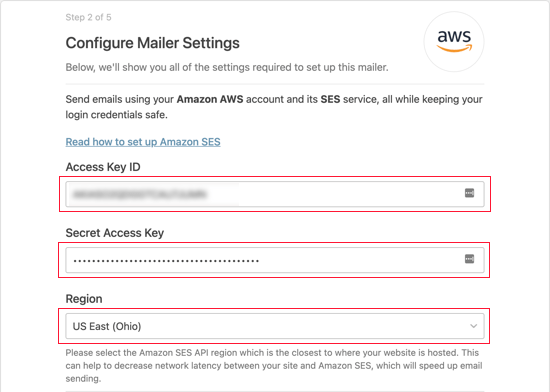
After that, you’ll be asked to configure your mailer settings. You’ll need to fill in the Access Key ID, Secret Access Key, and Region fields with the information you copied earlier when you created an Amazon AWS account.

Fill in the Access Key ID, Secret Access Key, and Region Fields

Now you need to scroll down to the SES Identities section. Here you can choose to verify either your domain or email address.

Verifying Your Domain

The benefit of verifying by domain is that it will verify any email address that uses that domain. Verifying an email address is easier, but then you will have to verify every email address you wish to use separately.

To verify your domain name on Amazon SES, you need to make sure the Verify Domain option is selected. After that, you should type in the domain name you used when signing up for Amazon AWS.

Verify Your Domain Name on Amazon SES

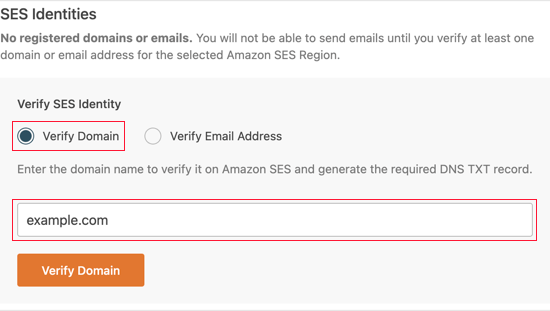
Once you’ve entered the domain name, you need to click the Verify Domain button. You will be given a name and value to add to a new TXT record in your domain’s DNS settings.

Verify Domain TXT Record

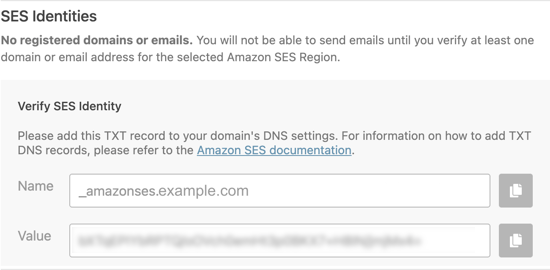
For instructions on how to create a TXT record to your site’s DNS settings, see our DNS guide

After you have successfully verified your domain, you should return to your site’s WP Mail SMTP settings and then refresh the page. Any verified domains will now be displayed.

You can now skip the ‘Verifying Your Email’ section below and move on to ‘Setting Up the From Name and Email’.

Verifying Your Email

If you only plan on using a single email address with WP Mail SMTP, then verifying your email address is a good choice.

First, you need to click on the Verify Email Address option and then you should type the email address you plan to use in the field provided.

Verify Email Address

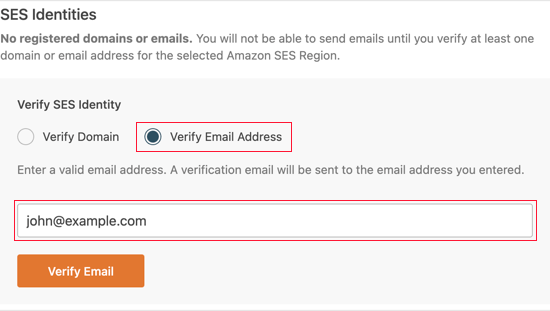
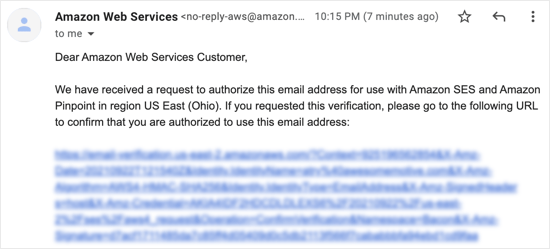
Once you’ve entered the email address you need to click the Verify Email button. You will see a notice asking you to check your email inbox for a confirmation email.

This email will be sent from Amazon Web Services and will include a verification link. You must click this link within 24 hours in order to verify this email address.

Check Your Email Inbox for a Confirmation Email

After you’ve successfully verified your email, you can return to your site’s WP Mail SMTP settings and refresh the page. Any verified email addresses should be displayed.

Setting Up the From Name and Email

Now you should scroll down to the final section of the page where you can enter the ‘From’ name and email address.

You need to type a name in the From Name field. This is the name associated with the emails you send and will be set to your site’s name by default.

You can change this to any name, such as your business name or personal name. You can also check the Force From Name option to apply this setting site-wide.

Type the From Name and From Email

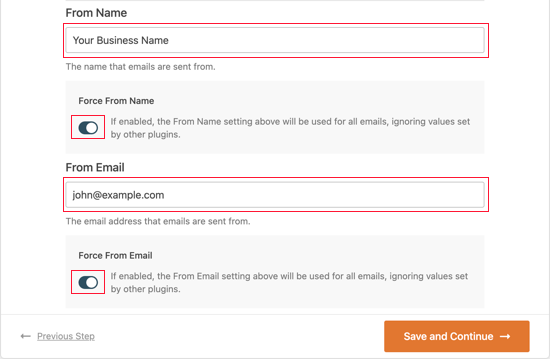
You can enter any verified email address into the From Email field. For best results, we recommend that you use a business email address with your site’s domain such as example@yourwebsite.com.

We recommend you check the box labeled Force From Email. This means you’ll automatically use the same outgoing email address across your WordPress site.

This option will save you the trouble of editing the email settings throughout your site and makes it less likely that your emails will go to spam.

Once you’ve finished entering the settings, you can click the Save and Continue button.

Enabling WP Mail SMTP Features

Finally, you will be asked which email features you wish to enable. By default, the first three options are enabled. These are improved email deliverability, email error tracking, and a weekly email summary.

You Will Be Asked Which Email Features You Wish to Enable

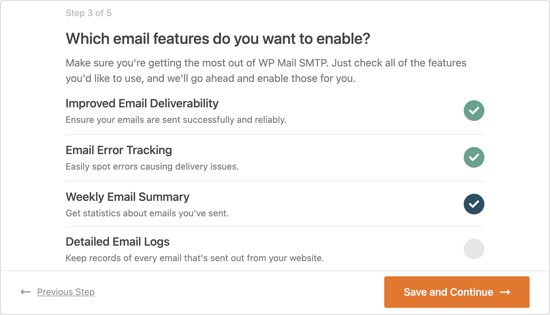
If you like, you can enable detailed email logs as well. Once you have made your selection, you should click the Save and Continue button.

Entering Your WP Mail SMTP License Key

Finally, you need to enter your WP Mail SMTP license key. You were sent this key by email when you signed up for your WP Mail SMTP Pro account.

You can also find your license key by clicking ‘View License Key, Details, and Downloads’ from the Account Page on the WP Mail SMTP website.

Enter Your WP Mail SMTP License Key

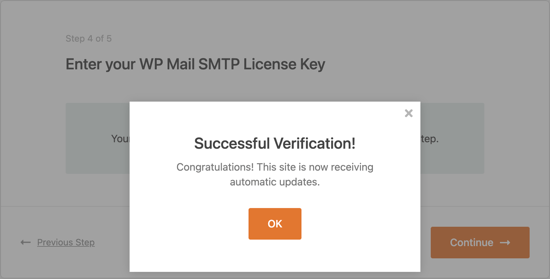
Once you’ve entered your license key you should click the Verify License Key button. You should see a success message. Simply click OK to acknowledge the message and then click on the Continue button.

You Should See a Success Message

WP Mail SMTP will now check your mailer configuration. If everything is working as expected, then you’ll see a screen with the message ‘Congrats, you’ve successfully set up WP Mail SMTP!’

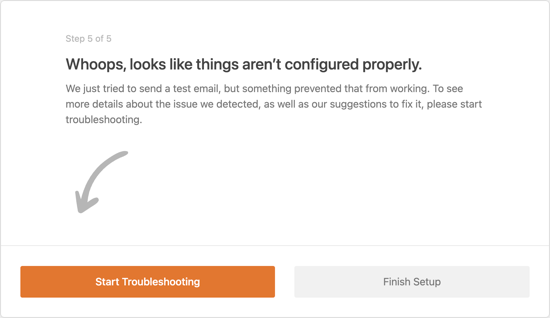
If there is something wrong, then you’ll see a message that says ‘Whoops, looks like things aren’t configured properly’. You will need to click the Start Troubleshooting button to fix the error.

Click the Start Troubleshooting Button

Sending a Test Email

Once you’ve finished troubleshooting, you might like to send out another test email to make sure everything is working correctly.

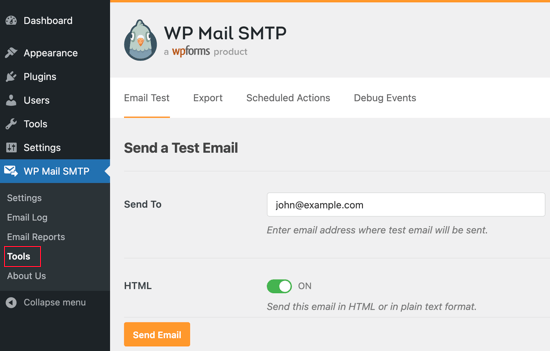
You’ll need to navigate to WP Mail SMTP » Tools and then click on the ‘Email Test’ tab. By default, the test email will be sent to your site’s admin email address, but you can change this. Next, click ‘Send Email’.

Send a Test Email

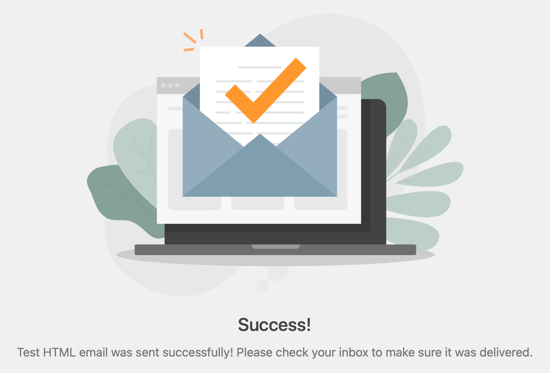
If everything has been set up correctly, then you should see a Success! message.

You Should See a Success! Message

That’s it! We hope this tutorial helped you learn how to send WordPress emails using Amazon SES. You may also want to learn how to get a free SSL certificate for your WordPress website or check out our list of must have WordPress plugins.

If you liked this article, then please subscribe to our YouTube Channel for WordPress video tutorials. You can also find us on Twitter and Facebook.

The post How to Send WordPress Emails Using Amazon SES (Step by Step) appeared first on WPBeginner.


from WPBeginner https://ift.tt/3CQZpHM
More links is https://mwktutor.com