Do you want to add Google Maps store locator in WordPress? A store locator is a map pointing to your business location.
It allows users to locate you on the map, find driving directions, or share the location with friends. Adding a store locator to your business website or even an online store helps you instantly earn user trust.
In this article, we will show you how to easily add Google Maps store locator in WordPress.
Google Maps introduced a paid API to display maps on websites. They still offer a limited free option to embed Google maps on small websites.
Most Google Maps plugins for WordPress use the Google API to retrieve and display maps. If you want to use a Google Maps plugin, then you will need to sign up with Google API platform and enable billing option.
It is a pay as you go service, which means you will be charged based on the number of API calls made from your website.
We will show you both free and paid methods with their pros and cons, then you can choose the one that best suits your needs.
Method 1. Adding Google Maps to Your Website for Free
This method is easier and free. The disadvantage is that you cannot show multiple stores on a single map.
It is recommended for users who just want to add a single Google Maps store location on their website.
First, you need to visit the Google Maps website on your computer. Next, enter your store’s address in the search field and Google Maps will show it on the map with a pinned marker on the map.
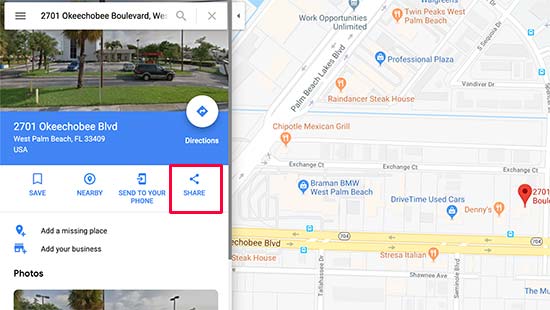
Make sure that the marker is placed on the correct location. You can select a zoom level by clicking the zoom button. Once you are satisfied with the zoom level, you need to click on the share button from the left column.
This will bring up a popup where you need to switch to the ‘Embed a Map’ tab. You will now see your searched location on the map with an HTML code.
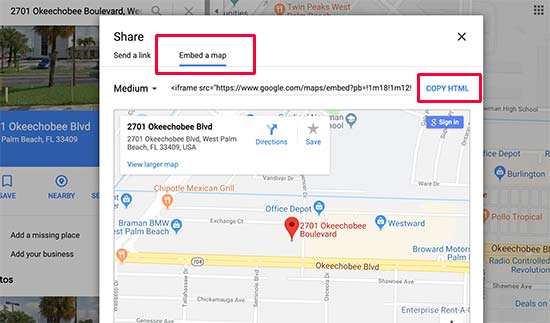
Click on the Copy HTML link to get the embed code.
Now head over to the admin area of your WordPress website. Once in the admin area, go ahead and edit the post or page where you want to display the store location map.
Normally, users add a store location map on their contact form page with their phone number and opening hours.
On the post edit screen, you need to add a custom HTML block.
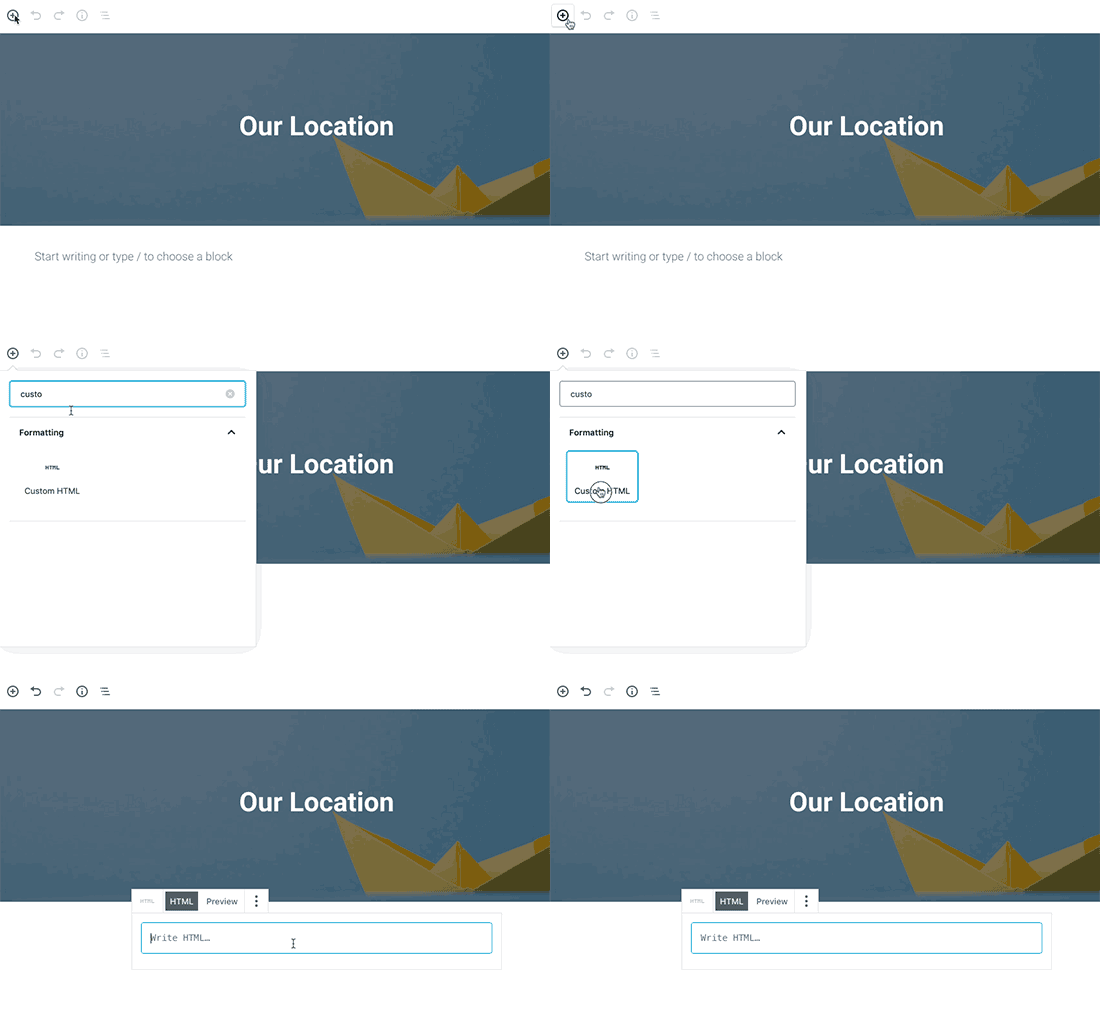
In the text area of custom HTML block, you need to paste the code you copied from Google Maps.
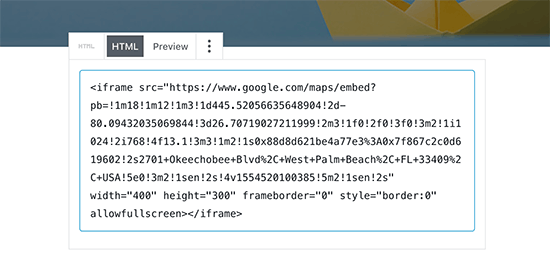
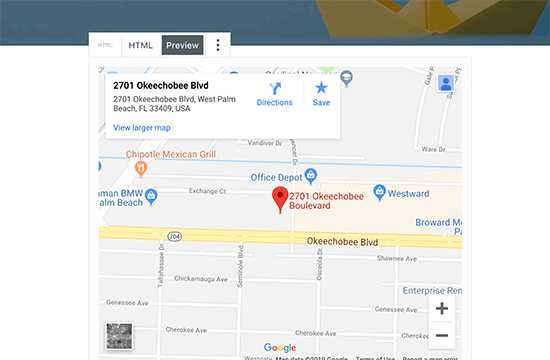
You can now switch to the preview tab to see Google Maps embedded into your page. It will show your store location marked on the map with links to directions or to save the location.
Method 2. Add Google Maps Store Locator Using a WordPress Plugin
This method is recommended for users who want to show multiple store locations on a Google Map.
The first thing you need to do is in install and activate the WP Store Locator plugin. For more details, see our step by step guide on how to install a WordPress plugin.
It is a free Google Maps plugin that allows you to create a custom map with multiple store locations and custom fields.
The disadvantage of this method is that it requires you to add an API key. You will need to provide your billing information to use the API key. For pricing and other information, please check out the Google Maps Platform website.
Ready, let’s get started.
Step 1. Generating Google Maps API keys
To use WP Store Locator plugin, you will need to generate two API keys. The first one is called the Browser API key and the second one is called the Server Key.
Let’s start with the Browser key first. Click on this Google Developer Console link and it will take you to the Google API website with all the required APIs enabled.
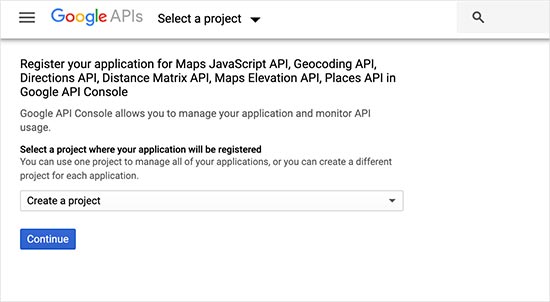
You need to create a new project and give it a name that helps you identify the project. After that, you will have to wait a few moments as the console creates the project for you.
Next, you will be redirected to the API key configuration page. You need to provide a title for your API key, so you can easily identify it as the browser api key for your Google Maps project.
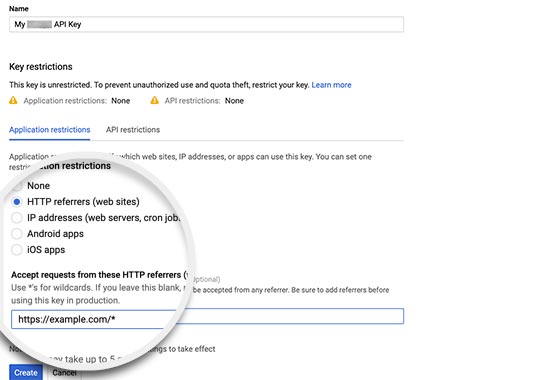
Next, you need to set ‘Application Restrictions’ to ‘HTTP Referrers’. Below that you need to set the ‘Accept requests from’ field to your domain name in the following format.
https://example.com/*
https://*.example.com/* (if you are using a subdomain)
Finally, click on the ‘Create’ button. The console will now save your settings and will show you the Browser key. You need to copy and paste this key in a text editor, you will need it later.
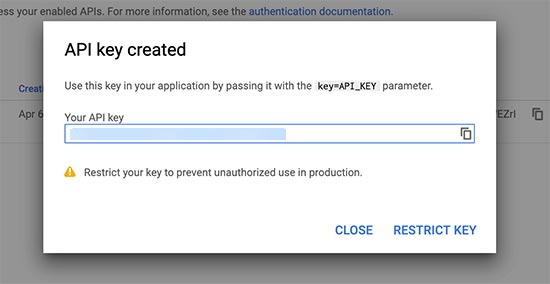
Next, you need to create the server API key. Click on this Google Developer Console link and it will take you directly to the console with selected APIs enabled.
You will once again see the create project page. However since you have already created a project, you can just click on the drop-down menu and select your project.
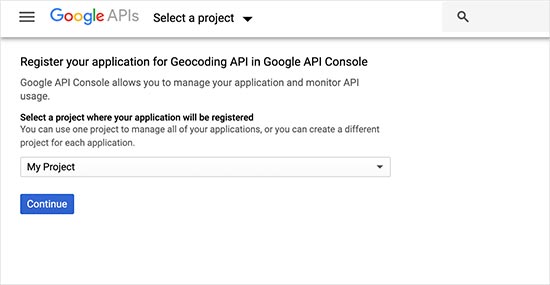
You will be then redirected to API configuration page. Provide a name for this API key that helps you recognize it as Server key.
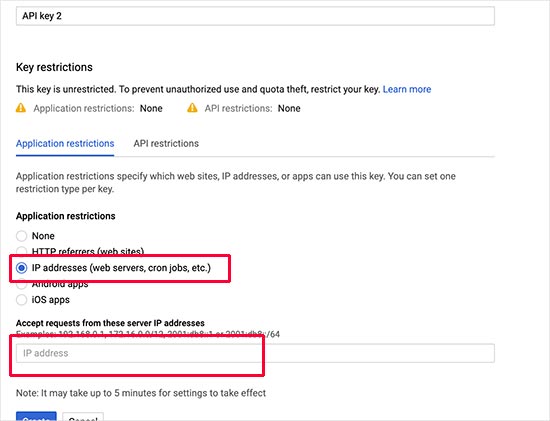
Under the ‘Application restrictions’ section, you need to select IP Addresses. Basically, we are telling Google to only accept server requests coming from specific IP addresses.
Now you would need to ask your WordPress hosting provider to tell you the IP range used by your hosting account. It would be in the following format:
172.16.0.0/12
After that, you need to click on the ‘Create’ button to save your settings and copy the Server API key.
Step 2. Setting up the WP Store Locator Plugin
Once you have created your API keys, you need to head over to Store Locator » Settings page to set up the plugin.
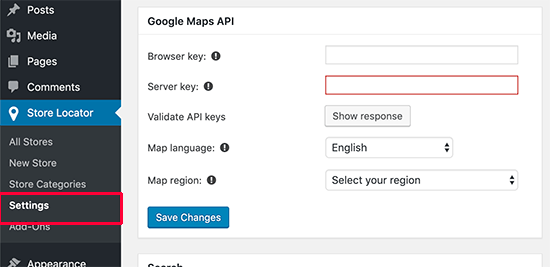
Enter the Google Maps browser and server API keys you generated earlier. Next, select Maps language and region and then click on the save changes button to store your settings.
Now, you need to scroll down on the settings page to the ‘Map’ section and enter a start point of the map. This start point could be a city or a country, so users can see markers placed at different locations.
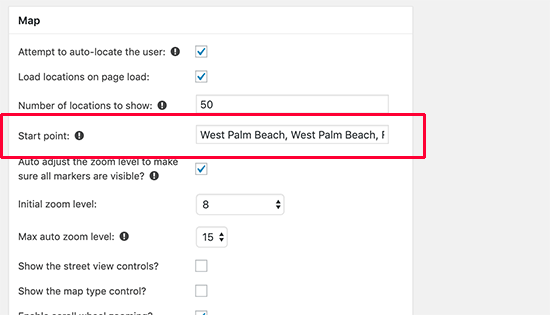
There are many other options on the settings page including map style, default zoom level, map type, search radius, country, etc. You can review them and adjust them to your needs.
Once you are done, it is time to add locations.
Step 3. Adding store locations
Head over to Store Locator » New Store page to add your first location. The New Store page will look just like the default post or page editor in WordPress.
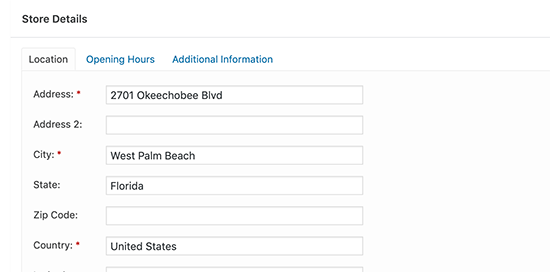
Provide a title for your store and then scroll down to ‘Store details’ section. From here, you need to enter your store address.
You will see a map in the right column, however it will not automatically update to the address you have entered. You will need to click on the Publish button to save your location. After that, refresh the page and the map will point to the address you provided.
Now repeat the process to add other store locations. You can add as many store locations as you want.
Step 4. Adding the store locator map in WordPress
To display your store locator on a WordPress page, simply create a new page or edit an existing one where you want to display the map.
On the post edit screen, you need to add the ‘Shortcode’ block to your post edit area. After that add the [wpls] shortcode inside it.
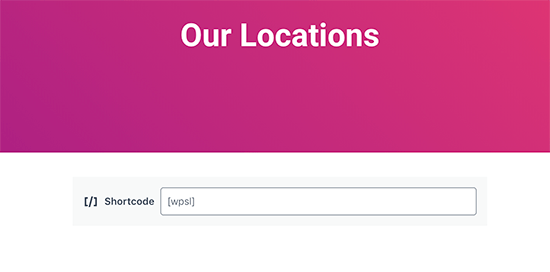
You can now save or publish your page and click on the preview button to see Google Maps store locator in action.
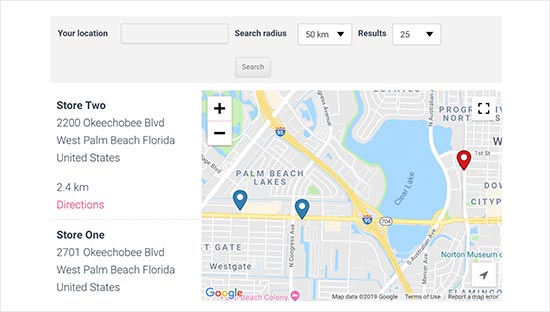
It will show your map markers for each store location and start the map from your preferred starting point. For example, in this map, it is focused on the city of West Palm Beach and showing two store locations on the map.
That’s all we hope this article helped you learn how to add Google Maps store locator in WordPress. You may also want to see our list of free Google Tools every site owner should use.
If you liked this article, then please subscribe to our YouTube Channel for WordPress video tutorials. You can also find us on Twitter and Facebook.
The post How to Add Google Maps Store Locator in WordPress appeared first on WPBeginner.
from WPBeginner http://bit.ly/2UkNu3f
More links is https://mwktutor.com
No comments:
Post a Comment