The ‘Avoid an excessive DOM size’ warning can appear in Google Lighthouse or other website speed testing tools. It basically means your website has too many elements, which can slow down loading times and frustrate visitors.
Luckily, there are a few things you can do to reduce the DOM size and improve your WordPress performance. We have tried out a bunch of methods to speed up our own websites, so we know what actually makes an impact on WordPress performance.
And in this article, we will show you our tried and tested ways for how to fix an excessive DOM size in WordPress.
What Does the ‘Avoid an Excessive DOM Size’ Warning Mean?
Ever run a website speed test on your WordPress site and come across a warning called ‘Avoid an excessive DOM size’?
This warning pops up in speed testing tools like Google Lighthouse, Google PageSpeed Insights, or GTMetrix. It indicates that your website has too many elements, which can slow down its loading speed.
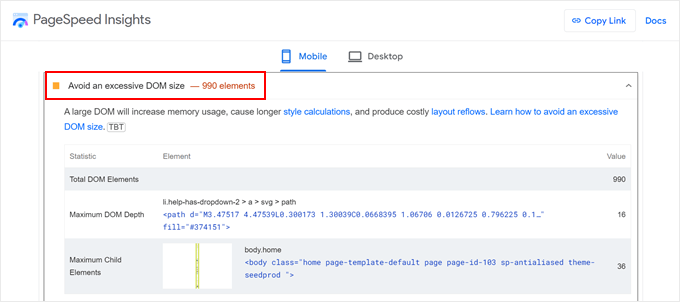
But what exactly is DOM, and why does its size matter? Let’s break it down.
DOM stands for Document Object Model. Think of your WordPress site as a big tree structure. Each element on your page, like text headings, images, menus, and buttons, is like a branch or a leaf on this tree. These individual elements are called DOM nodes.
The total number of nodes in your website’s tree structure is its DOM size. The more elements you have on your page, the larger the DOM tree becomes.
For instance, a simple page with just a heading and a paragraph might have a smaller DOM size compared to a complex page with multiple sections, images, contact forms, and embedded content.
How Does Excessive DOM Size Affect Website Performance?
A large DOM size can negatively impact your WordPress website’s performance in a few ways.
Think about how you create a new page in WordPress. You might add elements like headings, paragraphs, images, galleries, forms, buttons, and social media icons. Each of these elements translates to a DOM node in the tree structure.
While each element individually might seem small, the total number can quickly add up, creating an excessive DOM size.
If your DOM nodes keep increasing, the browser will take longer to read, understand, and load the structure of your website. This is because a complex DOM structure requires more memory usage and processing power from the user’s device to display the page.
All of this leads to slower loading times, which can frustrate visitors and cause them to bounce off your site before they even see your content.
These days, users expect websites to load quickly. A slow-loading website can be like waiting in a long line – it discourages people from sticking around.
Plus, search engines like Google prioritize websites that offer a good user experience, including fast loading speeds. So, an excessive DOM size can indirectly hurt your WordPress SEO and, ultimately, website conversions.
How Many DOM Elements Are Too Many for Google?
While there’s no strict limit set in stone, Google Lighthouse and other testing tools flag websites with an excessive DOM size. Here’s a breakdown of what these flags might indicate:
- Warning: Google Lighthouse flags a warning when the body element of your page has more than approximately 800 nodes.
- Error: If the body element reaches over 1,400 nodes, Lighthouse throws an error.
Let’s put this in context to understand what kind of websites might fall into these categories.
Without proper optimization, a single page with text content, images, a navigation menu, basic layout elements, and multiple plugins for forms or social sharing could easily reach around 800 nodes.
On the other hand, pages exceeding 1,400 nodes are likely more complex and might include a higher number of elements. These can include multiple sliders or carousels with large images, elaborate layouts with many nested elements and sections, or multiple embedded content.
These are just general examples. Don’t let these illustrations scare you from building a custom website the way you want to. That said, if you want to make sure people stay on your site, then you will need to avoid excessive DOM size.
Thankfully, we’ve put together a comprehensive guide for you to reduce DOM size in WordPress. You can use the quick links below to learn more about a DOM performance optimization method:
- Use a WordPress Speed Optimization Plugin
- Check Your Theme and Plugins
- Use an Optimized Page Builder
- Optimize Your Images and Videos
- Implement Lazy Loading
- Paginate Comments or Posts With Lots of Content
- Minify CSS and JavaScript Files
- Reduce Render-Blocking JavaScript and CSS
- Enable WordPress Caching
- Use a WordPress CDN
- Optimize Your WordPress Database
1. Use a WordPress Speed Optimization Plugin
Our first recommendation is to install a powerful WordPress speed optimization plugin. These plugins are designed to analyze your website and make it faster in different ways.
A speed optimization plugin can take care of the technical stuff needed to speed up your website. This way, you can focus on managing and creating your content.
Here at WPBeginner, we recommend using WP Rocket. We actually use it ourselves on the WPBeginner website, which you can learn more about in our article on how we boost page load speed on WPBeginner.
While WP Rocket is primarily known as a caching plugin, it has many features that can help with DOM size as well. These features include file optimization, lazy loading, and deferring JavaScript.
We’ll explain all these features in more detail later in the article. You can also read our WP Rocket review for more information.
But for now, using a speed booster plugin like WP Rocket is a great first step towards fixing DOM size and making your website faster, even if you are new to WordPress.
You can read our WP Rocket installation and setup guide to get the plugin up and running.
2. Check Your Theme and Plugins
While WordPress plugins and themes are great for adding functionality and style to your WordPress website, they can sometimes contribute to an excessive DOM size.
First, not all themes and plugins are created equal. Poorly-coded plugins and themes can result in a bloated HTML document with unnecessary elements. This can significantly increase your DOM size.
WordPress themes and plugins often come with extra features that you may not need. These can add unwanted elements to your website’s structure, even if you are not actively using them.
By taking a closer look at what’s installed on your website, you can identify potential culprits contributing to DOM size.
If you think a particular theme or plugin might be causing issues, try temporarily switching to a default WordPress theme or deactivating plugins one at a time.
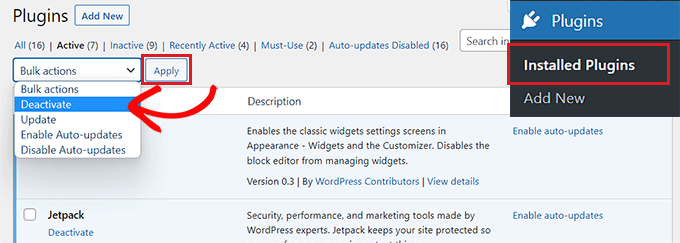
Then, see if the DOM size warning disappears in speed testing tools after making these changes. This can help you pinpoint the problematic element.
When choosing themes and plugins, you will want to stick with reputable sources like the WordPress directory or well-known developers. These resources have strict coding standards, reducing the chance of bloated code that could harm your website’s performance.
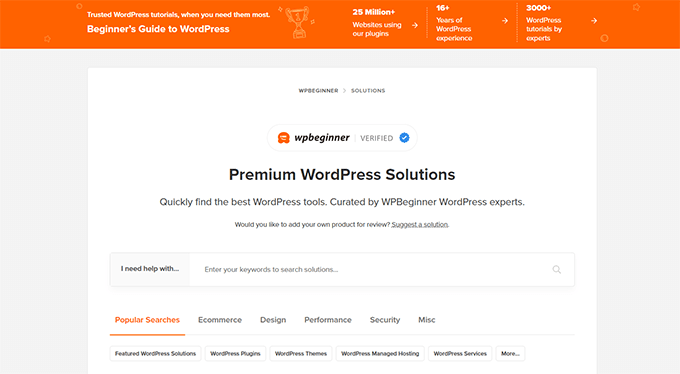
If you want to get trusted plugin and theme recommendations, then check out WPBeginner Solution Center. This is where we test, review, and recommend WordPress software. We only recommend solutions that we know will be helpful for our readers.
3. Use an Optimized Page Builder
Page builder plugins are WYSIWYG editors that are used for creating beautiful and functional WordPress websites without needing to code. However, some of these tools can actually contribute to an excessive DOM size.
One reason is that they often use additional HTML elements, like div tags with custom classes or attributes, to style your content and control its layout. While these elements allow for flexibility, they can also add a lot of bloat.
Plus, built-in blocks or widgets, like sliders or interactive elements created with a page builder, are often built using specific HTML structures.
Many page builders also rely on shortcodes to insert their functionalities. While these shortcodes might not be visually displayed on your website, they can add extra code to your DOM behind the scenes.
If you think your page builder might be contributing to DOM size issues, you can test this theory on a staging site. Try deactivating your page builder and see if the warning disappears in website speed testing tools. This can help you determine if it’s the root cause.
If you decide to not use your old page builder anymore, then you can use one of the built-in WordPress tools to design your website (like the Full-Site Editor or Theme Customizer).
They offer control over your website design without needing a separate plugin. They also typically have a smaller impact on DOM size.
That said, these tools are not the most flexible. In this case, we recommend using an optimized page builder like SeedProd.
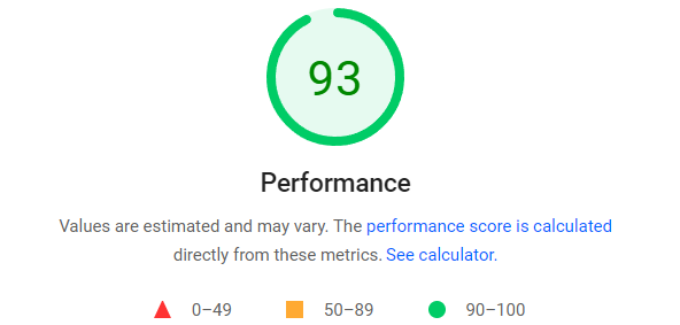
Here at WPBeginner, we’ve tested various page builders, and SeedProd has shown faster performance (93 on PageSpeed Insights) compared to competitors like Divi (91) and Elementor (90).
You can read more about it in our Elementor vs. Divi vs. SeedProd review.
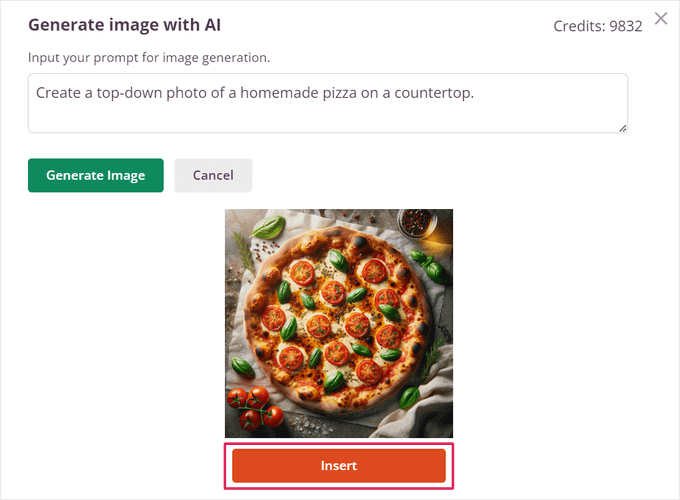
Beyond performance, SeedProd also has 350+ professional theme template kits, integrations with popular email marketing tools, and an AI assistant to help speed up your website-building process.
4. Optimize Your Images and Videos
Unoptimized images and videos can have big file sizes. These large files can contribute to DOM size because they become extra elements the browser needs to process.
Optimizing your images can significantly reduce their file size without sacrificing quality. This helps your website load faster and improves the overall user experience.
A plugin like Optimole can be a great solution for optimizing your images. Optimole is designed to work out of the box, automatically optimizing your website’s images as you upload them.
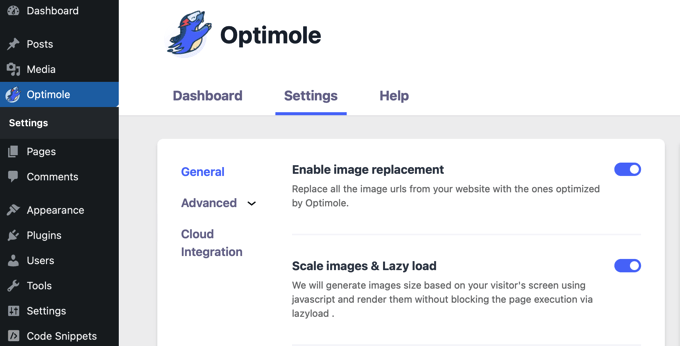
You can also fine-tune its settings to adjust the compression quality or resize images that exceed a certain size, further reducing their file size and DOM footprint.
If you don’t want to use too many plugins, you can use free online tools like TinyPNG to compress your images before uploading them to your WordPress website.
For an in-depth guide on image optimization, check out our article on how to optimize images for web performance without losing their quality.
When it comes to videos, we don’t recommend uploading them directly to WordPress. Large video files can significantly slow down your website’s loading time.
A better approach is to use a video hosting service like YouTube or Vimeo. These services handle storing and streaming your videos, taking the load off your website’s server, and reducing DOM size.
You can then embed the videos directly into your pages using embed codes provided by the hosting service.
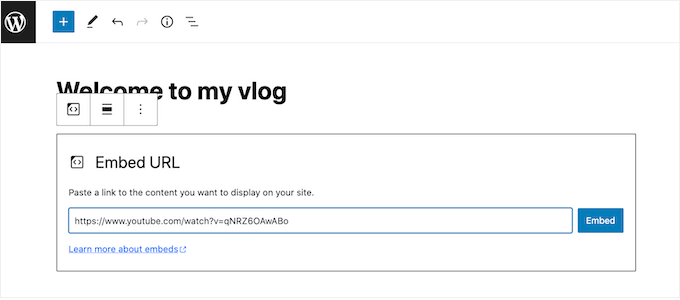
We have another helpful article on how to optimize videos for your WordPress site that dives deeper into video optimization strategies.
5. Implement Lazy Loading
When you open a long web page with lots of content, all of these elements will normally load at once. This process can take a while, especially on slower internet connections.
Lazy loading takes a smarter approach. It delays the loading of non-critical elements, like images and videos. They will only be loaded when they are actually needed by the user as they scroll down the page.
This means the essential content that appears first (like text and layout) loads faster. In turn, this results in a quicker initial page load and a smoother user experience.
Setting up lazy loading is easy, especially if you’re already using a WordPress speed optimization plugin like WP Rocket.
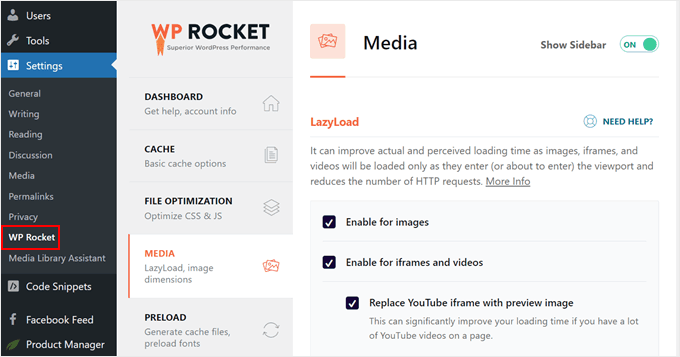
Simply navigate to Settings » WP Rocket in your WordPress dashboard. Then, click on the ‘Media’ tab.
Here, just check off all the options for enabling lazy loading for images, videos, and iFrames.
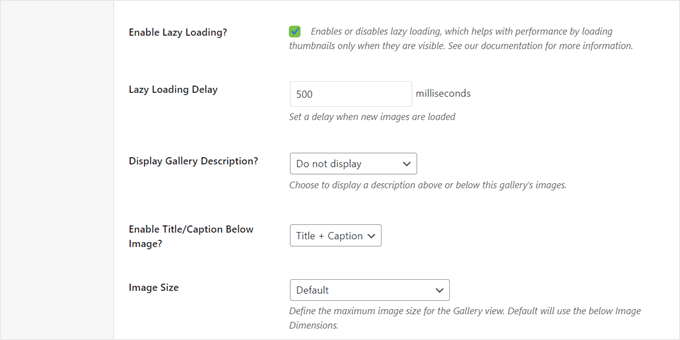
If you want to display an image gallery, then we recommend using a gallery plugin with a lazy loading feature.
Envira Gallery is a great example of this. Besides lazy loading, you can set a specific time delay for when the images are loaded.
Additionally, you can lazy load your comments section.
For this, you can use Thrive Comments, which offers features to optimize WordPress comments.
After the plugin is active, go to Thrive Dashboard » Thrive Comments. Then, open the ‘Advanced Settings’ tab and go to the ‘Page speed optimization’ section.
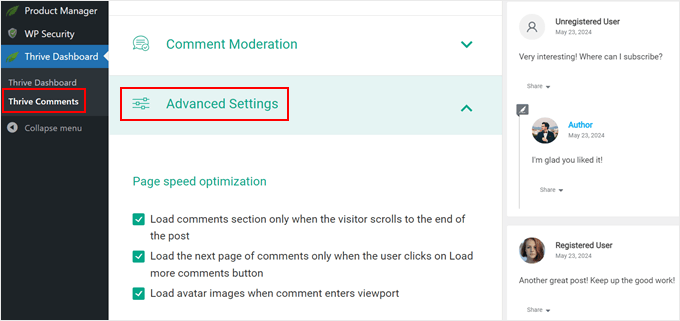
Here, just check off the boxes that may apply to your comment section. You can load the comment section until the user scrolls down to the bottom of the page, and/or load comments progressively in pages as users click the ‘Load more comments’ button.
You can also choose to load avatar images within comments until they come into view.
6. Paginate Comments or Posts With Lots of Content
Excessively long posts or comment sections typically have a large DOM size that slow down your website’s loading times. Here’s where pagination comes in handy.
Pagination essentially splits your content into manageable chunks, making it easier for users to navigate and digest information.
If you find yourself writing in-depth articles, consider splitting them into logical sections using pagination. This allows readers to take breaks between sections and avoid feeling intimidated by a giant wall of text.
Luckily, you can easily break up long posts using the ‘Page Break’ block in the block editor.
For step-by-step instructions, you can check out our article on how to split WordPress posts into multiple pages.
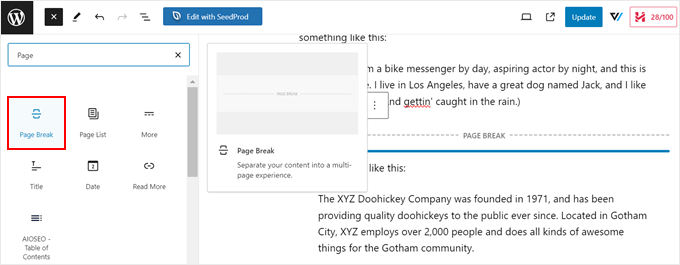
We also have a helpful guide on how to paginate comments in WordPress. But essentially, all you need to do is log in to your WordPress admin area and go to the Settings » Discussions page.
Then, check the box next to ‘Break comments into pages’ and customize the number of comments you want to see on each page.

Also, we suggest avoiding infinite scroll. While they can keep people on your site longer as they won’t have to switch between pages manually, this can cause performance issues on your server.
7. Minify CSS and JavaScript Files
Your website’s functionality and visual style rely on code files like CSS and JavaScript. While essential, these files can contribute to a larger DOM size if not properly optimized.
Minification can solve this issue by removing unnecessary elements from the code, such as comments, spaces, and line breaks. This smaller size translates to faster loading times and a smaller DOM size.
That said, it’s important to note that minification can sometimes introduce compatibility issues with certain themes or plugins.
Before minifying your code, it’s a good idea to create a backup of your website and test the changes in a staging or local environment if possible. This allows you to identify any potential issues before they affect your live website.
Then, you can read our guide on how to minify CSS and JavaScript files in WordPress for step-by-step instructions.
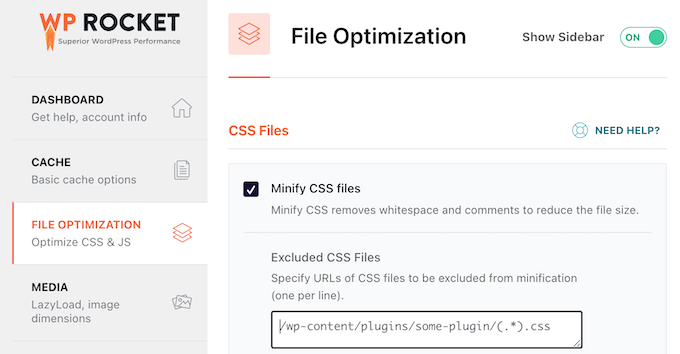
As you’ll see in the guide, minifying your code is easy if you’re already using a plugin like WP Rocket. All you need to do is go to Settings » WP Rocket and switch to the ‘File Optimization’ tab.
Then, just enable the features to minify CSS and JavaScript files.
Some WordPress hosting providers also offer built-in features for minifying CSS and JavaScript files.
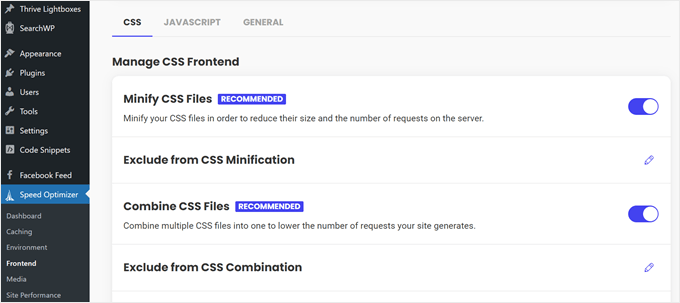
For instance, SiteGround (which is where we host WPBeginner) offers the Speed Optimizer plugin to minify CSS.
Hostinger also offers a similar feature through their built-in CDN, available on their Business plan and higher tiers.
8. Reduce Render-Blocking JavaScript and CSS
Another approach to optimize CSS and JavaScript files is by reducing render-blocking.
Render-blocking resources are like foundation materials that prevent the house (your website content) from being built until those resources are delivered and in place. The longer it takes for these resources to load, the longer it takes for users to see your website’s content.
WP Rocket has built-in features to reduce render-blocking CSS and JavaScript.
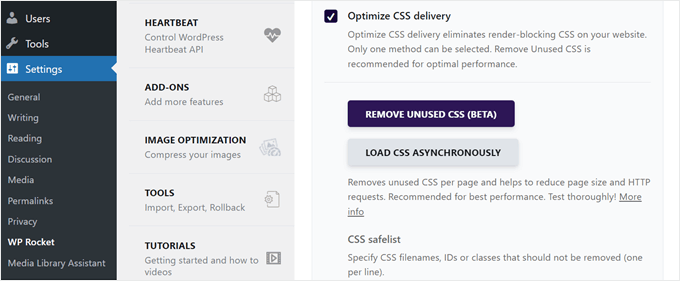
For example, you can combine CSS and JavaScript files, which will reduce the number of HTTP requests your website needs to make. Fewer requests mean less waiting time for the browser to load everything and render your content.
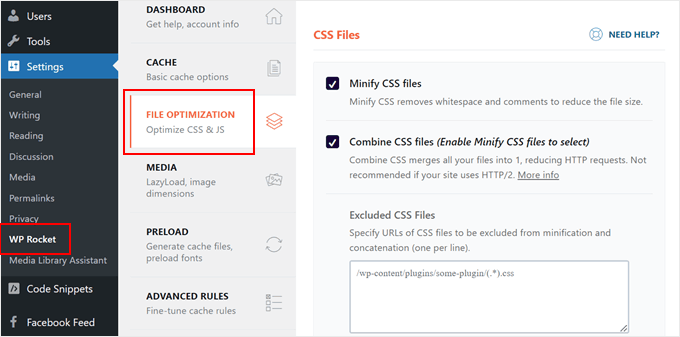
You can also remove any CSS code that isn’t actually used on your pages.
This not only reduces render blocking but also minimizes overall page size and the number of HTTP requests.
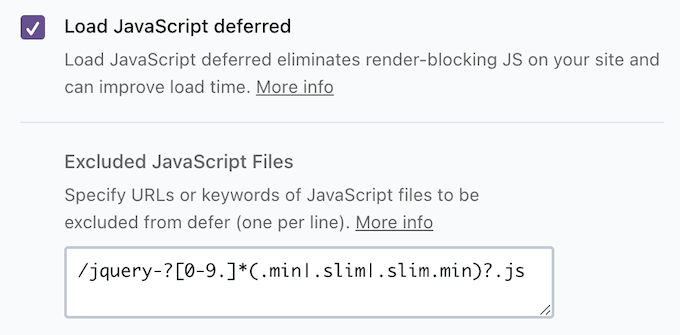
Additionally, there is a feature called ‘Load JavaScript Deferred.’ This tells the browser to wait on loading some JavaScript files until after the main content of your website (the HTML) has been displayed.
This way, users see your website’s content faster, even if all the background functionalities haven’t loaded yet.
You can learn more about enabling these features in our article on how to reduce render-blocking CSS and JavaScript in WordPress.
9. Enable WordPress Caching
Caching doesn’t directly reduce DOM size, but it significantly improves your website’s perceived performance.
Here’s what happens when caching is enabled: when a user revisits your website, their browser can check its cache first. If the files are already stored locally, they can be loaded much faster, significantly reducing page load times.
This makes the DOM load and display faster, resulting in a smoother experience for visitors.
Caching also helps your server run more efficiently by lightening its workload. This frees it up to focus on important tasks like processing the DOM, which ultimately speeds up your loading time.
Fortunately, setting up browser caching is simple with a plugin like WP Rocket. This is because the plugin automatically enables caching with optimal settings for your website.
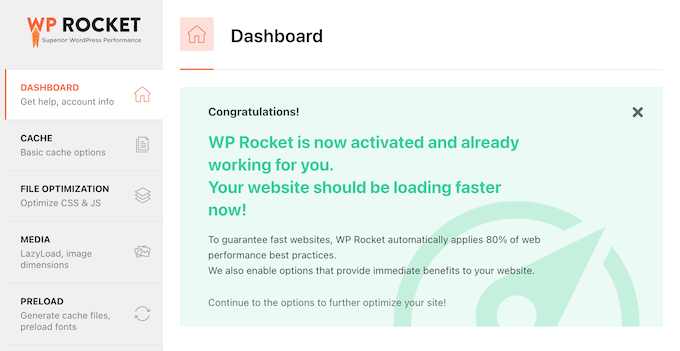
Even better, WP Rocket continuously caches your website at all times. Whenever the cache gets cleared (manually or automatically), WP Rocket automatically generates new cache files.
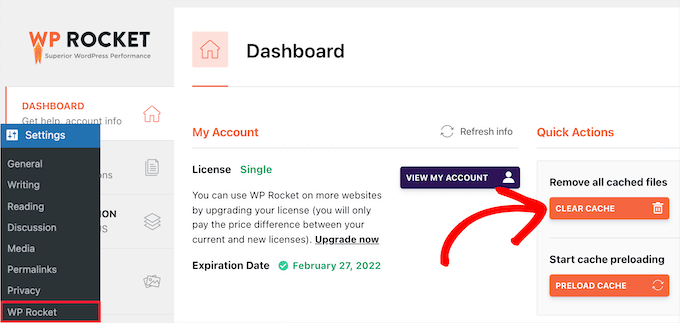
WP Rocket also provides you with the ability to clear the WordPress cache at any time. This might be useful if you make significant changes to your website and want to ensure users see the latest version.
For more details about WP Rocket’s caching features, you can refer to the setting up caching options section of our WP Rocket installation guide.
10. Use a WordPress CDN
A CDN (Content Delivery Network) is a network of servers spread out around the world. While a CDN doesn’t directly change the size of your website’s code, it makes your website feel like it loads faster.
This is because a CDN stores copies of your website’s static content (images, scripts, stylesheets) on servers in different locations. When someone visits your website, their computer downloads the content from the CDN server closest to them.
This significantly cuts down on download times compared to fetching everything from your original server, which might be far away. This faster delivery makes processing the DOM much faster.
Plus, a CDN helps your original server work faster by sharing the content delivery load. This allows the server to focus on what matters most, like processing the DOM. In turn, this makes your website render quicker overall.
If you need CDN recommendations, we have a guide to the best WordPress CDN services to help you pick the right one for your website.
We use Cloudflare’s CDN on our website here at WPBeginner. It works well for our large blog with lots of visitors.
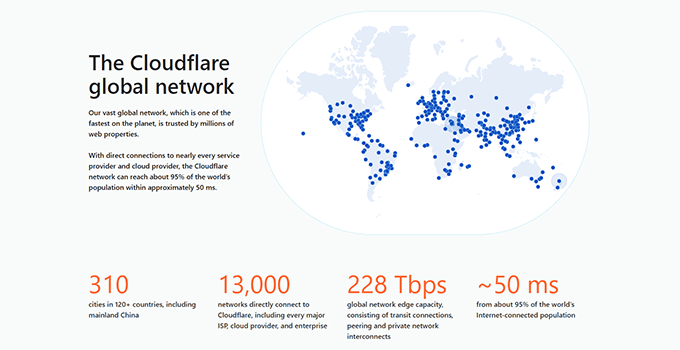
If you’re interested in learning more, you can check out our insider post on why WPBeginner switched from Sucuri to Cloudflare. This article explains what we looked for when choosing a CDN provider.
11. Optimize Your WordPress Database
Your WordPress website relies on a database to store all its important information, like posts, comments, user accounts, and even configurations.
Over time, this database can hold too much unnecessary data, such as old revisions of posts, spam comments, or leftover information from deleted plugins.
While the database itself isn’t part of the DOM, a bloated database can slow down your website. A slower website can make it seem like the DOM size is larger because everything takes longer to load and render.
Optimizing your database by removing unnecessary data helps your website run smoother and can indirectly improve perceived DOM size.
Check out our helpful guide on how to optimize your WordPress database in one click. This guide walks you through the process of using a plugin to clean up your database and ensure it runs efficiently.
Focus on Overall WordPress Performance, Not Just DOM Size
While addressing the ‘Avoid an excessive DOM size’ warning in WordPress is important for website speed, it’s not the only factor to consider.
A website with a lot of functionality or unique formatting may naturally have a bigger DOM, and that’s okay.
The key is to find the right balance between site performance and features. So, aside from DOM size, you may want to pay attention to other metrics like Core Web Vitals. These are specific metrics that Google uses to measure a website’s user experience.
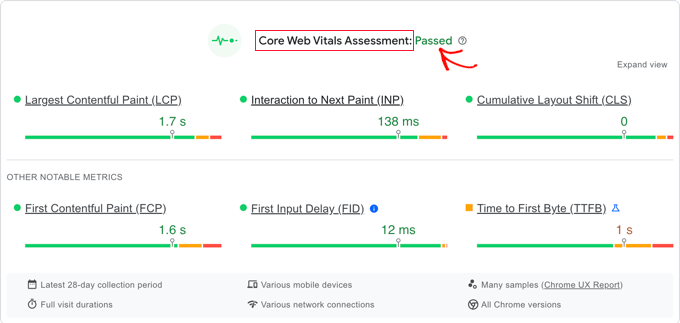
If you’ve used a lot of different optimization techniques and your website still feels slow, then consider seeking help from our Site Speed Optimization Services.
Our expert team can analyze your website and identify the most effective ways to streamline its performance.
All service plans include expert caching configuration for your website needs, image optimization without reducing your visual quality, database autoload optimization, and so much more. Plus, we guarantee that your website will get an A or B+ on our PageSpeed Tool.
We hope this tutorial helped you learn how to fix excessive DOM size in WordPress. You may also want to check out our guide on how to speed up WooCommerce performance or our complete WordPress speed and performance guide.
If you liked this article, then please subscribe to our YouTube Channel for WordPress video tutorials. You can also find us on Twitter and Facebook.
The post How to Fix Excessive DOM Size in WordPress (11 Expert Tips) first appeared on WPBeginner.
from WPBeginner https://ift.tt/q2fkims
More links is https://mwktutor.com
No comments:
Post a Comment