Do you want to add Google Authenticator 2-step verification to your WordPress site?
Passwords alone aren’t enough to ward off hackers and unauthorized users. Luckily, using Google Authenticator 2-step verification can add an extra layer of security to your website.
In this article, we will show you how to add 2-step verification on your WordPress site using the Google Authenticator app.
What Is the Google Authenticator App, and Why Do You Need It for Your WordPress Site?
The Google Authenticator app is a mobile application that adds a second layer of authentication every time you log in to a third-party app or website like WordPress.
Unfortunately, passwords can sometimes be cracked. If you are using the same password on numerous websites, then a security leak on one puts your other accounts in danger. Often, people are lazy, and they don’t change their passwords even after they get an email about a security compromise on a major site.
Well, the 2-step verification is the solution just for that. Even if the hacker knows your WordPress username and password, they will not be able to access your WordPress website unless they have a time-restrained random security code (provided by Google Authenticator).
Because your blog is directly connected to your mobile device, you will be the only person with access to retrieve the unique code for each login. The code expires in a short amount of time for security purposes.
The Google Authenticator app is just one example of a mobile application that provides two-factor authentication (2FA) for various online accounts and services.
It generates time-based one-time passwords (TOTPs) that serve as the second factor for authentication when logging into an account.
If you still aren’t convinced about the importance of WordPress security, then you should probably see how one of Wired.com author’s digital life was destroyed.
After reading that story, we jumped on board with the 2-step authentication for our Google accounts and most other services that offer this feature. If you are as security-conscious as we are and you value your blog, then you should follow this tip to improve your WordPress security.
Note: Google Authenticator only works on iOS, Android, Windows Phone, webOS, PalmOS, and BlackBerry devices. In other words, you will need your smartphone to log in to your website.
To further improve your security, we recommend looking at other methods as well. For example, software like 1Password can help you manage your passwords in one place and ensure they are strong enough to withstand potential hackers.
With that said, let’s jump into the tutorial on how to add Google Authenticator 2-step verification to your WordPress site.
How to Add Google Authenticator in WordPress
The first thing you need to do is install the Google Authenticator app on your phone. We are going to use the iOS terminology for the sake of this tutorial, but the process is similar for other devices as well.
Step 1: Install Google Authenticator App on Your Mobile Device
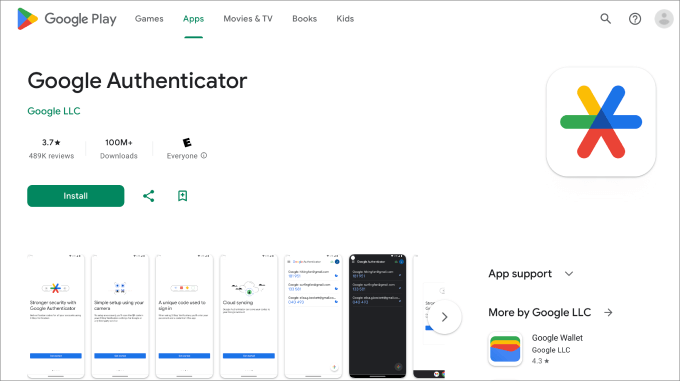
Visit the App Store, search for ‘Google Authenticator’, and then click on ‘Install’ for the application.
Now, let’s get back to your WordPress dashboard.
Step 2: Install MiniOrange’s Google Authenticator Plugin
Go ahead and install and activate the MiniOrange’s Google Authenticator plugin. For more details, you can see our step-by-step guide on how to install a WordPress plugin.

This is a free WordPress plugin that helps protect your site from unauthorized access. Every time you log in to WordPress, you’ll be asked to enter the one-time passcode from the Google Authenticator app to verify your identity.
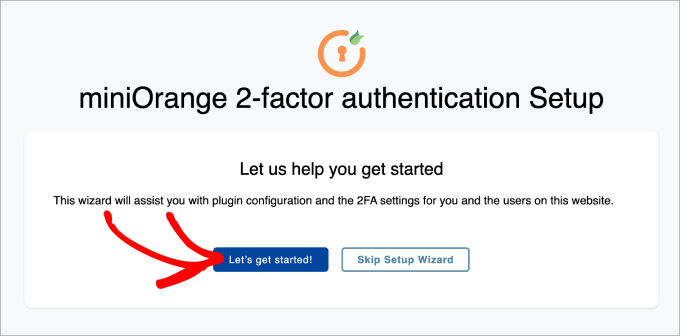
Upon activating the plugin, you’ll be taken to a setup wizard. Just follow the process to set up your Google Authenticator two-factor authentication in WordPress.
Step 3: Complete the Setup Wizard
Start by clicking on the ‘Let’s get started!’ button.
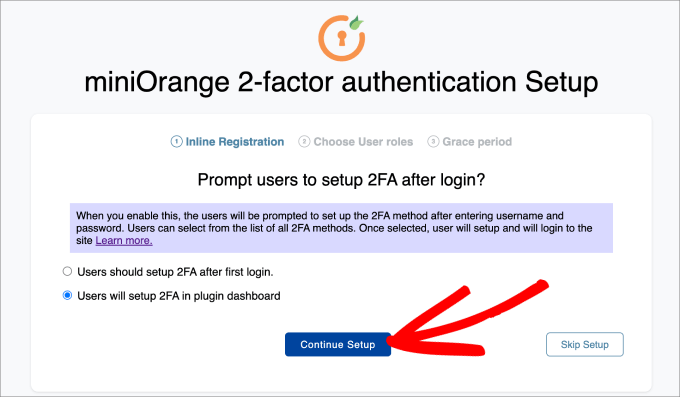
Next, you will be asked whether you want to set up 2FA after your first login or within the plugin dashboard. Either method is fine.
Click ‘Continue Setup.’
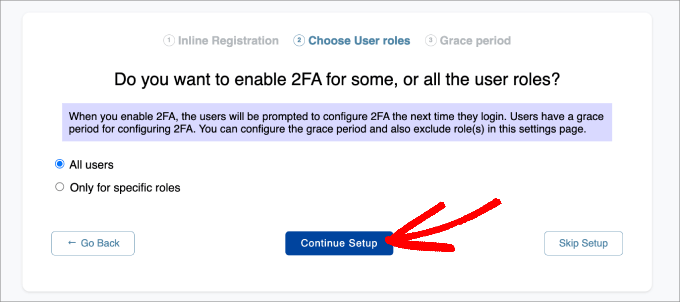
The next step is to choose who you’d like the 2FA to apply to. You can either select all users for maximum security, or you can only have it apply to certain user roles.
Then hit ‘Continue Setup.’
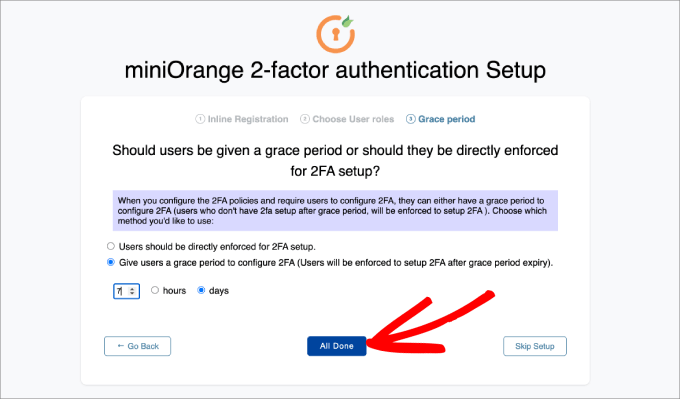
Lastly, you’ll be asked whether or not you’d like to directly enforce 2FA immediately or give users a grace period.
If you choose to give users a grace period, then you can select how long that would be in hours and days. Once that is complete, click on ‘All Done.’
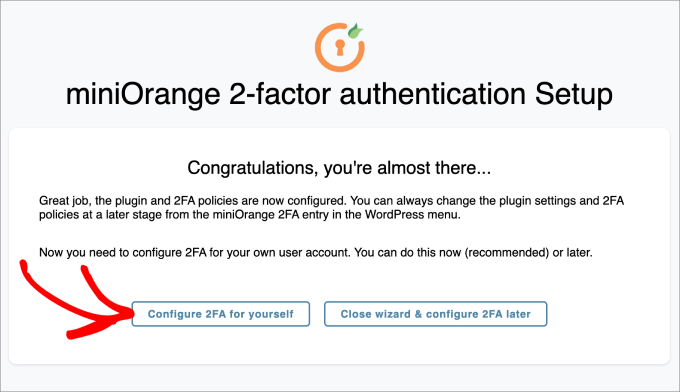
Now that you are done with the setup process, you can decide whether you want to set up 2FA for yourself now or later.
Go ahead and hit the ‘Configure 2FA for yourself’ button.
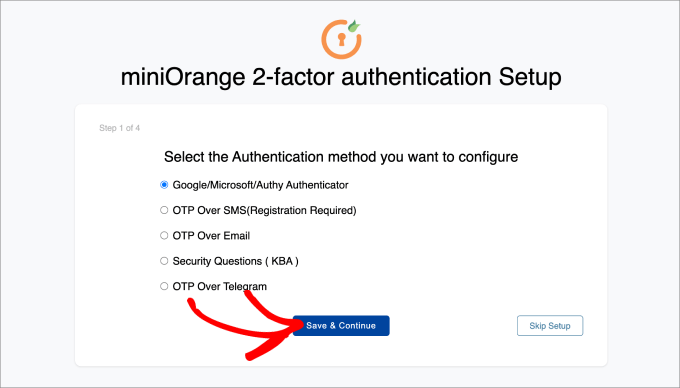
From here, you’ll be asked to enter the method of 2-factor authentication you’d like to add to your WordPress site.
For this tutorial, we will choose ‘Google/Microsoft/Authy Authenticator.’ Then, just hit the ‘Save & Continue’ button.
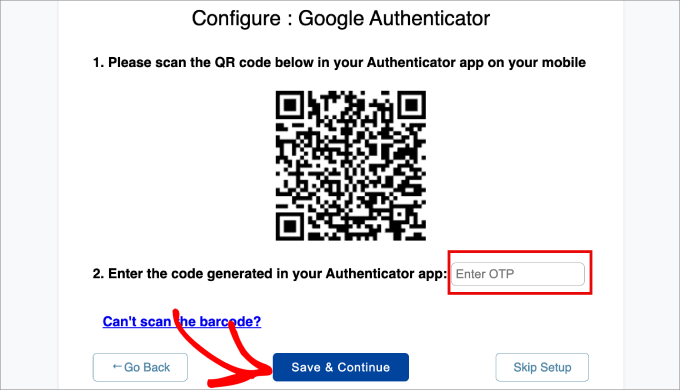
Next, you’ll be asked to scan the barcode on the screen. That means you’ll have to pull up the Google Authenticator app on your phone and scan the barcode displayed.
In your Google Authenticator app on your mobile device, hit the ‘+’ icon at the bottom and then select ‘Scan a QR code.’ Then, point your phone camera to your computer screen to scan the barcode.
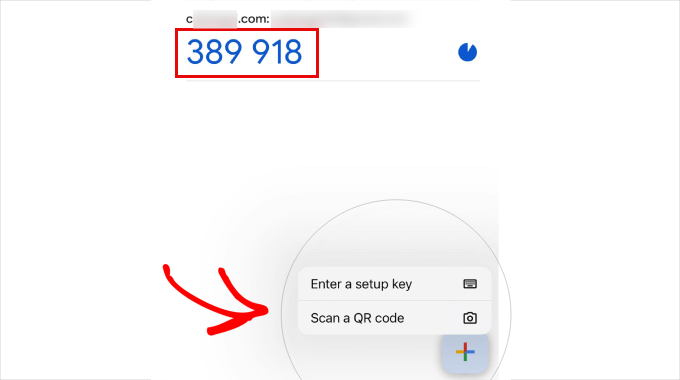
From here, a one-time passcode (OTP) will appear on your mobile device.
Type that into step 2 on your computer. From there, you can click on ‘Save & Continue.’
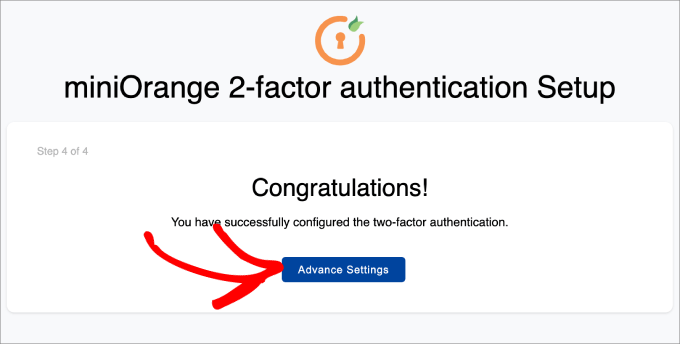
Now, you should receive a message that says that you’ve successfully configured two-factor authentication.
Simply select ‘Advance Settings.’
Step 4: Add Security Questions
In addition to adding Google Authenticator 2-factor authentication, you probably want to also add security questions as well.
If you can’t access your Google Authenticator app, then you can still log in to your WordPress website if you answer the security questions that you’ve set up for yourself.
You’ll need to head over to the Mini Orange 2-Factor » Two Factor page in your WordPress admin dashboard. Then, in the Setup 2FA For Me tab, find the Security Questions method and click on ‘Reconfigure.’
Keep in mind that you can also set up other types of two-factor authentication methods, such as email verification, OTP over SMS, OTP over email, OTP over Telegram, and even Duo Authenticator.
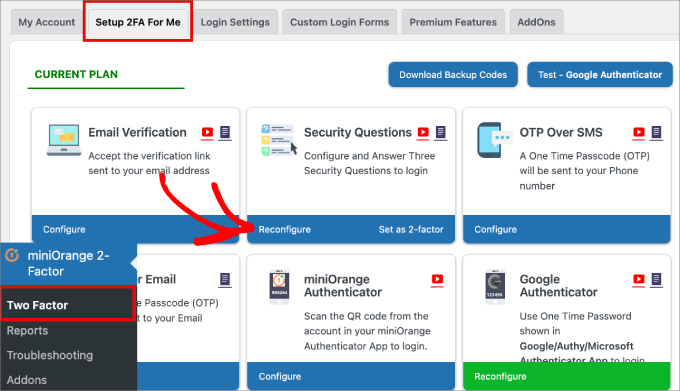
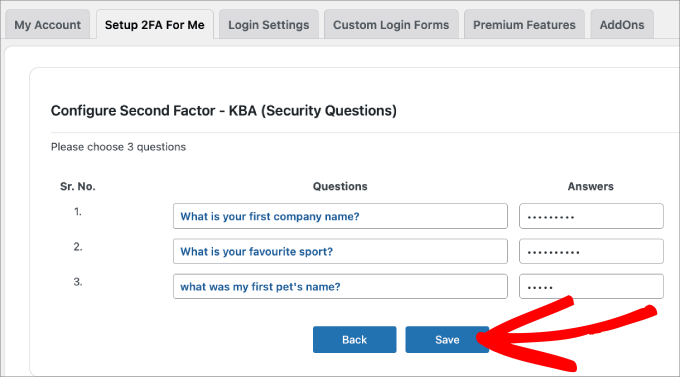
Next, you’ll be able to select up to three security questions. You can select two of them from a dropdown menu, and the third will be a custom question that you can come up with on your own.
Then, type in the answer for each of them and hit the ‘Save’ button.
Step 5: Test It for Yourself
Once everything is set up, you can test it out yourself.
Simply log out of your WordPress dashboard and try to log back in.
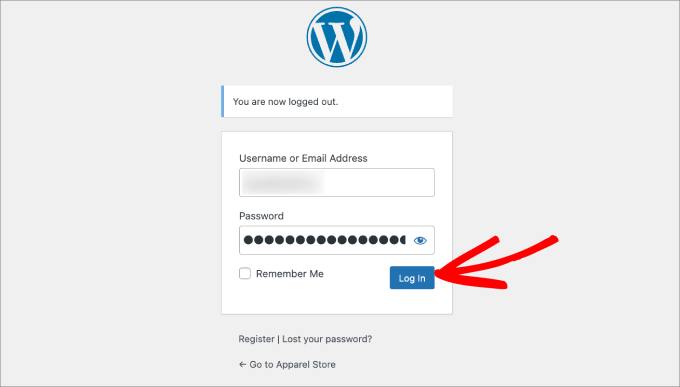
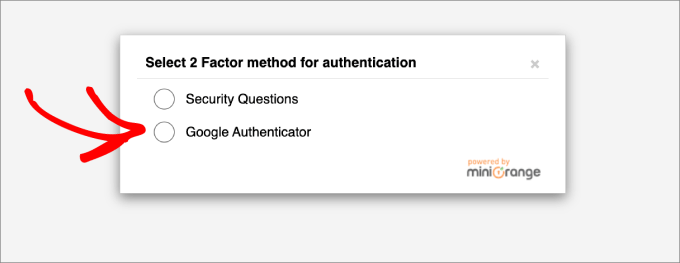
You will now be taken to a page where you can either answer security questions or use the Google Authenticator to enter your one-time passcode.
Go ahead and select the ‘Google Authenticator’ option.
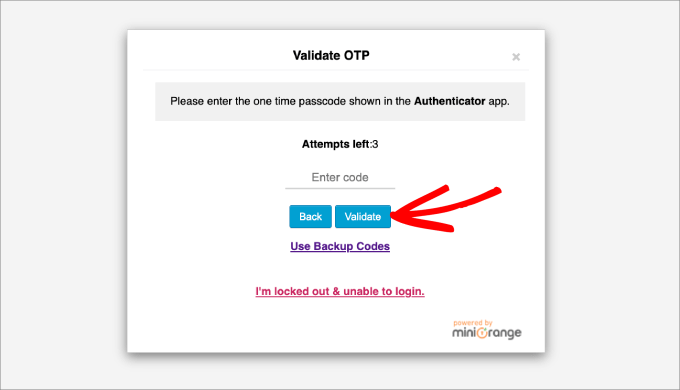
On this screen, you will be asked to enter your OTP from your Google Authenticator app.
Type in the code and then click ‘Validate.’
Now, you will land back into your WordPress admin dashboard, as usual.
Lastly, we recommend that everyone turn on 2-step verification on their Google accounts. You can also configure that with Google Authenticator, as shown in this tutorial.
We hope this article has helped you add Google Authenticator 2-Step verification to your WordPress website. You may also want to check out our article on the most common WordPress errors and how to fix them or our ultimate guide to boost WordPress speed and performance.
If you liked this article, then please subscribe to our YouTube Channel for WordPress video tutorials. You can also find us on Twitter and Facebook.
The post WordPress Security Tip: Add Google Authenticator 2-Step Verification first appeared on WPBeginner.
from WPBeginner https://ift.tt/8GALDH1
More links is https://mwktutor.com
No comments:
Post a Comment