Wednesday 31 January 2024

How to Add a BMI Calculator in WordPress (Step by Step)

Do you want to add a BMI calculator in WordPress?

If you offer health and fitness-related content, products, or services, then a BMI calculator could be helpful for your audience. It can improve the visitor experience and keep people on your WordPress site for longer.

In this article, we will show you how to easily add a BMI calculator in WordPress without any coding or math required.

Add a BMI Calculator in WordPress (Step by Step)

Why Add a BMI Calculator to WordPress?

BMI stands for Body Mass Index. It’s a rough measure of a person’s body fat based on their height and weight using the following calculation:

BMI = kg/m2

The kg is the person’s weight in kilograms, and m2 is their height in meters squared.

Alternatively, if you are working with imperial units, then you can use this formula, where lb is the weight in pounds, and in2 is their height in inches squared, multiplied by 703:

BMI = lb/in2 ∗ 703

A BMI reading can help your visitors, patients, or clients figure out whether they are underweight, overweight, or a healthy weight for their height. However, asking people to do the calculation themselves isn’t a good user experience.

This is where a BMI calculator comes in.

If you have started a health or fitness blog, then a BMI calculator can help visitors plan the next steps in their health journey. For example, someone who decides to reduce their BMI may sign up for your fitness tracker.

A BMI calculator can also encourage people to spend more time on your site. This can increase pageviews and decrease your bounce rate.

The more time someone spends on your site, the more likely they will convert. For example, they might book a trial at your CrossFit gym or buy exercise equipment from your online store.

With that in mind, let’s see how you can easily add a BMI calculator in WordPress. In this tutorial, we will cover two methods, and you can use the links below to jump to the method of your choice:

Method 1: Create a BMI Calculator With WPForms (Easy)

You can easily create a BMI calculator in WordPress with WPForms. It is the best calculator plugin on the market that comes with a drag-and-drop builder, 1300+ premade templates, and complete spam protection.

The plugin also offers a Calculations addon that lets you add any calculator form you like, including a BMI calculator, mortgage calculator, and age calculator.

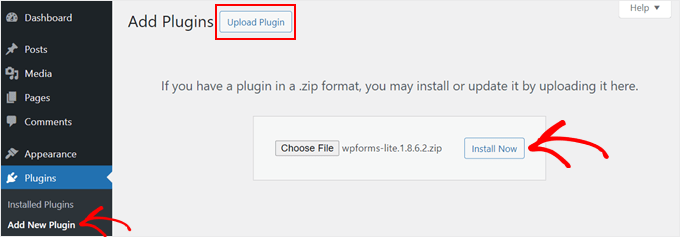
First, you need to install and activate the WPForms plugin. For detailed instructions, see our step-by-step guide on how to install a WordPress plugin.

Note: WPForms has a free plan. However, you will need the pro plan of the plugin to unlock the Calculations addon.

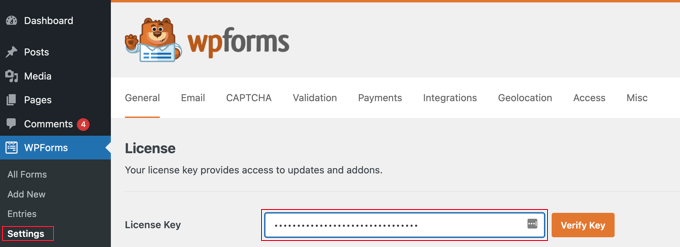
Upon activation, head over to the WPForms » Settings page from the WordPress dashboard to enter your license key. You can find this information in your account on the WPForms website.

wpforms-license-key

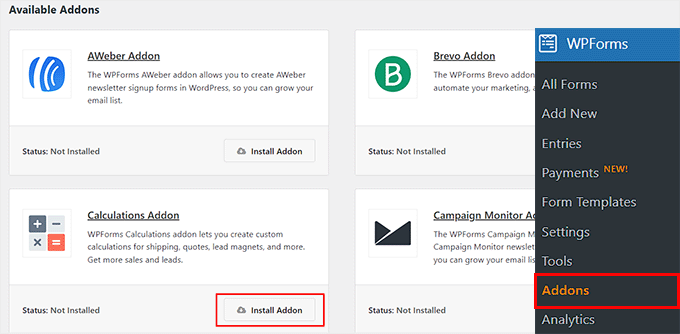
After that, visit the WPForms » Addons page and locate the ‘Calculations Addon’.

Then, just click the ‘Install Addon’ button to activate it on your site.

Install and activate the Calculations addon

Next, you must head to the WPForms » Add New page from the WordPress admin sidebar.

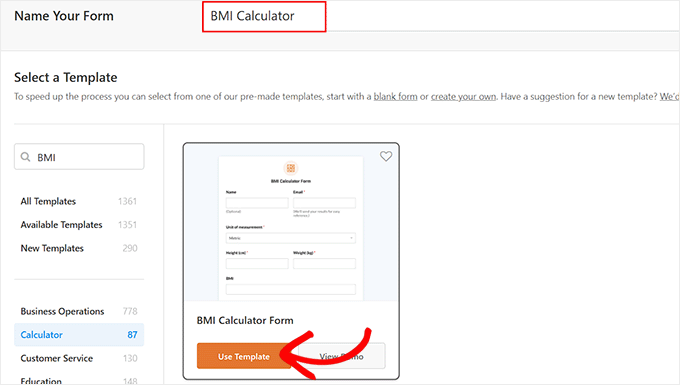
Here, you can start by typing a name for the calculator form that you are about to create.

After that, find the ‘BMI Calculator Form’ template and click the ‘Use Template’ button under it.

Click the Use Template button under the BMI Calculator Form template

The WPForms form builder will now open on your screen, where you will notice a form preview on the right with form fields in the left column.

From here, you can add any field you like and drag and drop them to rearrange their order.

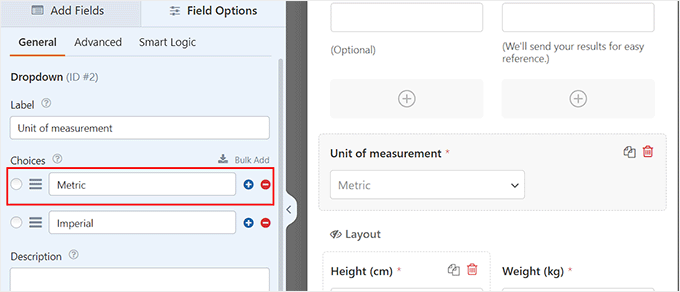
Next, click on the ‘Unit Of Measurement’ field to open its settings in the left column. Here, you will see that the BMI calculator gives users a choice between the imperial measurement system and the metric system.

However, if you only want to use a single measurement system in your calculator, then you can click on the (-) icon next to a system to remove it.

Keep in mind that using both measurement systems in your BMI calculator will help you cater to a wider audience.

Choose units of measurement for the form

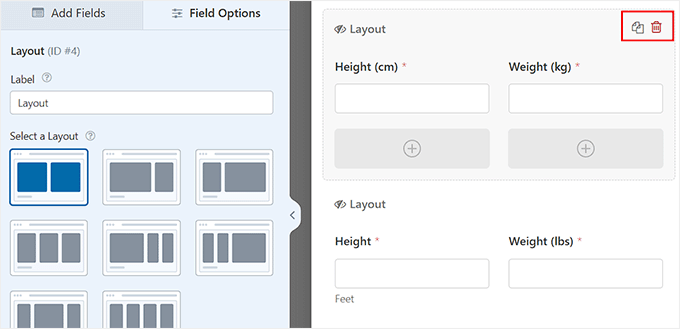
After that, you will notice two different unit fields that will be shown to users once they select one of the units of measurement from the dropdown menu.

However, if you are using a single measurement system, then one of the unit fields won’t be necessary, and you can delete it.

For example, if you only offer BMI in imperial units, then you must delete the unit fields for height (cm) and weight (kg) because they are metric units.

Delete a layout field according to the measurement system you chose

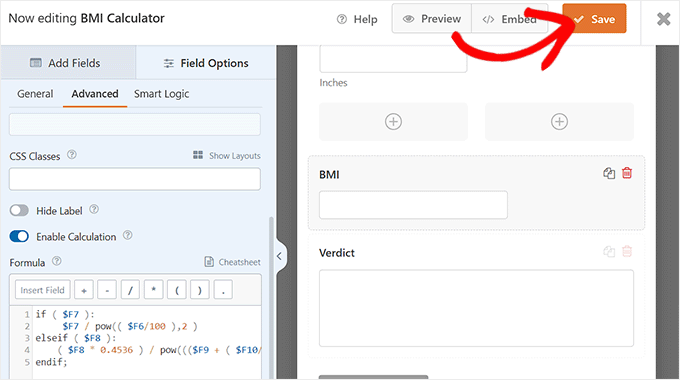
Next, scroll down to the ‘BMI’ and ‘Verdict’ fields. These fields will automatically calculate the height and weight of the users and show them their BMI results.

If you delete any of these fields, then the BMI calculator form won’t be able to perform any calculations for you.

Once you are satisfied with your form, simply click on the ‘Save’ button at the top to store your changes.

Save your BMI calculator form

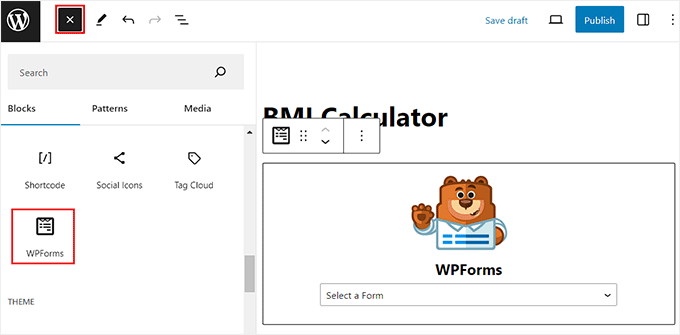
Next, open a page/post in the block editor where you want to add the BMI calculator.

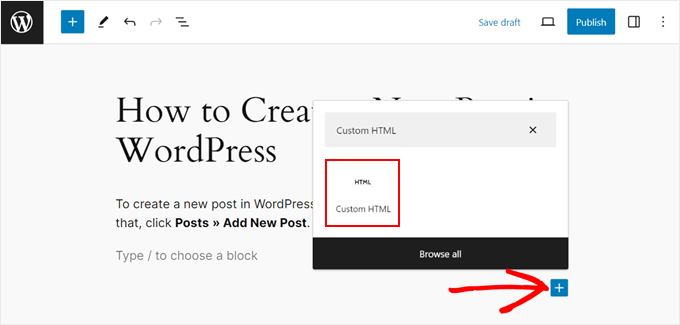
From here, click the add block ‘+’ button to open the block menu and locate the WPForms block.

Once you do that, add the BMI calculator form from the dropdown menu within the block itself.

Add BMI calculator form to the page with the WPForms block

Finally, click the ‘Update’ or ‘Publish’ button to store your settings. Now, you can visit your WordPress website to view the BMI calculator in action.

Here, visitors can simply type in their weight and height, and the calculator will show their BMI and say whether they are underweight, healthy, overweight, or obese.

WPForms BMI calculator preview

Method 2: Create a BMI Calculator With Formidable Forms (Advanced)

If you want to show a BMI range within your calculator, then we recommend making a BMI calculator in WordPress with Formidable Forms instead.

It is an advanced form plugin with more calculation capabilities, including conditional calculations. It also has features like a ChatGPT field, dynamic fields, premade templates, and a drag-and-drop builder.

First, you need to install and activate the Formidable Forms plugin. For detailed instructions, you can see our beginner’s guide on how to install a WordPress plugin.

Note: Keep in mind that the ‘Calculator’ templates are only available in the pro plan of the plugin. However, you will still need to install Formidable Forms Lite because it provides the core foundation for the premium plugin’s more advanced features.

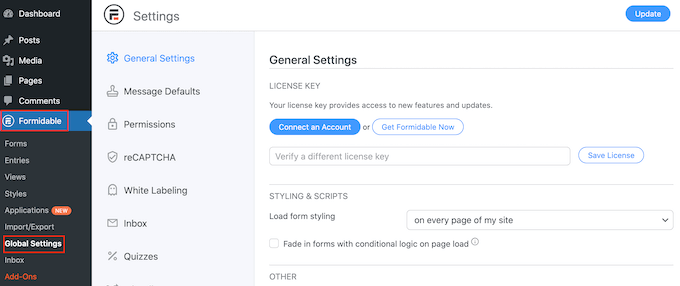
Upon activation, visit the Formidable » Global Settings page from the WordPress dashboard and select the ‘Click to enter a license key manually’ option.

You can find the key in your account on the Formidable Forms website. Once you enter the information, simply click the ‘Save License’ button to store your settings.

Enter the Formidable Forms license key

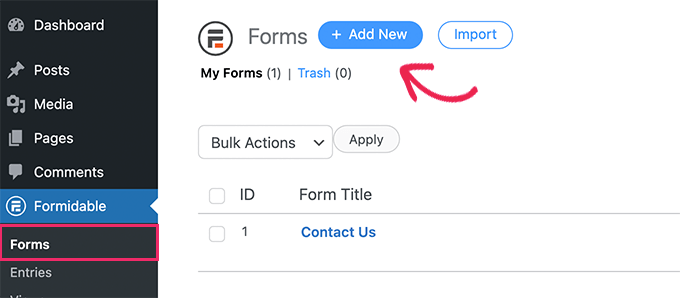
Next, you must visit the Formidable » Forms page from the WordPress dashboard.

Here, click the ‘+ Add New’ button to start building your calculator.

Adding a new calculator form

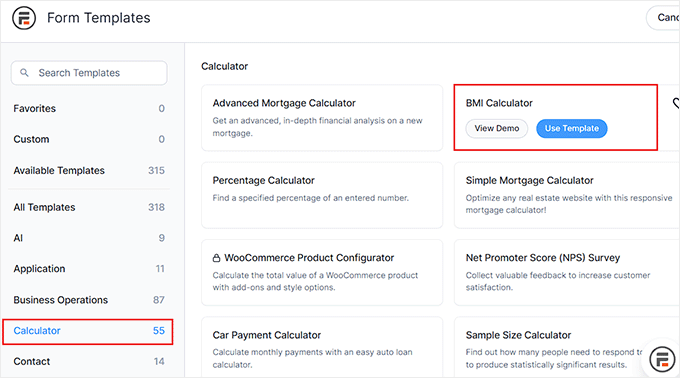
This will take you to the ‘Form Templates’ page. Here, you can click the ‘Calculator’ tab from the left column to view the 55+ calculator form templates, including an advanced mortgage calculator, percentage calculator, compound interest calculator, and more.

Go ahead and click the ‘Use Template’ button under the ‘BMI Calculator’ template.

Choose the BMI calculator template

This will open the form builder, where you will see a form preview on the right with form fields in the left column. You can now add any field to the form and drag and drop these fields to rearrange their order.

For example, the BMI calculator form template does not have a name field by default. But you can add it to the form from the left panel to collect more information about your users.

Add form fields of your choice in the BMI calculator from the left column

After that, you need to click on the ‘Unit of measurement’ field to open its settings in the left column.

From here, you can remove any of the two measurement systems (metric or imperial) by clicking on the (-) icon next to the systems.

However, if you want to keep both of them in the BMI calculator, then you can select one as the default measurement system.

Choose the default measurement system for the BMI calculator

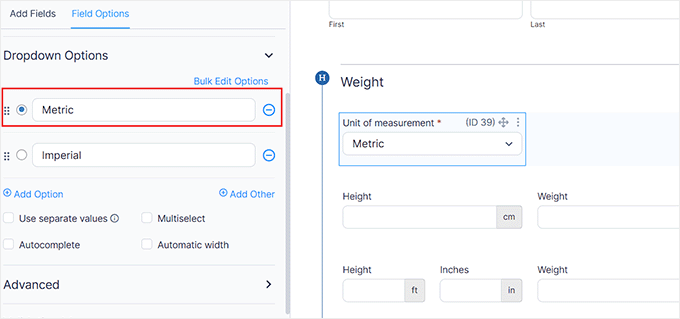
On the other hand, if you decide to use only one measurement system for the calculator, then you will have to delete the unit value fields for the other system.

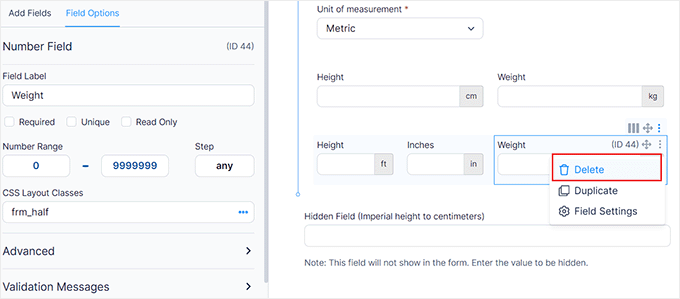
For instance, if you only want to work with the metric system, then you must delete the height (feet and inches) and weight (lbs) fields from the form.

To do this, simply click the three-dot icon on top of the field and then select the ‘Delete’ option.

Delete unit fields for the measurement system that you have removed

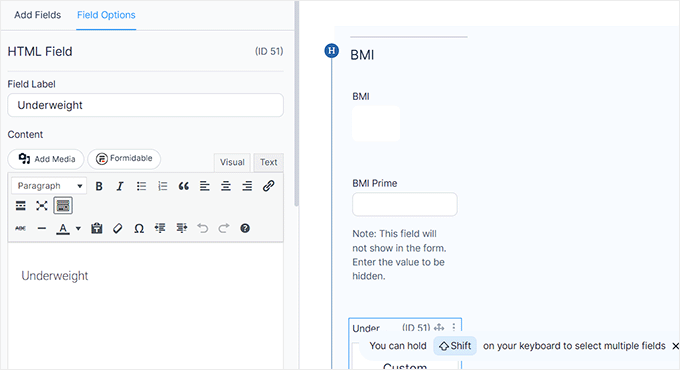
Next, you must scroll down to the ‘BMI’ field. This field will automatically calculate the BMI for your users and provide a verdict.

If you delete this field, then the BMI calculator won’t work. We recommend leaving it as is.

BMI field in the Formidable Forms

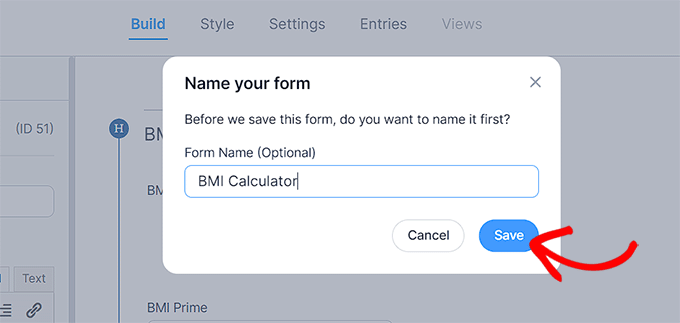
After that, click the ‘Save’ button at the top to store your settings.

This will open a prompt on the screen where you must add a name for your form and click the ‘Save’ button.

Add a name for the BMI calculator form

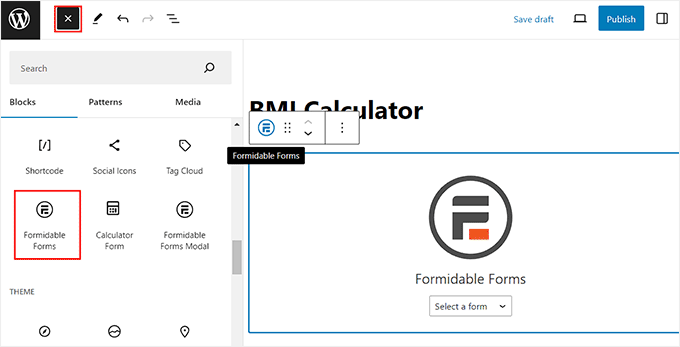
Next, you must close the form editor and open the page/post where you want to add the BMI calculator in the block editor.

Once you are there, go ahead and click the add block ‘+’ button to open the block menu and add the Formidable Forms block.

After that, select the form you just created from the dropdown menu within the block itself.

Add BMI calculator with the Formidable Forms block

Finally, click the ‘Update’ or ‘Publish’ button to store your settings.

Now, you can visit your WordPress blog or website to view the BMI calculator. Here, the visitor can type their height and weight to view their BMI. If they want more information, then they can click on the ‘See My Range’ button.

The calculator will then show the ranges for all the different weight categories.

Formidable Forms BMI calculator preview

Bonus: Create a Fitness Tracker in WordPress

Apart from adding a BMI calculator, you can also add a fitness tracker to your WordPress site. This tracker can be a simple form that users fill out every month to track their weight loss journeys.

If you have a fitness blog, then adding this tracker can increase engagement on your site and encourage more users to sign up and be a part of your email list.

You can easily create a fitness tracker with Formidable Forms without needing to learn any code. Then, users will be able to track their weight loss progress over time.

Live fitness tracker

For more details, just see our tutorial on how to create a fitness tracker in WordPress.

We hope this tutorial helped you learn how to add a BMI calculator in WordPress. You may also want to check out our guide on how to create a contact form and the must-have WordPress plugins for business sites.

If you liked this article, then please subscribe to our YouTube Channel for WordPress video tutorials. You can also find us on Twitter and Facebook.

The post How to Add a BMI Calculator in WordPress (Step by Step) first appeared on WPBeginner.


from WPBeginner https://ift.tt/XCpkvzr
More links is https://mwktutor.com

WordPress Playground – How to Use WordPress in Your Browser

Do you want to use WordPress in your browser for testing purposes?

Meet WordPress Playground, a platform where you can try out open-source WordPress.org in a browser without purchasing a hosting plan first. You can also use it to test plugins and themes without affecting your live WordPress website.

In this article, we will explain what WordPress Playground is and how to use it.

WordPress PlayGround - How to Use WordPress in Your Browser

What Is WordPress Playground and How Does It Work?

WordPress Playground is a temporary, in-browser WordPress instance where you can experiment and learn more about the content management system.

It’s like an online sandbox where you can do all sorts of WordPress development without affecting your real website.

What the WordPress Playground looks like

All you need to do is go to the WordPress Playground website to open it. Then, you can use WordPress as you normally would: install new plugins, try out new themes, add new pages, and so on.

If you refresh the WordPress Playground page, all the customizations will disappear. However, you can also download your WordPress instance and upload it again to WordPress Playground.

How Does WordPress Playground Work?

WordPress Playground runs on some cool technologies that let you use WordPress without the usual web server and database setup:

  1. WebAssembly binary (Wasm): It lets you run PHP code directly in your web browser, making WordPress work without a traditional server. It also makes the platform compatible with all browsers, from Chrome and Edge to Firefox and Safari.
  2. SQLite database: Instead of MySQL, WordPress Playground uses a lighter file-based database system called SQLite, which runs right in your browser.
  3. Service Worker and Worker Threads APIs: These web tools help handle requests and run background JavaScript scripts, making it possible for WordPress Playground to run PHP apps smoothly in your browser.

These technologies also enable developers to integrate WordPress Playground with node.js, Visual Studio Code, and a CLI tool called wp-now.

With these tools, developers can also use WordPress Playground on a development platform for testing or staging purposes.

What Are the Limitations of WordPress Playground?

Despite its benefits, WordPress Playground has several limitations, like:

  • No direct access to the theme and plugin directory – You will have to install themes and plugins by manually downloading and uploading them. That said, a network access beta feature aims to solve this problem.
  • Customizations in WordPress Playground are temporary – If you decide not to save the changes in the browser, you will have to be careful not to accidentally refresh the page to avoid losing your progress.
  • iFrame issues are common – If you embed a WordPress Playground instance on your web page, you may expect some problems, from accidental refreshes to iFrame not working.
  • It’s a relatively new feature – Not everything will work properly, so you can expect some hiccups here and there as you explore the environment.

All that being said, the Playground is a relatively new WordPress project. So you can expect the team to release new features and bug fixes to improve the user experience.

Now that you know what WordPress Playground is, let’s see how you can use it. You can use the quick links below to navigate through our tutorial:

How to Use WordPress Playground

To use WordPress Playground, you can directly go to this domain name in your web browser: https://playground.wordpress.net

Once you are on the website, wait a few moments for the Playground to set up. Then, you will see the front end of the website using a default WordPress theme.

If you are using WordPress Playground for testing, then you may want to configure the environment to reflect the WordPress software for your actual website.

To do this, click the menu that says ‘PHP 8.0 WP 6.4 – Storage: None.’

Configuring the WordPress Playground version

The first setting you have to configure is the storage type. There are three options.

‘None’ means all changes will be lost on page refresh. Meanwhile, ‘Browser’ means changes will be stored in the browser but disappear if you close the browser tab or clear your cache.

You can also save the changes on your computer by selecting ‘Device.’ This option will let you select a folder in your computer to store your WordPress Playground files, similar to creating a localhost WordPress site.

Customizing the WordPress Playground settings

The next thing you want to configure is the PHP version.

We recommend making it the same as the PHP version you use for your website. That said, you may not find PHP versions older than 7.0 here.

Available PHP versions in WordPress Playground

Below that, you can optionally enable the ‘Load extensions: libxml, openssl, mbstring, iconv, gd’ and ‘Network access (e.g., for browsing plugins)’ settings.

The first setting will load those specific PHP extensions (libxml, openssl, mbstring, iconv, and gd) to enhance your WordPress Playground. But they are not necessary.

The second setting is called ‘Network access.’ It’s a beta feature and will connect your WordPress Playground to the official plugin directory so that you can install WordPress themes and plugins right from the environment.

WordPress Playground's PHP settings

Finally, you can select a WordPress version for the Playground. You should pick the version you currently use for your WordPress blog or website.

WordPress also makes the ‘WordPress Nightly’ version available. This is the development version of WordPress that includes the latest changes made by the WordPress development team.

You can use this if you are a plugin or theme developer and want to test compatibility with the next WordPress update.

Once you are done configuring these settings, go ahead and click ‘Apply changes.’

Choosing a WordPress software version in WordPress Playground

And that’s all for the settings. Now, you can head to the admin area to start testing out the sandbox.

To open the admin area, hover over the site title menu and click ‘Dashboard.’ Or, you can also go to the Full Site Editor by clicking ‘Edit site.’

Going to the WordPress Playground dashboard or full site editor

How to Install Themes and Plugins in WordPress Playground

There are two ways to install a WordPress plugin or theme in WordPress Playground. One is to go to a plugin or theme page on WordPress.org and click the ‘Download’ button.

This will save the plugin or theme’s zip file to your computer.

Manually downloading the WPForms plugin

Then you can continue with the usual, manual WordPress installation for plugins and themes. You can read our guides for more instructions:

This method also works for testing premium WordPress plugins and premium WordPress themes.

For plugins, simply go to the dashboard of the WordPress Playground and navigate to Plugins » Add New Plugin.

After that, click the ‘Upload Plugin’ button and select ‘Choose File’ to upload the plugin zip file you downloaded earlier. Finally, click ‘Install Now.’

Installing a WordPress plugin in WordPress Playground

As for themes, WordPress will have a default theme installed for you when you first use the Playground.

But if you want to use a new free WordPress theme, you can download it manually from the WordPress theme directory. Then, in the Playground, go to Appearance » Themes and click ‘Add New Theme.’

Adding a new theme in WordPress Playground

On the next screen, click the ‘Upload Theme’ button.

After that, choose the theme file you downloaded earlier and click ‘Install Now.’

Installing a new theme in WordPress Playground

If this process seems a bit tedious, don’t worry. WordPress has been working on a beta feature allowing Playground to connect with the plugin or theme directory. This should be enabled if you choose ‘Network access’ during the setup earlier.

This way, the Playground works just like any typical WordPress dashboard and you can install free themes and plugins without saving them first to your computer.

Another way to install themes and plugins in WordPress dashboard is by using WordPress Playground’s Query API. It works by requiring you to add some query parameters to the WordPress Playground URL.

So, for example, if you want to install and test AIOSEO’s free version in WordPress Playground, then you can go to AIOSEO’s WordPress.org page. After that, take note of the AIOSEO’s URL slug.

Highlighting AIOSEO's URL slug in WordPress.org's plugin directory

Now, on a new browser tab, type in WordPress Playground’s URL with AIOSEO’s slug, like so:

https://playground.wordpress.net/?plugin=all-in-one-seo-pack

When you hit the ‘Enter’ key, WordPress Playground will automatically create a new environment with the AIOSEO plugin installed.

If you want to install the theme, then just replace the plugin parameter with theme, like so:

https://playground.wordpress.net/?theme=astra

You can even combine multiple query parameters if you want to install multiple plugins or themes on top of WordPress core. Just make sure to separate each parameter with the ampersand & sign.

Here’s what the URL will look like if you are installing the AIOSEO and MonsterInsights plugins as well as the Astra theme:

https://playground.wordpress.net/?theme=astra&plugin=all-in-one-seo-pack&plugin=google-analytics-for-wordpress

If you are a Chrome user, you can also install the Open in WordPress Playground extension. With this, whenever you go to a plugin or theme page on WordPress.org, you will see the ‘Playground’ button.

Clicking it will open a new WordPress Playground environment with the plugin or theme installed. It simplifies the query parameter method.

Using the Open in WordPress Playground Chrome extension

How to Export/Import a Site Made With WordPress Playground

Let’s say you’ve played around with WordPress Playground, added some new posts using the Gutenberg editor, and maybe even created an entire website. It would be a waste to just close the tab and lose all of your progress forever.

Luckily, you can export your site from WordPress Playground and save it to your computer. Whenever you open the Playground again, you can always upload that exported zip file to continue where you left off.

To do this, navigate to the top menu of the Playground and click the three-line menu in the top right corner. Then, click ‘Download as .zip.’

Downloading a WordPress Playground file

Your browser will then start downloading the file to your computer.

To upload the file to WordPress Playground, just open the Playground site and click the three-line menu again. After that, click ‘Restore from .zip.’

Restoring a WordPress Playground zip file

A popup will now ask you to choose a file that you exported earlier.

Once you’ve selected the file, just click ‘Import.’

Importing a WordPress Playground zip file

If the file is valid, you will see a popup notifying you that the import was successful and the Playground will be refreshed with the new instance.

Just click ‘OK’ to close the popup.

A popup message saying the WordPress Playground file import was successful

Import/Export WordPress Playground to GitHub

If you have a GitHub account, you can also export and import your site from WordPress Playground. GitHub is a great platform that allows you to track changes to your website, back up your files, and collaborate with other users.

To export a site from WordPress Playground to GitHub, click the three-line menu and select ‘Export Pull Request to GitHub.’

Exporting a WordPress Playground instance as a pull request to GitHub

In the next popup, you will see that WordPress encourages saving your website to your computer as a backup. Once you do that, you can tick the ‘I exported my Playground as zip’ box.

Then, click the ‘Connect to your GitHub account’ button.

Connecting GitHub with WordPress Playground

Next, you must confirm that you are authorizing WordPress Playground to access your repositories.

Just click ‘Authorize adamziel’ to continue.

Authorizing WordPress Playground to have access over your GitHub

At this stage, go ahead and select what type of files you are exporting: plugins, themes, or wp-content directory. If you want to export plugins, themes, media files, widgets, menus, and fonts, then select the last option.

You will also need to specify the GitHub repository’s URL to which you’d like to export the site. Then, click the ‘Next step’ button.

Choosing a GitHub repository to export the WordPress Playground to

Once you’ve done that, you need to choose whether you are creating a new pull request or updating an existing one. For demonstration purposes, we will choose the first option.

After that, enter the path in the repository where the changes should be committed.

You will also need to insert a commit message to specify what changes have been made using the WordPress Playground.

With all that done, click ‘Create Pull Request.’

Creating a new pull request in GitHub for a WordPress Playground instance

If the export is successful, WordPress will show a popup with a link to the new pull request.

Just click the link to see it in action.

Clicking the link to a newly created pull request of the WordPress Playground instance

Now, if you want to import a site from GitHub into WordPress Playground, just click the three-line menu again.

Then, select ‘Import from GitHub.’

Importing a WordPress Playground instance from GitHub

If you are opening a completely new WordPress Playground environment, then you might need to do the whole GitHub Playground authorization process again.

After that, just click the GitHub repository URL you’d like to import from. WordPress provides some examples if you are unsure.

Selecting a GitHub repository to import from in WordPress Playground

Next, you have to specify what files you are importing: themes, plugins, or the entire wp-content directory.

You may also insert the path of the repository that you are importing from. Once done, simply click ‘Import.’

Choosing what type of files to import from GitHub to WordPress Playground

If the import works, you will see a success message popup, confirming that the WordPress Playground will be refreshed with the new instance.

How to Embed WordPress Playground on Your Website

If you are writing a WordPress tutorial, then you will likely include screenshots from the WordPress dashboard to guide users through your instructions. However, sometimes screenshots just don’t accurately illustrate the actions you are describing.

This is where WordPress Playground can come in handy. You can embed it on your page or post, giving users a more interactive reading experience. They can follow along with your instructions using Playground.

First, you need to open the Gutenberg block editor for a page or post. Once there, click the ‘+’ add block button and select the Custom HTML block.

Selecting the Custom HTML block in the block editor

Now, go ahead and copy the code below, and paste it into the HTML block:

<iframe src="https://playground.wordpress.net/"></iframe>

If you want, you can also add some query parameters to this URL as we have shown you earlier.

After that, click ‘Publish’ or ‘Update’ to make the changes live.

Adding the WordPress Playground iFrame code in the block editor

The WordPress Playground may look different depending on your theme.

In our case, it did not look aligned with the blocks above it, and the element itself was too small to interact with.

The WordPress Playground iFrame element looking misaligned with the rest of the blocks

To avoid this, you can use this code instead:

<div class="iframe-container"><iframe src="https://playground.wordpress.net/" style="width: 100%; height: 500px"></iframe></div>

Here, the iFrame tag is wrapped in div tags to make the Playground embed follow the padding and margin of the container.

We also added the style attribute to set the iFrame’s width to 100% of its container, and the height to be 500 pixels tall.

Here’s what it looks like on the front end:

What the WordPress Playground iFrame code looks like on the front end when it's aligned

Frequently Asked Questions About WordPress Playground

Let’s cover some frequently asked questions about WordPress Playground.

Can you use WordPress in your browser?

Yes, WordPress Playground lets you use WordPress directly in your browser. You can build websites and try out themes and plugins before installing them on your live site.

Can I install custom themes and plugins in WordPress Playground?

Yes, you can install custom themes and plugins in WordPress Playground to see if they work in the admin area and are compatible with certain WordPress versions.

Can I upload a site made with WordPress Playground to my hosting account?

Technically, you can export your site from WordPress Playground and import it into your WordPress hosting account. However, since WordPress Playground uses the SQLite database, you may need to convert the database to MySQL for the site to run on a web server.

How do I run WordPress plugins and themes locally?

If you want to run WordPress plugins and themes in a local development environment, then you must create a local WordPress site first. You can read our tutorial on how to build a local WordPress site for step-by-step instructions.

We hope this article has helped you learn what WordPress Playground is and how to use it in your browser. You may also want to check out our article on how to easily create a staging site for WordPress and our list of the best WordPress plugins to clone or duplicate a site.

If you liked this article, then please subscribe to our YouTube Channel for WordPress video tutorials. You can also find us on Twitter and Facebook.

The post WordPress Playground – How to Use WordPress in Your Browser first appeared on WPBeginner.


from WPBeginner https://ift.tt/dqg4HWt
More links is https://mwktutor.com