Do you want to create a questionnaire in WordPress to survey your visitors or collect data?
Getting feedback on your products or simply learning more about your users can help your business to succeed.
In this article, we will show you how to easily create a questionnaire in WordPress, step by step.

Why Create a Questionnaire in WordPress?
Creating a questionnaire is a great way to learn more about your audience. This lets you tailor your content to their needs. You can also use the results to create or modify the products / services that will be most helpful to your audience.
There are several survey tools that you can use outside your website, but having your questionnaire on your website itself means you have full control over how it’s displayed. Plus, it’s more familiar and reassuring for your audience.
That being said, let’s take a look at how to easily add a questionnaire to your WordPress site.
Creating a Questionnaire Form in WordPress
For this tutorial, we’ll be using WPForms to create a questionnaire.
WPForms is the best forms plugin for WordPress and allows you to easily create any kind of forms using a simple drag and drop form builder.
First, you need to install and activate the WPForms plugin on your WordPress site. For more details, see our step by step guide on how to install a WordPress plugin.
Note: You’ll need the Pro version of the plugin to get the features that we will use in this tutorial.
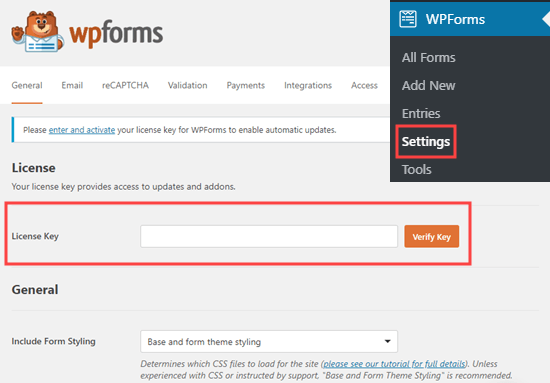
Upon activation, you need to visit the WPForms » Settings page in your WordPress admin area to enter your license key. You’ll find the license key under your account on the WPForms website.
Now, it’s time to move on and create your questionnaire.
Creating a Questionnaire Using WPForms’ Survey and Polls Feature
WPForms’ powerful surveys and polls addon lets you create questionnaires easily. It also produces beautiful visual graphs of the results.
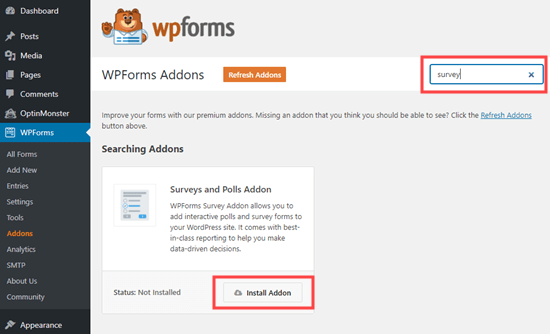
First, visit the WPForms » Addons page to install the Survey and Polls addon. Use the search bar to find it, then click the Install Addon button.
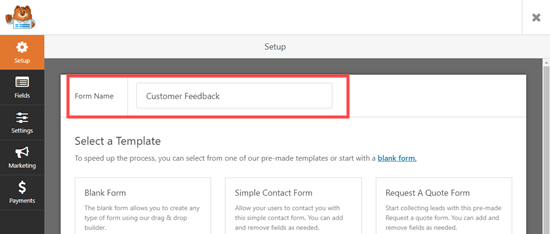
Next, go to WPForms » Add New to create a new form. First, type in a name for your form at the top of the screen:
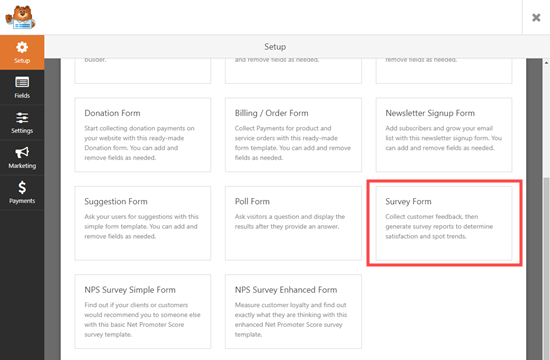
There are 4 different pre-built survey form templates to choose from. These are the Poll Form, the Survey Form, the NPS Survey Simple Form, and the NPS Survey Enhanced Form.
We are going to use the Survey Form for our questionnaire.
After you select the template, it will open up in the WPForms editor.
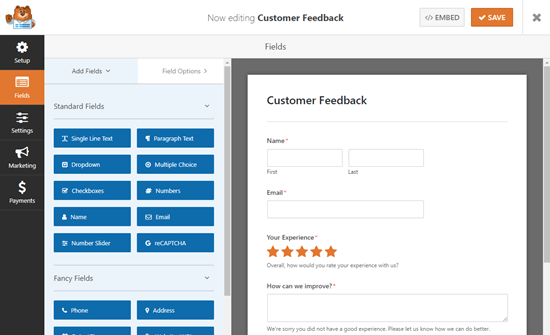
We recommend that you edit the questions to make them appropriate for your audience and needs. We are going to use the form to gather customer feedback on products and delivery.
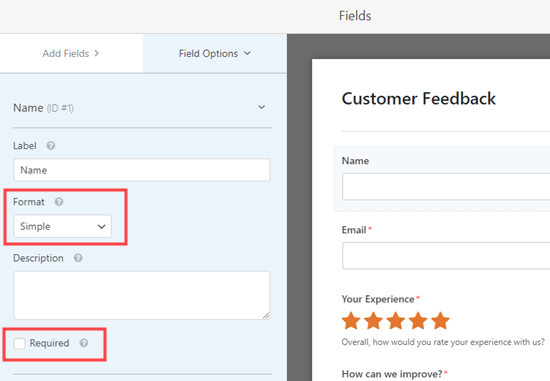
To edit any field, simply click on it. The editing view will then open up on the left-hand side of your screen. Here, we are editing the Name field at the top. We changed the format to ‘Simple’ using the dropdown.
We also made it optional by unchecking the ‘Required’ box.
The ‘How can we improve?’ box only appears if the user rates their experience as 1 star or 2 stars.
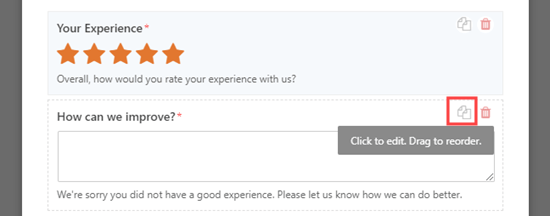
We’re going to add a new feedback box that will appear if the user rates their experience as 3 or 4 stars. To do this, simply bring your mouse cursor over the ‘How can we improve?’ box then click the Copy button:
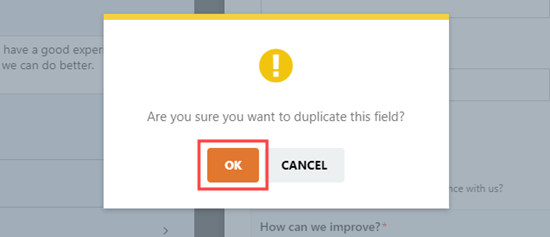
Next, WPForms will check that you want to duplicate the field. Go ahead and click the ‘OK’ button to continue:
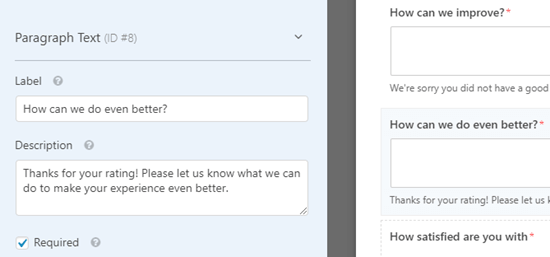
Now, you can edit your new field on the left-hand side of the screen. We have changed the label, which appears above the box. We also changed the description, which appears below the box:
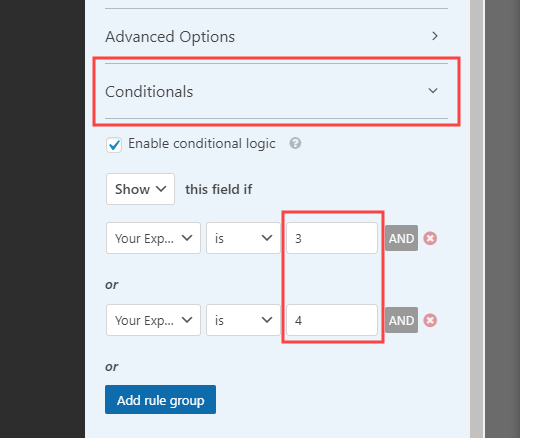
You also need to set the conditional logic for this field. To do that, click the Conditionals tab. Then, set the numbers to 3 and 4 instead of 1 and 2:
Finally, we are going to edit the ‘How satisfied are you with’ Likert scale. A Likert rating scale is a 5 or 7 point scale that is often used to measure satisfaction or attitudes.
Again, simply click on the field to edit it. Then, change the labels of the rows or columns to the text you want to use.
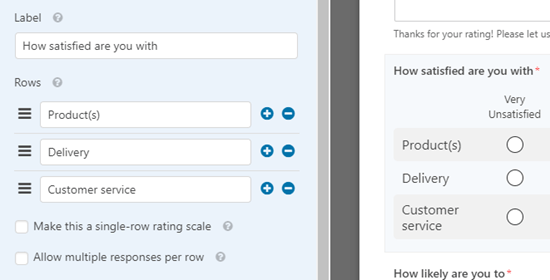
We are going to change the labels of the rows to make them more specific:
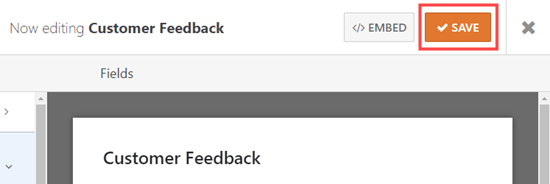
Go ahead and make as many changes to the form as you like. Don’t forget to click the ‘Save’ button at the top of the screen:
Setting Up Notifications for Your Questionnaire
WPForms will send each completed questionnaire to the business email address that’s set in your website settings. It’s easy to change this by going to Settings » Notifications.
Simply delete the {admin_email} in the ‘Send To Email Address’ box and enter the email address you want to use instead:
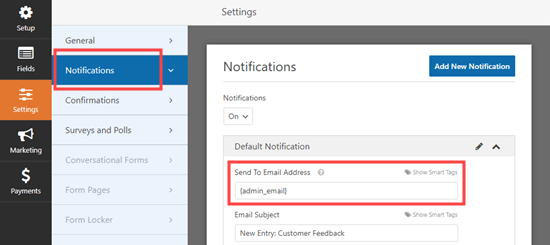
Tip: Not sure what your WordPress administration email is? Go to Settings » General and check what is listed in the ‘Administration Email Address’ box.
Don’t forget to save your questionnaire after making any changes.
Adding Your Questionnaire to Your Website
You can add your questionnaire to any post or page on your website. You can even add it to your sidebar.
To add your form to a page, edit your page or go to Pages » Add New to create a new one. Then, click the + button to add a new block. Select the ‘WPForms’ block:
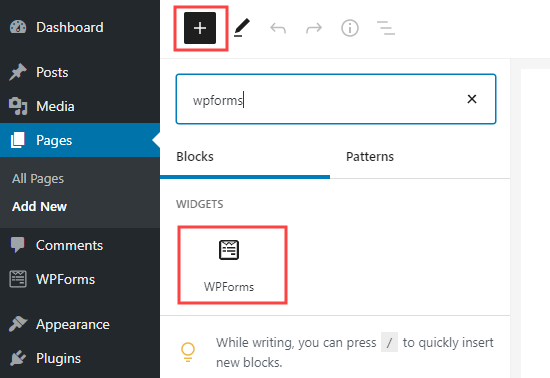
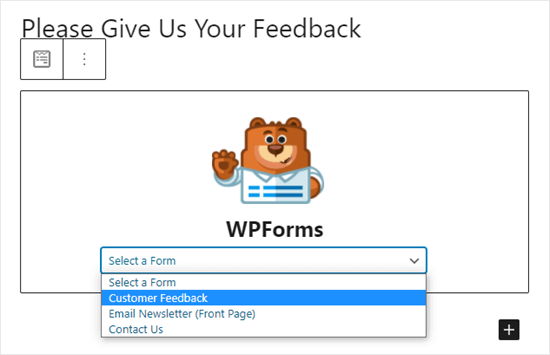
Next, simply click on the dropdown and select your questionnaire form.
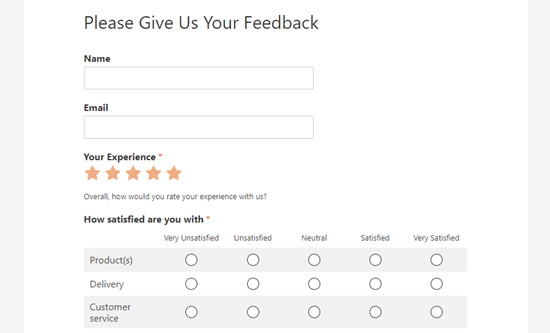
Now, simply preview or publish your post to see the form live on your WordPress website:
Creating a Questionnaire Using Conversational Forms
You can also use WPForms’ conversational forms feature.
A conversational form is an interactive form that flows like a conversation. Users answer a question and it automatically shows them the next one.
It makes longer forms like a questionnaire easier to fill out and reduces form abandonment.
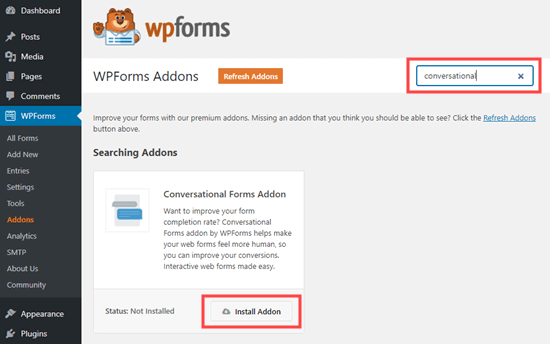
First, you need to go to WPForms » Addons in your WordPress admin. Then, search for and install the Conversational Forms addon:
After that, go to WPForms » Add New and create a new form using the instructions in the previous method.
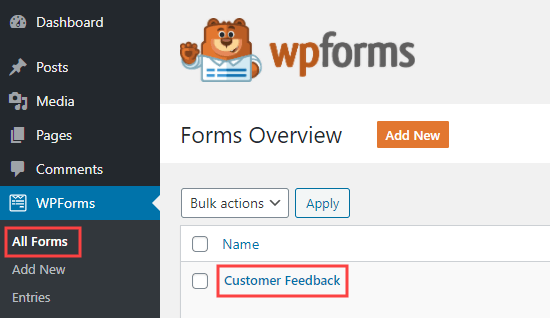
If you already created your form, then simply go to WPForms » All Forms page and click on it to edit it:
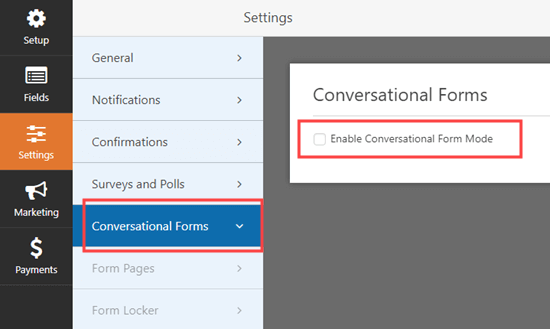
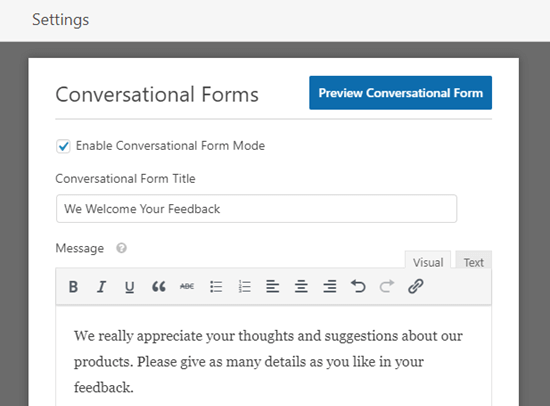
Now, we are going to convert your form into a conversational form. First, go to the Settings » Conversational Forms tab. Then, simply check the ‘Enable Conversational Form Mode’ box.
You will then see a number of extra options to fill in. Conversational forms can’t be embedded in a post or page, so you need to give your form a title here. You can also write any text that you want to display above the form:
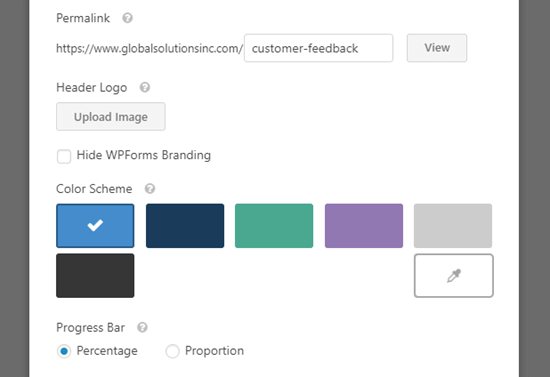
WPForms will automatically create a URL for your conversational form based on the form’s name. If you want to change this, simply type in a different URL here.
Optionally, you can also upload a header image, choose a color scheme, and change the Progress Bar style.
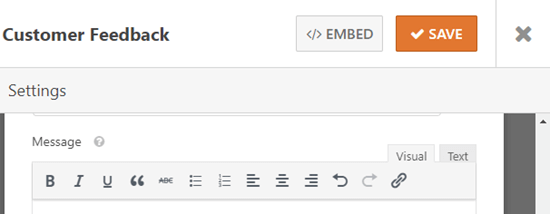
Once you are happy with your form’s settings, don’t forget to click the ‘Save’ button at the top of the screen:
Now, click the ‘View’ button next to the permalink for your form to see it live on your site:

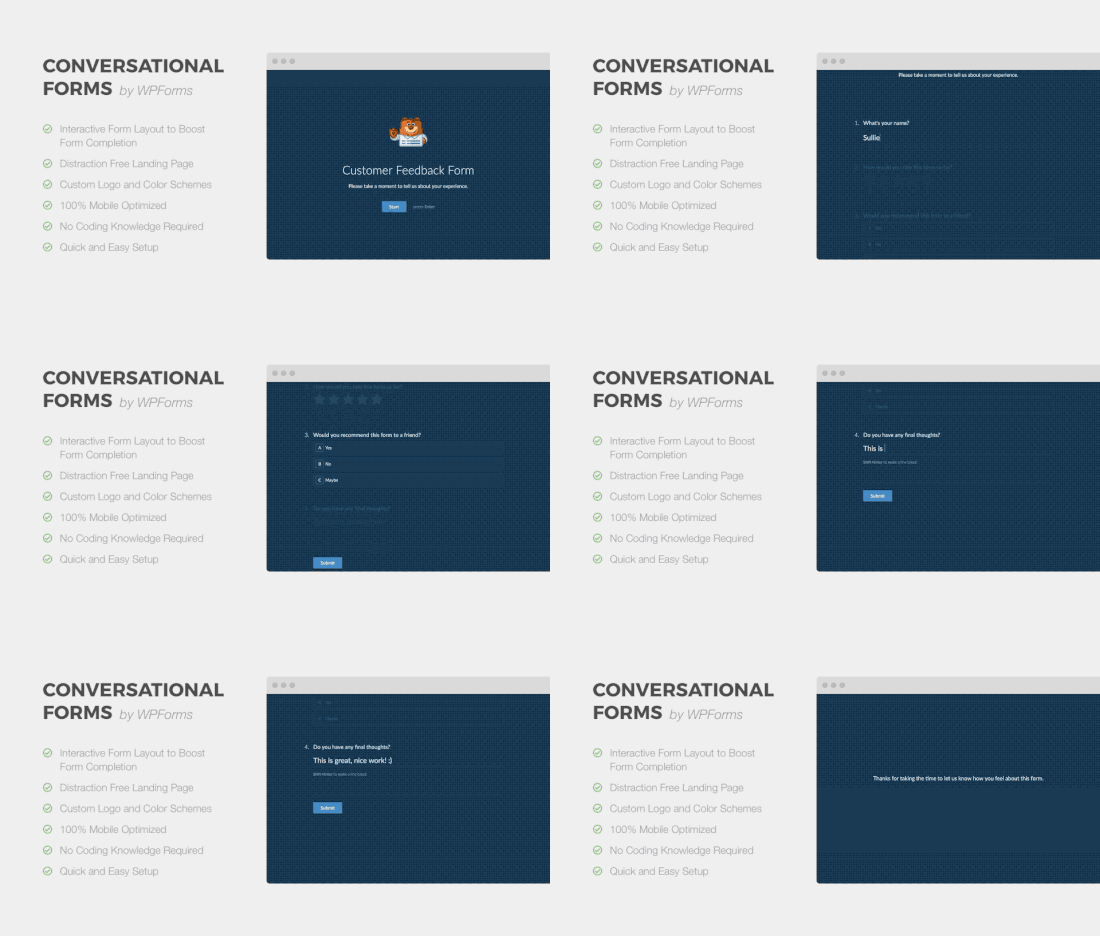
The customer simply clicks the Start button to begin the form.

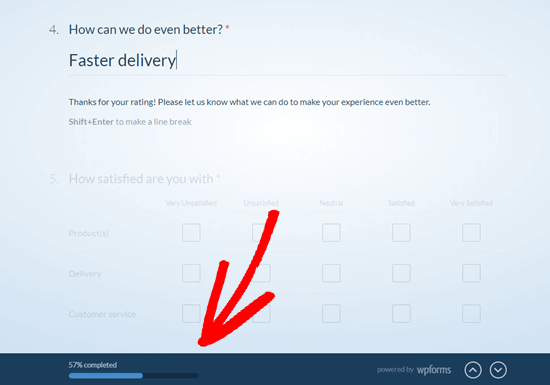
They can then enter their responses one question at a time. The questions that aren’t active will be faded out until the customer moves to them.

The sticky progress bar at the bottom of the screen will show how far through the form the customer is:
That’s it. You’ve successfully created your conversational questionnaire.
Viewing the Results from Your Questionnaire
Whether you created a regular survey or a conversational form, the process for viewing the results is the same.
Each questionnaire response will be emailed to the email address you set up under Settings » Notifications.
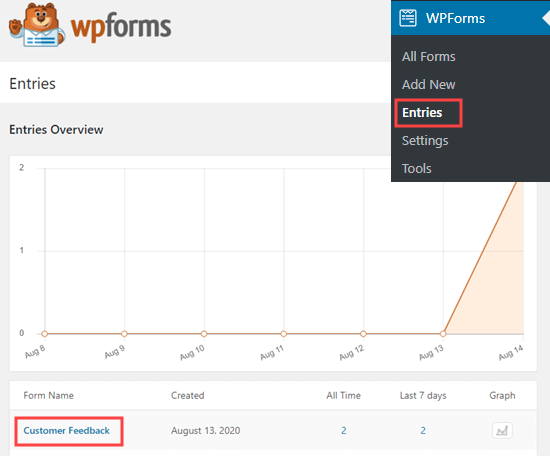
WPForms also stores all your survey results in your WordPress database. To view them, go to WPForms » Entries in your WordPress dashboard. Then, click on the name of your survey form:
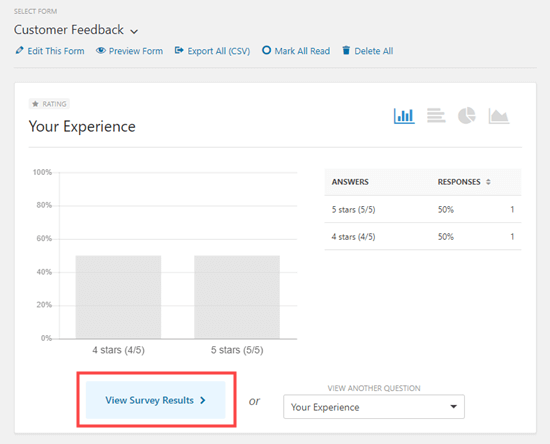
You will then see some of the answers from your questionnaire. Simply click the ‘View Survey Results’ button to view all the questionnaire results.
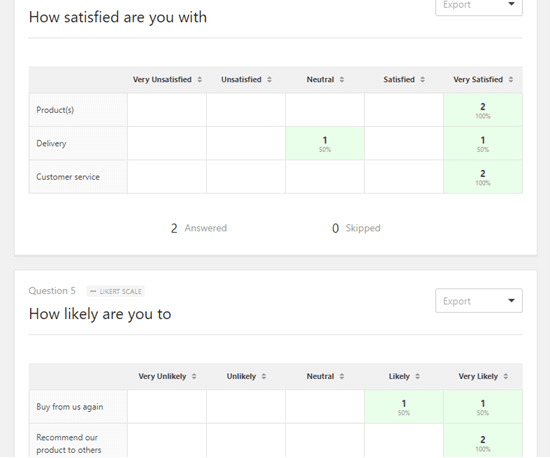
WPForms will automatically create graphs and charts to make it easy to interpret the results:
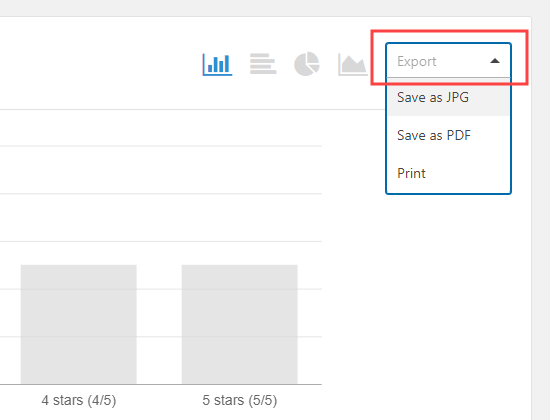
It’s easy to export any of the graphs as a PDF or JPG. You can even print them to share with others in your organization. Just click the ‘Export’ link next to any item and choose from the dropdown menu:
You can also download all your results as a CSV file. Just click the ‘Export All (CSV)’ button near the top of the page to download all the results:
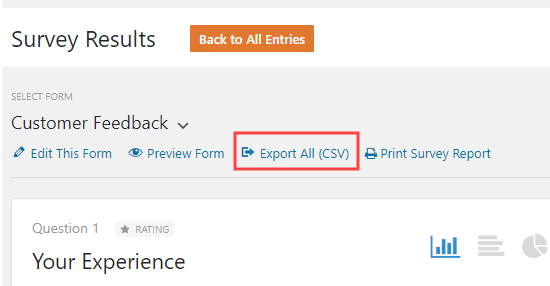
If you want to view the questionnaire answers from individual customers, then click the ‘Back to All Entries’ button at the top of the screen:

Next, scroll down to the table at the bottom of the screen. Click the ‘View’ button for the entry you want to see:
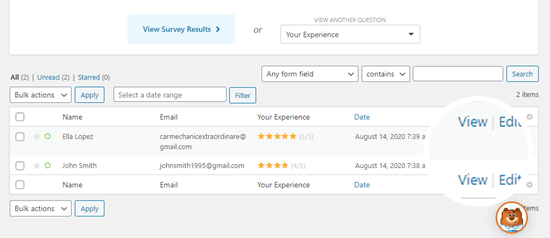
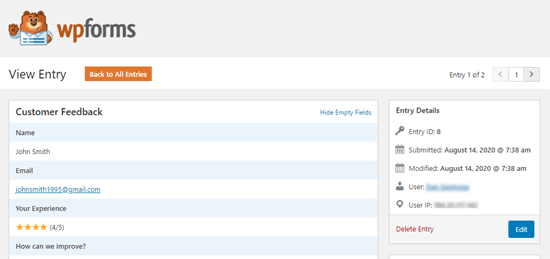
You will now see all the answers submitted by that person.
We hope this article helped you learn how to create a questionnaire in WordPress. You might also enjoy our articles on the best email marketing services and how to start an online store.
If you liked this article, then please subscribe to our YouTube Channel for WordPress video tutorials. You can also find us on Twitter and Facebook.
The post How to Create a Questionnaire in WordPress (Easy Way) appeared first on WPBeginner.
from Tutorials – WPBeginner https://ift.tt/31vqFfc
More View at https://mwktutor.com
No comments:
Post a Comment