As I write and you read this, the WordPress core team is in the process of developing an entirely new content editor for WordPress – Gutenberg – and it is currently scheduled for release at some point in 2018 as part of WordPress 5.0.
When that happens, the way that you write your blog posts in WordPress will drastically change (though you will be able to install a plugin to keep using the current editor, if desired).
It is to help you get ready for the change that I have penned down this post on How To Use The WordPress Gutenberg Editor.
I’ll show you exactly how you can use the new editor to write a blog post so that you are ready for the transition when WordPress 5.0 and Gutenberg get released.
An Introduction To The WordPress Gutenberg Editor Interface
When you first go to create a new post or page with Gutenberg, here’s what you’ll see:
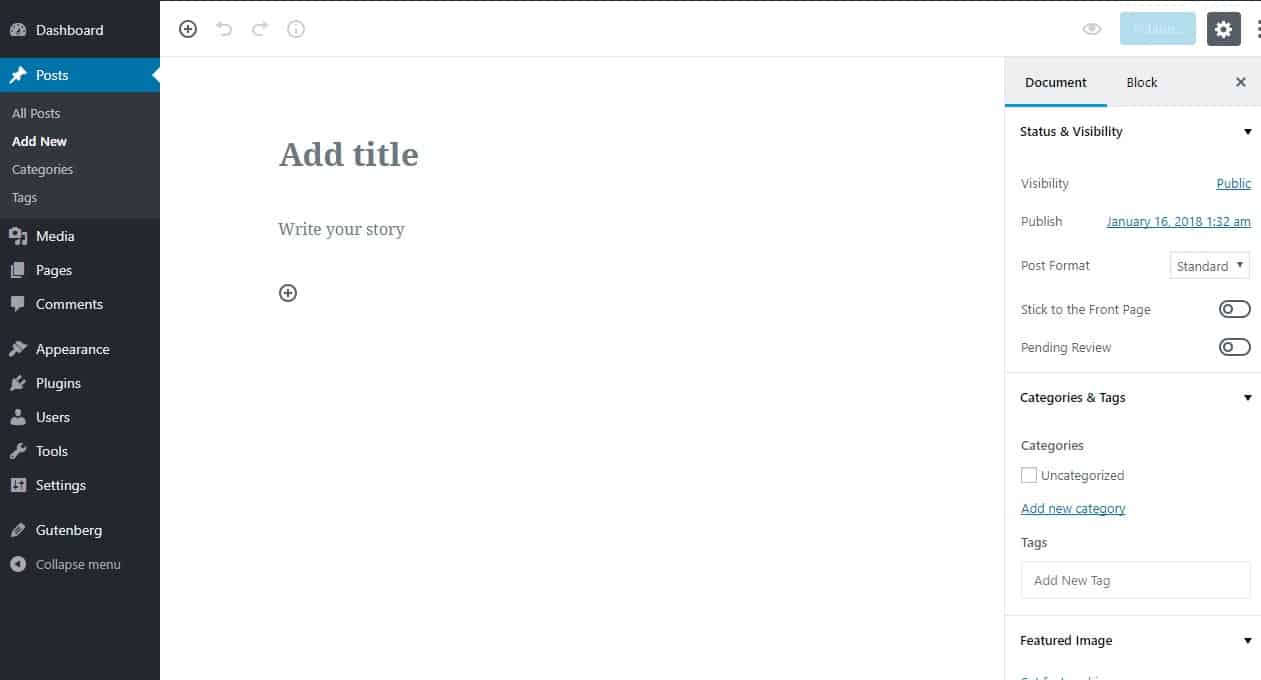
It is somewhat similar to the current WordPress TinyMCE editor, but the biggest difference to you would be the absence of the single text box for you which you currently use to write and format all your content.
Instead, you will have one big white area that starts with ‘Write your story’. If you read my post on what the WordPress Gutenberg editor is, you’ll know that is because Gutenberg uses “blocks” to help you create your content, rather than a single text input area.
For more information on what blocks are, I recommend that you read my post above. But as a quick refresher, a block can basically be anything. It can be:
- A regular paragraph of text
- An image
- A CTA button
- An embedded video
Third-party developers will also be able to code their own blocks to add more functionality. You can already see an example of this with the BlocksWP Social Share Block.
How To Use The Gutenberg Editor Interface
Here are what the various areas of the Gutenberg interface let you do:
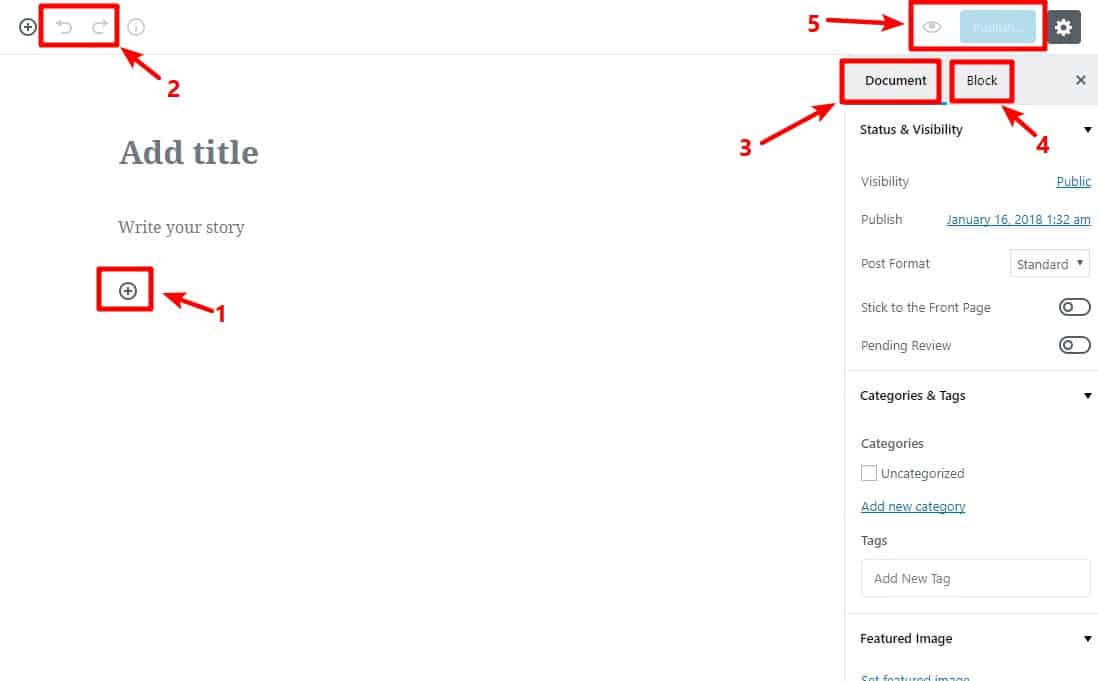
- Click this button to add a new block.
- Undo/redo buttons let you move forward or backward to edit easily, just like Microsoft Word.
- This settings area includes many of the same options as the current WordPress editor sidebar. It is where you add categories/tags, set the featured image, choose the publishing date etc.
- When you select an individual block, this settings area includes settings that are specific to that block. It is where you can choose colors, styles, and other important block-specific details.
- These two buttons let you preview or publish your post.
If you click on the +Plus button to insert a block, it will open a window that lets you browse all available blocks that you can use in your content:

The Recent and Saved tabs allow you to access blocks that you frequently use, while the Blocks and Embeds tabs let you browse all available blocks.
You can also use the search box to quickly find a specific block by typing in the block’s name.
How To Write A Blog Post Using The Gutenberg Editor
Now that you know how the interface works, well, to an extent, I’ll show you how you can actually use Gutenberg to write a blog post for your site.
For example, let’s say that you want to write a blog post that includes:
- Lots of regular text
- An image
- An embedded YouTube video
- A table
- A CTA button
Previously, you might’ve needed some separate plugins or custom CSS to handle creating a table and CTA button – but now you can do everything with Gutenberg.
Step 1: Write your text using paragraph blocks
To write the text of your blog post, Gutenberg doesn’t require you to actually add a new block. Instead, you can just click on the page and start writing like this:
Pretty easy so far, right?
All you do is type. And whenever you hit enter to start a new paragraph, Gutenberg will automatically create a new block.
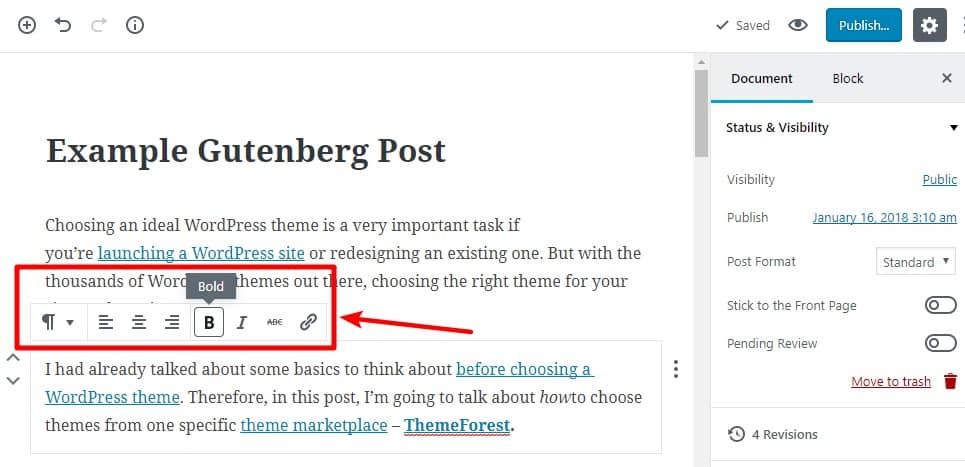
If you want to add a link, change alignment, or format the text with bold or italics, you can just click on the text block and use the floating menu bar:
Step 2: Add an image block
To add an image anywhere in your blog post, all you need to do is hover over the spot where you want to insert your image.
When you do that, you will see the +Plus icon appear. Clicking on it will open the block list, which will help you choose the Image block.
When you do that, you’ll be able to upload a new image or select an image from your Media Library, just like you do with the current WordPress editor:

Once you insert the image block, you’ll see the actual image right there in the editor.
Step 3: Add a YouTube embed block
To embed a YouTube video, you follow an almost identical process:
- Hover over where you want to embed your YouTube video
- Click the +Plus icon
- Go to the Embeds tab
- Choose YouTube
Then, all you need to do is paste in the URL to the video, click Embed, and you’ll see the embedded video right there in your post:

Step 3: Add a table block
The table block lets you insert and manipulate a table anywhere in your content with ease.
To do so, you will need to follow the same process as above. And once you add it, you can add or remove rows and columns by using the floating menu bar:

Step 4: Add and style button block
The button block is one of my favorite additions to the Gutenberg editor because buttons are something that were previously difficult to add without knowing the usage of custom CSS. But with Gutenberg, using buttons is simple.
First, you can insert a button by following the same process similar to other blocks. To edit the button’s text, all you need to do is click and type:

You can also go to the Block tab to change the colors of your button:

And that’s it! You just wrote an entire blog post using the new WordPress Gutenberg editor. It is that simple.
Some Other Helpful Things That You Can Do With The WordPress Gutenberg Editor
Apart from what I demonstrated above, there are also some other helpful things that you can do with Gutenberg.
One feature that’s helpful is the ability to add a unique background color to any paragraph block in your post:

You can also use the up and down buttons next to each block to quickly change the positioning of the block i.e. without the old copy and paste method:

And finally, if you want to save some time while inserting new blocks, I like the quick-insert autosuggest feature. Rather than needing to use the +Plus icon every time you want to insert a new block, you can just start typing and use this format /block-name.
As you type, Gutenberg will automatically suggest blocks that match:

With this feature, you can add blocks just by using your keyboard, which helps keep you in your flow.
What Do You Think Of The New Gutenberg Editor?
Now that you’ve had a chance to see more of how the new Gutenberg editor functions, let us know what you think about it.
Do you think it will make your blogging easier? Or do you still prefer the current WordPress editor?
Let us know in the comments!
Here are a few other hand-picked articles for you to read next:
- Blogging In Indian Society & How You Can Bring Change
- Flywheel WordPress Hosting: Everything You Need To Know
- 10 Killer Ways To Promote YouTube Videos For Higher Traffic
- The Importance of Keywords in SEO: A Beginner’s Guide
Subscribe on Youtube
How To Use The WordPress Gutenberg Editor – A Complete Guide For Beginners is a post from ShoutMeLoud - Shouters Who Inspires
from ShoutMeLoud http://ift.tt/2DJdkpm
More View at https://mwktutor.com
No comments:
Post a Comment