Tuesday, 30 September 2025

WPBeginner Spotlight 16: WordPress Privacy Tools, New AI Block Builder, and Smarter Plugin Updates

We’re back with the September 2025 edition of WPBeginner Spotlight: our monthly roundup of WordPress news, plugin updates, and community highlights.

This issue is packed with major product releases, new AI tools, and insights from WordCamp US 2025 in Portland.

Among the most significant updates are stronger privacy controls in WPConsent and new automation options in Uncanny Automator.

Let’s take a closer look at the biggest announcements and what they mean for WordPress site owners.

β„Ή️ WPBeginner Spotlight brings you a monthly roundup of the most important WordPress news, updates, and industry insights. πŸ“…✨

Got news to share? Whether it’s a new product launch, major update, or event, send us a tip here, and it could be featured in the next edition! 

WPBeginner Spotlight 16: WordPress Privacy Tools, New AI Block Builders, and Smarter Plugin Updates

WPConsent Adds Clarity Consent Mode, Global Privacy Controls, and Subdomain Cookie Sharing

The popular cookie consent management plugin, WPConsent, has shipped major updates that make privacy compliance simpler and less intrusive for visitors.

New support for Global Privacy Controls lets sites automatically honor browser-level privacy signals. This helps with regulations like the CCPA and reduces friction for visitors.

WPConsent global privacy control

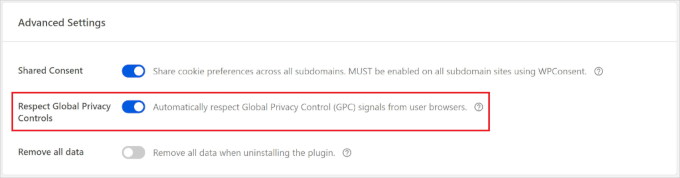
Plus, Shared Consent across subdomains means a user’s choice applies site-wide, so visitors no longer see repeat banners on sibling subdomains.

Another new feature is the ‘Clarity Consent Mode‘, which keeps Microsoft Clarity functional in a limited, cookieless state until users give consent. This is important because Clarity will start enforcing consent on October 31, 2025, for the EEA, UK, and Switzerland.

Clarity consent mode in WPConsent

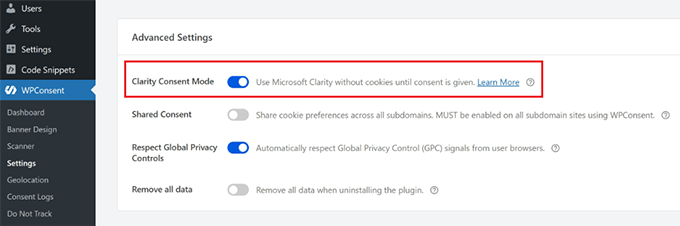
Site owners can also now customize banners and messages based on visitor location or region. For example, you can show GDPR-focused wording in Europe and simpler notices elsewhere.

You can enable these features in WPConsent’s Advanced settings and in location templates. The goal is a smoother user experience with fewer compliance risks.

WordCamp US 2025 Brings 1,200 Attendees to Portland, With Growth, AI, and Community in Focus 🎀

WordCamp US 2025 group photo

Photo credit: WordCamp US

WordCamp US 2025 wrapped up four days of contributions, sessions, and keynotes at Portland’s Oregon Convention Center. Organizers sold 1,200 tickets, down from 1,928 in 2024.

Note: WordCamps are WordPress community events organized around the world by volunteers. WordCamp US is a bigger flagship event that is organized every year. To learn more, see our WordCamp explainer.

The event was powered by 27 organizers and 47 volunteers, creating a positive atmosphere for attendees.

Sessions covered a wide range of topics, from Danny Sullivan’s keynote on search to technical deep dives into AI tools, block development, and experiential medicine. Presentations by John Maeda, Ryan Welcher, and others highlighted both the opportunities and challenges ahead for WordPress and the open web.

In his closing keynote, WordPress co-founder Matt Mullenweg shared growth statistics. These included a 19% traffic increase on WordPress.org, surging YouTube subscribers, and a 32% rise in WordPress events.

He praised the Plugins Team for clearing their review backlog, which means faster approval times for new plugins and updates. And he showcased AI prototypes built during Contributor Day, pointing to tools that could make development and site management easier in the near future.

He also soft-launched Telex, an AI tool that generates Gutenberg blocks from simple user prompts. For non-developers, this could make custom site design far easier and reduce the need to hire developers for custom features.

The conference concluded with the announcement that WordCamp US 2026 will be held in Phoenix, Arizona, from August 16 to 19. Despite concerns about the heat and unusual schedule, local organizers expressed excitement about welcoming the WordPress community to their city.

EDD Software Licensing Adds Smart Reports, Auto-Drafts, and Performance Upgrades for Digital Sellers πŸ“Š

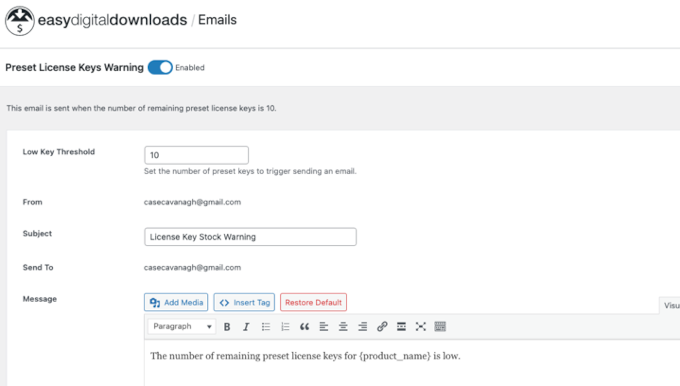
Easy Digital Downloads has released a new version of its Software Licensing extension. The update offers smarter reporting, more automation, and performance improvements for software businesses, including WordPress plugin and theme companies.

For example, store owners can now receive low stock email alerts when keys are running out. They can also switch products automatically to draft once the last key is sold, which can prevent overselling.

License key preset

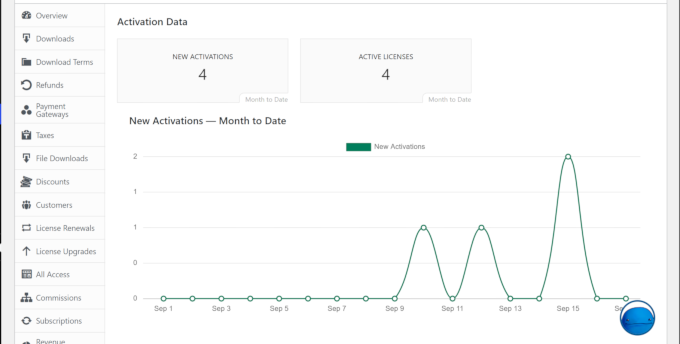
The update also introduces new reports, which give sellers a clear view of how licenses are being activated and which product versions are most in use.

This helps with planning updates, prioritizing support, and deciding where to focus development resources.

Licensing reports in Easy Digital Downloads

License and refund management have been improved as well. Site owners now have more flexibility when giving partial refunds, with a simple option to disable associated license keys. This makes handling customer requests easier and more accurate.

Other updates include compatibility improvements and the ability to show license expiration dates at checkout.

Together, these changes give digital sellers more control, better insights, and a stronger foundation for growth.

Uncanny Automator Adds Asana, GitHub, and Remote Work Automations for Developers and Teams

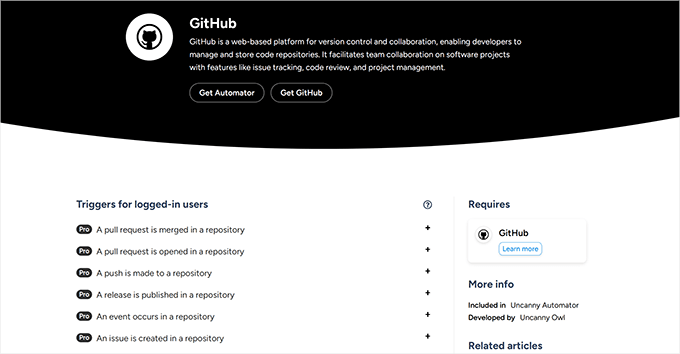
The WordPress automation plugin, Uncanny Automator, has introduced powerful new integrations for Asana and GitHub, making it easier to connect WordPress with remote work and development workflows.

The Asana integration lets users create and update tasks, add comments, and trigger actions in real time from the WordPress dashboard. This helps teams stay aligned without extra manual steps.

Automator's Asana integration

On the other hand, the new GitHub integration is built for developers, with triggers for pull requests, issues, and releases, plus actions like adding labels or comments.

This creates a bridge between WordPress sites, development pipelines, and repository management.

Uncanny Automator's Github integration

Automator 6.9 also expands existing tools. Google Calendar and Woo Bookings gain new tokens to simplify scheduling, while Easy Digital Downloads adds triggers for customer segmentation and automated discount codes.

Together, these updates make Automator a stronger hub for connecting WordPress to third-party apps, saving time for developers, marketers, and remote teams.

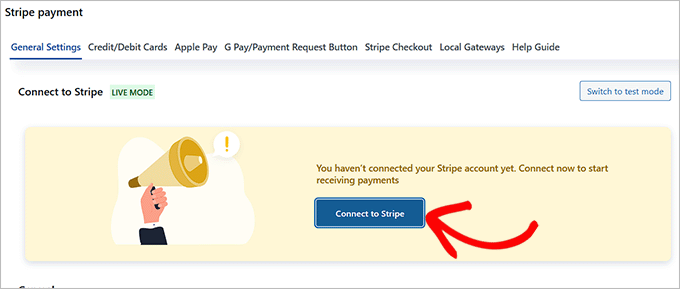
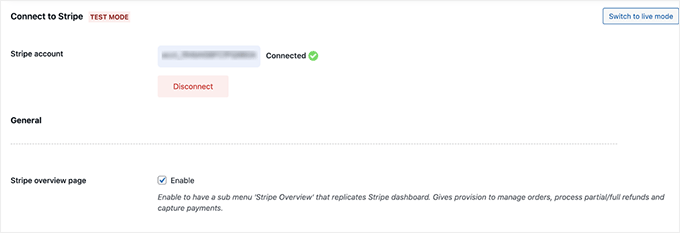
AffiliateWP Adds Stripe Payouts for Easier Affiliate Payments Inside WordPress

AffiliateWP, the powerful affiliate management plugin for WordPress, has introduced Stripe payouts. This gives site owners a faster way to pay their affiliates directly from the WordPress dashboard.

AffiliateWP Stripe payout option

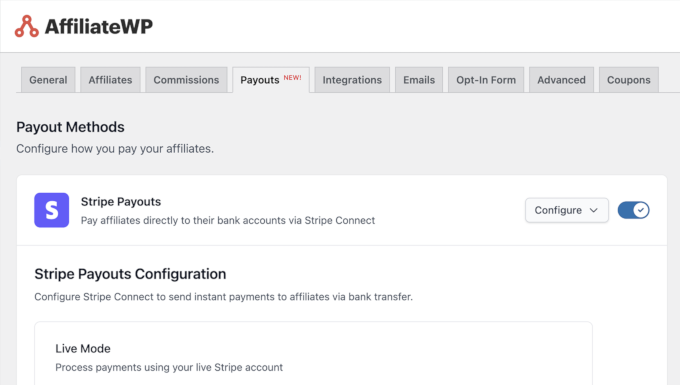
Until now, many programs have relied on PayPal or manual transfers, which have added delays and complexity. With the Stripe integration, business owners can send payouts quickly and securely without leaving WordPress.

They can also choose to send a payout to individual affiliate partners manually or to eligible partners based on their payout period.

AffiliateWP send payout

Affiliate partners can also view their payments in their Stripe Express dashboard, which makes tracking easier and reduces the support requests for site owners.

Overall, the new feature makes affiliate management more efficient for site owners while offering affiliates more reliable and flexible payment options.

MonsterInsights Adds Google Ads Campaign Creation Inside WordPress Dashboard for Faster Marketing πŸš€

MonsterInsights, a Google Analytics plugin for WordPress, has recently launched a new feature that lets users create Google Ads campaigns directly from the WordPress dashboard.

The tool pre-fills campaign data using site insights and connects with the MonsterInsights analytics features. This allows site owners to set up ads quickly without needing to switch to external tools.

Google Ads in MonsterInsights

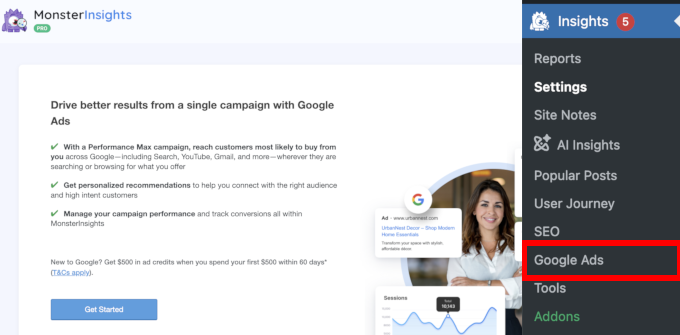
It allows site owners to set up Google Ads that appear across Search, Gmail, YouTube, and more from a single campaign. This makes paid marketing faster and simpler, even for small businesses without prior ad experience.

Plus, it makes ads more effective by connecting them to actual site data. As an added bonus, users can also track the performance of their ads from the same dashboard.

By combining ad creation with tracking and reporting, MonsterInsights makes paid marketing more accessible to small businesses and site owners who want to grow traffic.

In Other News

  • Envira Gallery has introduced new features in their recent update: a new Highlight Grid layout for showcasing featured images and a Dribbble Addon that lets designers display their latest Dribbble shots in WordPress galleries. The update also includes UI improvements for easier gallery creation.
  • Web hosting provider Rocket.net has announced a partnership with Hosting.com (formerly A2 Hosting). The two companies aim to build a next-generation SaaS web hosting platform by combining Rocket.net’s edge hosting technology with Hosting.com’s infrastructure and capital resources.
  • Smash Balloon has added support for embedding live Twitter/X broadcasts directly on WordPress sites. This update makes it easier to stream events, announcements, or live shows in real-time without the need for a third-party tool.

πŸ“’ Grow Your Email List with OptinMonster

OptinMonster

OptinMonster is the #1 conversion optimization toolkit for WordPress. Easily create popups, slide-ins, and email signup forms to turn abandoning visitors into subscribers and customers.

Join 1M+ websites using OptinMonster to grow faster with smart targeting, A/B testing, and powerful analytics.

  • Web.com is now officially part of Network Solutions as Newfold Digital restructures into two divisions. The move consolidates domain services under the Network Solutions brand while creating a separate hosting and web services group.
  • Charitable has released a new version with Test Mode alerts, more Elementor styling options, and a built-in feedback form. The update helps nonprofits avoid missed donations, design better campaign pages, and share ideas for future features directly with the Charitable team.
  • FunnelKit has rolled out a series of summer updates, including improved analytics dashboards, a new archive page builder, and improvements to WooCommerce one-click upsells. These features aim to provide store owners with deeper insights, more flexible design tools, and better post-purchase monetization options.

Easily Migrate and Back Up Your WordPress Site with Duplicator

Duplicator

Duplicator is the most powerful WordPress backup and migration plugin. Easily clone, move, or back up your site with just a few clicks—no technical skills required.

Join 1.5M+ website owners who trust Duplicator for secure backups, seamless migrations, and peace of mind.

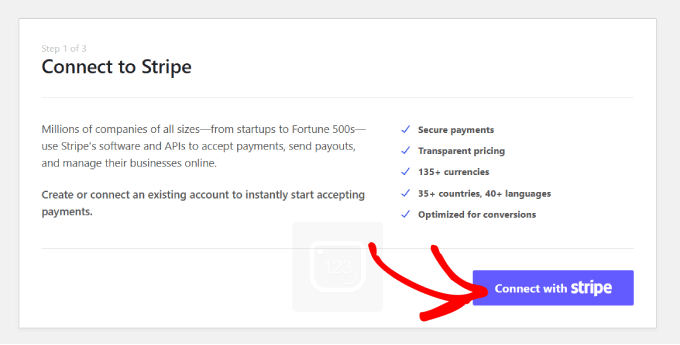
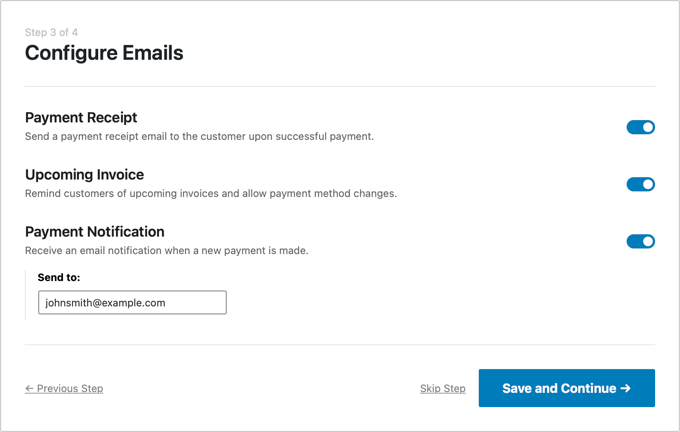
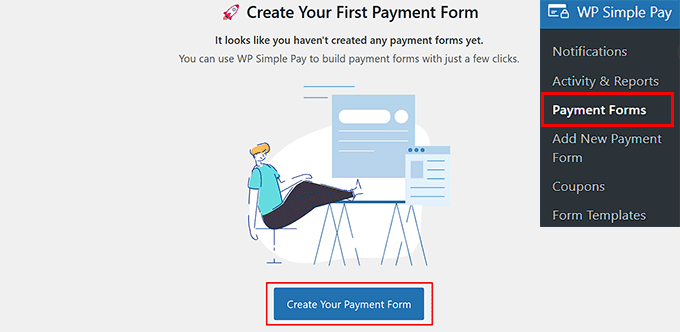
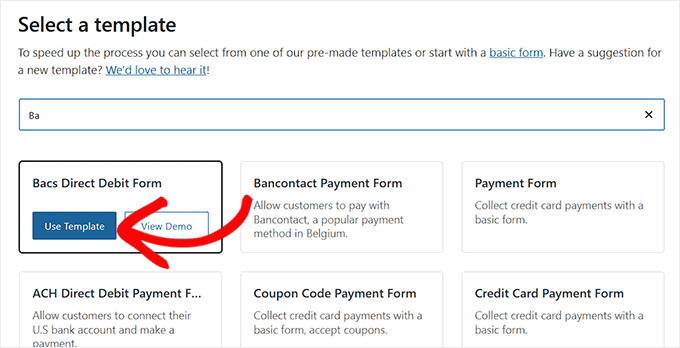
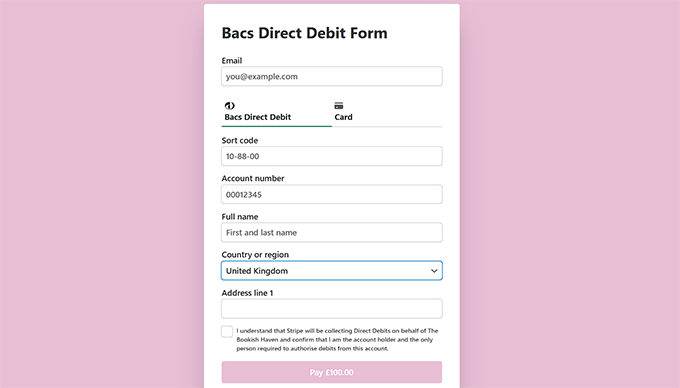
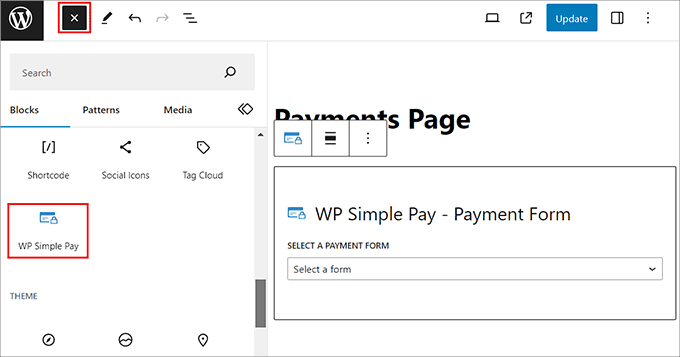
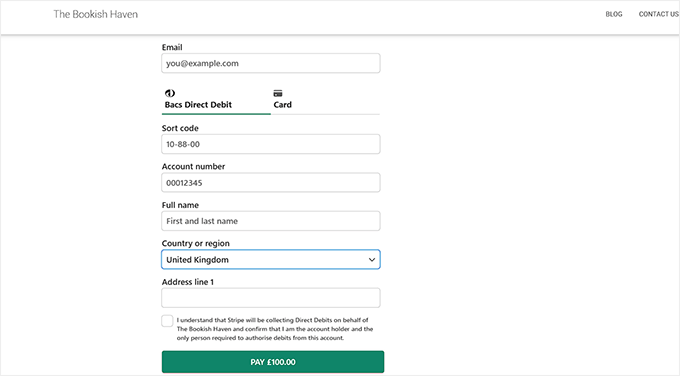
  • RSL Standard is a new initiative for introducing a machine-readable standard for digital media licensing. It aims to make it easier to declare and detect license information across projects. A free plugin, RSL-WP, is already available on GitHub for WordPress users who want to add it to their sites. This is not a payment solution, but a way to provide clear licensing details. If you need to accept subscription payments, then tools like WP Simple Pay can handle that instead.
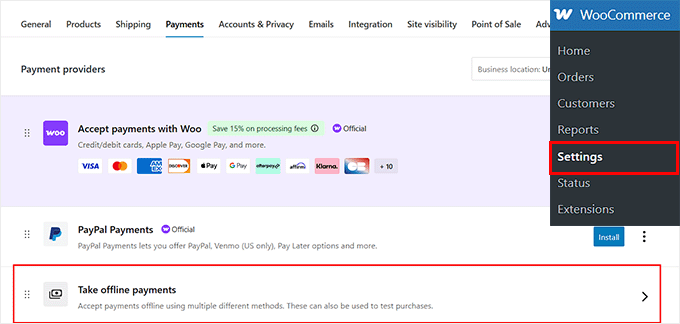
  • WooCommerce 10.2 was released with major performance improvements to the cart and checkout blocks. This release also added new layout options for product grids, a featured product block, and better support for multilingual stores using the new Product Collection block.

New Plugins & Tools

  • WPForms PDF Addon (πŸ”₯Trending) – Generate PDFs from form submissions in WordPress. This helps you instantly create PDF documents on the fly and send invoices, signed documents, certificates, and more.
  • DB Reset PRO – The easiest way to reset your WordPress database to its default state. Unlike reinstalling WordPress, this database reset plugin preserves your files, uploads, and admin credentials, providing a fresh start in seconds.
  • Chatics – Easily add a chat widget to your WordPress website that connects to your n8n workflows via public webhooks. This helps you create automations that can be triggered from a simple chatbox on your website.

That wraps up the September edition of WPBeginner Spotlight. From privacy tools in WPConsent to new automation workflows, Stripe payouts, and highlights from WordCamp US 2025, it’s been a busy month for the WordPress community.

We’ll be back next month with more news, product updates, and insights from around the WordPress ecosystem. Until then, keep building, keep learning, and stay connected with the community.

If you liked this article, then please subscribe to our YouTube Channel for WordPress video tutorials. You can also find us on Twitter and Facebook.

The post WPBeginner Spotlight 16: WordPress Privacy Tools, New AI Block Builder, and Smarter Plugin Updates first appeared on WPBeginner.


from WPBeginner https://ift.tt/tqHan2u
More links is https://mwktutor.com

Monday, 29 September 2025

How I Accept Bacs Direct Debit Payments in WordPress

Running an online business means every abandoned cart hurts. My friend learned this the hard way when his anime subscription service started getting interest from UK customers who kept leaving without buying. πŸ˜Ÿ

The culprit? He wasn’t offering Bacs Direct Debit, which is a payment method that many UK customers prefer for recurring payments.

We spent a weekend researching solutions, and I was amazed at how quickly we got Bacs Direct Debit working on his WordPress site using WP Simple Pay.

No developer calls, no complicated setup—just a plugin that made accepting this payment method as easy as accepting credit cards.

That experience made me realize how many WordPress site owners may be losing sales simply because they don’t know how easy it is to offer more payment options.

I’ve since tested the top solutions, and I’m here to show you exactly how to set up Bacs Direct Debit on your website without any technical headaches.

Set Up Bacs Direct Debit in WordPress Without a Developer

πŸ’‘Quick Answer: How to Accept Bacs Direct Debit Payments

In a hurry? If you just want the solutions without all the details, here’s what I’ll be covering:

  • Method 1: WP Simple Pay – Best for services, subscriptions, or single products. No online store needed.
  • Method 2: WooCommerce (Manual Bacs Payments) – Uses built-in “Bacs/Direct Bank Transfer.” Simple setup, but manual verification is required.
  • Method 3: WooCommerce (Automated Direct Debit Plugin) – Fully automated solution for WooCommerce stores with recurring payments.

These three methods cover most use cases. I recommend picking the one that matches your product type and store setup.

What is Bacs Direct Debit?

Bacs Direct Debit is a simple way for businesses to collect payments directly from a UK customer’s bank account. It’s perfect for subscriptions, memberships, or recurring invoices.

Bacs stands for ‘Bankers’ Automated Clearing Services’ and is widely used in the UK to move money safely between accounts.

Unlike credit cards or PayPal, payments go directly from the bank. This means customers don’t need to enter their details each time.

It’s also super popular. Many UK adults use it to pay regular bills, and billions of pounds move this way each month.

Why Accept Bacs Direct Debit Payments?

It’s simple, reliable, and something UK customers already trust. Here are the main benefits of using Bacs:

  • πŸ’° Lower transaction fees – Usually more affordable than credit cards or PayPal.
  • πŸ›‘️ Higher customer trust – Backed by the UK Direct Debit Guarantee.
  • 🌍 Widely adopted in the UK – Millions of businesses and customers already use it.
  • πŸ”„ Easy recurring billing – Perfect for subscriptions or regular payments.
  • Fewer payment failures – Bank-to-bank payments are generally more reliable.
  • πŸ“ˆ Better cash flow management – Scheduled payments arrive automatically, making business planning easier.
  • πŸ‘ Convenient for customers – No need to remember card details or log in to multiple accounts.

Overall, offering Bacs Direct Debit makes paying easier for UK customers. It reduces friction at checkout and improves your chances of getting paid on time.

UK Rules for Collecting Bacs Direct Debit Payments

Before you start, here are the main rules to know when collecting Direct Debit payments:

  • πŸ”‘ Service User Number (SUN): You will need a SUN to collect payments. This license number shows Bacs that your business is approved to take payments from customer accounts. Big companies can often get one from their bank. Smaller businesses usually can’t, so they work through a bureau instead.
  • 🏒 Bacs-approved bureau: This is a trusted third party approved by Bacs. If you don’t qualify for your own SUN, a bureau lets you use theirs. They handle the technical and compliance parts for you.
  • πŸ”’ GDPR (data protection): You must handle bank details securely, only store what’s necessary, and always get the customer’s consent. GDPR is a UK/EU privacy law that protects customers’ personal data, including payment info.
  • Strong Customer Authentication (SCA): SCA is a security rule in the UK and EU that sometimes requires an extra identity check before a payment goes through. For example, a customer may confirm a payment through their banking app or with a code sent to their phone. This one-time authorization is typically all that’s needed to set up a secure recurring payment plan.
  • πŸ“– Official guidance: For the latest updates, it’s always best to check the official Bacs website.

πŸ‘‰ These steps may seem like a lot, but most small businesses use Stripe like my friend did. That way, you stay compliant while keeping the payment process smooth for both you and your customers.

Method 1: Accept Bacs Direct Debit Payments With WP Simple Pay (For Single Products, Subscriptions, or SaaS Services)

If you’re selling subscriptions, SaaS products, or even just a single digital or physical product, then WP Simple Pay is the plugin I recommend.

It is the best WordPress Stripe plugin, designed for businesses to accept payments without setting up a full eCommerce store.

WP Simple Pay connects directly with Stripe. It even includes a pre-made Bacs Direct Debit template, letting you start accepting payments in just a few clicks.

There’s no complicated setup and no coding required — you simply install the plugin, enable Bacs, and you’re ready to go.

If you’d like a deeper dive into all of its features, you can check out our full WP Simple Pay review.

Step 1: Install and Activate WP Simple Pay

First, you need to sign up for an account on the WP Simple Pay website. Just click on the ‘Get WP Simple Pay Now’ button and follow the signup instructions.

WP Simple Pay website

🚨Note: WP Simple Pay has a free version, but you’ll need the Pro plan to unlock the Bacs Direct Debit payment template.

Next, you need to install and activate the WP Simple Pay plugin. For detailed instructions, see our tutorial on how to install a WordPress plugin.

Upon activation, the setup wizard will automatically launch on your screen. Here, you have to click the ‘Let’s Get Started’ button.

The WP Simple Pay Setup Wizard Will Start Automatically

This will take you to the next step, where you need to enter your license key.

You can find this information in your account on the WP Simple Pay website. Entering it will unlock the pro features required to accept Bacs Direct Debit payments.

You’ll Be Asked to Enter Your WP Simple Pay License Key
Step 2: Connect to Stripe

After that, you’ll be asked to connect your site with Stripe.

Since WP Simple Pay is a Stripe-powered plugin, it won’t work until you connect it with a Stripe account. If you don’t already have one, you can create a new Stripe account during this process.

Stripe is what makes the Direct Debit work in the background. Unlike card payments, Bacs takes a few working days for the money to move from your customer’s bank.

Once Stripe is connected, WP Simple Pay takes care of everything. For more details, check our step-by-step guide on accepting Stripe payments in WordPress.

Connect with Stripe
Step 3: Configure WP Simple Pay Settings

Next, the wizard will guide you to set up your email notifications. Here you can enable options to receive email notifications for payment receipts, upcoming invoices, and payment notifications.

You can also choose the email address where you want to receive these notifications.

When you’re finished, click ‘Save and Continue’ to move to the final setup steps.

Configure Your WP Simple Pay Emails
Step 4: Create a Bacs Direct Debit Payment Form

At this point, WP Simple Pay will finish configuring your site, and you’ll be ready to create your Bacs Direct Debit payment form.

For this, head over to the WP Simple Pay » Payment Forms page from your WordPress dashboard and click the ‘Create Your Payment Form’ button.

Click Create your Payment form button

This will take you to the template library.

WP Simple Pay gives you plenty of premade templates, but since we’re focusing on Direct Debit, go ahead and select the ‘Bacs Direct Debit Form’ template.

Choose the Bacs Direct Debit form template in WP Simple Pay

Once you’ve done that, you’ll land on the ‘Add New Payment Form’ page.

Here you can add a title and description for your form. I suggest keeping these short and clear since your customers will see them during checkout.

With the basics in place, make sure the form type is set to ‘On-site payment form.’ This ensures your customers can finish checkout without leaving your site.

If you want to add a bit more protection, I also recommend checking the ‘Spam & Fraud Protection’ box. It adds a CAPTCHA to your form, protecting it from malicious bots.

Add title and description for Bacs direct debit form in WP Simple Pay

Next, move over to the ‘Payment’ tab on the left. This is where you’ll set the price for your product or service.

If you’re offering a subscription, choose ‘Subscription’ and click ‘Add Price’. You can create multiple tiers, like a Basic Plan at £10/month and a Premium Plan at £20/month.

However, if you are just selling a single product and don’t need to set up recurring payments, you can choose the ‘One time’ option and add your pricing.

At this stage, don’t forget to set your currency to ‘GBP’.

Bacs Direct Debit only works with British pounds. If you set a different currency, like USD or EUR, then payments won’t process correctly.

Configure your product or subscription price in WP Simple Pay

As you scroll down, you’ll see the ‘Payment Methods’ section. Here, you need to make sure ‘Bacs Direct Debit’ is selected.

You’ll also notice that WP Simple Pay supports other options like SEPA, Cash App, Bancontact, and more.

I recommend adding both Bacs and credit card payments so that your UK and international customers have the flexibility to pay the way they prefer.

Choose Bacs direct debit as a payment option in WP Simple Pay

Once that’s set, switch to the ‘Form Fields’ tab. This is where you can decide what information you want to collect.

You can drag and drop fields, add new ones, or remove ones you don’t need.

For example, if you’re selling a digital service, you might just keep name and email. But if you’re shipping a physical product, you’ll definitely want to include an Address field.

Configure form fields for Bacs direct debit payment form
Step 5: Publish Your Bacs Direct Debit Payment Form

Finally, head to the ‘Payment Page’ tab and check the ‘Enable a dedicated payment page’ box.

WP Simple Pay will now create a standalone page for your form without any work from you.

You can also set a permalink, pick a color scheme for your payment form, add your business logo, and display footer text from here.

Customize the payment page

Once you’re happy with the setup, click ‘Publish’ to save your form.

You can now visit your WordPress website to see the Bacs Direct Debit payment form in action.

Bacs Direct Debit payment form preview in WP Simple Pay

If you’d rather not use a dedicated page, you can easily add the form to any existing page.

To do this, just click the ‘Publish’ button after adding form fields.

Then, open the page or post where you want to add the Bacs form and click the ‘Add Block’ (+) button in the top left corner.

This will open the block menu, where you have to search and add the WP Simple Pay block. Then, select the payment form you created from the dropdown menu within the block.

Add the WP Simple Pay block to the page or post

When you’re done, just click the ‘Update’ or ‘Publish’ button to store your settings.

Your Bacs Direct Debit form is now live.

Bacs Direct Debit payment form on existing WordPress page

Method 2: Accept Bacs Payments in WooCommerce With Manual Bank Transfers

If you already run a WooCommerce store and want to reach UK customers without extra plugins, then this method works well.

WooCommerce comes with a built-in Direct Bank Transfer option, which works perfectly for handling Bacs payments. Customers simply choose this option at checkout, send money directly to your bank account, and you confirm the payment on your end.

However, before I dive into the setup, it’s important to understand the trade-offs of this approach:

  • No automation: You have to check your bank account and manually mark each order as paid.
  • Slower process for customers: Customers must leave your site to complete the payment through their online banking.
  • Best for low volume: This works well if you only process a few orders per month, but it is not ideal for busy stores.

For small or local businesses, this setup is a simple, no-fuss way to accept Bacs payments without extra costs.

Step 1: Enable Bacs Direct Debit

First, head over to your WordPress dashboard and go to WooCommerce » Settings » Payments. On this page, you’ll see a list of available gateways.

Go ahead and click on the ‘Take offline payments’ option.

Choose offline payments option in WooCommerce

This will bring up a screen where WooCommerce lists all the offline payment methods it supports, like Direct Bank Transfer, Check Payments, and Cash on Delivery.

Here, simply click the ‘Enable’ button next to the ‘Direct Bank Transfer’ option.

Click Enable next to direct bank transfer in WooCommerce
Step 2: Configure Bacs Direct Debit Payment Settings

Now, click the ‘Manage’ button next to the Direct bank transfer option to adjust the settings.

You will now be directed to a new page where you can change the title and description that appear at checkout.

By default, it says ‘Direct Bank Transfer,’ but you can edit this to ‘Bacs Direct Debit’ or something clearer for your UK customers.

Change title and description for direct bank transfer in WooCommerce

Scroll down a bit, and you’ll find the ‘Instructions’ box. This is the text WooCommerce will show customers after they place an order.

Here, I suggest adding simple directions like your bank name, account number, and sort code so customers know where to send their payment.

Add your bank info for customers in WooCommerce

Finally, under ‘Account Details’, you have to enter the exact bank information that WooCommerce will display on the thank-you page and order emails.

If you work with multiple bank accounts, you can even add more than one here.

Connect your bank account with WooCommerce

When everything looks good, don’t forget to click ‘Save Changes’ at the bottom to store your settings.

Now, you can visit your online store to see the Bacs Direct Debit payment option in action.

Bacs direct debit shown as a payment option in WooCommerce

Method 3: Accept Bacs Direct Debit Payments in WooCommerce With a Plugin (For Automated Payments)

If the manual process in Method 2 seems too time-consuming for your WooCommerce store, then this automated solution is the perfect alternative.

Unlike manual bank transfers, Stripe handles everything in the background. From approving the mandate to collecting funds, you don’t have to check payments individually.

Step 1: Set Up the Payment Gateway Plugin

For this, you need to install and activate the free Payment Gateway for Stripe and for WooCommerce plugin.

If you don’t know how to do that, you can follow our guide on installing a WordPress plugin.

Upon activation, you have to connect the plugin with Stripe. To do that, visit the WebToffee Stripe page in your WordPress dashboard and click the ‘Connect to Stripe’ button.

Click Connect to Stripe button

This will open a window, where you can log in to your existing Stripe account or create a new one. When the connection is complete, you’ll see a confirmation screen showing your store is linked.

By default, Stripe starts in test mode, but you can switch to live mode anytime from the top right corner.

Stripe is now connected to your WooCommerce store
Step 2: Turn on Bacs Direct Debit Payments

Next, switch to the ‘Local Gateways’ page and select the ‘Bacs’ option.

Then, check the ‘Enable’ box to add Bacs as a payment method in your store.

Enable Bacs direct debit in WooCommerce with a plugin

You can also edit the title, description, and button text at checkout. This makes the process clear and simple for UK customers.

For example, you might change the title to ‘Pay by Direct Debit (Bacs)’. You can also use the description to explain that the payment will be collected through their bank once they approve the mandate (the customer’s permission for you to collect payments).

Adjusting the button text to something simple like ‘Authorize Direct Debit’ can also make the process feel more trustworthy and transparent.

πŸ“Œ Important Note: Make sure your store currency is set to GBP (£). Bacs only works with pounds, so this step is essential.

Add title and description for Bacs payments

Once you are done, don’t forget to click ‘Save changes’ to store your settings.

You can now visit your WooCommerce store to see the automated Bacs direct debit payment option.

Preview of Bacs direct debit in WooCommerce

πŸ”Security Best Practices for Accepting Bacs Direct Debit in WordPress

Once you’ve set up Bacs payments on your website, the next step is making sure everything runs securely in the background.

Here are some important steps you’ll want to follow:

  • Install an SSL Certificate: An SSL certificate ensures that customer data (like bank details) is encrypted during checkout. Most hosting providers now offer free SSL, and it’s a must-have for any WordPress site that processes payments.
  • Use a Reliable Security Plugin: A tool like Sucuri or Cloudflare can help you monitor threats, block suspicious traffic, and scan for malware automatically. To get started, take a look at our ultimate WordPress security guide.
  • Enable Payment Logging: Both WP Simple Pay and WooCommerce let you log payment events. This gives you a record of failed or suspicious payment attempts, which is really helpful for spotting fraud early.
  • Keep WordPress, Themes, and Plugins Updated: Outdated software is one of the biggest security risks. You need to regularly update your WordPress core, plugins, and themes to keep your site secure.
  • Limit Admin Access: If you’re not the only person managing your store, then make sure each team member has the right role. For example, don’t give someone full admin access if they only need to manage orders. To get started, see our guide on managing user roles and permissions.
  • Regular Backups: Finally, always have a backup plan. I set up automated daily backups with Duplicator so that if something goes wrong, I can easily restore my site. To do the same, take a look at our tutorial on how to back up your WordPress site.

By taking these precautions, you’ll make sure your Bacs Direct Debit setup isn’t just working — it’s also secure and trustworthy for your customers.

Troubleshooting Common Issues with Bacs Direct Debit Payments

Even with everything set up correctly, there may be times when Bacs payments don’t go through as expected.

When my friend first launched his subscription box with Bacs Direct Debit, we also ran into a few hiccups — but with the right troubleshooting steps, they were easy to fix.

Here are some of the most common issues and how you can handle them:

Set Up Proper Error Notifications

By default, Stripe logs every failed payment attempt. But you’ll want to go into your Stripe dashboard and enable email notifications for both you and your customers.

Send a customer email upon failed transaction

This way, customers instantly see why their payment didn’t go through, and you’ll also get an alert so you can follow up quickly.

Without this step, it’s easy to miss failed payments until much later.

Payment Failures or Declined Transactions

Sometimes a payment fails because the customer’s bank doesn’t approve the mandate, or because the account details were entered incorrectly.

In these cases, you should advise your customers to double-check their information or contact their bank.

Managing Failed Payment Recovery

Inside the Stripe dashboard, you can set up automated retries for failed payments.

This is especially useful for subscriptions, because a single failed payment doesn’t mean you’ve lost the customer.

Stripe can attempt the charge again after a few days, and you can also send a reminder email with a link to update payment details.

Retry after a failed transaction
Contacting Payment Provider Support

If you’ve tried the basics and the issue still isn’t resolved, then don’t hesitate to reach out to your payment provider.

Stripe offers detailed error logs and live support, which can come in handy when you aren’t sure if the issue is from your end or the customer’s bank.

πŸ”‘The key takeaway? Most Bacs issues aren’t permanent roadblocks — they just need clear communication with your customers and a quick check inside your Stripe or WooCommerce dashboard. With the right notifications and follow-up, you can keep things running smoothly without losing sales.

Other Payment Options to Consider (Besides Bacs)

While Bacs Direct Debit is great for UK customers who prefer bank payments, it’s not the only option you should have on your checkout page.

In fact, offering multiple payment methods gives customers more flexibility and can reduce cart abandonment.

Here are a few alternatives you may want to add alongside Bacs:

  • πŸ’³ Card Payments (Stripe/PayPal): The fastest and most common option worldwide. Most UK shoppers use debit or credit cards, so enabling Stripe or PayPal card payments ensures your checkout feels familiar and convenient.
  • ⚡ Faster Payments (UK): This is another bank transfer method. But unlike Bacs, it clears within minutes instead of a few days. Great for one-off or urgent payments.
  • πŸ’° PayPal Recurring: For subscription-based services, PayPal recurring payments are a trusted choice. Many customers already have PayPal accounts, so they feel more comfortable subscribing with it.
  • 🏦 ACH (US Customers): ACH is basically the American version of Bacs. If you also sell to US customers, it’s worth enabling. Like Bacs, payments take a few days to clear but are cheaper than card transactions.
  • 🌍 SEPA Direct Debit (EU Customers): SEPA is the European equivalent of Bacs. If your WooCommerce store attracts buyers from the EU, enabling SEPA gives them a familiar and local payment option.

For more options, you can see our complete guide to accepting payments in WordPress.

Frequently Asked Questions About Bacs Direct Debit Payments

Here are some questions that our readers frequently ask about Bacs direct debit payments:

Do I need a developer to set up Bacs Direct Debit in WordPress?

No, you don’t need a developer. Plugins like WP Simple Pay and WooCommerce make the process straightforward. As long as you’re comfortable installing and configuring plugins, you’ll be able to handle the setup on your own.

How much does it cost to accept Bacs Direct Debit?

Bacs is usually cheaper than card payments. If you’re using Stripe, the fee is about 1% per transaction + 20p, capped at £2. This makes it one of the most affordable payment methods for UK businesses, especially if you process larger transactions.

Is Bacs Direct Debit safe for my customers?

Yes. Bacs payments are protected by the Direct Debit Guarantee, which means customers are covered against any errors or unauthorized payments. Plus, Stripe and WooCommerce handle the technical security, and with SSL enabled on your site, sensitive data stays encrypted.

Do I need a Service User Number (SUN) for Bacs Direct Debit payments?

If you’re a small business using Stripe with WP Simple Pay or WooCommerce, you don’t need to apply for a SUN directly. Stripe works with a Bacs-approved bureau, which provides the SUN on your behalf.

However, if you wanted to collect Direct Debit payments directly through your bank without a provider like Stripe, then yes, you would need to apply for your own SUN. Keep in mind that this can be a lengthy and difficult process for new or smaller businesses.

I hope this article helped you learn how to easily accept Bacs direct debit payments in WordPress. You may also want to see our guide on how to accept deposit payments in WordPress and our comparison of Stripe vs. PayPal to find out which is better for your online store.

If you liked this article, then please subscribe to our YouTube Channel for WordPress video tutorials. You can also find us on Twitter and Facebook.

The post How I Accept Bacs Direct Debit Payments in WordPress first appeared on WPBeginner.


from WPBeginner https://ift.tt/eoZP8xa
More links is https://mwktutor.com

Friday, 26 September 2025

How to Connect Amazon FBA (MCF) to WooCommerce

Many WooCommerce store owners face the same challenge. They love running their own online stores but find it hard to match the fast, reliable shipping that Amazon customers now expect.

That’s where Amazon Multi-Channel Fulfillment (MCF) comes in. It allows you to use Amazon’s fulfillment centers to ship orders from your WooCommerce store. This gives you Prime-like delivery speeds while still keeping control of your customer relationships and brand.

I’ve researched and tested the best ways to connect Amazon FBA with WooCommerce. In this guide, I’ll show you the most reliable setup, enabling you to offer faster shipping without giving up control of your business.

Connect Amazon FBA (MCF) to WooCommerce

Why Connect Amazon FBA (MCF) to Your WooCommerce Store?

Connecting Amazon FBA (MCF) to your WooCommerce store allows you to offer fast, reliable shipping to your customers while automating your fulfillment process. This lets you match the delivery speeds of major retailers like Amazon without giving up control of your brand.

Here are more reasons why you should connect Amazon FBA to your WooCommerce store:

  • Less time spent on fulfillment: You don’t have to pack boxes, print labels, or visit the post office. Amazon takes care of everything for you.
  • Happier customers: Quick shipping and reliable service can lead to better reviews and more repeat customers.
  • More time to grow your business: When Amazon handles shipping, you can focus on other things, like improving your products or working on marketing.
  • You stay in control: Even though Amazon handles the delivery, the customer still buys from your WooCommerce site. You keep full control over the brand, pricing, and customer relationship.

If you’ve been wondering how to offer faster shipping without sacrificing control over your store, this setup might be just what you need.

Let’s go step by step and see how you can connect Amazon MCF to your WooCommerce store:

Note: You will need to set up your WooCommerce store before starting this tutorial. If you don’t have one yet, then please see our complete WooCommerce guide for beginners.

πŸ› ️ Step 1: Set Up Your Amazon MCF Account

Before you can connect Amazon to your WooCommerce store, you need to make sure your Amazon FBA account is properly set up.

First, you’ll need to have a Professional Seller account on Amazon. If you don’t already have one, head over to sellercentral.amazon.com to sign up.

Sign up for an Amazon Seller account

🚨Important: You must sign up for a Professional Seller account. The Individual plan does not support the necessary tools for this integration.

Once you enter your email address and create a password, Amazon will send you a verification code. This is just to make sure your email is valid.

After you enter the correct code, Amazon will take you to the next screen and outline the steps needed to complete your account setup.

Make sure you have the following documents ready:

  • A valid government-issued ID (like a passport or driver’s license)
  • A recent bank account or credit card statement
  • A chargeable credit card
  • Your mobile phone
Amazon seller account requirements

Amazon will then ask for your business location and business type.

Be sure to select the country where your business is located because Amazon will verify it later.

For business type, you can choose from several options such as State-owned business, Publicly-owned business, Privately-owned business, Charity, or ‘None, I am an individual.’

If you haven’t officially registered your business yet, just select the last option. You’ll also need to enter your full name and click ‘Agree and continue.’

Add business location and type

In the next step, you need to give your personal information, including a form of identification (either your passport number or driver’s license number).

After that, you’ll be asked to verify your mobile phone number by entering a PIN code that Amazon sends via text or call.

Once you enter the code correctly, your phone number will be verified. When everything looks good, click ‘Next’ to continue.

Add personal information

Now you’ll be asked for your billing information. This includes a valid credit card and bank account number.

Amazon needs this to charge your monthly fees and deposit your earnings from sales.

Provide bank information

Once your billing info is verified, you’ll move on to a few questions about your products and your Amazon store. Don’t worry — you don’t need to overthink this part.

You’ll be asked to enter a name for your Amazon store (you can change it later), and answer a few product-related questions, like:

  • Do you have UPC codes for your products?
  • Do you have any diversity certifications?
  • Are you the manufacturer or brand owner?
  • Do you have a government-registered trademark?

Answer these based on your situation, and click ‘Next.’

Answer store related questions

At this point, you’ll need to upload your ID (like a passport or license) and a bank statement to verify your identity. Once submitted, Amazon will ask you to complete a video call with one of its associates.

This required video call helps Amazon verify your identity by matching your face to the documents you submitted.

Identity and address verification

After the video call and final review, your account will be approved, and you’ll be able to log in to your Amazon Seller Central dashboard.

πŸ“„ Step 2: Create an FBA Product Listing for Your WooCommerce Products

Now that your Amazon Seller account is ready, it’s time to set up the actual product listings that Amazon will fulfill.

For every product you want Amazon to ship, you’ll need to create a matching product listing in your Amazon Seller Central account.

To do this, log in to the Seller Central dashboard and head over to the Catalogue » Add Product page.

Visit the Add Products page on the seller account dashboard

If your product already exists on Amazon, you can match it.

But if it’s unique to your online store, you’ll need to create a new listing by entering all the details manually.

πŸ’‘Quick Tip: It’s usually best to create a new listing for your brand. This gives you full control over the product title, images, and description. If you match an existing listing, you’ll be selling on a product page that someone else controls.

Then, click the ‘Sell this product’ button.

Add product details

This will direct you to a new screen where you’ll just need to enter basic details like quantity, price, and fulfillment channel.

πŸ’‘Just one quick note: Amazon assigns each product a Seller SKU, which you’ll need later to match with your WooCommerce product. I recommend copying these into a spreadsheet so that you can easily access them later.

Think of the SKU as a product’s secret code — WooCommerce and Amazon must use the exact same code so the plugin knows which item to ship.

For example, if your product’s SKU is TSHIRT-BLUE-LG in WooCommerce, you must enter TSHIRT-BLUE-LG as the Seller SKU in your Amazon listing for the connection to work.

For FBA, be sure to choose ‘Amazon will ship and provide customer service for this product.’ This tells Amazon to handle the product using FBA instead of making you ship it yourself.

Configure fulfillment channel details

Once the listing is complete, save it and repeat the process for other products on your website.

You’ll now be able to send that product’s inventory to Amazon and make it eligible for both FBA and Multi-Channel Fulfillment (MCF) — which means Amazon can ship it when an order comes from your WooCommerce store.

πŸ“¦ Step 3: Send Your Inventory to Amazon Using “Send to Amazon”

Once your product is listed in Amazon Seller Central and marked for FBA, the next step is to send your inventory to Amazon’s warehouse.

This is how your WooCommerce product becomes eligible for multi-channel fulfillment.

To do this, you’ll use Amazon’s Send to Amazon shipment workflow, which replaces the old shipping process with a more streamlined system.

Amazon will inform you which fulfillment center(s) to ship to and may request that you split your shipment across multiple locations to help distribute inventory throughout their network.

Start by going to your Manage All Inventory page in Seller Central.

Here, find the product you want to ship and click the ‘Edit’ dropdown next to it. Then, select the ‘Send/Replenish Inventory’ option.

Click the Send/Replenish Inventory button

This will open the Send to Amazon setup, where the platform will ask for your packing details.

You’ll need to enter the number of units you’re placing in each box, the box dimensions and weight, and whether Amazon or you will apply the product labels.

Configure packing details

You can save this as a template if you plan to use the same box setup again later.

Once that’s done, enter the number of units you want to send, then click ‘Ready to Send’ followed by ‘Confirm and Continue.’

Click the Ready to Send button

Next, you’ll choose your shipping method. Most WooCommerce sellers use Small Parcel Delivery (SPD) for individual boxes, especially if you’re using Amazon’s partnered carrier, like UPS.

You can also go with Less Than Truckload (LTL) if you’re shipping pallets. Amazon will show you rate options for each.

After choosing your ship date and carrier, click the ‘Accept charges and confirm shipping’ button.

Choose a shipping mode

Now it’s time to print your shipping labels and add them to the boxes you plan to ship. You can then drop off the boxes at UPS or schedule a pickup.

Once your inventory is live, you’re ready to connect your WooCommerce store to Amazon FBA.

πŸ”§ Step 4: Connect WooCommerce to Amazon FBA Using a Plugin

Now that your inventory is active in Amazon FBA, you can connect your WooCommerce store to Amazon using the Amazon Fulfillment for WooCommerce plugin.

This tool allows orders from your WooCommerce store to be automatically fulfilled by Amazon without you having to manually ship anything.

Set Up the Amazon Fulfillment for WooCommerce Plugin

First, you need to install and activate the Amazon Fulfillment for WooCommerce plugin. For step-by-step instructions, see our tutorial on how to install a WordPress plugin.

🚨Note: Amazon Fulfillment for WooCommerce is a premium plugin and doesn’t have a free version. However, out of all the tools that I have tested, it offers the most straightforward way to connect Amazon FBA to WooCommerce.

Connect to Your Amazon Seller Account

Upon activation, visit the WooCommerce » Settings » Integration » Fulfillment by Amazon page from your WordPress dashboard to start the setup process.

Here, you’ll first need to click the ‘Login With Amazon’ button. This will direct you to a new screen where you have to add your Amazon Seller account credentials.

Login with Amazon

After logging in, you’ll return to the plugin settings, and your ‘Home Region’ and ‘Marketplace ID’ will be filled in automatically.

Now, you have to click the ‘Click to TEST Connection between Amazon and WooCommerce’ button. This confirms that your website is linked to Amazon through the Selling Partner API.

An API (Application Programming Interface) is like a secure bridge that lets your WooCommerce store and Amazon talk to each other automatically.

Test Amazon API connection with WooCommerce
Import Your Amazon Products into WooCommerce

Once that is done, scroll down to the ‘Compare and Import Products from Amazon’ section and click the ‘Compare & Import your Products into WooCommerce by SKU’ button.

This pulls product data directly from your Amazon catalog and matches it with your WooCommerce products based on SKU.

πŸ’‘Bonus Tip: The SKUs in your WooCommerce store must match the ones in your Amazon inventory. Otherwise, the plugin won’t know which product to sync.

Check Amazon SKUs

After that, go to the ‘Inventory (Stock Level) Settings’ section. Here, you can click the ‘Click to Sync WooCommerce Stock Levels to match Amazon’ button to update your inventory manually.

To make sure everything is syncing correctly, use the ‘TEST Inventory Connection’ tool.

The plugin’s documentation may give a sample SKU (like OBRAMAIN) for testing, but I recommend using a real SKU from one of your own products. This will give you the most accurate test results.

If it works, your connection is good to go.

Sync WooCommerce and Amazon stock levels

Below that, I recommend enabling the ‘Update local stock levels per Order item sent to Amazon Fulfillment’ setting. This will make sure your WooCommerce inventory automatically updates whenever a customer places an order.

You should also check the ‘Automatically sync stock levels from Amazon at the interval below’ box to enable automatic inventory syncing.

By default, the plugin syncs every 1440 minutes (once a day), but you can adjust this based on how often your stock changes.

There’s also an option to limit syncing to FBA-enabled products only, which can be helpful if you sell a mix of products fulfilled by Amazon and others that you ship yourself.

You can even set a low stock threshold so you get notified when items are running out. This helps prevent overselling and keeps your store running smoothly.

Configure other stock level settings
Customize Order Fulfillment Settings

Once that is done, I suggest you add an ‘Order Prefix’ under the Order Fulfillment Settings.

It is a small label that will be added to Amazon-fulfilled orders in your dashboard. For example, you can use something like fba to make those orders easy to identify.

You can also customize the Order Comment (for example, “Thank you for your order!”) and set a default shipping speed.

This default is used when a specific shipping method isn’t matched during checkout.

After that, make sure to check the ‘Enable Shipping Method Mapping’ box. This step is really important because it connects the shipping options in your WooCommerce store to the actual shipping speeds Amazon offers, like Standard, Expedited, or Priority.

By turning this on, you’re telling the plugin to match the options your customers see at checkout with the correct delivery methods on Amazon’s side.

Finally, click the ‘Save Changes’ button to apply all your settings.

Enable shipping method mapping
Set Up Amazon Shipping

Now it’s time to configure Amazon shipping as a method within your WooCommerce store. This step ensures your customers can choose a shipping speed, and Amazon will know exactly how to fulfill it.

For this, head over to the Shipping tab on the WooCommerce Settings page, and either edit an existing shipping zone or create a new one.

Once you do that, click the ‘Add Shipping Method’ button.

Adding a shipping method in WooCommerce

This will open a popup, where you have to select ‘Amazon’ as the shipping method.

Then, click the ‘Continue’ button.

Choose Amazon as the shipping method

You’ll now see options to enable Standard, Expedited, and Priority shipping. Just check the boxes next to the ones you want to offer at checkout.

For each shipping speed, you can apply a price adjustment, either as a fixed amount or a percentage. This gives you control over how much you want to charge customers based on the shipping method they select.

For example, you could offer Standard shipping for free, charge a small fee for Expedited, and set a premium for Priority delivery — depending on what works for your pricing strategy.

Set shipping rates for amazon shipping methods

Once you’re happy with the settings, click the ‘Create and save’ button to activate Amazon shipping on your site.

πŸ›’ Step 5: Enable Amazon FBA for Each WooCommerce Product

Now that the plugin is connected and your shipping settings are in place, the final step is to enable FBA for each product you want Amazon to fulfill.

To do this, visit your Products » All Products page and click the ‘Edit’ link for a product that you have already added to your Amazon inventory earlier.

Click the Edit link for your preferred product

This will open the product editor, where you have to scroll down to the ‘Product Data’ section and look for the ‘Amazon Fulfillment’ tab.

There, you’ll see a checkbox labeled ‘Fulfill with Amazon FBA’ — go ahead and tick that box.

Check fulfil with Amazon FBA box

Once selected, click the ‘Update’ button to save your changes.

Now, repeat this process for each product you want Amazon to ship. Just make sure that the SKU in WooCommerce matches the SKU in your FBA inventory. If they don’t match, the order fulfillment will fail, or the sync won’t work properly.

Your products are now ready to be automatically fulfilled by Amazon whenever someone places an order in your WooCommerce store.

🎁 Bonus: Improve Customer Satisfaction with Shipping Discounts

While connecting Amazon FBA to your WooCommerce store can significantly improve your shipping times, you can add even more value to your customers by offering attractive shipping discounts.

Providing discounts encourages repeat purchases and improves customer loyalty. Plus, this is easy to set up with the Advanced Coupons plugin.

Advanced Coupons review

Advanced Coupons allows you to create fixed discounts, percentage discounts, or even offer free shipping based on specific conditions. Plus, you can auto-apply coupons, schedule them for sales events, and manage everything directly from WordPress.

To follow along step-by-step, you can read our article on how to offer a shipping discount in WooCommerce.

Frequently Asked Questions About Amazon FBA

Here are some of the questions I’m frequently asked about connecting Amazon FBA with WooCommerce:

What Is the Difference Between Amazon FBA and Amazon MCF?

Fulfillment by Amazon (FBA) is the service for storing, packing, and shipping products sold on Amazon. On the other hand, Multi-Channel Fulfillment (MCF) is a service that uses this same Amazon infrastructure to fulfill orders from other sales channels, such as a WooCommerce store.

Can I use Amazon FBA to fulfill only some of my WooCommerce products?

Yes, absolutely. You have full control on a per-product basis.

To enable fulfillment for a specific item, you’ll simply check the ‘Fulfill with Amazon FBA’ box in that product’s settings within your WooCommerce dashboard, as shown in Step 5.

Do I need a Professional Amazon Seller account to connect with WooCommerce?

Yes, you must have a Professional Amazon Seller Central account to use MCF (Multi-Channel Fulfillment) and connect it with WooCommerce. Individual seller accounts are not supported for API integrations like this.

Will WooCommerce automatically update inventory levels from Amazon?

Yes, if inventory sync is enabled in the plugin settings, then stock levels in WooCommerce will be automatically updated based on your Amazon FBA inventory. This helps avoid overselling out-of-stock products.

Does Amazon handle returns for WooCommerce orders?

Amazon does offer return handling for MCF orders, but it depends on your fulfillment settings and region. You’ll need to enable return management in your Amazon Seller Central account and review their return policies for non-Amazon sales.

How much does it cost to ship orders with Amazon MCF?

Amazon charges fulfillment fees for every order it ships through MCF. These fees are based on the product’s size, weight, and the shipping speed selected (Standard, Expedited, Priority). You should review the current Amazon MCF pricing on their website to understand the costs for your specific products.

I hope this article helped you learn how to easily connect Amazon FBA to WooCommerce. You may also like to see our beginner’s guide on building an Amazon affiliate store using WordPress and our tutorial on how to upsell products in WooCommerce.

If you liked this article, then please subscribe to our YouTube Channel for WordPress video tutorials. You can also find us on Twitter and Facebook.

The post How to Connect Amazon FBA (MCF) to WooCommerce first appeared on WPBeginner.


from WPBeginner https://ift.tt/LNU5EFi
More links is https://mwktutor.com