Welcome to the June 2025 edition of WPBeginner Spotlight!
This month brings exciting updates across the WordPress ecosystem, including new plugin features, AI tools, and community highlights.
Highlights include Charitable’s donor management system, expanded AI in Uncanny Automator, and takeaways from WordCamp Europe 2025
There’s plenty to discover, so let’s dive into this month’s most noteworthy WordPress updates.
📌WPBeginner Spotlight brings you the monthly roundup of WordPress news, updates, and community happenings. 📅✨
Got something to share? Whether it’s a new product launch, a significant update, or an exciting event, reach out to us through our contact form.

Charitable Adds a Built‑In Donor Management System for Easier Fundraising and Reporting
Charitable, a leading donation plugin for WordPress, has rolled out a new update that improves its Pro version with a centralized donor management system.
The new system gives nonprofits a clearer view of donor history and interactions. This allows them to manage fundraising campaigns more efficiently by accessing donor data in one place.
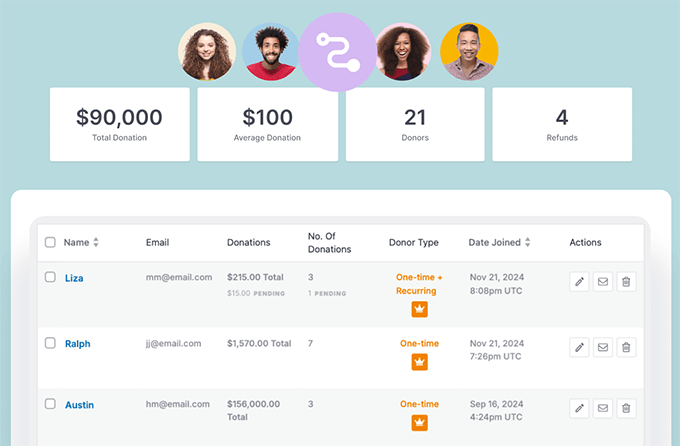
Donor profiles now include detailed donation histories, communication preferences, and personalized insights.
Plus, nonprofits can use Charitable to generate segmented reports and tailor their communication strategies. In turn, this can improve donor relationships and boost campaign success rates.
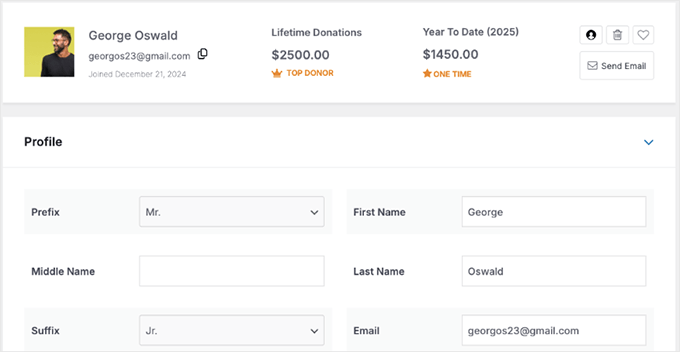
Overall, this update represents a significant enhancement for nonprofit users by simplifying donor management and optimizing fundraising efforts.
Uncanny Automator Expands AI Automation Beyond OpenAI With Claude, Gemini, Grok & More
Uncanny Automator, a popular WordPress workflow automation plugin, brings seven new AI integrations to WordPress: Claude, Gemini, Grok, Perplexity, Cohere, Mistral, and DeepSeek.
Users can now choose from multiple AI models when building WordPress automations, offering flexibility beyond OpenAI. This makes it easier than ever to build smart workflows inside WordPress—no custom code required.
You can now generate AI responses inside workflows using different models, which is ideal for tasks like AI content generation, customer support replies, or research summaries. Plus, each AI service comes with a dedicated action for prompting text responses.
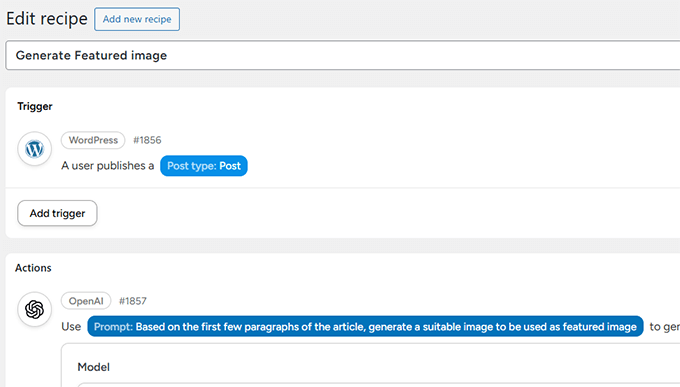
The update also adds new integrations for FluentCommunity and Mailster, with over 25 new triggers and actions across learning and email tools. ARMember and Events Manager users also receive small but useful automation upgrades.
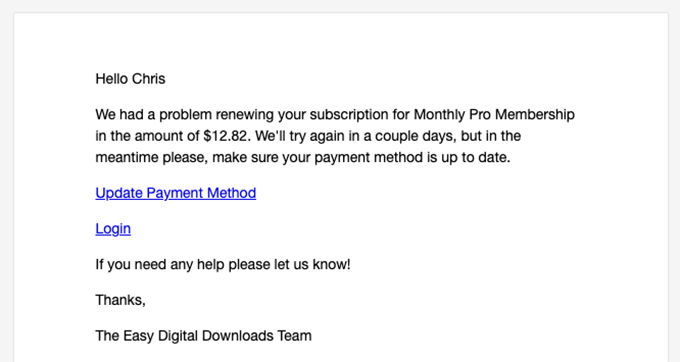
Churn Reduction Made Easy: EDD Adds One‑Click Payment Updates for Recurring Payments
Easy Digital Downloads, the popular eCommerce plugin for WordPress, has released a major update to its Recurring Payments extension. It now gives store owners better tools to reduce involuntary churn and protect recurring revenue.
Involuntary churn happens when loyal customers are lost due to failed payments, often from expired cards or billing errors. Previously, fixing this required customers to log in, which led to friction and revenue loss.
The new update adds secure, no-login one-click links that let subscribers update their payment method directly from email. These “magic links” can be added to renewal reminders and failure notices, making payment recovery quick and painless.
Store owners also get upgraded analytics.
A new dashboard widget and improved subscription reports now include key stats like Monthly Recurring Revenue (MRR), Annual Recurring Revenue (ARR), and active subscriptions, which allow business owners to track performance at a glance.
Plus, a new frontend subscription block can give customers more control over their billing, reduce support tickets, and improve retention.
Overall, this update makes EDD even more useful for WordPress-based SaaS, membership, and digital product sites.
Automattic Acquires Clay to Bring AI-Powered Relationship Management to Its Messaging Tools
Automattic has acquired Clay, which is an AI-powered CRM platform that helps users organize, update, and search their networks across emails, calendars, social media, and more.
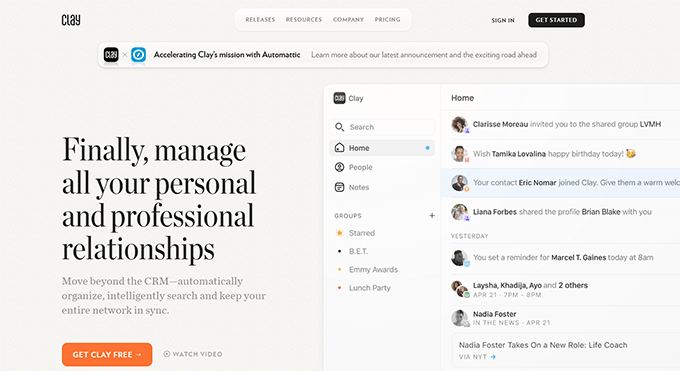
Clay uses intelligent insights to simplify how people track and nurture connections. It automatically gathers contact information from different communication tools and keeps it up to date. This makes it easier for users to stay in touch with their personal or professional networks.
The Clay team, including co-founders Zachary Hamed and Matthew Achariam, will join Automattic’s Other Bets division, alongside Beeper and Gravatar. The goal is to integrate Clay’s thoughtful, relationship-first approach into Automattic’s growing messaging and communications ecosystem.
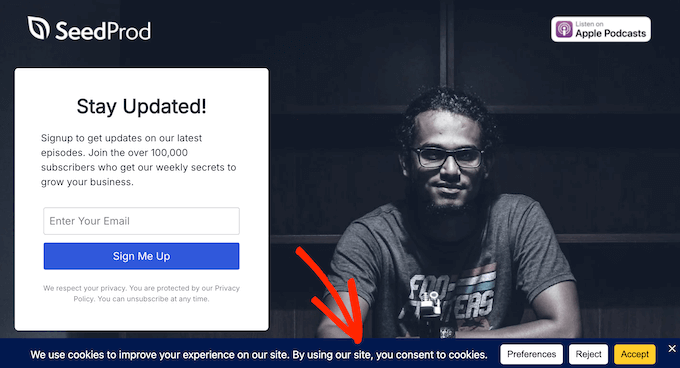
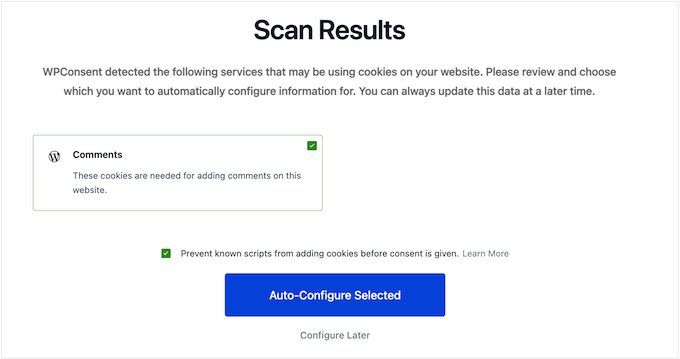
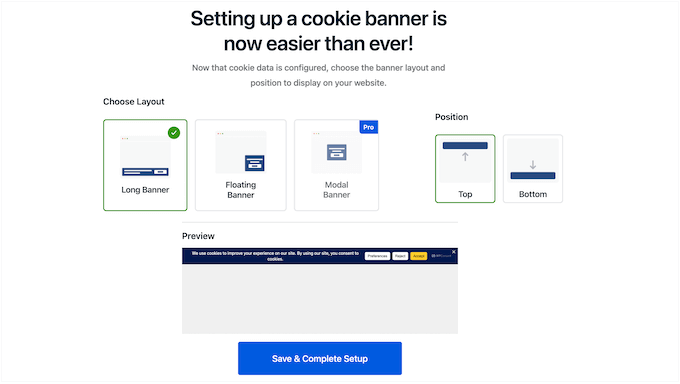
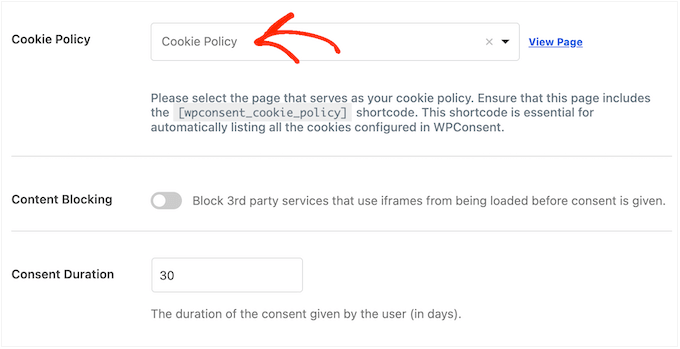
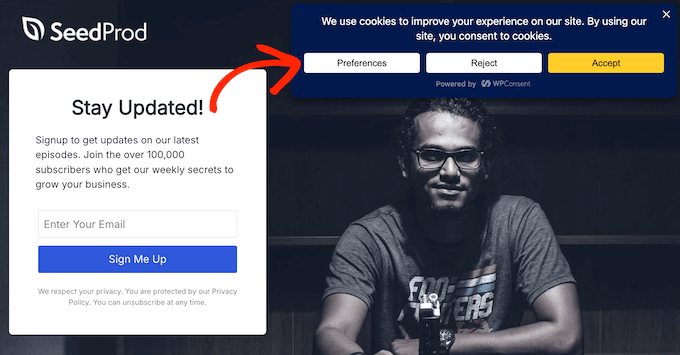
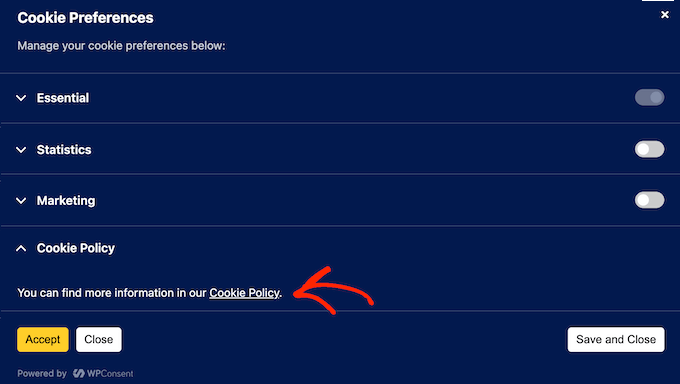
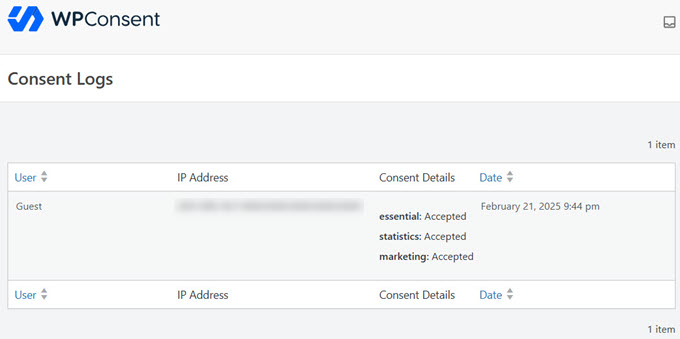
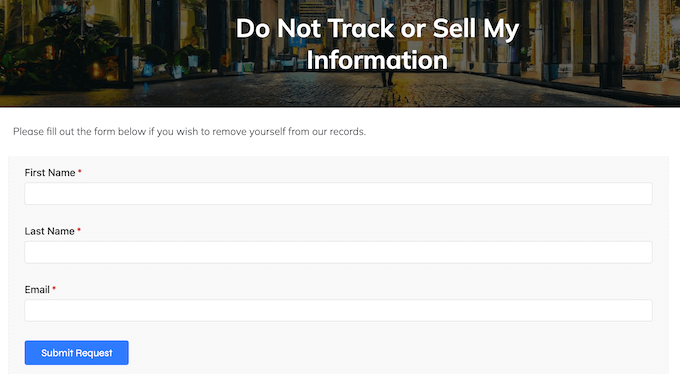
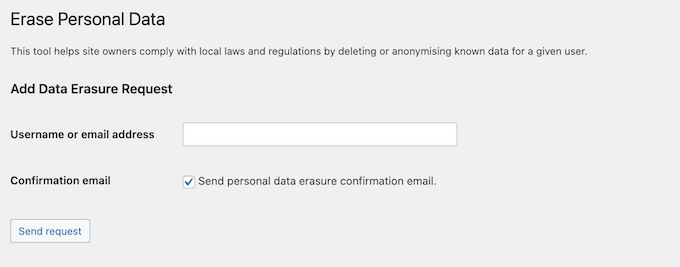
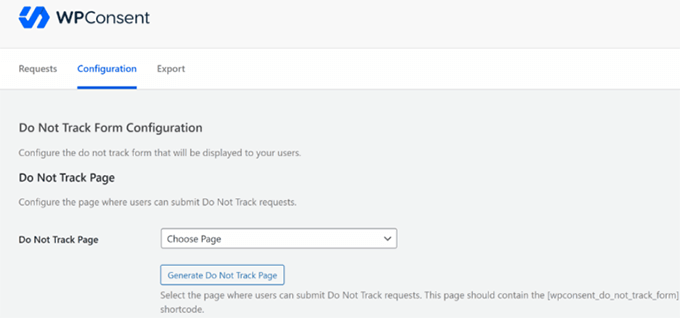
WPConsent Adds Do Not Track Page and Per‑Service Controls for Smarter Cookie Compliance
WPConsent has recently rolled out major updates to make cookie compliance simpler and more transparent for WordPress website owners.
You can now create a dedicated “Do Not Track” page where users can submit opt-out requests. These are stored locally on your site and can be tracked or exported from your dashboard.
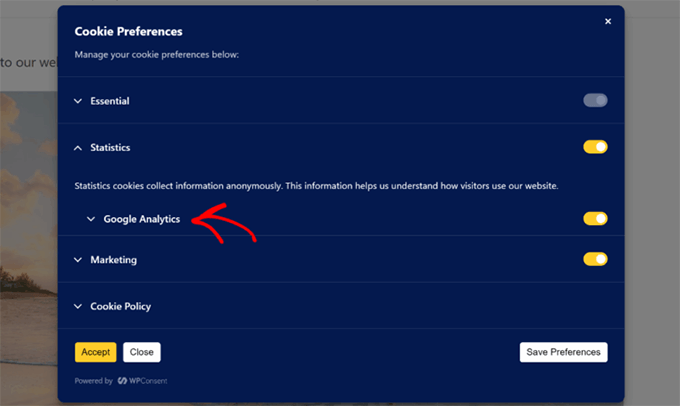
This update also gives more control to visitors through the cookie popup panel to improve compliance.
Instead of accepting or rejecting broad cookie categories, users can now choose which individual services to allow, like Google Analytics or Facebook Pixel.
Other improvements include a floating settings button, easier import/export of settings, and a built-in service library for quicker cookie setup.
These updates help WordPress users stay compliant, reduce friction, and build trust—all without relying on external tools.
Community, Code, and Collaboration: WordCamp Europe 2025 Draws a Global Crowd to Basel
WordCamp Europe 2025 brought together WordPress enthusiasts from around the world in Basel for a week of collaboration, learning, and open-source contributions.
This annual WordCamp event featured a wide array of informative talks, workshops, and networking opportunities designed to inspire and connect attendees.
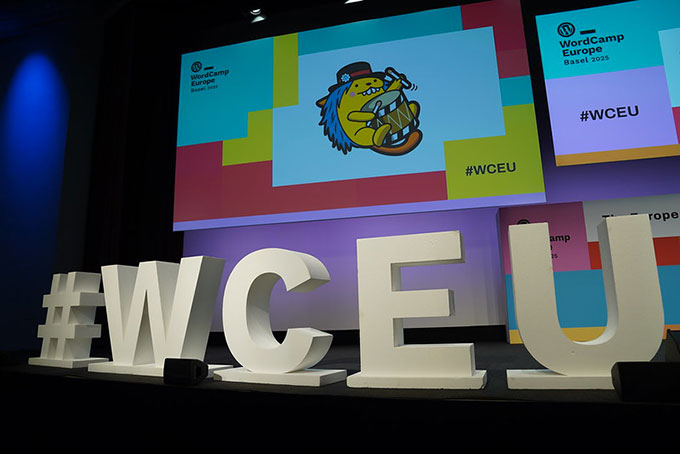
One major highlight of the event was the Contributor Day, where participants came together to contribute to WordPress projects, tackling tasks such as bug fixes and feature enhancements.
The sense of collaboration and shared passion underscored the event’s success, encouraging continued open-source contributions.
Additionally, engaging sessions covered topics ranging from the future of WordPress and Gutenberg advancements to SEO best practices and accessibility improvements.
Overall, WordCamp Europe 2025 demonstrated the WordPress community’s commitment to growth and innovation through collaboration and shared learning.
MonsterInsights Rolls Out Advanced Forms Report for Deeper Form-Level Insights & Better ROI
MonsterInsights, the popular Google Analytics plugin for WordPress, has launched its Advanced Forms Report.
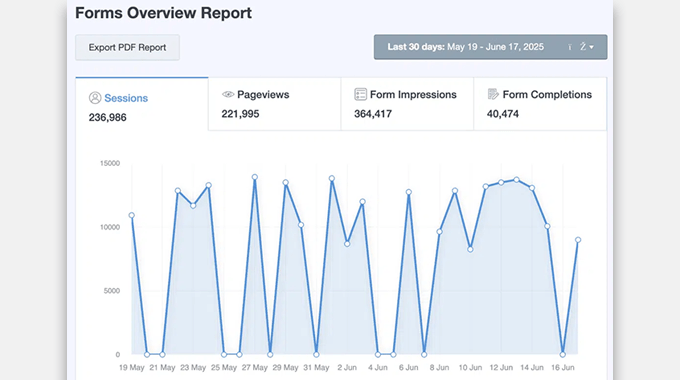
This new feature allows site owners to track various metrics such as form views, conversion rates, and user interactions.
The Advanced Forms Report helps site owners understand how their forms are performing, so they can optimize for better engagement and results.
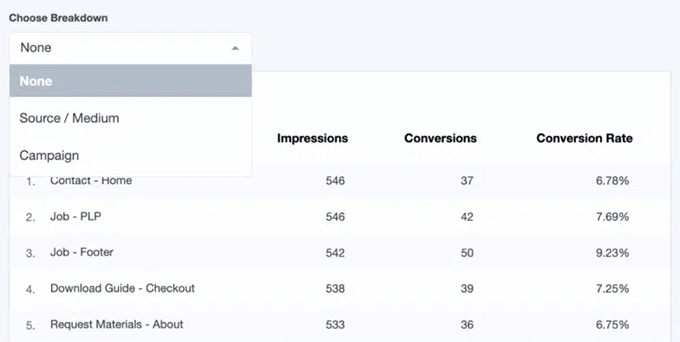
By understanding visitor behavior and pinpointing areas for improvement, site owners can make informed decisions to improve the user experience.
New Search & Replace Update Lets You Bulk Swap Image File Extensions
The WPCode team has released an update for the Search & Replace Everything plugin with new tools for faster image management and performance optimization.
This plugin helps WordPress users search and replace content, code, or media across their website from a safe, visual interface. It’s widely used for tasks like replacing outdated links, bulk-editing posts, or cleaning up unused assets.
With the latest update, you can now swap an image with a new file that has a different extension, like replacing a JPG with a WebP, without having to manually update every instance where that image appears.

The plugin also adds new filters to the Media Library that let you quickly sort and remove unused images. This helps store owners and content creators reduce bloat and speed up their sites without needing to dig through folders or write SQL.
These features are especially useful for improving load times and streamlining media-heavy sites.
In Other News 🗞️
- PushEngage now supports WhatsApp messaging for WordPress and WooCommerce, starting with a free click-to-chat button and automated order updates. Store owners can send abandoned cart alerts, confirmations, and more, without needing email addresses or phone numbers.
- FunnelKit Automations has released new updates for smarter store automation. Store owners can now export abandoned, recovered, and lost carts to CSV, resync WooCommerce orders without manual import, and track email stats like opens, clicks, revenue, and winning variation.
- Automattic, the company behind WordPress.com, has officially returned its full contributions to WordPress.org. They are restarting their work on Core, Gutenberg, Openverse, Playground, and more after a brief strategic pause.
- BuddyBoss has introduced Activity Topics to help communities organize posts and replies. Members can now group updates under shared topics, making conversations easier to follow and manage.
- Wholesale Suite has added a new WooCommerce Payment Reminder feature. Store owners can now send automatic payment reminder emails without needing a Stripe account.
- Popular course builder platform, Thrive Apprentice, now supports Square payments directly in course checkouts. This feature allows course creators to accept faster, on-site transactions for cards, Apple Pay, Google Pay, and more.
- Formidable Forms has launched Timeline Views, a no-code plugin feature that lets you display events, milestones, and updates in a visual, chronological format. Now you can turn form entries into engaging stories or timelines on your site.
- WordPress Core has announced the 6.8.2 release schedule, with multiple bug-scrub sessions starting on June 19 and the first Release Candidate slated for July 8, ahead of the July 15 final release. This minor update focuses on fixing regressions and editor-style issues ahead of the next milestone release.
- Automattic has launched the Open Horizons Scholarship, which offers $30,000 to help underrepresented WordPress contributors attend flagship WordCamps globally. The scholarship will cover travel and registration, with the goal of boosting diversity in the WordPress community.
- Advanced Coupons now lets you reward customers with referral points through its WooCommerce Loyalty Program. Shoppers earn points when friends sign up or make a purchase, which encourages organic growth and boosts customer loyalty.
- WP Tasty has launched Tasty Recipes Lite, a free, beginner-friendly recipe card plugin for WordPress. It lets food bloggers create clean, schema-ready recipe cards with multiple templates and handy features.
New Plugins 🔌
- MyPayKit – Collect secure Square payments on your WordPress site with easy-to-build, responsive payment forms — no coding needed.
- WPConsent (🔥Trending) – Powerful WordPress cookie popup and compliance plugin. It helps WordPress site owners comply with privacy laws, such as GDPR and CCPA, by offering customizable cookie banners, consent management tools, and Do Not Track options.
- Sliderberg – Sliderberg is a fast, flexible Gutenberg slider plugin that lets you create responsive carousels using any WordPress block. It’s perfect for showcasing images, products, testimonials, and more.
That wraps up this month’s edition of WPBeginner Spotlight! 🎉 We hope you found it useful for keeping up with the latest happenings in the WordPress space.
Got a product launch, update, or cool project to share? Send it our way, and we might feature it in the next issue.
Thanks for tuning in! We’ll be back next month with more WordPress news and highlights.
If you liked this article, then please subscribe to our YouTube Channel for WordPress video tutorials. You can also find us on Twitter and Facebook.
The post WPBeginner Spotlight 13: Smarter WordPress Tools, Compliance Upgrades, and Workflow Wins first appeared on WPBeginner.
from WPBeginner https://ift.tt/Uj41gXp
More links is https://mwktutor.com