May has been a month of big changes in the WordPress ecosystem. From enhanced SEO features in AIOSEO to important privacy updates in WPConsent and performance boosts in WooCommerce, there’s a lot to cover.
This month, we also saw the formation of a dedicated AI team at WordPress.org, which signals exciting developments to come.
Let’s explore the key highlights and discover what’s new in the world of WordPress!
📌WPBeginner Spotlight brings you the monthly roundup of WordPress news, updates, and community happenings. 📅✨
Got something to share? Whether it’s a new product launch, a significant update, or an exciting event, reach out to us through our contact form.
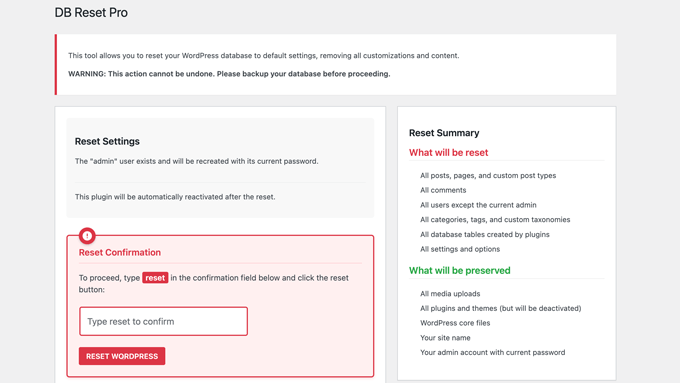
DB Reset Pro Makes WordPress Database Resets Easier for Developers and Testers 🔃
The team behind popular plugins like SeedProd and Duplicator has launched a new tool: DB Reset PRO. It lets you reset your WordPress database easily and safely, with full control over what gets wiped and what stays.
The plugin removes posts, pages, comments, and users but keeps your admin account, site title, and all media uploads. Themes and plugins are deactivated but not deleted.
Built-in safety features include permission checks and clear reset warnings. There’s also an option to automatically reactivate selected plugins after the reset.
It’s ideal for debugging, development, and learning. You can quickly start fresh without needing to reinstall WordPress. The plugin also supports multisite and has a clean, WordPress-native design.
DB Reset PRO is free and now available on WordPress.org. It’s a useful tool for anyone who needs a reliable reset without affecting files or uploads.
WordPress Announced a Dedicated AI Team to Guide Open-Source Innovation
WordPress.org has launched a new AI Team to lead and coordinate artificial intelligence efforts across the platform.
The team’s goal is to help WordPress stay ahead as AI tools become more common in content creation and site management.
This move brings structure to AI-related work that is already happening in the ecosystem. It helps avoid fragmentation and makes sure that future innovation lines up with WordPress’s long-term goals and open-source values.
The team will take a plugin-first approach to development. This means new features will roll out as Canonical Plugins, which allows for faster testing and community feedback outside the slower Core release cycle.
The founding members are James LePage (Automattic), Felix Arntz and Pascal Birchler (Google), and Jeff Paul (10up). James and Felix will act as the first team representatives, helping organize work and connect with other Make WordPress teams.
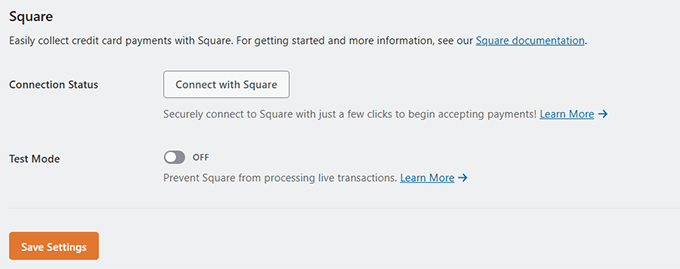
WPForms Adds Square Payments for Free Users and Launches Google Drive Integration
WPForms now lets users accept Square payments on all plans, including the free version. This makes it easier for small businesses, nonprofits, and personal sites to collect payments directly through WordPress forms.
The Square integration allows quick setup without custom code. It supports basic payment forms, while advanced features, such as conditional logic, are still available through the PRO addon for paid plans.
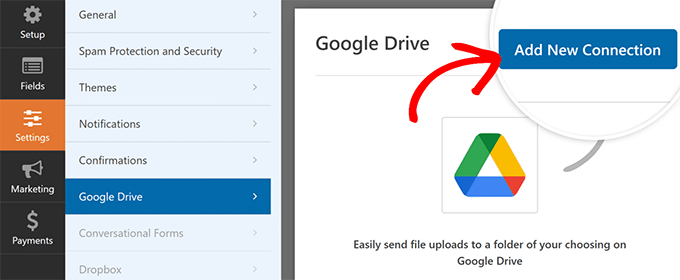
WPForms has also launched a new Google Drive Addon. This feature helps teams manage uploaded files without needing to give everyone WordPress access.
Form submissions and file uploads can now be synced automatically to any folder in Google Drive.
The integration is designed to fit smoothly with Google Workspace. It makes collaboration easier by allowing teams, like HR, marketing, or client services, to access form files where they already work.
Plus, smart permissions ensure that users see only what they need, without extra WordPress user roles or logins.
WordPress Ecosystem Expands with 87% Increase in New Plugin Submissions
The WordPress Plugins team has reported an 87% increase in new plugin submissions compared to last year. This growth shows that there has been strong wave of innovation across the developer community.
The data shows a steady rise in submissions since September 2024. And many contributors point to AI as a driving force behind this increase.
A growing number of plugins now include “AI” in their titles, offering features like content generation, chatbots, SEO tools, translation, and AI image creation. Overall, developers are using AI to improve both front-end experiences and backend efficiency.
The Plugin Review Team has also upgraded its internal scanner. It now checks for more security issues, such as missing sanitization or escaping, and offers clearer code examples for fixes. It can also detect similar plugin names, which reduces duplicate plugins and confusion within the plugin directory.
Despite the higher volume of plugins, the team has kept average review wait times low. Faster reviews give developers more motivation to experiment, publish early, and contribute new solutions to the WordPress community.
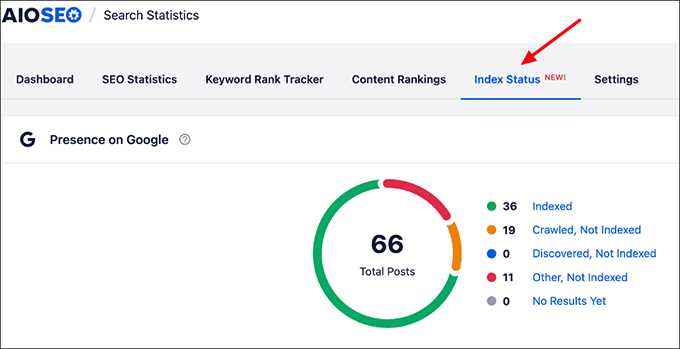
AIOSEO Update Brings Google Indexing Insights Directly to WordPress
This tool shows you how Google views your website’s content, without leaving your WordPress dashboard. This allows you to find and fix SEO issues before they hurt your rankings.
The Index Status Report helps users understand which pages are indexed, which aren’t, and why. It displays five key categories: Indexed, Crawled but Not Indexed, Discovered but Not Indexed, Other Not Indexed, and No Results Yet.
AIOSEO says the feature fills a critical gap for users who struggle with invisible pages in search results. “While other SEO plugins only show basic indexing status, AIOSEO’s Index Status Report tells you exactly why pages aren’t being indexed—and what to do about it,” said Ben Rojas, President of AIOSEO.
Users can also view post-level indexing issues, including crawl status, canonical tags, and robots.txt rules. Each post has a direct link to inspect it in Google Search Console.
Plus, advanced filtering lets users sort by indexing state, post type, or crawl conditions.
Another feature tracks rich results eligibility. This helps users see which posts can show rich snippets in Google and which schema markup types are already applied, all without opening the post editor.
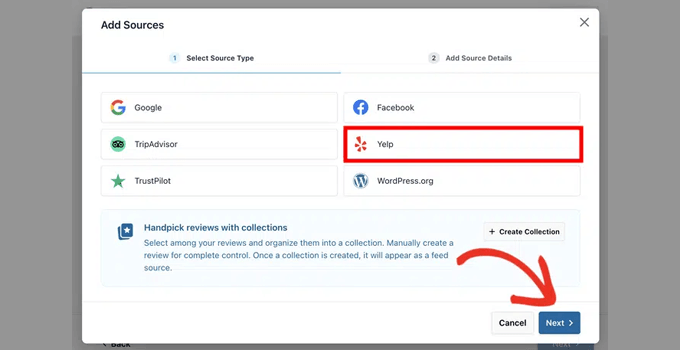
Review Feeds Simplifies Google and Yelp Reviews with No API Required
Smash Balloon has released a major update to Review Feeds Pro that allows you to display light-use Google and Yelp reviews without API keys. The change is designed to help users save time and avoid recent third-party charges, especially from Yelp’s paid API model.
Users can now paste a link to their Yelp page or Google Place ID to set up a review feed in minutes. There’s no need to connect billing accounts or enter credit card details.
The feature is ideal for users who only need to show a handful of reviews. Free plan users can display up to 10 reviews from a single source without any API integration. Pro users still have the option to enter API keys to unlock unlimited sources and faster feed updates.
With this update, users can highlight Google and Yelp reviews directly on their websites, promote trust, and increase conversions—all with fewer technical requirements.
WooCommerce 9.9 Beta Introduces Blueprints, Faster Dashboard, and Smarter Exports
WooCommerce 9.9 is set for release on June 2, 2025. The beta version is now available for testing, with new features that focus on speed and store management.
The update introduces ‘Blueprints’, which is a tool for exporting and importing store settings. It helps developers and agencies maintain consistent setups across sites.
Admin speed is also improved with asynchronous dashboard widgets. This change significantly reduces load times on uncached or high-traffic sites.
Additionally, store owners can now export selected products by ID and hide all shipping rates when free shipping is available. Both these features were previously only possible with code or third-party tools.
Other updates include automated database migrations and smoother navigation in Product Collection blocks. Experimental features, including COGS tracking and a redesigned Product Gallery block, are also available for early testing.
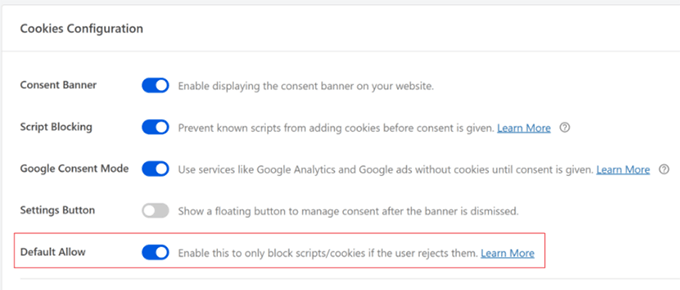
WPConsent Adds Per-Page Scanning and New Consent Defaults
It now offers per-page scanning, improved cookie settings, and cleaner uninstall options.
Site owners can choose which pages to scan for scripts and cookies. This helps reduce scan times, allowing users to focus on key areas like checkout, forms, and login pages. WPConsent also suggests commonly used pages for added convenience.
A new “Default Allow” option gives more control over how cookies are handled. When this setting is enabled, scripts and iframes will load by default unless the user opts out. If rejected, cookies are cleared and the page refreshes to reflect the updated consent choice.
WPConsent also now includes an option to delete all plugin data when the plugin is uninstalled. This ensures full data removal and supports cleaner site management.
The update also includes enhancements to Google Consent Mode compatibility and works well with plugins like MonsterInsights.
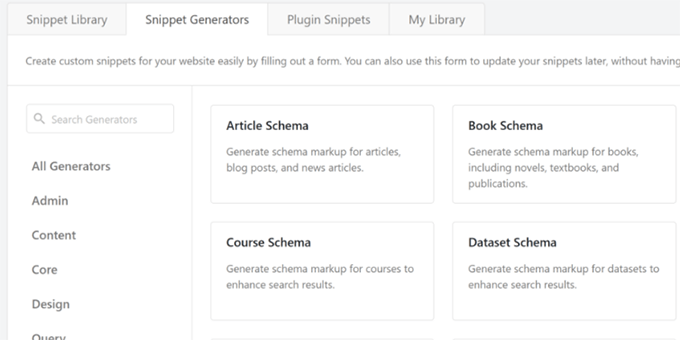
WPCode Adds Schema Generators and Improved Pixel Tracking
Users can now create structured data for articles, FAQs, reviews, and more—no coding required. This makes advanced SEO tools more accessible for beginners and small business owners.
The schema tool uses a simple form-based interface. Once filled, WPCode generates valid schema code that can be easily inserted and edited. Premium users can also use Smart Tags to dynamically auto-fill values.
This update also improves click tracking in the Conversion Pixel addon. Click events now send data to both Google Analytics and Google Ads for more complete reporting.
In Other News 🗞️
MonsterInsights now supports Pinterest ad tracking. Users can measure conversions and return on investment (ROI) from Pinterest PPC campaigns using just their Tag ID and Ad Account, all from inside WordPress. No coding needed.
WordPress 6.8.1 has been released as a maintenance update. It fixes 15 bugs across Core and the Block Editor, and improves stability in multisite, the REST API, and other key areas.
A2 Hosting has rebranded as Hosting.com. The company promises improved performance and support while continuing with its core services and infrastructure.
The folks behind rtCamp have launched GoDAM, a new digital asset management plugin. It offers enhanced video handling and media organization for WordPress users, especially agencies and enterprise teams.
When I first started building WordPress websites, tracking visitor data just meant installing Google Analytics and calling it a day.
But times have changed. With new privacy regulations, using cookies to collect personal information without user consent can lead to legal headaches and lost visitors.
I’ve helped several WordPress site owners transition to cookie-free analytics solutions that still provide powerful insights. After testing numerous options and implementing them across various types of websites, I’ve identified the most effective approaches.
In this guide, let me show you two ways to add analytics while respecting your visitors’ privacy. One uses a privacy-first setup for Google Analytics (which uses first-party cookies), and the other is a cookieless option.
Do I Really Need Cookieless Analytics?
You’ve probably heard a lot about cookies and privacy laws. But what does it all really mean for your WordPress website’s analytics? Let me break it down.
Cookies are small pieces of data that are stored on a user’s browser when they visit a website.
Traditional analytics tools like Google Analytics 4 (GA4) use these cookies to track visitor behavior. This includes details like which pages they visit, how long they stay, and what actions they take.
All this data helps site owners better understand their audience and improve their websites.
🚨 Here’s the challenge: New privacy laws, like the GDPR, CCPA, and ePrivacy, require websites to ask for explicit user consent before tracking with cookies. Because of this, many website owners think they must switch to cookie-free analytics to stay compliant.
However, that’s not actually true!
You can still track important data while staying compliant with privacy laws. We’ll show you some workarounds to set up cookieless analytics.
Why “Cookieless” Google Analytics 4 is the Best Option
When it comes to website analytics, Google Analytics 4 (GA4) is still the best and most powerful tool available – and that’s true for all types of websites. So, if you want accurate insights into your visitors’ behavior, GA4 is the way to go.
But before we start, let’s clear up a common misunderstanding: GA4 does not rely on third-party cookies. Instead, it uses first-party cookies, which are set by your own website to collect data about your visitors’ activity on your WordPress site only.
In contrast, third-party cookies are set by external services (like ad networks) and track users across multiple websites. Because of their broader tracking scope, they raise more privacy concerns and are being phased out by many browsers.
Now, you might be wondering: “Since GA4 still uses cookies – even if they’re first-party – can it be used in a way that complies with privacy laws?”
The answer is yes!
However, do note that Google Analytics itself isn’t automatically compliant or non-compliant. It’s your responsibility to use it in a way that follows the rules that apply to you.
Plus, whether you need cookie consent for Google Analytics depends on several factors. They can be where you and your visitors are located, and how you handle their data.
Since cookie consent laws differ by country (even within the EU), some websites must ask users to consent to specific cookies, while others need a banner for any cookie use.
To help with this, I’ll show you how to pair GA4 with:
✅ MonsterInsights with the EU Compliance addon – This helps ensure your data handling aligns with GDPR and other privacy regulations.
✅ WPConsent cookie banners – These help you request and manage user consent the right way.
With these tools in place, you can continue using GA4 in a way that supports compliance with privacy laws. This helps you gather valuable insights while reducing the risk of legal issues.
How to Add WordPress Analytics Without Cookies
Now that I’ve covered what cookieless tracking is and whether you really need it, let’s talk about how to set it up on your WordPress site.
There are 2 solid options to do this:
GA4 + MonsterInsights EU Compliance addon – Track user behavior with GA4 while staying compliant with privacy laws like GDPR. It uses first-party cookies and offers configurable settings for stronger privacy. Ideal for getting detailed insights with easy website integration.
Burst Statistics – Let’s you set up analytics without cookies. It stores data on your server and offers a hybrid mode with optional cookies.
I will cover both methods in our tutorial, along with some extra tips and FAQs about cookieless tracking.
Feel free to use the jump links below to go to your preferred method:
Method 1: How to Set Up WordPress Cookieless Analytics (Keep Using GA4 for the Best Insights)
This method is for if you want access to powerful analytics while still respecting user privacy. I’ll be using MonsterInsights alongside WPConsent to set up cookieless tracking.
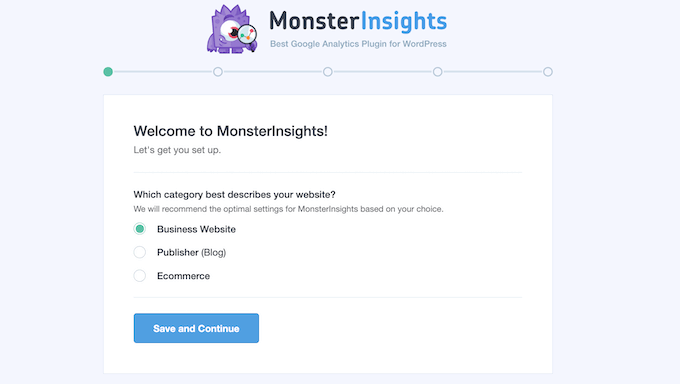
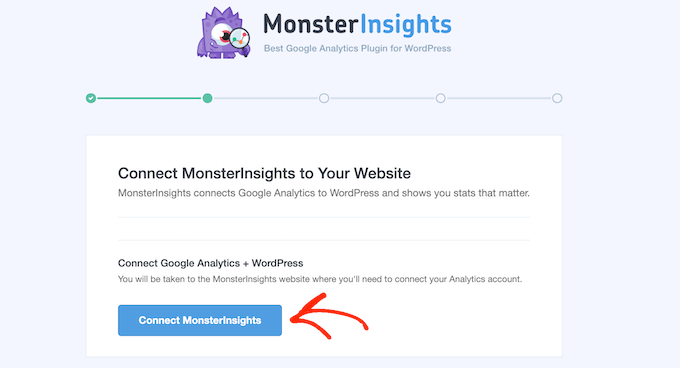
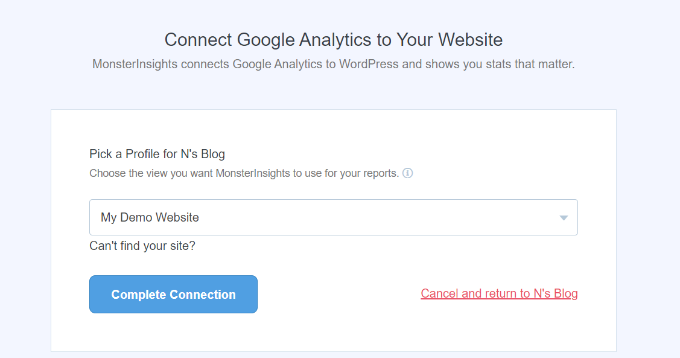
Step 1: Install MonsterInsights to Set Up Cookieless Analytics
At WPBeginner, we use it to track traffic sources, visitor demographics, and conversion rates on our forms, buttons, referral links, and more. Check out our complete MonsterInsights review for a deeper look at its features.
✏️ Quick note: In this tutorial, I’ll be using the MonsterInsights Pro version because it comes with the EU Compliance addon (we’ll need it in step 3). But there’s also a free MonsterInsights version that works great if you just need basic analytics reports.
Step 3: Install the MonsterInsights EU Compliance Addon
Since GA4 still uses first-party cookies, you need to make sure that your tracking complies with GDPR. The MonsterInsights EU Compliance addon makes this easier by automating key privacy settings in GA4.
Some of its essential features include:
Anonymizing IP addresses to prevent personal data storage.
Disabling the tracking of user demographics, interests, and User IDs.
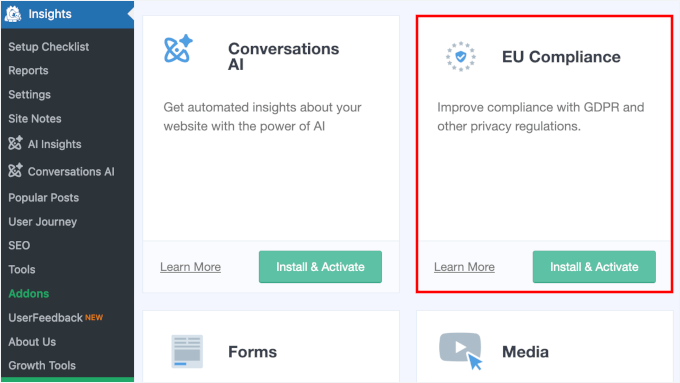
To install the addon, you can navigate to Insights » Addons.
Here, go ahead and click the ‘Install & Activate’ button to install the EU Compliance addon.
After that, you can switch the toggle to activate the addon when it appears.
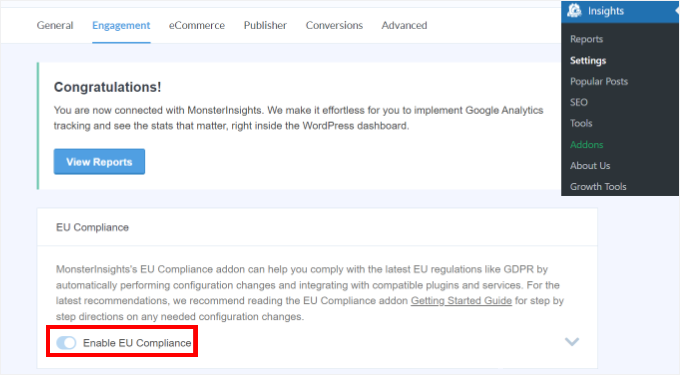
Upon activation, let’s go to the ‘Settings’ menu.
In the ‘Engagement’ tab, simply toggle the ‘Enable EU Compliance’ setting to turn it on.
We also recommend verifying the settings directly in GA4 to ensure your GA4 setup aligns with your MonsterInsights privacy settings.
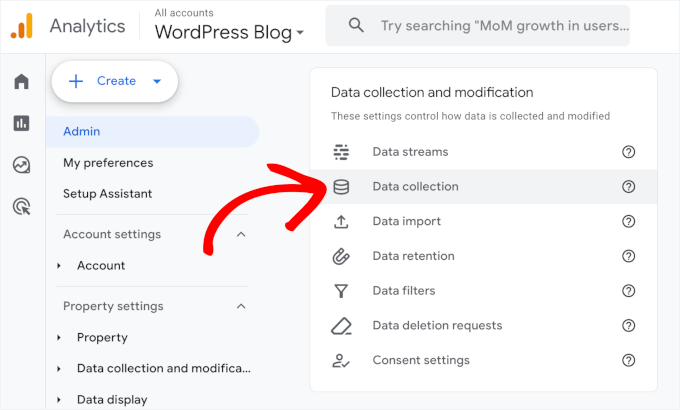
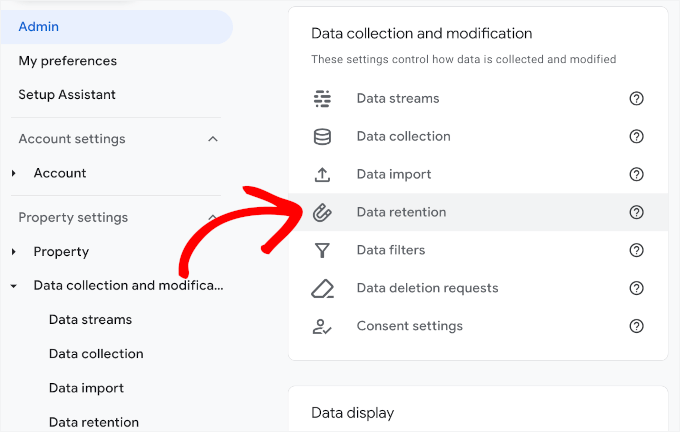
For example, to make sure your GA4 doesn’t track demographics, you can navigate to your GA4 ‘Admin’ panel.
Next up, you’ll want to locate the ‘Data collection and modification’ setting.
Then, simply click the ‘Data collection’ option.
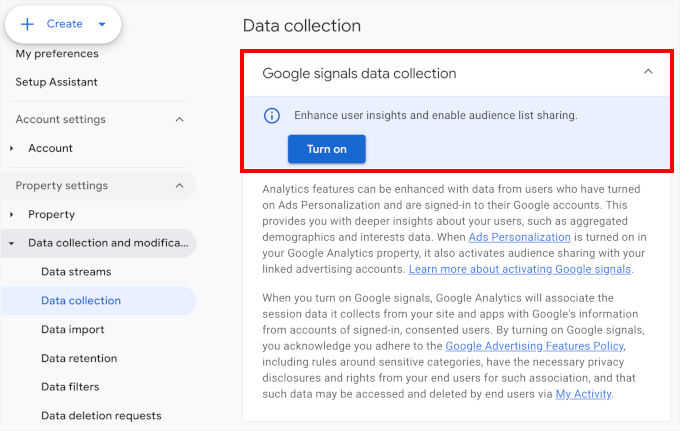
Now, in the ‘Google signals data collection’ settings, you should make sure it’s disabled.
Why does this matter? Google Signals collects extra user data, including:
Demographics & Interests – Age, gender, and hobbies.
Location & Engagement – User locations (from Google accounts).
Cross-Device Tracking – Identifies users as they switch between devices.
Cross-Platform Reports – How users interact across devices.
Ad Personalization Data – Connects with Google Ads for remarketing.
If it’s already off, then you should see the option to ‘Turn On’ like this:
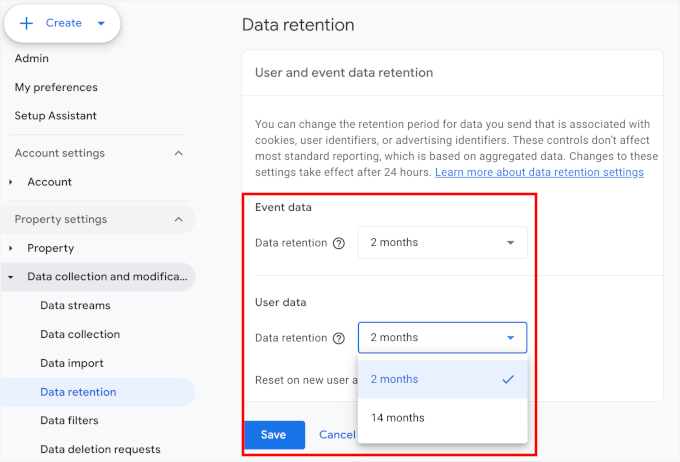
You might also want to review your data retention settings.
Data retention controls how long GA4 stores user-level and event-level data before automatically deleting it. A shorter retention period can help with GDPR compliance and privacy regulations.
To do this, you can go to Data collection and modification » Data retention from the ‘Admin’ menu.
On the next screen, you’ll see options to set the event and user data retention period.
You can click the ‘Data retention’ dropdown menus for both event and user data. Then, for stricter compliance, simply choose the ‘2 months’ option.
Don’t forget to click ‘Save’ when you’re done adjusting.
Step 4: Set Up the WPConsent Cookie Consent Plugin
Using Google Analytics 4 while complying with laws like GDPR and CCPA means you need to get user consent before tracking. And that responsibility falls on you.
Whether consent is required depends on where your business is based, where your users are located, what data you collect, and how it’s used. Plus, rules vary widely across countries, even within the EU, with some requiring consent for specific cookies and others for any type.
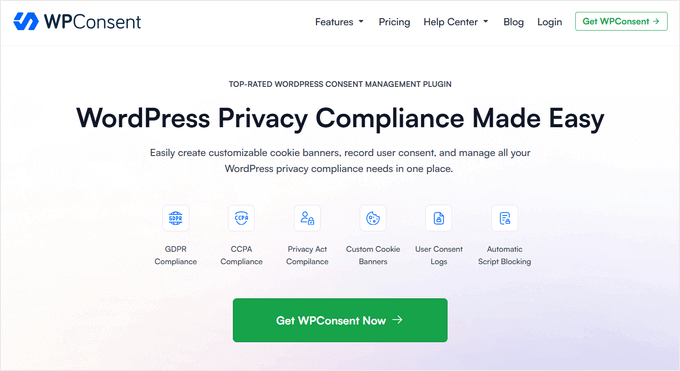
Instead of handling this manually yourself, you can use WPConsent to simplify compliance.
This powerful plugin lets you display a cookie consent banner, log user choices, and control when tools like GA4 are allowed to run — all within WordPress.
At WPBeginner (and some of our partner brands), we use WPConsent, and it’s been a reliable solution for managing privacy settings. Explore all of its features in our complete WPConsent review!
✏️ Quick note: You can use the free WPConsent plugin to set up cookie banners. But for this article, I’ll use the WPConsent Pro version because it provides access to cookie consent logs.
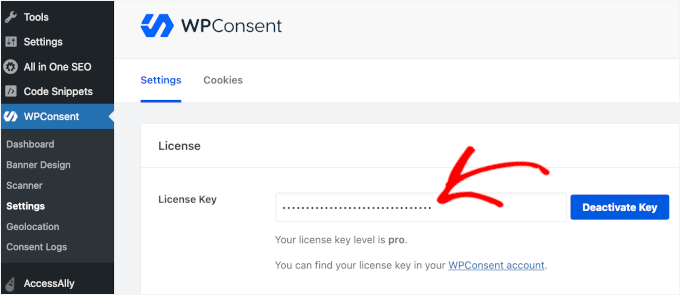
Upon plugin activation, let’s activate the license key.
To do this, you’ll need to go to WPConsent » Settings. After that, simply copy the license key from your WPConsent account and paste it into the ‘License Key’ field.
Then, go ahead and click the ‘Activate Key’ button.
With that done, let’s navigate to ‘Dashboard’ to go through the setup wizard.
Go ahead and click on the ‘Let’s Get Started’ button.
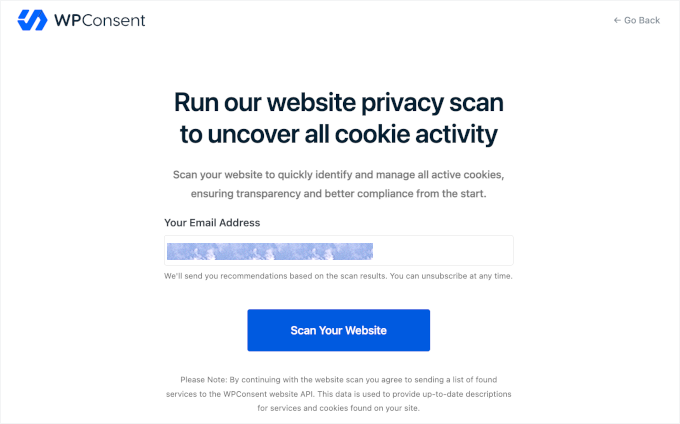
First, it will ask you to check your site’s email address.
If everything looks good already, then you can click ‘Scan Your Website.’
This will trigger the tool to start the cookie scan.
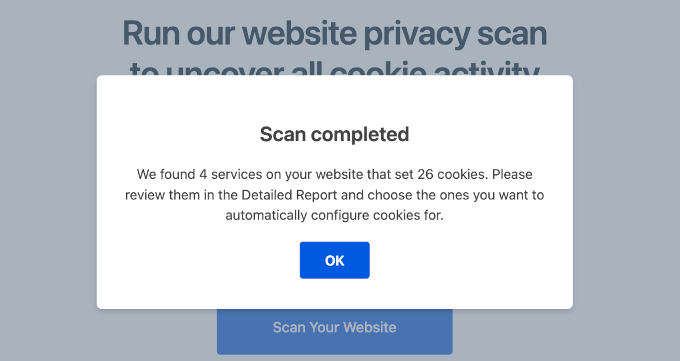
Once done, you’ll see a ‘Scan completed’ notification along with a short report on the tool’s findings. For example, here it says that WPConsent found 4 services on our site that have set cookies.
Let’s click on ‘OK’ to continue the process.
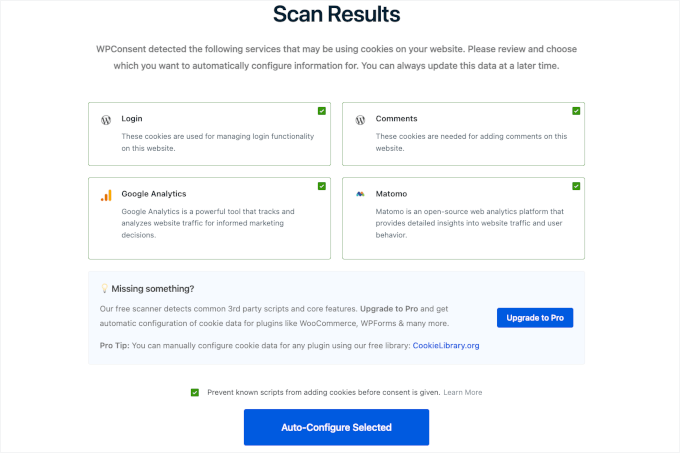
Next up, you’ll see your WordPress site’s scan results in more detail.
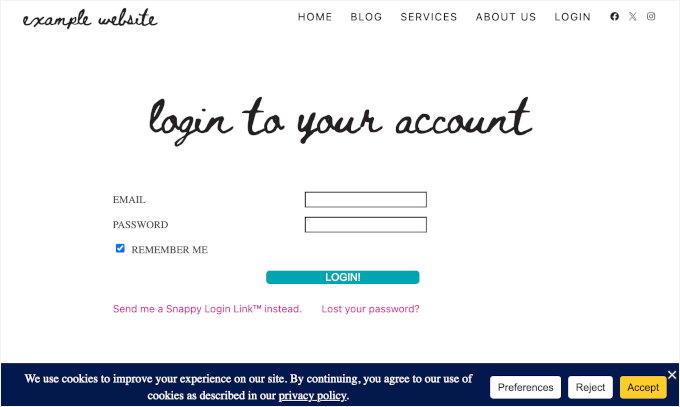
On my demo site, the services that use cookies are WordPress login (this might be because of the ‘Remember Me‘ option), WordPress Comments, Google Analytics, and Matomo.
Make sure that you select all the services. Then, you should also check the box that says ‘Prevent known scripts from adding cookies before consent is given.’
With that done, go ahead and click the ‘Auto-Configure selected’ button.
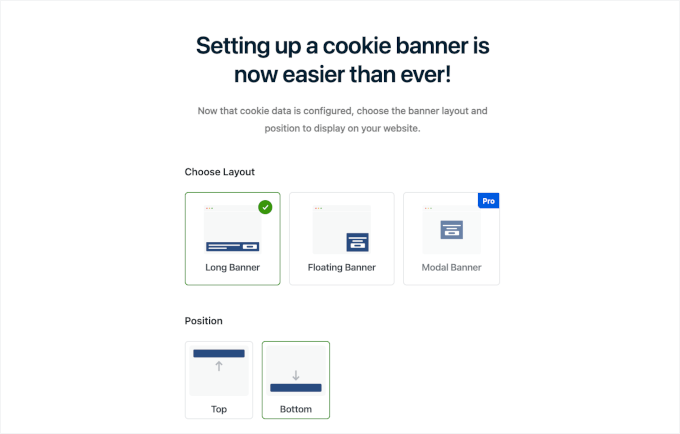
After that, WPConsent will prompt you to set up your cookie banner.
The process is super simple. You just need to choose a layout and pick a position.
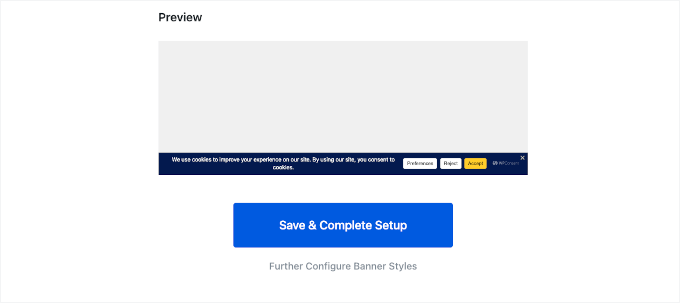
Then, you can scroll down the page to preview your cookie consent banner.
If everything looks good to you, it’s time to click the ‘Save & Complete Setup’ button.
And you’re done!
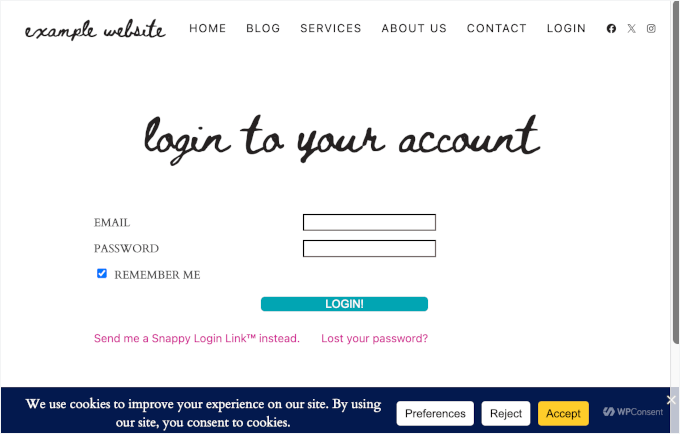
Now, if you visit your website, you’ll see your cookie consent banner in action.
👉 Expert Tip: Adding a link to your privacy policy page in the cookie banner helps build trust with your visitors and align with legal requirements. If you don’t have one yet, then check out our tutorial on how to add a privacy policy page in WordPress.
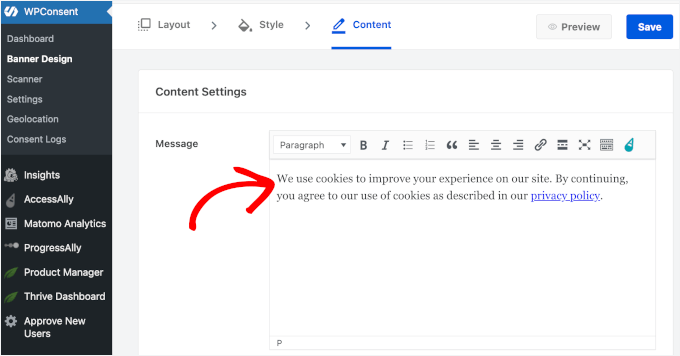
After setting it up, you can embed the link into your cookie banner from the WPConsent editor.
Just navigate to WPConsent » Banner Design from your admin area. Then, you can edit the text in the ‘Message’ field to include the link to your Privacy Policy page.
Don’t forget to click the ‘Save’ button so you don’t lose your progress.
And here’s your cookie banner:
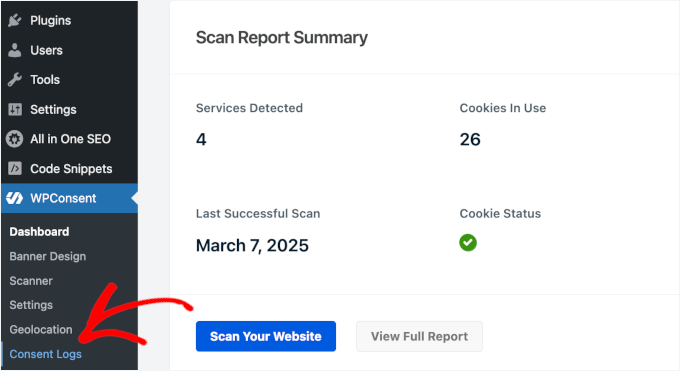
Step 5: Access Consent Logs to Verify Your Privacy Settings
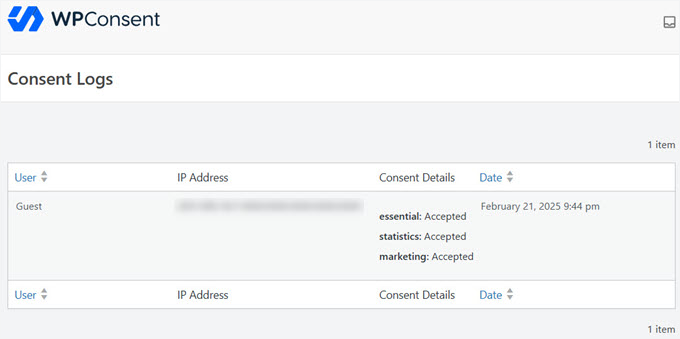
WPConsent has a ‘Consent Logs’ section that provides a detailed record of how visitors interact with your site’s cookie consent popup.
To see your logs, go ahead and navigate to WPConsent » Consent Logs from your WordPress admin area.
Here, you’ll find a table with all your users’ consent details.
For example, I have a user who accepted all cookies – essential, statistics, and marketing.
And that’s it – you’ve successfully set up Google Analytics with enhanced privacy settings while still using cookies.
Method 2: How to Set Up WordPress Analytics Without Cookies (Free Option with Less Data Accuracy)
If you’re looking to track analytics without cookies, then Burst Statistics is a great option. This free plugin makes the process pretty simple.
Keep in mind that Burst Statistics uses a technique called fingerprinting. It’s a way to identify a computer or device based on its unique characteristics, like the browser, operating system, and installed fonts, even without using cookies.
While it’s generally considered less intrusive than cookies, it’s still a form of tracking, so it’s good to be aware of it.
Now, let’s take a look at how you can set it up on your WordPress site.
Step 1: Install and Activate the Burst Statistics Plugin on WordPress
To get started, you need to install and activate the free Burst Statistics plugin. Simply navigate to Plugins » Add New Plugin from your admin area.
After that, you’ll want to use the search feature to quickly find the plugin. Then, go ahead and click the ‘Install Now’ button.
✏️ Quick note: For this guide, I’ll use the free Burst Statistics plugin to set up analytics without cookies. However, upgrading to Burst Statistics Pro will unlock lots of other cool features, including data archiving, multiple goal tracking, and advanced filters.
Then, you should click once again on the ‘Activate’ button when it appears. If you need help, then you can check out this guide on how to install a WordPress plugin.
Step 2: Configure Settings for Optimal Performance and Privacy
Upon plugin activation, you can enable analytics without cookies straight away.
All you have to do is navigate to Statistics » Settings from your WordPress admin area. Then, let’s make sure you’re in the ‘General’ tab.
From here, simply switch on the ‘Enable Cookieless tracking’ option like this:
And that’s it – you’ve successfully set up WordPress analytics without cookies on your website.
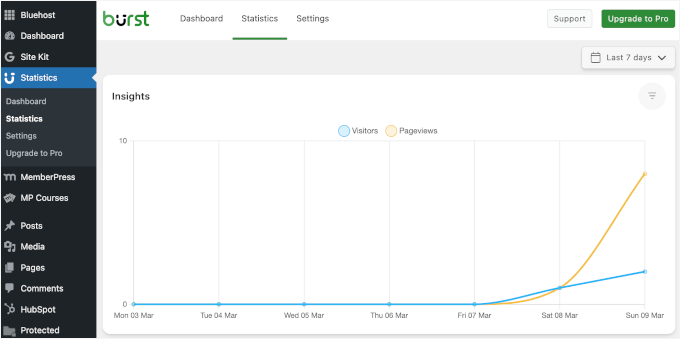
Step 3: Verify if Your Analytics Are Working Properly
Unlike the more traditional approach, analytics without cookies avoids storing personal data, like IP addresses or other user identifiers. Instead, it provides anonymized, aggregated data.
That said, it’s important to note that some methods still involve data collection. This may carry privacy implications depending on how they’re implemented.
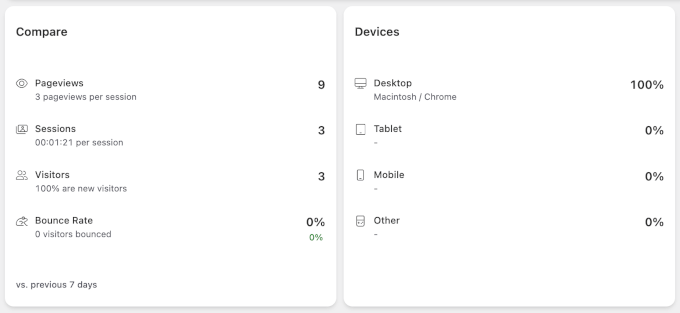
To see if your analytics are working properly, you need to go to the ‘Statistics’ menu. On the next screen, you’ll immediately find your visitors and pageviews graph for the last seven days.
To see the statistics in detail, you can scroll down this page.
Here, you might notice that your sessions are counted differently.
In traditional analytics, cookies track when a visitor starts and ends a session. If the same person comes back within a certain time frame (usually 30 minutes), it’s counted as the same session.
In analytics without cookies, returning users cannot be recognized within that window. Instead, each visit is treated as a new session, even if it occurs shortly after the last one.
🤔 What does this mean for your reports? You may see a higher number of sessions than usual because visitors who leave and return within a short period won’t be grouped into a single session.
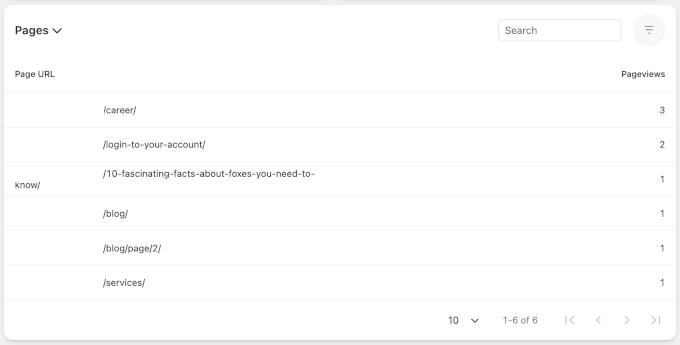
Further down the page, Burst Statistics provides a dedicated ‘Pages’ report that shows how pageviews are distributed across your site.
For example, if your ‘Compare’ report shows 9 pageviews, then you can see that 3 views came from the ‘Career’ page, 2 views from the ‘Login’ page, and so on.
FAQs About Cookieless WordPress Analytics
Still have questions? Let’s clear up some common concerns about tracking website data without cookies.
Why do websites need cookies?
Cookies store small amounts of data to remember user preferences, track user behavior, and improve the user experience. Many analytics tools use cookies to identify returning visitors and track interactions over time.
How can I add analytics to my WordPress site?
In short, you can add analytics to your WordPress site using tools like MonsterInsights, Matomo, or HubSpot.
I recommend MonsterInsights because it makes installing Google Analytics in WordPress easy. It gives you all your GA4 data in easy-to-understand reports directly in your WordPress dashboard.
Do all websites with analytics need cookie warnings?
No. If your analytics solution doesn’t store personally identifiable information (PII) or track users across sessions using cookies, then you don’t need a cookie consent banner. This is why many site owners switch to analytics without cookies.
For example, Burst Statistics is a privacy-focused analytics tool that uses fingerprinting techniques. Instead of storing cookies, it analyzes non-personal browser and device data to differentiate visitors.
Keep in mind that while this approach is technically cookieless, it is still a form of data collection that may have privacy considerations.
Will cookieless analytics affect data accuracy?
It depends on the tool you use.
Cookieless tracking may not capture user journeys in as much detail, but it still provides accurate insights into overall traffic, page views, and engagement.
Many modern cookieless analytics tools use fingerprinting techniques or server-side tracking to improve accuracy. While these methods minimize cookie usage, they still collect data in other ways, which may raise concerns about privacy.
Can I switch back to traditional analytics if needed?
Yes, most analytics solutions allow you to switch between cookieless and traditional tracking. However, if you start using cookies again, then you may need to add a cookie consent banner to comply with privacy laws.
Further Reading 📚: More WordPress Analytics Guides
I hope this article has helped you learn how to add WordPress analytics without cookies.
Want to dive deeper into WordPress analytics? Check out these guides to track and understand your website’s performance more effectively:
Are you fed up with overspending on your business phone system? Or maybe you’re a startup looking for a cost-effective solution that still has all the features you need?
RingCentral is a great option for many companies and entrepreneurs (in fact, we often recommend it to WPBeginner readers). However, it’s not the perfect solution for every single business.
That’s why I’ve done the research for you, testing a ton of business phone systems to find the best RingCentral alternatives. I looked at everything from pricing and ease of use to call quality and customer support, focusing on solutions suitable for all kinds of business owners.
Whether you’re looking for advanced features or just want something simple and affordable, I’m confident I’ve found a RingCentral alternative to fit your needs.
Quick Pick – The Best RingCentral Alternatives
In a hurry? No worries! Take a look at my top picks so you can quickly choose the right RingCentral alternative for your site.
I know that finding the right communication platform can be daunting and high-stakes. Make the wrong decision, and your remote team may struggle to collaborate. Even worse, you might miss urgent customer queries, provide a terrible customer experience, or lose out on potential leads.
With so much at stake, I’m committed to giving you the best possible advice about RingCentral alternatives.
That said, here’s how I tested the different options in this article:
We have actually used them at WPBeginner: For instance, we have used Nextiva for our own business phone system for many years and Zoom for company meetings. This real-world experience means we understand how these tools perform in a real business, and not just in a perfect demo environment.
I put the most popular ones to the test: I dug deep into these solutions, analyzing them based on the stuff that really matters: How easy are they to use? What features do they offer? Do they have any time-saving artificial intelligence tools? And of course, how much do they cost?
I tried customizing them: Your business is unique, so your communication system should be, too. With that in mind, I personally tested each RingCentral alternative to see whether you can customize the call flows, greetings, and overall experience. For example, do you have the flexibility to fine-tune the VoIP or communications solution to better suit your business, or are you stuck with the default settings?
I categorized them: The truth is, there’s no single ‘best’ RingCentral alternative that’s perfect for everyone. I understand that a small startup has different needs than a large call center. With that in mind, I categorized each solution to help you find the right platform for your unique needs.
Why Trust WPBeginner?
As someone who’s been part of the WPBeginner team for a while now, I’ve seen firsthand how important good communication is for any business, including ours!
We use tools like Nextiva across our entire business to manage our communications, so we have first-hand experience with how they work.
In addition, everyone at WPBeginner follows a strict editorial process to make sure our reviews are always helpful and trustworthy.
So, when you read my thoughts on these RingCentral alternatives, know that they come from someone who uses these kinds of tools daily, understands the communication needs of a business like yours, and is committed to helping you find the right solution.
6 Best RingCentral Alternatives
Now, let’s look at the best RingCentral alternatives you should consider for your business.
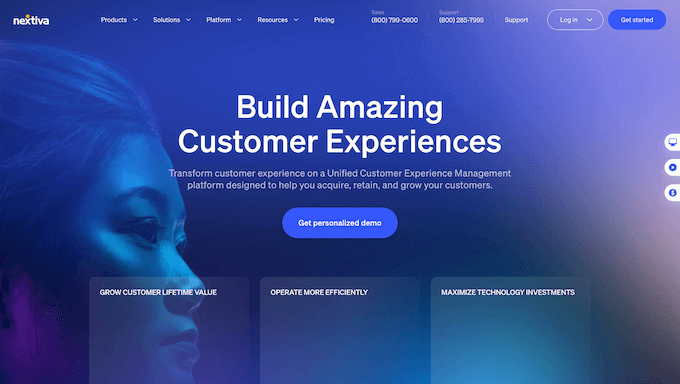
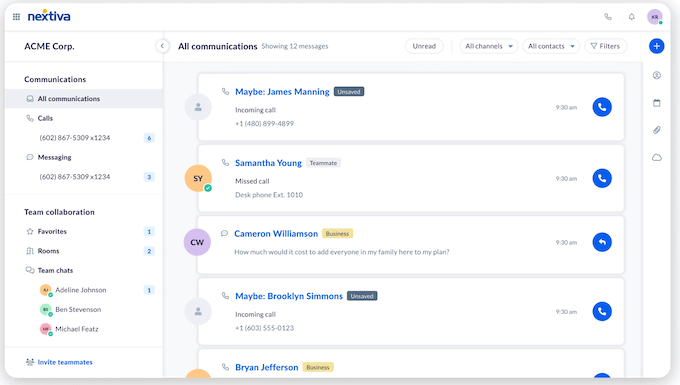
I can confidently say that Nextiva is an excellent business phone service, especially for remote teams. Since it’s a cloud-based platform, you can answer calls from anywhere using an app on your computer or phone.
We also use it across our own business. We ultimately chose Nextiva because it offered the best balance of features, ease of use, and affordability for a business phone system, especially for remote teams like ours.
You can check out our Nextiva review for more information.
Another standout feature is Nextiva’s ability to handle multiple communication channels, including phone, SMS, live chat, video, team messaging, and social media.
This makes it particularly well-suited for customer support, as it allows for seamless customer interactions.
Nexitva’s IVR (Interactive Voice Response) system is also incredibly useful. This automated phone menu allows callers to interact with Nextiva using their keyboard or voice.
If you’ve ever rang a phone number and heard a pre-recorded greeting say something like “Press 1 for…” then you’ve encountered an IVR system before.
This feature enables you to route callers to the right department or person automatically, allowing you to better handle high call volumes. By automating simple routine tasks like this, you’ll be free to focus on more complex customer issues.
Plus, Nextiva has some great call analytics and reports. These call metrics allow you to see how many calls your team can handle and improve your customer service and sales teams.
Overall, Nextiva’s feature set is very impressive and includes automated reminders, video calls, an auto-attendant, and screen sharing.
It also integrates smoothly with other business tools like HubSpot, Zendesk, Zoho, and Salesforce.
No matter what plan you buy, you’ll need to pay for each additional user. This may make Nextiva difficult to scale, especially if you’re a rapidly expanding company that regularly onboards new employees.
The desktop app uses many resources and can slow down your computer.
Why I recommend Nextiva: As remote work continues to grow, I’m hearing from more and more businesses that need a reliable cloud-based phone solution. If this sounds like you, then Nextiva may be your ideal solution.
It lets you answer calls from anywhere using an app on your computer or phone, so it’s perfect for remote teams. I can also see this being a good option if your employees regularly travel or work in the field.
Pricing: Plans start at $20 per user per month for the Digital Plan and go up to $60 per user per month for the advanced Power Suite plan.
Switch from RingCentral and save up to 50%. As a trusted alternative to RingCentral, we’re offering our WPBeginner readers a big discount on their Nextiva subscription.
2. Ooma – Best for Small Businesses on a Tight Budget
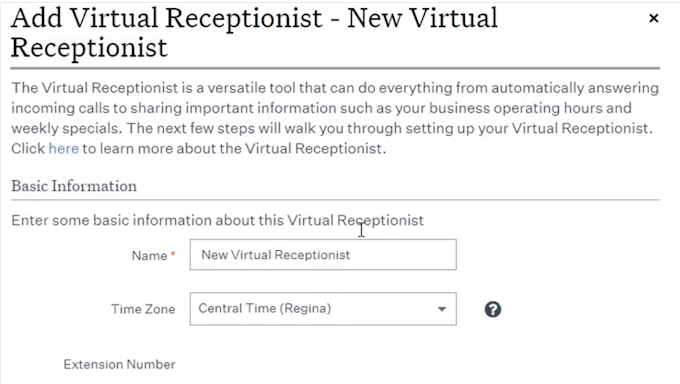
For small businesses, every dollar counts. Luckily, Ooma offers advanced features like auto-attendant, call forwarding, and voicemail transcription at a surprisingly budget-friendly price.
One of Oooma’s standout features is its virtual receptionist, which lets you create custom messages with general information such as your business hours and locations. It will then read these messages to anyone who calls your business number.
This helps callers get essential information right away, even if you don’t have a huge support team available 24/7.
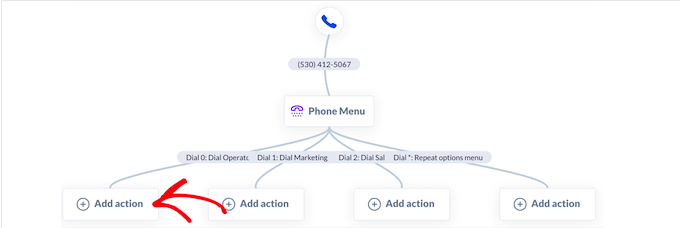
But here’s where Oooma gets really smart.
The Virtual Receptionist isn’t just some basic answering machine. It can actually figure out who the caller needs to speak with and automatically forward them to the right person or department. For example, the virtual receptionist can ask callers to press different buttons for specific extensions, such as “Press 1 to speak with our refunds department.”
This makes your business look incredibly efficient and organized, allowing you to compete with the big guys (even if you’re a small team behind the scenes).
I also appreciated the drag-and-drop call flow designer, making it easy to create custom call flows. Even if you don’t have a technical expert on staff, you can still create custom call routes in minutes.
During my testing, I found Ooma’s call quality to be consistently clear and reliable. The mobile app is also pretty handy, allowing you to make unlimited domestic calls.
Even better, you can save up to 90% on international call rates when you dial through the app. That’s a massive saving if you call overseas a lot!
The Ooma app also uses your phone’s Wi-Fi or data connection to make calls. That means you can chat away without worrying about using up all your mobile data or sacrificing call quality.
The Caller Info Match feature automatically fetches customer information from sources like LinkedIn, Facebook, Google, HubSpot, ServiceNow, or Zoho.
Supports video chat, including noise suppression, host muting, and HD streams.
Convenient ‘meet now’ link for instant virtual meetings.
Automatic voicemail transcription, plus a voicemail-to-email option.
Easily connects with other business tools, including Microsoft Dynamics 365, Zoho, FreshDesk, and Salesforce Lightning.
❌ Cons of Ooma:
A few users have experienced issues setting up the mobile app.
Some features, such as the IVR system, can be complex to set up and require technical expertise.
Why I recommend Ooma: If you’re a small business or have a limited budget, then Ooma Office Essentials is a great starting point. Its user-friendly interface makes it easy to set up and manage your phone system, even if you don’t have a team of technical experts on staff.
Ooma is also designed to be affordable. It includes unlimited calling to the US, Canada, Mexico, and Puerto Rico, so it’s a great, budget-friendly solution if you regularly call these locations.
Pricing: Ooma Office Essentials is priced at $19.95 per month, and is our recommendation for startups, small business owners, and WordPress freelancers.
However, you can unlock additional features such as call recording and call blocking, voicemail transcriptions, and video conferencing by upgrading to either Ooma Office Pro ($24.95) or Ooma Office Pro Plus ($29.95).
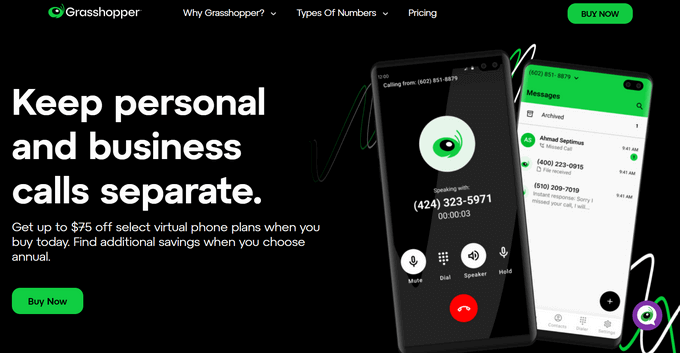
3. Grasshopper – Best for Solo Entrepreneurs in the US/Canada
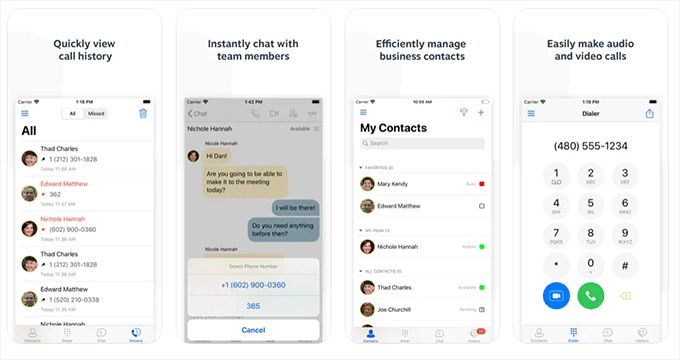
Setting up and maintaining a professional phone system can be overwhelming, especially when you’re flying solo. That’s where Grasshopper comes in.
This is a powerful virtual business phone service specifically designed to help solo entrepreneurs establish a strong brand image and communicate effectively with customers.
Solo entrepreneurs often work from home or remotely, which can make it difficult to establish a professional phone presence. Grasshopper solves this problem by allowing you to create a toll-free number, a vanity number, or a local number in any city of your choice.
I particularly like the option to create a local number, as it helps you appeal to customers outside of your immediate area. You could potentially take your solo business international!
Even better, the Grasshopper app lets customers and potential leads reach you at any time. It doesn’t matter whether you’re working from home, your local coffee shop, or on the go. The app helps you grow your business by ensuring you don’t miss important calls.
The best part? You don’t need to buy any additional phones or equipment—your existing smartphone or computer will do. This makes it an affordable solution for solo entrepreneurs who need to establish a reliable phone system on a limited budget.
It’s also a good option for startups or even some small businesses that may not have invested in professional equipment yet.
To make sure customers always get a response, Grasshopper can automatically send a text to new callers when you can’t answer them right away. This feature is especially useful when you’re flying solo – even the most dedicated solo entrepreneur can’t be available 24/7.
However, keep in mind that Grasshopper is only available to customers in the US or Canada.
✅ Pros of Grasshopper:
Send and receive texts on your Grasshopper business number.
Forward any incoming calls to multiple phones at once.
Automatic voicemail transcriptions.
Use your internet connection when cell reception is poor.
Receive faxes as PDF attachments, sent straight to your email inbox.
Monitor your business with detailed call reports and analytics.
Limited integrations with other software (Skype and Google Voice only).
$500 deposit is required to enable international outgoing calls.
Only available in the US and Canada.
Why I recommend Grasshopper: With Grasshopper, you don’t have to worry about complicated technical setup, maintenance, or equipment. This makes it a good option for startups and small businesses, but I particularly recommend it for solo entrepreneurs.
Grasshopper’s choice of toll-free, vanity, and local numbers helps you establish a professional phone presence, while the app allows you to answer calls from any location at any time.
The end result? Your business projects a more polished and professional image, which is essential for building trust and driving sales.
Pricing: Starts at $14/ month for the True Solo plan. This plan includes 1 user, 1 phone number, and 1 extension – basically, everything you need to support a solo-person business.
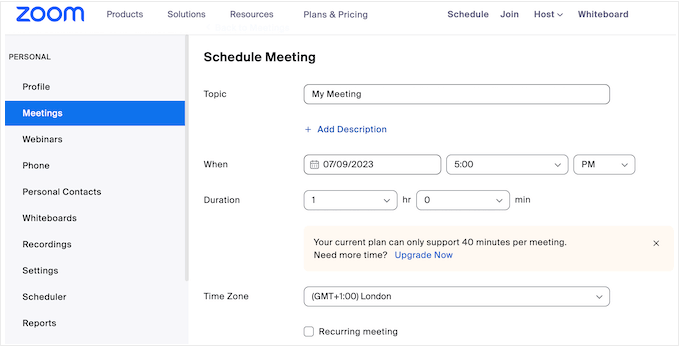
4. Zoom Phone – Best for Video Conferencing & Team Messaging
Managing calls, video conferencing, and team chat can be a challenge for any business. However, it’s particularly tricky for remote teams where most of the communication happens virtually.
Zoom Phone offers a solution to this problem by providing an all-in-one platform for managing all your communication needs. This includes answering customer calls, following up on leads, hosting video conferences, and chatting with team members.
As a 100% remote team, we use Zoom for some of our large company meetings.
We need a reliable and efficient platform with built-in team chat and video conferencing. This is essential for keeping our employees connected across different time zones.
With Zoom, we have hosted one-on-one reviews, town hall meetings, team chats, and even team-building social calls, all from the same platform.
Despite being a comprehensive all-in-one platform, Zoom Phone is incredibly easy to set up. Simply choose a cloud phone plan, and you can start making calls immediately using the Zoom mobile or desktop app.
Additionally, Zoom has an AI Companion that can streamline your workflows with advanced features like meeting and call summaries, real-time AI queries during meetings, and AI-powered whiteboard generation.
These features are ideal for video conferences in general, but they’re particularly useful for remote teams where most communication happens via video meetings. They let you keep everyone in the loop, including people who could not attend the video chat.
I also like the ability to switch between voice and video calls with one click. Once again, this is ideal if you need to handle a mix of customer calls, internal meetings, and remote collaboration.
Integrates seamlessly with Salesforce, Contact Center, Slack, and other popular solutions.
❌ Cons of Zoom Phone:
No free trial available (although there is a free version that’s limited to 40-minute call durations and 100 participants).
The metered international calling fees are a bit expensive for small businesses.
Why I recommend Zoom Phone: With its advanced video conferencing and team chat features, Zoom Phone is a great option for teams that host regular virtual meetings. It’s particularly good for remote teams that rely on chat and video conferencing to work together effectively.
Pricing: Zoom plans start at $15 per user, per month for domestic US and Canada calling, with prices going up to $22.49.
Do you have customers all over the globe? Phone.com offers competitive international calling rates to communicate with your existing customers and find new ones without breaking the bank.
Another feature that caught my attention was Phone.com’s AI-powered Answer Bot service. This service can pick up the phone using your company’s name and give a pre-written answer. This is a fantastic way to make your business appear more professional.
It’s also a great addition if you have customers in different time zones, but don’t have call center staff available 24/7. With Phone.com’s Answer Bot service, you can be confident that callers always get some form of response.
Do you work in the healthcare industry? Then I really recommend checking out Phone.com’s HIPAA compliance features.
Keeping patient data private is a huge deal, and Phone.com understands this. For example, if a patient tries to contact you via SMS, then Phone.com can automatically tell them to contact your office in a different way to discuss medical information. This is because text messaging usually isn’t HIPAA compliant.
Setting up Phone.com is also fairly straightforward. Their dashboard is user-friendly, so you can customize call routing, voicemail, and other settings without any hassle. They even have a smart call routing system where you can define custom rules based on the time of day, caller ID, and more.
Once again, these features can be particularly useful for international businesses that want to provide personalized service to customers in different locations. For example, you might route callers to a customer service agent who speaks their preferred language.
✅ Pros of Phone.com:
Low rates for international calling.
Connect to any traditional analog telephone.
HIPAA compliance features.
Track your top performers and busiest hours with built-in analytics.
Get additional insights via call logs and call recording.
❌ Cons of Phone.com:
Customer service response times can sometimes be slow.
Only includes call analytics and CRM integrations in the most expensive plan.
Why I recommend Phone.com: While Phone.com has limitations, including slower customer service response times, it’s still an excellent option. Its competitive international calling rates, in particular, make it a really attractive platform for companies with customers all over the globe.
And here’s a little something extra that really stood out to me: if you work in the healthcare field, then Phone.com has dedicated HIPAA compliance features. This immediately makes it stand out from every other solution on this list.
If you’re willing to overlook some minor drawbacks, then Phone.com could be your perfect solution, especially for businesses that sell or operate globally.
Pricing: Users can choose between Basic ($15), Plus ($22.50), and Pro ($33.33), with all plans billed per user, per month.
As a well-established name in VoIP, Vonage is an excellent option for call centers and larger businesses. After trying out their business phone service, I was impressed by its wide range of features and capabilities.
I was really surprised by how easy it was to manage company phone numbers from my admin dashboard. You can even generate local and toll-free numbers directly from the dashboard (although you will need to contact Vonage to generate international numbers).
Vonage is a great option for call centers due to features such as team messaging, video conferencing (with up to 200 participants!), call recording, and auto-dialing.
It also supports VoIP desk phones, so you can use traditional office phones alongside the desktop and mobile apps.
However, it’s worth noting that Vonage is one of the more expensive options on this list. So, if you’re a startup or small business, then you may be better off with a different RingCentral alternative.
✅ Pros of Vonage:
Capture more potential leads with Call Forwarding and Simultaneous Ring.
Dedicated dial-in numbers from 60 countries.
Record inbound and outbound calls for any or all users within your organization.
Call center-specific features like call logs, call recordings, AI routing, and advanced call analytics.
Why I recommend Vonage: Vonage has some seriously advanced features built explicitly with call centers in mind. That makes it a fantastic pick if you need a rock-solid VoIP solution that can handle the demands of a busy customer service team.
However, while Vonage offers many powerful features, it is pricier than some other options. If budget is a major concern for your business, then I’d definitely recommend choosing one of the other RingCentral alternatives in this guide.
Pricing: Vonage’s base plan starts from $13.99 per month, per line, and goes all the way up to $27.99 per month, per line.
What Is the Best RingCentral Alternative?
After thoroughly testing and comparing various business phone systems and platforms, I’m excited to share my top pick for the best RingCentral alternative: Nextiva.
It’s a reliable, flexible, and secure platform with an impressive feature set. It’s also a cloud-based solution, so your team can answer calls using any computer or phone. Overall, Nextiva is a perfect fit for remote teams or employees who travel a lot, or perhaps even work in the field.
Nextiva can also automatically forward calls based on each team member’s schedule. This can help remote team members work together more seamlessly, even when they’re spread across multiple time zones.
But what about other options?
If you’re a small business with a limited budget, then Ooma and Grasshopper are both great starting points. They both offer affordable plans, and they’re easy to use, making them ideal for solo entrepreneurs, startups, and small businesses alike.
However, the best RingCentral alternative for your business will ultimately depend on your specific needs and requirements. I recommend considering factors like budget, scalability, features, and user interface to help you make the right decision for your business.
Best RingCentral Alternatives: Frequently Asked Questions
I’ve been part of the WPBeginner team for a while, so I’ve definitely heard my fair share of questions along the way.
To help you out, I’ve put together answers to some of the most common questions we get asked about RingCentral and potential alternatives.
Why should I avoid RingCentral?
The main issue I hear from businesses is that RingCentral is considerably more expensive than other VoIP providers. Often, this means it simply isn’t an option for solo entrepreneurs, startups, and small businesses, since they typically have smaller budgets.
RingCentral also has many features, so its learning curve tends to be steeper than its competitors. Once again, this tends to be a problem for smaller businesses, as they’re less likely to have a technical expert who can help them set up and maintain RingCentral.
Don’t get me wrong: RingCentral is still a great platform. In fact, it has all the features you’d expect from an advanced communication tool, including call forwarding, number sharing, call waiting, and call management. It also integrates with popular CRMs like Salesforce and Zendesk.
So, while Nextiva is my top recommendation, RingCentral is a fantastic tool that I still recommend to larger businesses with bigger budgets or more complex needs.
If you want to learn more, then you can see our detailed RingCentral review for a deeper dive.
And if you do decide that RingCentral is the right fit for you, then you’re in luck – we have a RingCentral coupon, so you can get a discount.
Is there a free version of RingCentral?
While there isn’t a completely free version, RingCentral does offer a free trial. This means you can see if the platform is right for you before investing in a paid plan.
What is the best RingCentral alternative?
In my experience, Nextiva is the best virtual business phone service on the market. It’s loaded with advanced features, offers truly excellent support, and is designed to scale as your team grows.
We use Nextiva across our company, and in our opinion, it’s the best cloud phone system and platform on the market, especially if you have a remote team.
Which is better, Nextiva or RingCentral?
When it comes to finding the absolute best VoIP phone provider and platform for small businesses, everything points to Nextiva.
Nextiva offers competitive pricing, a ton of features, the best call quality, lower rates for international calls, and a wide range of numbers to choose from (local, international, toll-free, and vanity numbers).
Disclaimer: I’ve tried all the top RingCentral alternatives, including MightyCall, Google Voice, Freshcaller, Microsoft Teams, and many others. However, I decided not to include them in this list to help you avoid choice paralysis.
Bonus: How to Get Started With Your Business Phone System
Choosing which communication platform to use is a big step, so great job deciding! Now that you’ve got that sorted, let’s help you set up a seamless business phone system.
We’ve put together some handy guides that will show you how to set up call forwarding, voicemail greetings, and other essential features to make sure customers and potential leads can reach you with ease: