Did you know Google updates its search results around 13 times daily, from changing its rankings to the search interface? Or that keeping visitors on your website just 3 seconds longer can boost your Google rankings?
These are just some of the most surprising Google search engine stats, and there’s a lot more.
Like every other website, Google’s constant algorithm changes have affected WPBeginner’s search rankings. That’s why we study Google’s updates so closely. This helps us improve our SEO strategy and show you how to do the same so that your site stays visible in search results.
In this guide, we will dive into the most crucial Google search statistics that you should know to improve your website’s search engine optimization (SEO).
The Ultimate List of Google Search Statistics
We have a lot of ground to cover, so feel free to use the quick links below to skip to the topic that interests you the most:
- General Google Search Stats: Market Share and Search Volume
- SERP Stats: Google's Changing Landscape and Algorithm
- Google Search Features: AI Overviews, Rich Results, and More
- Google Search Ads: PPC and Ad Revenue Statistics
- Consumer Behavior: How People Use Google Search to Shop
- Mobile Google Search Trends: The Shift to On-the-Go Queries
- Local Google Search Stats: How Businesses Are Found Online
- Google Voice Search Statistics: The Rise of Hands-Free Search
General Google Search Stats: Market Share and Search Volume
Let’s dive into some eye-opening Google search stats that show just how big this search engine really is.
1. Google dominates the search engine market on both mobile (95.18%) and desktop (80.41%).
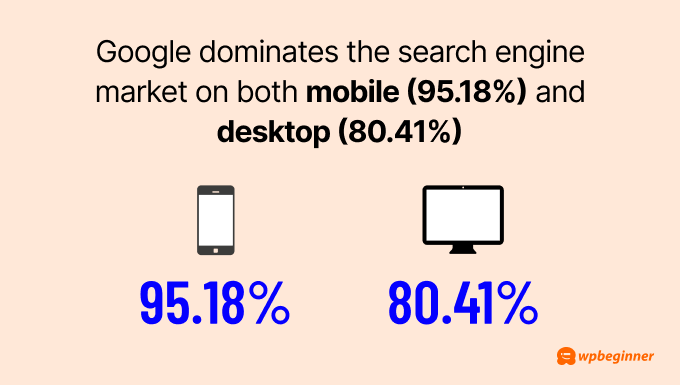
Interestingly, over the past 5 years, Google’s share of desktop searches has gone down from 83.94% to 80.41%. Its mobile share has also slightly decreased from 95.9% to 95.18%. That being said, Google is still the clear leader.
Simply put, if you want people to find your WordPress website, you need to focus on Google. It’s where most of your potential visitors are searching.
2. Google’s search index contains hundreds of billions of web pages and over 100 million gigabytes of data.
This enormous index shows just how much content is out there competing for attention. To stand out, you need to make sure your website is properly optimized and easily discoverable by Google.
This is where All in One SEO (AIOSEO) comes in handy.
AIOSEO is a powerful WordPress SEO plugin that helps your site shine in this vast sea of content.
One of its key features is the ability to easily add your site to Google Search Console. This is crucial for getting your pages indexed quickly and accurately.
But AIOSEO doesn’t stop there. It offers a wide range of on-page SEO optimization tools to help your content rank higher in search results, from optimizing your SEO titles to implementing schema markup.
We’ll be discussing more of AIOSEO’s features throughout this article. But if you want a comprehensive overview, check out our detailed AIOSEO review.
3. Google processes over 6.3 million searches every minute.
This staggering number of searches represents a huge opportunity for website owners. But with so many searches happening, how do you know which keywords are bringing visitors to your site?
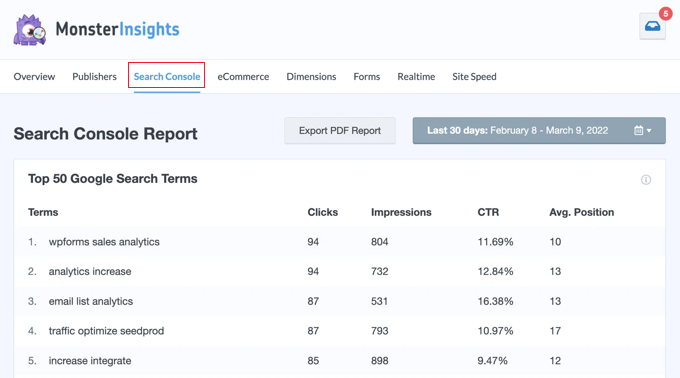
MonsterInsights can help you out. This tool helps you understand exactly how users are finding your WordPress site by connecting it with Google Analytics.
You can also connect your site with Google Search Console to see the exact keywords people use to find your pages.
From here, you can identify your top-performing keywords and create more content around these topics to attract even more visitors.
4. Every day, 15% of Google searches are brand new.
In other words, users constantly come up with new search terms that Google has never seen before.
For website owners, this means you need to stay on top of what people are searching for.
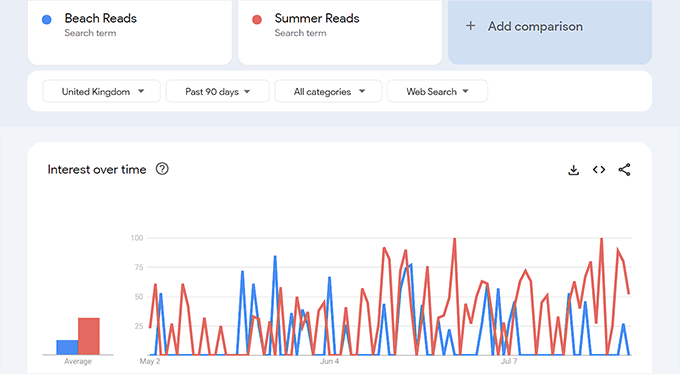
To keep up, you can regularly check Google Trends to find new topics in your niche and spot rising trends early before your competitors do.
Additionally, you can use keyword research tools weekly to find new search terms.
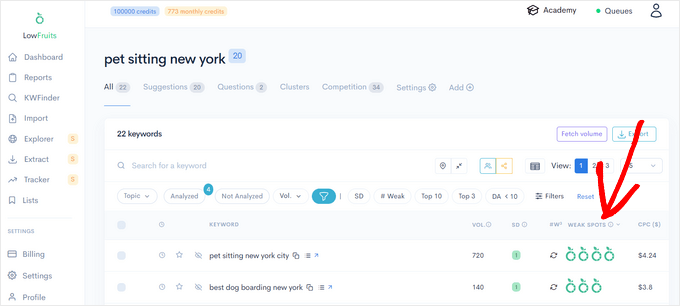
At WPBeginner, we like to use LowFruits to find new keyword ideas. The tool shows you search results where the top websites don’t have a strong domain authority.
This means you have a better chance of getting your content to rank well for these keywords, even if your WordPress blog is relatively new or small.
More General Google Search Statistics
- Google.com attracts approximately 2.77 billion daily visits worldwide.
- The top 5 Google search queries globally include ‘Google,’ ‘you,’ ‘YouTube,’ ‘weather,’ and ‘Facebook.’
- Google generated a global revenue of $305.63 billion USD in 2023.
- In Russia, Yandex leads the search market with a 63% share, while Google holds nearly 36%.
- Alphabet, Google’s parent company, has a market value of $1.6 trillion USD.
- Google’s first storage system had ten 4GB hard drives in a Lego casing, which is now displayed at Stanford University.
- A 5-minute Google outage in 2013 resulted in a 40% decrease in global Internet usage.
SERP Stats: Google’s Changing Landscape and Algorithm
What makes a website rank on Google? And how do you get to the top position in search engine results pages (SERPs)?
Let’s look at some surprising stats about Google’s search results and what they mean for your website’s chances of showing up in organic search.
5. 96.55% of web pages get no traffic from Google.
This shows how tough it is to stand out in Google search results. But don’t be discouraged! There are many tools out there that can help you get into that top 3.45%.
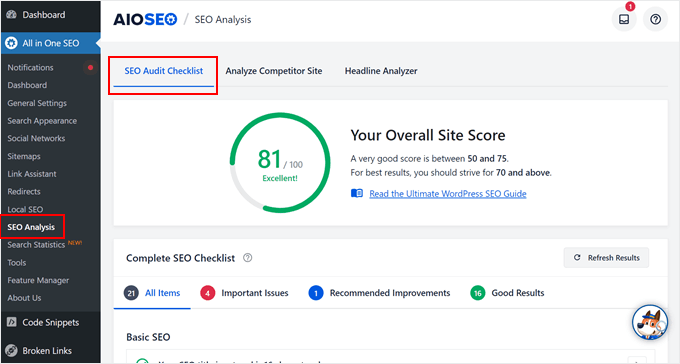
For example, AIOSEO’s SEO audit checklist feature can uncover various issues that might be holding your site back.
For instance, it can detect if there’s an accidental noindex tag preventing Google from indexing your pages. Or it might reveal that your website’s loading speed isn’t up to Google’s standards.
6. Google is predicted to tweak its search algorithm about 13 times every day.
This prediction by Search Engine Land came after Google revealed they did over 4,700 launches, 13,000 live traffic experiments, and many more tests in their algorithm in just one year. That’s a lot of changes.
While following SEO best practices generally keeps you on track, some major updates can affect even well-optimized websites.
To help you stay on top of these changes, AIOSEO offers a handy way to monitor Google algorithm updates.
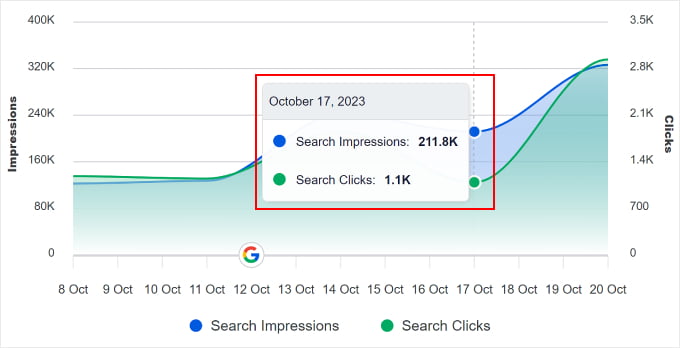
With the SEO Statistics feature, you will find a graph with markers for all Google search result updates, allowing you to see exactly when changes were rolled out.
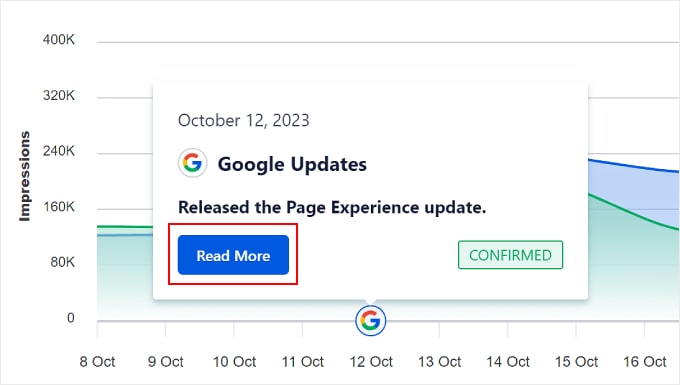
The graph also compares two key website performance metrics: impressions and clicks.
By comparing this data with the update markers, you can easily see how each algorithm change might have affected your site’s performance.
7. Websites that increase their time on-site by 3 seconds can rank one spot higher in Google search results.
The same Backlinko study also found that the average time on site for a Google first-page result is 2.5 minutes. This shows that engaging content that holds visitors’ attention and a good user experience both matter a lot for SEO.
If you’re not sure where to start with improving your site’s user experience, then you need to look at your data first.
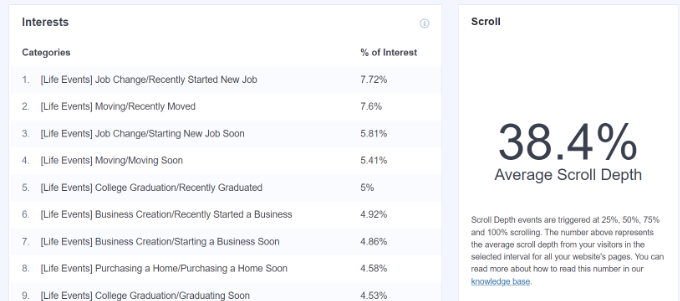
If you use Google Analytics, you can set up user engagement tracking. This shows you which parts of your site visitors interact with most and how they explore your site.
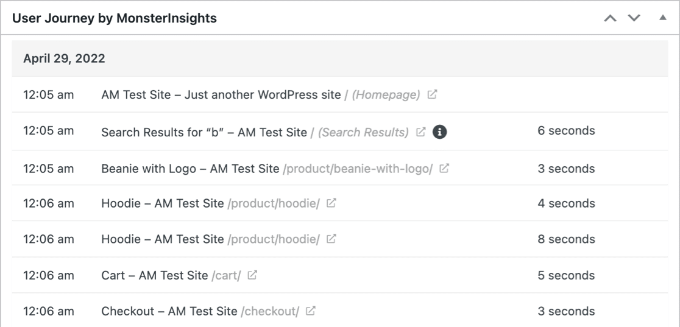
If you have a WooCommerce online store, then you will want to set up customer tracking with Google Analytics.
This helps you understand your customers’ journey from the moment they land on your online store to when they make a purchase. You can see which products are viewed most often, which pages lead to more sales, and where customers might be dropping off in the checkout process.
8. The average Google first page result has 1,447 words.
Does this mean you should always aim for long content? Not necessarily.
While longer content can cover topics more thoroughly, what really matters is quality and value.
Focus on answering your readers’ questions completely and providing useful information. Sometimes, that might take 500 words, other times 2,000. The key is to make every word count.
One tool we love to use is SEOBoost. With this, you can plan your content based on data-driven suggestions.
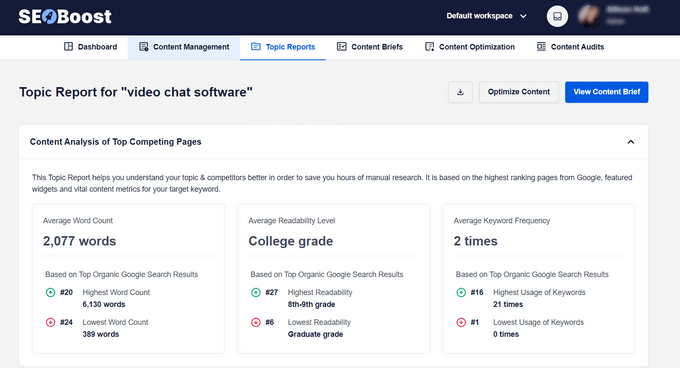
For instance, it shows you how many headings your competitors use, how long their content is, and what questions you should consider covering in your articles.
While these are just guidelines, they can be incredibly helpful in creating content that competes well in search results.
Pro Tip: Need help with SEO? Our expert team at WPBeginner Pro Services can check your website performance and come up with an SEO strategy tailored to your business. Book a free consultation today.
More Facts About Google’s Organic Search Results Pages
- 65% of SEO experts say that Google’s search engine algorithm updates have helped their websites gain more traffic and achieve higher rankings.
- The 1st result in Google has about 3.8 times more backlinks than positions 2-10.
- Google’s top 10 results include 65% to 85% of their ranking keywords in their title tags.
- The average Google first page result loads in 1.65 seconds.
- The average URL length on Google’s first page is 66 characters long.
- Nearly 95% of newly published pages fail to reach the Top 10 results within a year, while most successful pages achieve this ranking in about 3-6 months.
Google Search Features: AI Overviews, Rich Results, and More
Here are some of Google’s exciting search features that are helping people find information online.
9. 91.4% of searches now show an AI-generated response from Google.
Many website owners fear their sites might lose traffic if users find what they need in AI-generated answers.
However, it’s not all bad news.
After all, Google’s other features, like featured snippets, are also known to sometimes reduce click-through rates. But they can also increase visibility and brand awareness for the featured sites.
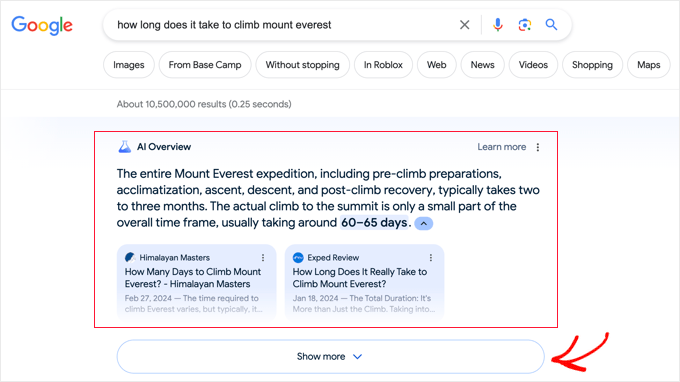
Plus, if your content is featured in these AI overviews, you could see a boost in traffic.
If you need help, you can check out our tips and tricks to optimize your site for Google’s AI overviews.
10. Rich results in search get 58 clicks for every 100 searches, outperforming regular search results.
Rich results are enhanced search listings that provide extra information directly in the search results.
Think of recipe cards with cooking time and ratings, product listings with prices and availability, or event details with dates and locations.
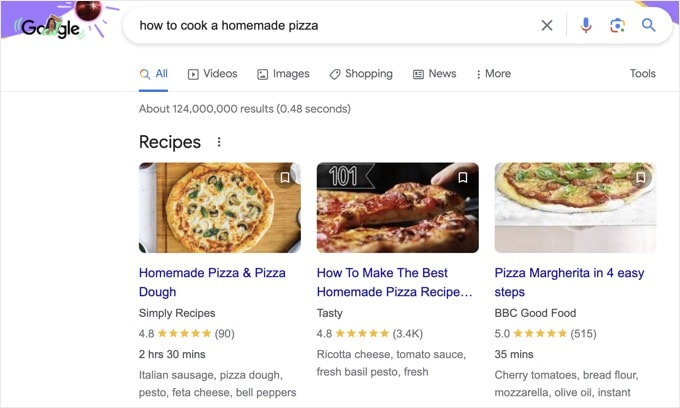
These rich results are popular because they give users more information at a glance, making them stand out and attract more attention. This explains why they get more clicks than regular search results.
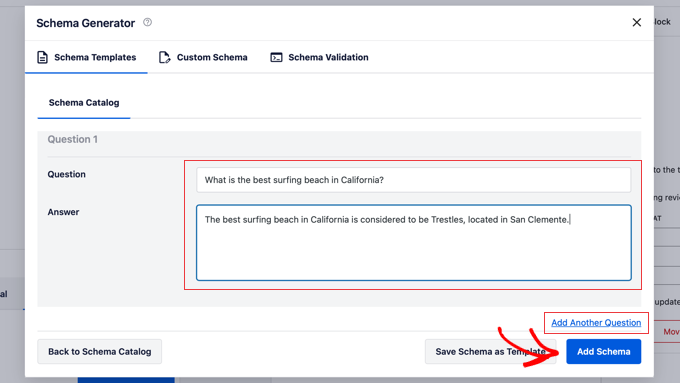
To get rich results, you need to use schema markup, a type of code that helps search engines understand your content better.
While this might sound technical, AIOSEO makes it easy with its dedicated Schema feature. In the block editor, you can simply input the information you want to show in rich results, and AIOSEO handles the technical part for you.
11. 44% of people trust regular search listings more than fancy SERP features.

While rich results can attract clicks, many users still prefer simple, trustworthy listings. So, it’s important to optimize for both types.
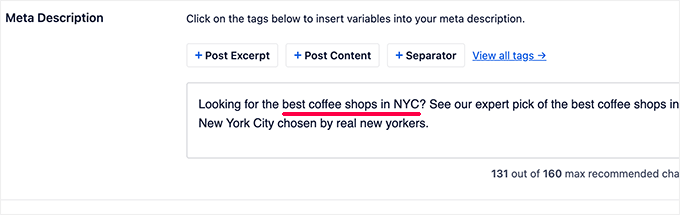
You will want to write clear, informative meta descriptions and use relevant title tags to make your regular listings more credible.
An SEO plugin like AIOSEO makes the whole process super easy. In the block editor, you can quickly enter your meta description. Then, the plugin tells you if it’s the right length and includes your focus keyword.
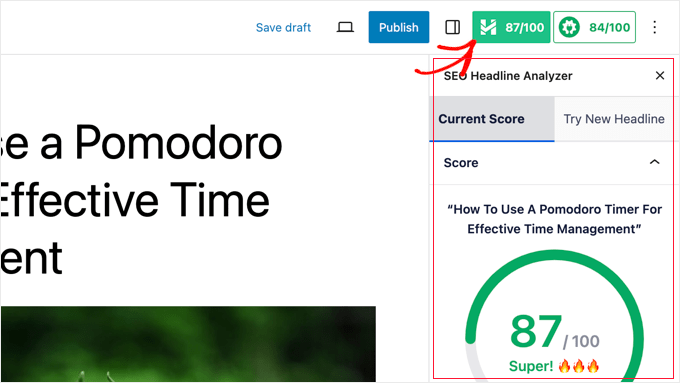
AIOSEO also offers a headline analyzer tool. It evaluates your post’s title and suggests improvements to attract clicks.
Plus, with the OpenAI integration, you can automatically generate headline ideas to save time.
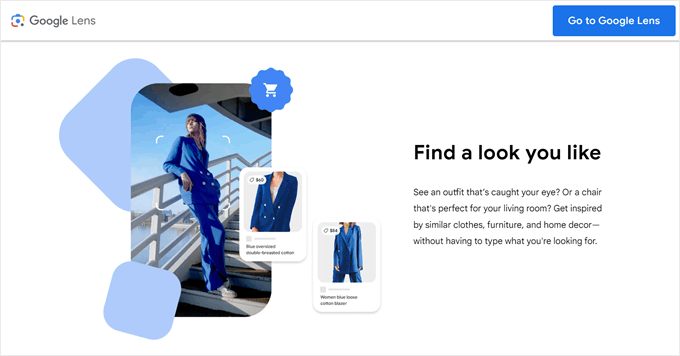
12. Google Lens processes over 12 billion visual searches every month.
Google Lens is a tool that lets users search the internet using images instead of words.
It’s been a game-changer for many, helping people with everything from identifying plants to finding where to buy products they see in real life.
To optimize images for Google Lens, you will need to focus on clear branding and high-quality images on your website and products. Make sure your logo is visible and your product images are clear.
For your website, make sure to follow best image SEO practices. These include using descriptive alt tags and file names for images.
These steps help Google Lens understand and identify your images better, potentially increasing traffic from visual searches.
More Stats for Google Search Features
- FAQ rich results get the most clicks out of all rich results (87%).
- Google Autocomplete helps people type 25% less when searching.
- 62% of links in Google’s AI-powered answers come from websites that are not in the top 10 search results.
- Google’s AI answers show up less often for finance (71%) and insurance (52%) topics.
- 72.6% of pages on Google’s first page use Schema markup.
- Getting a featured snippet can help your website show up 1,000 more times a day in search results.
- Featured snippets and knowledge panels can get 42% of all clicks in SERPs.
- Web pages with Schema markup can get 40% more clicks than those without.
- ‘People Also Ask’ boxes get 6 out of every 100 clicks in search results.
- Google had about 136 billion images in its image search in 2023.
- Pages with schema markup have a 40% higher click-through rate than pages without.
- The ‘Discussions and forums’ feature shows up in 77 out of 100 search results.
- 3D images in Google Shopping receive almost 50% more clicks than static ones.
Google Search Ads: PPC and Ad Revenue Statistics
Google isn’t just a search engine giant. In fact, it makes money mainly from its advertising platform, Google Ads.
If you run Google search ads, here are some key statistics you should know:
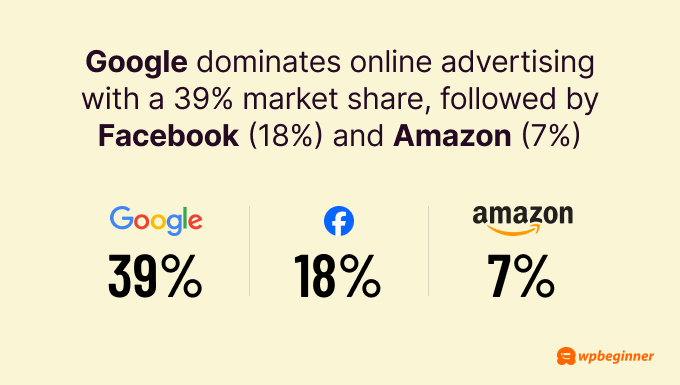
13. Google dominates online advertising with a 39% market share, followed by Facebook (18%) and Amazon (7%).
If you want to get into online advertising for your business, Google Ads may be your best bet. That being said, it’s also highly competitive.
To stand out, consider diversifying your approach. For example, if you run a WooCommerce site, you might want to explore Google Shopping. This platform allows you to showcase your products directly in search results, potentially increasing visibility and sales.
We have a detailed tutorial on how to add products from your WordPress website to Google Shopping.
14. The click-through rate for a paid search ad in the 1st position (2.1%) and the organic search result in the 10th position (2.2%) is very similar.
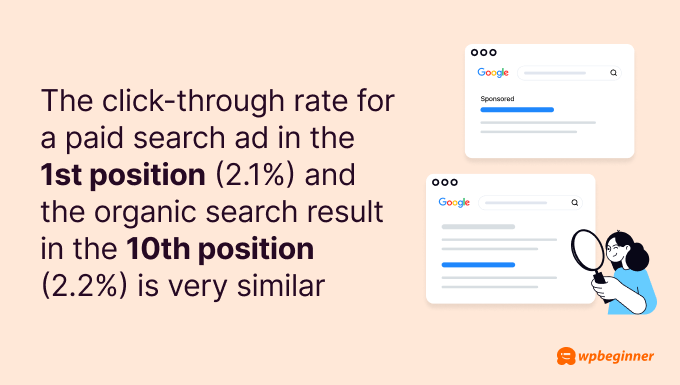
This suggests users may trust organic results more than ads. Even being at the bottom of the first page in organic search can be valuable.
However, paid ads can be helpful for short-term campaigns or events needing quick visibility. They’re also useful for highly competitive keywords.
Often, combining paid and organic strategies works best. This approach lets you get immediate traffic while building long-term visibility and perhaps test some keywords before investing in SEO.
Of course, to see how much money you’re making in return for your ads, you need to set up a tracking system. For this, you can read our guide on how to set up Google ads conversion tracking in WordPress.
15. 8 out of 10 people can tell the difference between paid ads and regular search results on Google.
In other words, your ads need to work harder to earn clicks.
To make the most out of ads, don’t just throw money at every keyword. Instead, focus on areas where you can offer something special. Think about what makes your business unique and highlight that in your ads.
Also, getting clicks is only half the battle. Your landing page needs to deliver on your ad’s promise to get conversions and get your money’s worth.
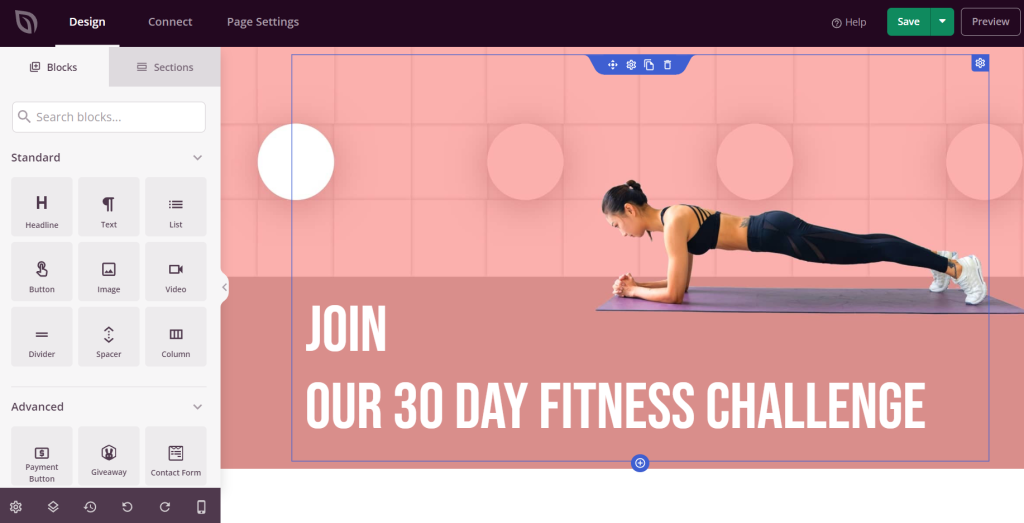
Our article on how to make a Google ad landing page in WordPress can walk you through the steps using SeedProd, the best drag-and-drop page builder on the market.
16. 33% of people click search ads because they directly answer their query, more than those who click for brand familiarity or ad position.
Relevance is more effective than brand recognition and ad placement when it comes to getting people to click on your ads.
Just like with SEO, you need to focus on solving the searcher’s problem on your ad copy. Show how your product or service addresses their specific need.
This approach can help your ads perform well even if you’re up against big brands or don’t have the budget for the top ad spots.
Not sure how to do that? Check out our guide on how to use AI to boost your marketing, where we show you a prompt for generating smart ad copy.
More Google Search Ad Statistics
- Google’s revenue reached $79.9 billion in the first quarter of 2024, up from $69.4 billion in the same quarter last year.
- The average cost-per-click for Google Ads in the U.S. is $6.56.
- Shoppers who click a Google search ad before visiting a store that runs the ad are 27% more likely to buy something.
- People who click on a Google search ad before visiting a store by that ad spend 10% more on average.
- Google Ads have an average conversion rate of 4.8%.
- 38% of baby boomers (ages 55+) click paid search ads because they mention familiar brands.
- If limited to one ad type, 70% of advertisers would choose Google search ads over display ads.
- Over 20% of advertisers focus on ‘Target CPA (Cost per Action)’ or ‘Maximize for conversions’ when setting Google Ads bids.
- 40% of companies use Google Ads mainly to generate leads, while 30% use them to drive direct sales.
Consumer Behavior: How People Use Google Search to Shop
Google isn’t just a place to find information. Many users use it to look up the next thing they need to buy online or in-store.
Let’s look at how consumers interact with Google.
17. 71% of people say Google Search is their top choice to find information on topics like electronics, cars, health, and finance.
These topics usually require extensive research because they involve big decisions or investments. Before making these choices, people turn to Google for trusted, comprehensive information.
Because of that, it’s important to focus on E-E-A-T when creating web content. This stands for Experience, Expertise, Authoritativeness, and Trustworthiness. It’s what Google looks for when ranking content, especially for important topics.
One way to do this is to showcase your business’s experience and expertise to build trust with Google and your audience.
AIOSEO has an Author SEO add-on for this exact purpose. With it, you’re essentially telling Google, “Hey, this author is a real expert in this field.”

This can boost your content’s credibility in Google’s eyes, potentially leading to better rankings. Plus, when readers see that your content is written by qualified experts, they’re more likely to trust and engage with it.
18. 4 in 10 shoppers start their purchase research on Google for both online and in-store buys.
This stat tells us how important it is to have a strong online presence that goes beyond your website.
While great content on your site is important, don’t forget to build relationships with your customers, influencers, and brands in your niche. Doing this can create online recommendations for your business, which can influence what people decide to buy.
You can start by teaming up with content creators for product reviews, engaging with customers on review sites like Trustpilot, or even creating a referral program to get more word-of-mouth recommendations.
19. 80% of 13 to 21-year-olds search at least 3 times a day, while only 60% of those over 60 do the same.
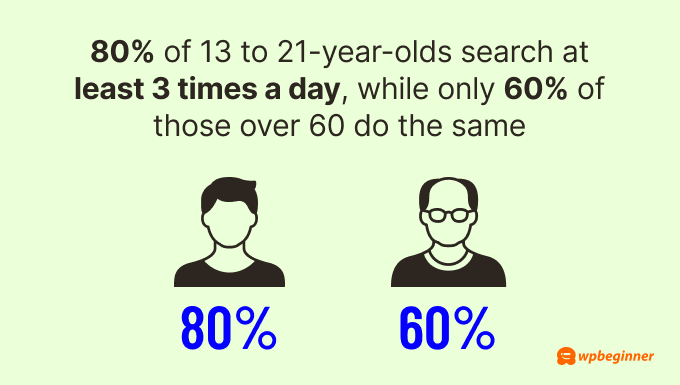
A lot of businesses targeting a younger crowd often focus more on social media than search. That being said, this stat highlights how important it still is to have a website and optimize it for SEO.
By doing SEO, you’re building credibility for all age groups. A well-optimized website that ranks high in search results signals trustworthiness to both younger and older audiences.
Also, focus on clear, easy-to-read content that doesn’t assume too much tech knowledge, especially if you target an older audience. Consider using larger fonts and high-contrast designs for better readability.
More Google Consumer Behavior Findings
- 49% of consumers use Google to discover new products.
- The most frequently asked question on Google worldwide is ‘Where is my refund,’ with an average of 15.5 million search queries per month.
- 73% of people who research online use a search engine to access at least one source of information.
- For routine purchases like baby care, 58% of consumers use search as their main source of information.
- For less frequent purchases like personal finance, 49% of consumers rely on search for information.
- Searches for ‘my activity,’ where users manage their Google Account information, have increased by more than 1000% worldwide.
Mobile Google Search Trends: The Shift to On-the-Go Queries
Smartphones have changed our internet usage and search habits. Let’s see how people look for information on mobile devices:
20. Mobile Google searches are less likely to end without clicks to websites (17.3%) compared to desktop searches (25.6%).
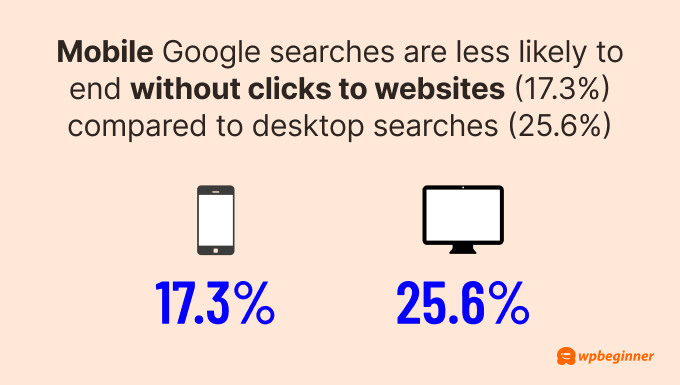
This difference might be because mobile users tend to scroll more and look at more results, making them less likely to find their answers in the features at the top of the search results page.
This is good news for website owners. It means mobile users are more likely to click through to your site, even if you’re not in the very top position.
21. Bounce rates for mobile organic search are 3% higher than for desktop.
Mobile users are on the go more often and, therefore, less likely to wait for a slow website to load, which can contribute to higher bounce rates.
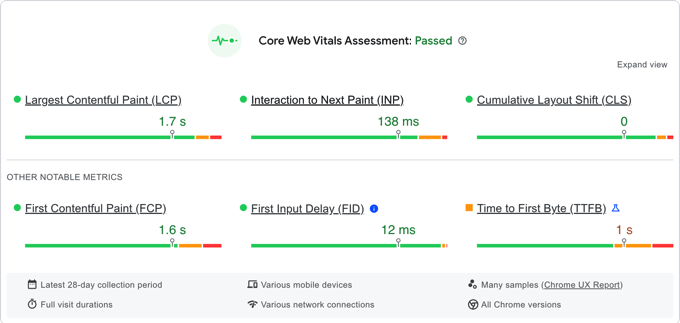
If you want to get on Google’s good side and reduce your mobile bounce rate, then you should focus on Core Web Vitals. These are Google’s metrics for measuring user experience and site performance.
Start by using PageSpeed Insights to check your current performance. This tool will give you your Core Web Vitals scores and highlight areas that need improvement.
Then, there are many ways to go about improving speed, from optimizing your images and minifying your code to using a content delivery network.
For a comprehensive guide on how to implement these strategies and more, check out our ultimate guide on how to boost WordPress speed and performance.
22. 33% of mobile users make decisions within 5 seconds of searching on Google, compared to 45% of desktop users.
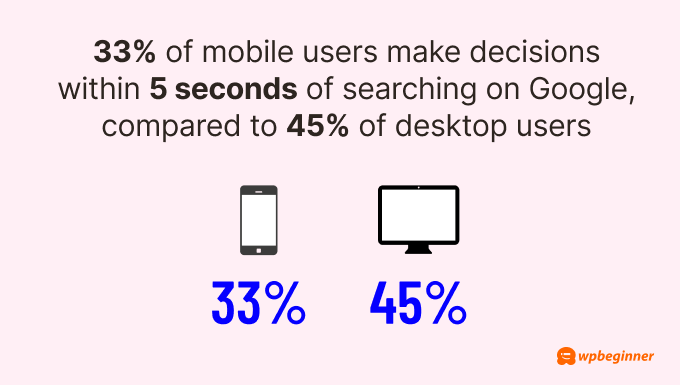
This difference likely stems from the smaller screens, which make it harder to look at visuals or read information clearly. Plus, mobile browsing just feels more casual and generally more distracting.
To accommodate mobile users’ decision-making process, you should adapt your website design.
You can use a responsive theme, make buttons and links easy to tap, add a font resizer for better readability, and keep your most important information at the top of the page so users can find it without scrolling.
Here’s our guide on how to make your WordPress website more mobile-friendly if you want more details.

23. 56% of in-store shoppers use their smartphones to research items while shopping.
That’s why it’s crucial to have detailed, up-to-date product information on your website. Shoppers compare prices, read reviews, and check specs right in the store.
To take advantage of this, make sure your product pages are optimized and include all the information a shopper might need. Consider adding features like stock availability or easy-to-use size guides to help these on-the-go researchers make a decision.
More Mobile Google Search Facts
- 51% of smartphone users have found a new company or product while searching on their phones.
- 90% of smartphone users aren’t sure which brand they want when they start researching online.
- 79% of people are more likely to revisit or share a mobile site if it’s easy to use.
- Featured snippets cover 50% of a mobile phone screen, making them important for search visibility.
- Organic click-through rates are higher on desktop searches and 50% lower on mobile searches.
- Mobile users are more likely to perform multiple searches, with 29.3% of mobile queries using new keywords compared to 17.9% on desktop.
Local Google Search Stats: How Businesses Are Found Online
Google features like Google Business Profile and Google Maps are making it easier than ever for users to discover local brands. We have found some interesting stats to demonstrate that:
24. Google is the most widely used online review site (81%), followed by Facebook (45%) and Yelp (44%).
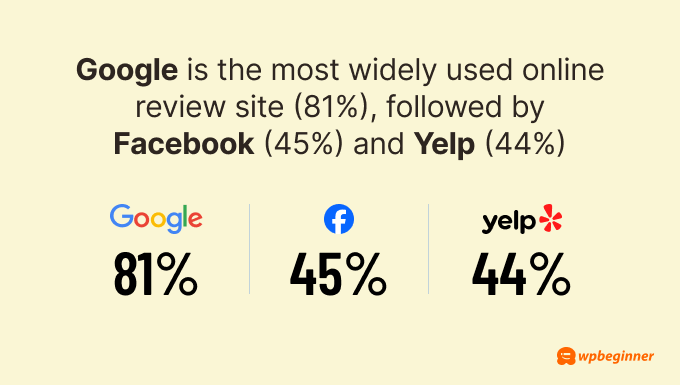
If you have a local business and you’re not on Google, you’re missing out on a huge opportunity. Having a Google Business Profile is the first step you can take to show up in these local searches.
For a comprehensive guide on optimizing your WordPress site for local search, check out our detailed tutorial on local SEO for WordPress websites.
Our article will walk you through how to set up a Google Business Profile and optimize it for local search.
25. ‘Shopping near me’ searches on Google Maps have increased by 100% globally year over year.
To optimize for these local searches, you should keep your business information consistent across your Google Business Profile, website, and other platforms.
Be as detailed as possible with your information. Include accurate opening hours, pin the exact location, and provide a complete description of your business.
This consistency helps Google understand and trust your business information, making it more likely to show your listing in relevant local searches.
If you have multiple online listings, then we suggest using Semrush Local to make sure all of your information is consistent. This tool can crawl all over the web to see on which platforms your business is present and what details you need to fix.
26. 47% of consumers find the ‘Sort by newest’ review function most useful when looking at business reviews.
Fresh reviews let potential customers know that your business is active and maintaining high quality.
One effective way to encourage reviews is by offering customers a small incentive, like a coupon code, in exchange for their feedback.
If you’re running a WooCommerce store, we have a handy guide on how to automatically send a coupon after a product review.
Other than that, consider displaying customer reviews throughout your website, such as on your product pages, homepage, or even a dedicated customer reviews page.
Besides boosting your site’s E-E-A-T score. these reviews may even appear in Google search results. As a result, potential customers can look at some real social proof before they even click on your site.
More Statistics for Local Google Searches
- 54% of smartphone users search for business hours.
- 53% of mobile device users look up directions to local stores in search.
- 18% of local smartphone searches lead to a purchase within a day, compared to 7% of non-local searches.
- 60% of smartphone users have directly contacted a business using search results, like the ‘Click to call’ option.
- Businesses with complete Google Business Profiles are 2.7 times more likely to be seen as reputable.
- Customers are 70% more likely to visit and 50% more likely to consider buying from businesses with complete Google Business Profiles.
- 89% of consumers say local branch reviews influence their decision to use a store.
- 91% of consumers believe local reviews of chains and franchises affect their overall brand perception.
Google Voice Search Statistics: The Rise of Hands-Free Search
Voice search is transforming the way people interact with Google, opening up new opportunities for website owners to connect with their audience.
Let’s take a look at the latest trends for Google voice search:
27. Over 500 million people use Google Assistant every month, mainly in English.
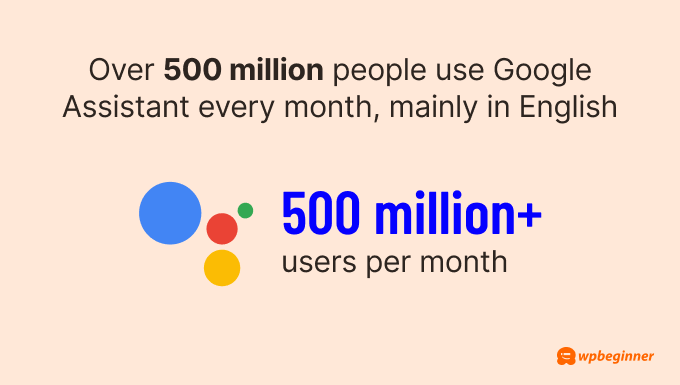
As this number keeps rising, needing to optimize your content for voice search is unavoidable.
One effective way to do this is by creating FAQ sections that address common questions in your industry. This approach works well for voice search because it directly answers questions people might ask their Google Assistant.
To make your FAQ section even more effective, you can add FAQ schema. This structured data helps search engines understand and potentially feature your content in voice search results.
AIOSEO can help you with this, as you can easily insert your FAQ section in the Schema feature in the block editor.
28. 7 in 10 Google Assistant requests use everyday language, not typical search keywords.
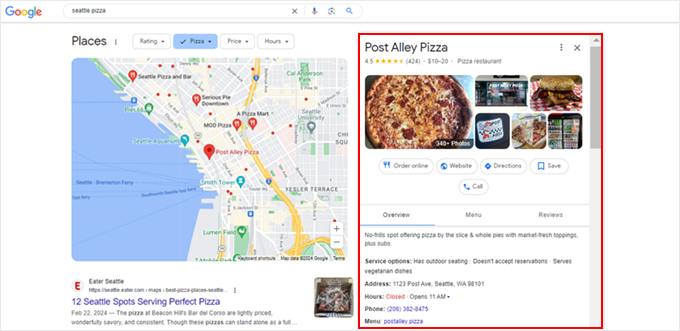
For instance, instead of searching for ‘best pizza in New York,’ users might ask, ‘Hey Google, what is the best pizza in New York City?’ This trend shows that your SEO strategy should focus on long-tail keywords and natural language phrases.
Instead of merely inserting keywords, you will want to optimize your content to answer specific questions and handle more complex, conversational queries.
Also, natural language queries often provide deeper insights into user intent. Therefore, your SEO efforts should aim to understand and address this intent rather than just matching exact keywords.
To assist with this, you can use LowFruits, which offers keyword clustering. This feature groups similar long-tail keywords based on shared intent using real-time search data.
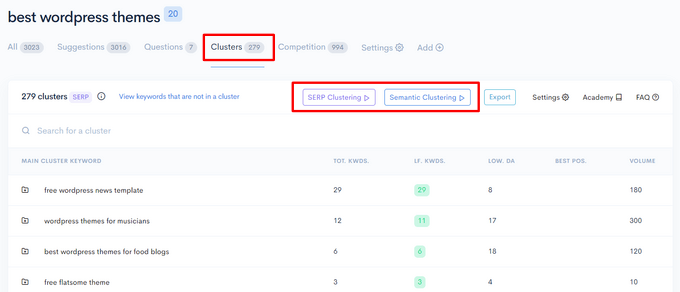
By targeting these clusters, you can address a broad range of relevant search queries and improve your chances of ranking for multiple related keywords.
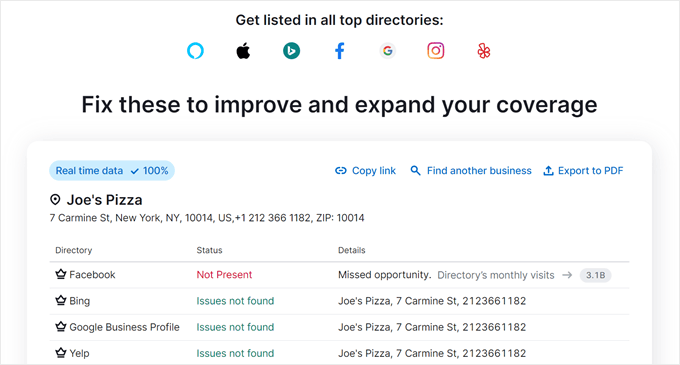
29. Having accurate business info on Google, Yelp, and Bing can make your business 90% more voice search-friendly.
People often use voice search when they’re on the go. They might ask, ‘Where’s the nearest coffee shop?’ or ‘What time does the hardware store close?’
If your info is correct and consistent, you’re more likely to be the answer to these voice queries.
This isn’t just about showing up in search results. It’s about getting more people through your door.
Every voice search that leads to your business is a potential customer walking in.
More Stats About Voice Search in Google
- Google Assistant is the second most popular voice search app worldwide, with Alexa being the first and Siri being the third.
- Google Assistant has over 85 million users in the United States.
- 27% of searches in the Google App are done by voice.
- Google’s voice recognition is said to be 95% accurate.
- 52% of voice-activated speaker owners want to receive info about deals and promotions from brands.
- 44% of regular voice-activated speaker users order products like groceries at least once a week.
- 51% of people over 55 use voice-activated speakers to get instant answers and information.
- 72% of voice-activated speaker owners use their devices as part of their daily routine.
Sources:
Ahrefs, Authoritas, Backlinko, Bright Local, Databox, Detailed, EngineScout, EnterpriseAppsToday, First Page Sage, Google Search, HubSpot, Milestone Inc., Moz, Photutorial, PR Newswire, Schema App, Search Engine Land, Semrush, StatCounter, Statista, Textmetrics, The Keyword, Think With Google, Uberall, Vixen Labs, and Wordstream.
We hope this ultimate list of Google search statistics can help you with your own SEO strategy.
Looking for other research findings to improve your digital marketing? Check out these guides:
More Statistics and Trends You Should Know
- Surprising AI Statistics – Everything You Need to Know
- Blogging Statistics, Trends & Data – Ultimate List (UPDATED)
- Impressive eCommerce Statistics You Won’t Believe
- Shopping Cart Abandonment Statistics (Expert Insights)
- Affiliate Marketing Statistics You Need to Know
- WordPress Market Share Report – Latest Trends + Usage Data
- CMS Market Share Report – Latest Trends and Usage Stats
- Creator Economy Statistics That Will Blow You Away
If you liked this article, then please subscribe to our YouTube Channel for WordPress video tutorials. You can also find us on Twitter and Facebook.
The post 90+ Google Search Statistics and Data for 2024 first appeared on WPBeginner.
from WPBeginner https://ift.tt/D1t4vz5
More links is https://mwktutor.com